Armor/AFV: Axis - WWII
Armor and ground forces of the Axis forces during World War II.
Hosted by Darren Baker
DML#6383 Tiger 1 Turret Zimmerit Mod
barkmann424
Visit this Community
England - North West, United Kingdom
Joined: November 23, 2008
KitMaker: 357 posts
Armorama: 353 posts
Posted: Wednesday, June 03, 2009 - 07:55 PM UTC
Hi Chris, This is not my thread! It belongs to the Tigers! Any others of the litter are welcome along to! Glad to see you having a go with the blind gear! The thickness of the putty is the real trick to this style, as the ridges need a slightly flattened peak, a little over rolling also captures the pattern well.
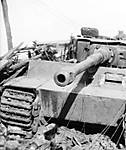
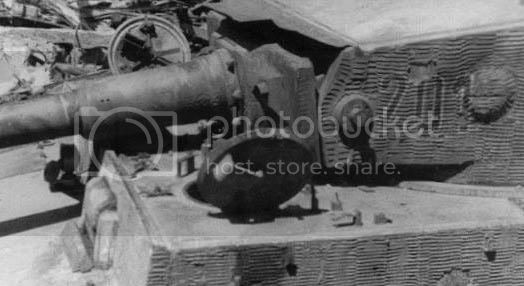
It appears from available clear images, that the 2nd Companies 2nd Platoon all displayed the units cross keys emblem on the glacis and hull rear plate, directly onto the zimmerit, unlike the Companies 1st and 3rd Platoons who portrayed the insignia in a cut out front and on the front plate and rear. There is a theory that these differences aided the Company recognition and sub-company recognition in this case, and that the 1st and 3rd Platoon had differing background colours within the cut-out windows to aid this further. Anyhow, here are 221,222 and 223 all showing this 2nd Platoon 2nd Company marking trait, from this we can assume that '224' also displayed it's Abteilunng's Heraldic style marking in this fashion.


Hope this helps Chris, also check out the remnants of the 'chalk' markings for the draughting of the Turret Stowage Bin's Numerals on '221', great little detail eh?

See Yall later! Phil.
chrsf68
Joined: May 26, 2007
KitMaker: 17 posts
Armorama: 16 posts
Posted: Wednesday, June 03, 2009 - 08:44 PM UTC
Phil,
Thank you. Those are excellent and its just what I needed to know.I working on the DML Kitty with zim and have their newer version 3 in 1 late prod. kit on the way.Very addictive these Tigers! I had planned on doing 112 and 221 before I found this thread, and while looking for examples of zimmerit patterns, I lucked up and found this most excellent thread! I am now just a little unsure which kit will be which tank.I had already(unwisely) finished the 2 cutouts on the rear because I had thought this was the way both would have it, so I guess the best thing is to make the one I have already, #112 and the 3 in 1, when it arrives shall be 221.Better to have a blank canvas to work with for that zim pattern anyway, even though I think 112 has this pattern as well.Is that correct? I am thinking of re zimming that lovely DML pattern on the turret only, with the blind gear pattern for 112.Well its late here and obviously I am rambling , so I will check in here again tommorow.Oh and by the way,is 221 one of the Tigers you are building also?I am sure you stated that already,but the reason I ask is I wondered if you would be duplicating the chalk marks that you pointed out? A very cool detail indeed.Thanks Phil. Chris


barkmann424
Visit this Community
England - North West, United Kingdom
Joined: November 23, 2008
KitMaker: 357 posts
Armorama: 353 posts
Posted: Friday, June 05, 2009 - 10:26 PM UTC
Hello everybody! Back again, Hi Chris, I really like these little details that, set apart on Tiger from another, and in the s.SS.Pz.-Abt. 101, there appears to be quite a few! I think my favourite is the 'wonky' painting of the numerals on '231's turrets left hand side!
Now then, I had always intended to depict '221' as one of the Tigers for the N175 project, so yes I'll think I'll stick with that... For now! The other Tiger in this blog is another one of those quandaries, as it can be whittled down to a handful of Tigers from the 2nd kompanie, but nothing solid as to a definitive, I like the feel of '213', though on the 13th June 1944 this was 'parked' somewhere back along the the march route to the combat zone.
Now on the point of small details, the Bosch light bracket... To zimmerit or not? From a study of clear non-toasted Tigers of the 101st, we can see that the formed bracket was on zimmerited on quite a few of the Tigers across the companies.


Soooo...What do you reckon? Okay then before... and after!

The area was spread with a very small amount of Tamiya Epoxy Putty 'smooth surface' White, and the pattern was indented with the end of a sharpened 3mm electrical 'slot headed' screwdriver.

There! Jobs a good un'
I have been concentrating on the stowage that is to be 'stowed' on this kitty, along with finishing some hull details. The rear of the hull is to receive some PE in the form of fenders and sheet metal exhaust shrouds, in order to fit the hinged mudguards, the moulded section on the hull rear that makes up the upper hinge of the assembly has to go!

A chisel xacto blade was used for the surgery! Not to bad, just a little filling and sanding need.

You will have probably noticed a few other little additions since the last post, I have dry fixed the cast metal U-Shackles, taken from a DML #6253 along with the tubular brass spare ariel container, and because I have put the container on the right-hand side of the rear hull upper edge... I had nothing to use as a spare-track hanging rail for the bow plate! (I am still spotting this mix up over the two parts... That Dragon have confused the parts in the last 4 editions of their Late Tiger... Grrrrr. #6253,#6406,#6416 and #6383 not just the muzzle brake then? This does annoy me slightly, as they are very similar looking, so a Tiger noob, at whatever modelling level, will fall foul of this especially in the latest kits, as there is no brass alternative to compare against)
The turned brass cleaning rods are from the Voyager cable set for the Tiger 1, as are the finer copper towing cables. Oooh,look these behave a bit better than the 'feisty' kit ones.


So I'll get on with a bit more, and post some more later...

Cheers for looking, any views on the 'pre-modulation' idea?

Phil.
bizzychicken
Visit this Community
Wales, United Kingdom
Joined: September 06, 2008
KitMaker: 967 posts
Armorama: 842 posts
Posted: Saturday, June 06, 2009 - 12:42 AM UTC
Hi Phil. Sorry I've missed so much, the weather down here as been You've got to enjoy it while its here because we dont get much sun. I think the Modulelation base is going to be great. Easy to darken things than try and lighten. Looking forward to seeing "Good Old Tamiya" in comparison to the darker tones of 112. following this Tiger Fest has really been one of my fav past times lately "I'm Hooked" Whatching this one with great delight and will pass all this info on to my Panther build. The photo's of yor tiger in Normandy are awsome, I've enjoyed looking at them as much as watching the build shame you weren't into Panthers as much. Now that would be great, Dragons Pz IV H next to a couple of Tigers. Wasn't that what was supporting Whittmann when he returned to Villers-Bocage to link back up with his 1 st company. Dragons new Ausf H looks to be one awsome kit. My Birthday is soon, so lets hope? anyway back to your "Fest" Pink looks like fun, watching with pleasure Geraint
barkmann424
Visit this Community
England - North West, United Kingdom
Joined: November 23, 2008
KitMaker: 357 posts
Armorama: 353 posts
Posted: Thursday, June 11, 2009 - 10:57 AM UTC
Hello again folks! Hi Geraint! The weather up here in the 'Dark Satanic Hills' has been a bit textbook 'Rain shadow of the Pennines' kind of thing! I am thinking about DML's Pz.IV Ausf H, as I am led to believe that these were the model used by the Panzer Lehr, when it was being supported by the Tigers of the 1st Kompanie later in the day after the Wittmann action of the morning (65 years ago this Saturday eh? Time just marches on and on!) I will need my hand holding with any Pz.IV builds though, as I have not done that much research on the 'workhorse of the Panzerwaffe'.
Right then I'll stop gassing, and show you all where I am up to on '121'
A little more painting has been done on the lower hull interior. Though I have not filtered or washed anything yet, as last time the wash thinner ate through some of the torsion bars, at their cemented point! In these images you can see the difference a wash and filter stage makes to the colour and general appearance.


The fuel tank and cooling assemblies need some more painting, dull steel for the fuel tank, and a wood tone for the planked protection slats on the radiator ducting vents. See David my short term memory problem is controllable with the medication!
Next up a bit of brass work, I have used part of Voyagers set for the towing cables (nice soft copper wire Easy peasy!) And also their rather springy fine steel cable for the track mounting cable on the hull side. The 'U' hangers that support the track cable are also from the Voyager set, as with the DML PE ones you can have a bit of trouble stacking the cable three high in the holder. The (working) locking brackets for the towing cables is from the Voyager set for the DML Late Tiger 1 also. These look really fiddly, but are in fact a breeze to put together, and add a little more detail than the DML effort from the older #6253 PE set.


And the attachment of the cables, the larger copper towing ones went on like a dream, but the finer steel track cable, was like trying to nail a jelly to a wall! I think I'll let Freyja do it again next time!


Right then, tommorow start the phase for the hullside/sponson fenders, and the pioneer tool clamps on the hull roof. This could be in the paint shop for the end of next week... If eveything goes to plan .

Right I think it's bedtime. Phil.
scratchmod
Visit this Community
Massachusetts, United States
Joined: November 07, 2008
KitMaker: 796 posts
Armorama: 763 posts
Posted: Thursday, June 11, 2009 - 11:20 AM UTC
OK, Phil you are definitely the Tiger king, Man this is going to be another beauty I can see it already. Looking forward to seeing this one when done. Awesome so far Phil.

Rob
alanmac
Visit this Community
United Kingdom
Joined: February 25, 2007
KitMaker: 3,033 posts
Armorama: 2,953 posts
Posted: Thursday, June 11, 2009 - 11:55 AM UTC
Hi Phil

I've been dipping in and out of this thread over the weeks you've been working on this modelling marathon and credit to you that you still maintain the momentum.

On page seven you showed this picture


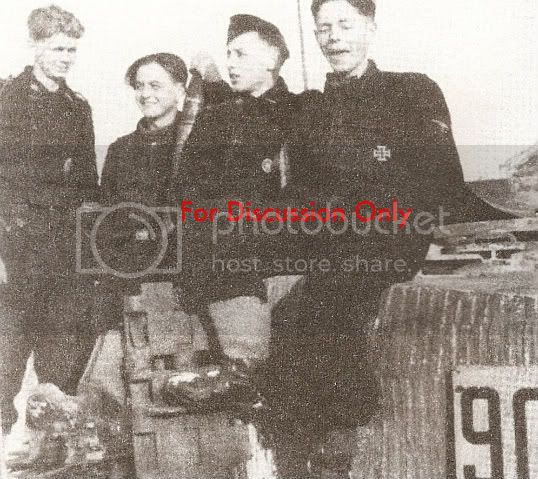
I'm sure you are aware of this but as soon as I saw the picture I knew I'd seen the guy somewhere before.....not bad I thought. Maybe a little chubby compared to the real guy but carries a reasonable likeness.


Keep up the good work. Any ideas for the next projects

Alan
bizzychicken
Visit this Community
Wales, United Kingdom
Joined: September 06, 2008
KitMaker: 967 posts
Armorama: 842 posts
Posted: Friday, June 12, 2009 - 07:53 AM UTC
Alan good spotting, It him alright . pee Dot looks great on those tankers uniforms. Phil those voyager brackets look the Dogs ********* When it comes to tool clamps Griffon or voyager? Haven' used either, Dragons can be a bit of a pain. I've heared Griffons are good. But would like to get your feed back before purchasing, as you know money is kind of tight at mo. cheers Geraint
barkmann424
Visit this Community
England - North West, United Kingdom
Joined: November 23, 2008
KitMaker: 357 posts
Armorama: 353 posts
Posted: Friday, June 12, 2009 - 11:30 AM UTC
Hi Everybody!

Hello Rob! Thanks for taking time out to drop in, those T55's look like a lot of hours work, did you manage to finish the house? Please don't tell me it's called 'Gottdamerung'! How do you fit it all in, and at such a level of dedication... It's a pity we don't live nearer, I could do with some help on some 'scenery' to 'decorate' the N175 bit of road I'm starting on for the display base for these Tigers to populate. Not very knowledgeable about Churchills, Shermans, Fireflys, Stuarts, M3 Halftracks etc, especially not turning some of them inside out! Maybe a few universal carriers, and six pounders to litter the verges?
Hi Alan, I have been eyeing these figures for a while, very nice, and at a price sometimes. The likeness of the 'unfortunate' Unterscharfuhrer Kurt 'Quax' Kleber is excellent. Some of the other figures I have had the pleasure of looking over, are really well detailed and very close to the features of the celebrity Panzer Pilots, they represent... Any other projects, well you did ask


Tiger '411' of the Kompanie Hummel/ 4./s.Pz.-Abt. 506, a hybrid that suffered this amazing winging shot on the sleeve collar, immobilising it near Oberwampach 10 klicks from Bastogne during the later operations of the unit in the Ardennes... My thanks and sincere apologies go to David Byrden for this, as he really pulled out all the stops in coming up with solutions and drawings for the dismembered gun assembly, when you see the complexities of things such as internal seals and the mechanisms used to make the Tiger water-tight it is simply mind boggling... I am putting a partial interior into this, David so it should be going again in the next couple of months.


This is also awaiting the fitting of a partial interior and engine bay, due to the rapid evacuation of '201' of Kompanie Hummel, as it beached itself in house ruin debris, after it's victory over a Pershing in Elsdorf Germany
Next up!


This is Tiger '90?' of the 9.s.SS.Pz.-Kmp. Totenkopf, a ver early mid, with an experimental zimmerit pattern of a vertical nature... At the moment it is 'stalled' , with a view to re-pasting the glacisplate as I'm starting to think that the Kubinka mid (deighned to be this Tiger) has vertical zimmerit on it also... See what you think!


But the rest of the hull is horizontal as per normal?
And a few others beside Alan, mainly anomalies!
Hi there Geraint I think, that Lion Roar seem to have the upper hand over the other companies offerings at the moment, If you want a set of Griffon ones (also very nice) pop us your address in a PM and I'll get them off to you, Mike sent me a few extras, when the last shipment's was ordered. I'll put together a comparison over the week end, Dragon are a bit fiddly, but possibly a very good scale match compared to some others. Right off to bed then. I'll have some more updates over the weekend.

Cheers Phil.


scratchmod
Visit this Community
Massachusetts, United States
Joined: November 07, 2008
KitMaker: 796 posts
Armorama: 763 posts
Posted: Friday, June 12, 2009 - 12:06 PM UTC
Hey Phil ..Yep , too bad we have the big pond between us or we could come up with some cool stuff.
Those Tigers look awesome,I've been wanting to do another Tiger wreck, for now I'll be watching your Tigers.
How many Tigers in total are you building for this project of yours

Rob
chrsf68
Joined: May 26, 2007
KitMaker: 17 posts
Armorama: 16 posts
Posted: Saturday, June 13, 2009 - 10:21 AM UTC
Hi Phil. Chris here again.Wow!You are kicking butt on these builds.It has been great fun following along with you.If you remember me I was also working on Tigers 112 and 221.I have made some progress and wondered if you would mind me posting some of my progress on this thread.I don't want to confuse anyone, and I am sure the quality of your work compared to mine will be obvious, but I thought maybe it would be of interest to Tiger fans and also I could use any constructive criticism.I f not please know I completely understand,I know alot of people are following along and I don't want to interfere. I have also used some techniques I picked up from you on this thread that you may find interesting.Anyhow, everything looks outstanding.Keep it up!Can't wait to see all these Normandy Tigers together on one base! Chris
barkmann424
Visit this Community
England - North West, United Kingdom
Joined: November 23, 2008
KitMaker: 357 posts
Armorama: 353 posts
Posted: Saturday, June 13, 2009 - 11:19 AM UTC
Hi Rob! Hi Chris! Thanks for dropping by again. Up to my ears in brass and CA at the moment.
Rob, if I ever get over the 'Big Blue Wet Thing' Chez Ferreria will be first port of call... Then The Triple Rock Then some Hockey games with the boys! You know you have got me thinking about the the Beja 'Tigers Graveyard' and other from the TIME colour set, TNT eh! Better than a cutaway drawing!
Hi Chris, feel free, this thread is all about these Tigers, and they do look a bit mopey and lonesome, especially before paint. I am really interested to see your results, as ATAK and Cavalier seem to be really outproducing DIY zimmerit lately. Right back to 'Brass Babylon'... Now I want a kebab!

Night folks... Phil.
barkmann424
Visit this Community
England - North West, United Kingdom
Joined: November 23, 2008
KitMaker: 357 posts
Armorama: 353 posts
Posted: Sunday, June 14, 2009 - 10:38 AM UTC
Good Evening all!
Right back to sanity! The side fenders are now completed and installed, these are the DML preformed stamped brass set, that was included in their Tiger 1 Late Production 3 in 1 kit #6253. Although the do not have the folded lip on the exposed edge, these for me are the kind of thing that modellers really like to see included in premium kits, like the excellent #6253, maybe some newer research and detail tweaks have left it a tiny bit dated, but one of the great kits of styrene history for me... Do you think it would be a good idea to start a 1/35 Armour 'Hall of Fame? #6253 would get my vote.
Right the images, here are the left and right fender runs completed and ready to be affixed.

Because of the uneven nature of the moulded hull zimmerit pattern, I thought it best to CA glue some short lengths of 2mm stock styrene rod into the the rear of the mudguards, in order to give them a secure anchor to seat them.

Before fixing them in place, I'd like to point out again, that the welded lug on the side end of the glacisis not present on the zimmerit option in #6383 and need to be taken from a donor part, both the un-zimmerited hull side plates and glacis are included in the kit, and have plenty of the square lug nuts you need for the purpose.

A quick surgery with the implement of your choice, and you have them ready for the transplant.

With this done you can safely affix the fenders onto the hull sides, with either a liberal application of extra thin, this will help really weld the styrene inserts onto the hull (or any other styrene cement) or CA in smaller amounts, as you don't want too much of that stuff wandering everywhere.


A little bit of really enjoyable modelling... The wooden jack block, depicted in the kit is a little basic so I called in the PE parts off the Voyager detail set along with a length of 3mm balsa to build one up. The strips of balsa were glued with PVA wood glue, and clamped till dry. Then cut square into a 9.5x9.5mm block, sanded a little but not too much that the subtle grain is lost or the join lines. When done you can now furnish it with the brass of your choosing. I am really pleased with the outcome of this, as previous attempts with a single balsa square block, or 'scuffed' up styrene have not been how I'd have liked them.

Okay their is no avoiding it any longer... Tool clamps! There you go Geraint, I have got the lot... I have got some Aber on the way, so which do you like the look of the most?

Griffon it is then!

Okay I should be back on the morrow... Cheers for now. Phil.
SIRNEIL
Visit this Community
England - South East, United Kingdom
Joined: July 30, 2007
KitMaker: 658 posts
Armorama: 599 posts
Posted: Sunday, June 14, 2009 - 11:19 AM UTC
Hello phil

Griffon are good and so are lion roar but aber are the RR of tool clamps...

neil....................
vanhall
Visit this Community
Groningen, Netherlands
Joined: January 23, 2007
KitMaker: 406 posts
Armorama: 391 posts
Posted: Monday, June 15, 2009 - 12:00 PM UTC
Looking good already Phil, I'll be looking in regular for my Tiger fix...

What's your thinking on the upper glacis (the hozitiontal part). Some zimmed, some not?
I'm asking because I came across a photo of Totenkopf's '901' late and it's clearly unzimmed, (too late for my representation.. ).
Suppose I'll just have to build another one..
chrsf68
Joined: May 26, 2007
KitMaker: 17 posts
Armorama: 16 posts
Posted: Monday, June 15, 2009 - 07:24 PM UTC
arrrggghhh!I think I am going insane. I love following the updates ,but I seem to be having a couple of setbacks.I had ordered an aluminium barrel from Eduard(first mistake)and it appears to have the larger muzzle brake which if I am not mistaken is wrong for 112 or 221.Then I opened the box of Tiger I late tracks from AFV and while they will be excellent when done,by the time I get them cleaned up and sink marks filled, well I may never!Anyhow feel better now after getting that off my chest.Phil, need your advice.What aluminum barrels are you using and if close at hand,maybe the part numbers.The Eduard barrel dosen't have the detachable brake so I need to order the correct barrel and I am not sure which is correct(don't want to order the wrong one again.)OK enough of my whining and if I can muster it I will post up some pics soon.Chris
spitfire303
Visit this Community
Vendee, France
Joined: December 22, 2006
KitMaker: 1,437 posts
Armorama: 1,406 posts
Posted: Monday, June 15, 2009 - 10:53 PM UTC
Amazing job. For the clamps I always use those from lion roar. I find the white metal much better (harder) than ordinary PE.

keep up the great work man!

spit
bizzychicken
Visit this Community
Wales, United Kingdom
Joined: September 06, 2008
KitMaker: 967 posts
Armorama: 842 posts
Posted: Tuesday, June 16, 2009 - 09:56 AM UTC
Phil. thanks for the offer on the tool clamps. Karma, its great Spit will know what I mean. If I'm up at my sister in laws soon, the 1st is on me
barkmann424
Visit this Community
England - North West, United Kingdom
Joined: November 23, 2008
KitMaker: 357 posts
Armorama: 353 posts
Posted: Wednesday, June 17, 2009 - 07:29 PM UTC
Good morning chaps!

Hi Neil! The finish on your Gruppe 'Fehrmann' Tiger was quick! ... Nearly slipped past me their buddy But an alert came up, on my Tiger detector in the 'Cat Cave' Excellent job Neil, really nice kitty. I'll have a chance to compare all of the clamp offerings, when the Aber PE sets arrive, I think I will put these on the last Tiger with the 'Roller Blind' zimmerit. I have been mucking about with a few test pieces on this, and the basecoat and initial washes look good so far.

Hello Grant! How are you buddy? Thanks for looking in on me and the 'litter', as you can tell I have reached my 'Achilles heel' PE, I am notoriously slow at this. Even with all the tools, and tricks of the trade, I have to take it really slow.
Now then these bow/glacis aprons... or transmission roof cover as some folk say. There was a point when I believed that most Tigers during the zimmerit phase of July/August '43' till the termination of the Tiger 1's production in August '44', did not usually have this area pasted, but after realising that the oblique angle that most of the Tigers are photographed at, does not allow the zimmerits texture and pattern to be picked up, along with the obvious crew wear, as this is the obvious mounting point on the Tiger, and the natural inclination for dirt and detritus to settle here, I now think that the majority had it zimmerited rather than as before, I thought that it would have been towards the lesser proportion of the production run. It looks as though all the late SSTK s.SS.Pz.-Abt. 103 Tigers I can find images of with a glimpse of this area do have it. (I can't seem to locate '901' is that the early/mid Befehlswagen, or a late from the training shot sets in Holland or Poland?, you will have to send it to me sometime, as my HD archive is all over the show still) I will have to finish '90?' soon eh? Take care Grant

Hi Chris! I usually just stick with Armorscale or Aber for the barrels, though RB Models look like a very similar offering. Yet on some of the company sites images, you can get visually confused between the larger muzzle brake and the smaller later version.
Abers is listed as #35L78 , Armorscales is #B35-036 and RB's version is #35B71, I had a brief look on the Lion Roar website! It would be advisable to be able to read Chinese for their pages, as the 'translate' button causes all sorts of issues!) I know what you mean about the AFV club tracks, they do require quite a bit of clean up and attention.

Hey Pawel! Thanks for dropping by, how is your new addition to the family? Allowing you plenty of time at the bench I hope, the BefehlsPanther, is really coming along nicely! Some great bits of detail modelling going onto it I see!

Good Morning Geraint! Hows tricks? The griffon clamps are heading south! They may not be workable, but the 2 part design of them allows a 'quicker' construction time, and they do look neat when finished and attached. Well it's finally stopped raining up here, even when I ventured down south to 'Stockport' yesterday it was bucketing down, but with the sun shining I can get on with a bit more today, and get the hull roof stowage and fittings finished.

Right I'm off herding goldfish, I can hear the children stirring! See you tonight when I can play out again!.. Phil
barkmann424
Visit this Community
England - North West, United Kingdom
Joined: November 23, 2008
KitMaker: 357 posts
Armorama: 353 posts
Posted: Thursday, June 18, 2009 - 11:02 AM UTC
Good evening people! Just a brief update on the painfully ponderous PE positioning! I managed to get a little bench time in and have near completed the hull roof stowage. New ABS rod locking posts and swing posts for the c-clamps, have been fabricated, these will take the locking plates and securing wing nuts. These are easily replicated with lengths of 0.5mm and 1.0mm ABS rod, with the larger being drilled out with a 0.5mm drill bit to take the PE wing nuts, I should get to finish these and the rest of the tool clamps tomorrow ( these extra clamps are to replace the removed styrene kit moulded clamps on the starter crank handle assembly and jack handle) the locking plates for the heavy towing cables and barrel cleaning rods also need attaching.


As you may have spotted, I have dry fitted a turned brass MG barrel in the kugeblende, this is an older one from Lion Marc... We should be able to compare other turned brass bow MG's from other manufacturers with this one, I'll put in a request, and see what the 'Tiger Elves' send! Anything else before the final orders go in? I quite like the look of 'Adlers Nest' track pins, and 'Tiger Model Designs' turret spare track clamps look excellent.

Right I'll try and get a bit more done before bed... Thanks for looking. Phil.
chrsf68
Joined: May 26, 2007
KitMaker: 17 posts
Armorama: 16 posts
Posted: Thursday, June 18, 2009 - 12:05 PM UTC
Phil,
I know you are busy with life as well as some serious modelling, so thanks alot for taking the time to respond. I actually have the roller blind pattern applied to one of the turrets now,but I am gonna re-do one side as it isn't quite right. Keep up the great work. Chris
bizzychicken
Visit this Community
Wales, United Kingdom
Joined: September 06, 2008
KitMaker: 967 posts
Armorama: 842 posts
Posted: Friday, June 19, 2009 - 01:34 AM UTC
H Phil. A massive thank you for the Griffon Tool Holders, made my day. LOL. They jack block looks great, a massive improvement over the styrean one. How many Tigers have you got in the pipe line More than the Wehrmacht and Waffen SS had defending Berlin Looking forward to seeing the Tamiya paint on all the different base colours. A different approach to modulation I think? Again thanks for the chance of trying some different AM parts. Cheers Geraint
barkmann424
Visit this Community
England - North West, United Kingdom
Joined: November 23, 2008
KitMaker: 357 posts
Armorama: 353 posts
Posted: Monday, June 22, 2009 - 11:13 AM UTC
Hello everybody!
Hello Chris... This 1/1 scale life stuff certainly gets in the way eh? How are you enjoying using the roller blind gear? It is amazing how with a little practice you can almost replicate the wider larger turret pattern.
Hi Geraint...This is the larger plan Well for the s.SS.Pz.-Abt.101 ,all of of the 2nd Kompanie, 3 or 4 from the 1st Kompanie and maybe some celebrity mids from the 3rd Kompanie(speculatively 45!!!! depending on when the DML mid breaks cover) and around 8 anomalies. So 53 perhaps... Hope I live that long eh? We will just have to see how it all pans out.

Well I have finally managed to find where I left the mobile workbench... And have been working on finishing the rest of the PE, so far I have completed the rear hull plate, rear fenders, hull roof stowage and cable clamps.

The rear fenders c-hook bracket and jack bracket are from the Voyager set, with the tool clamps from Griffon.

The underside of the Voyager PE fenders, are very nicely done, and a doddle to put together.

Next up are the front mudguards/fenders. For this I will use DML's excellent fret from the glorious #6253... Do you reckon that they could 'Orange Box' it someday soon? Not a hope in hell eh lads a

Right then back to the cupboard werks... Thanks for popping by, Phil.
scratchmod
Visit this Community
Massachusetts, United States
Joined: November 07, 2008
KitMaker: 796 posts
Armorama: 763 posts
Posted: Monday, June 22, 2009 - 01:03 PM UTC
Phil , you are definitely CRAZY. I could see doing one or two Tigers , with PE and Zimm then it's time for a break, but you just bank one out after the other.
Seriously dude, that's some awesome work. I'm almost tempted to do a Tiger.

Rob
vanhall
Visit this Community
Groningen, Netherlands
Joined: January 23, 2007
KitMaker: 406 posts
Armorama: 391 posts
Posted: Tuesday, June 23, 2009 - 10:52 AM UTC
Fine PE work Phil, especially those rear mudguards. I can never get the hinges looking that good.. That's why I always try to find Tiger subjects with them missing...

"..I quite like the look of 'Adlers Nest' track pins, and 'Tiger Model Designs' turret spare track clamps look excellent..."

I've used the TMD track hangers before. The detail on the top clamps is excellent. The spare links I got in my first set were terrible though, full of air holes. Probably just a bad batch because the following set were faultless.
TMD have also re-packaged and renumbered the set. The original set, 352129, contained enough parts for 12 hangers (2 short of 2 Tigers.. or 5 spares, depending how you look at it.. ) The 'new' set, 16514, just contains enough for 8 hangers.

Keep the good stuff comin'...