[quote]thanx Phil for the effort to answer my question ! i will drop the ideea of S11 and go for S13 . i will be watchig u're work , i'm learning so much from what u do ! keep up the good work. i'm plannig a #6253 late tiger after i finish my curent early tiger i'm thinking of one of the two tigers 215 or 231
Hi, how did you manage to get that 6253, im searching for it but in vain.
Phil, you are an inspiration, I now have 4 Tigers (2 Tamiya late and 2 AFV club late) in the stash. and im sure gonna need your help when I start building them so if you dont mind i'll send you private messages whenever i need your help.
Hosted by Darren Baker
DML#6383 Tiger 1 Turret Zimmerit Mod
spetsnazgru
Lebanon
Joined: March 05, 2009
KitMaker: 661 posts
Armorama: 652 posts
Joined: March 05, 2009
KitMaker: 661 posts
Armorama: 652 posts
Posted: Wednesday, October 14, 2009 - 10:21 PM UTC
magica
Prahova, Romania
Joined: September 11, 2009
KitMaker: 9 posts
Armorama: 7 posts
Joined: September 11, 2009
KitMaker: 9 posts
Armorama: 7 posts
Posted: Wednesday, October 14, 2009 - 11:04 PM UTC
[quote
Hi, how did you manage to get that 6253, im searching for it but in vain.
[/quote]
hy jamal. #6253 is out of production . i dono why dragon use this marketing strategy with theyre #6252 , 6253 6254 kits ! i think they where best sellers and is a mistake for not continued to produce them ! as for u're question , i got it from ebay at an incredible price of 41 USD in august . but recenty i've been looking on to ebay and saw that it has reached a price arrown 80 - 100 USD . for that money u can get the #6406 , modelkasten tracks and PE from any producer u want ! and in my opinion it woud be better this way! 80USD is an exagerated price for the kit! except for the Michale Wittmann figurine (possing like in the fameous propaganda photo ), u can finde everything !
spetsnazgru
Lebanon
Joined: March 05, 2009
KitMaker: 661 posts
Armorama: 652 posts
Joined: March 05, 2009
KitMaker: 661 posts
Armorama: 652 posts
Posted: Thursday, October 15, 2009 - 12:13 AM UTC
Quoted Text
[quote
Hi, how did you manage to get that 6253, im searching for it but in vain.
hy jamal. #6253 is out of production . i dono why dragon use this marketing strategy with theyre #6252 , 6253 6254 kits ! i think they where best sellers and is a mistake for not continued to produce them ! as for u're question , i got it from ebay at an incredible price of 41 USD in august . but recenty i've been looking on to ebay and saw that it has reached a price arrown 80 - 100 USD . for that money u can get the #6406 , modelkasten tracks and PE from any producer u want ! and in my opinion it woud be better this way! 80USD is an exagerated price for the kit! except for the Michale Wittmann figurine (possing like in the fameous propaganda photo ), u can finde everything ! [/quote]
80$!! very exagerated, i'll buy the 6406 and voyager 35179, do you know if i can use the Atak Zimmerit for Dragon 6253 on the 6406?
magica
Prahova, Romania
Joined: September 11, 2009
KitMaker: 9 posts
Armorama: 7 posts
Joined: September 11, 2009
KitMaker: 9 posts
Armorama: 7 posts
Posted: Thursday, October 15, 2009 - 01:32 AM UTC
Quoted Text
80$!! very exagerated, i'll buy the 6406 and voyager 35179, do you know if i can use the Atak Zimmerit for Dragon 6253 on the 6406?
sorry phil for the offtopic discussion ! i also bought the atak zimm for my #6253 . it should fit witout any problems. it's the same hull !
barkmann424
England - North West, United Kingdom
Joined: November 23, 2008
KitMaker: 357 posts
Armorama: 353 posts
Joined: November 23, 2008
KitMaker: 357 posts
Armorama: 353 posts
Posted: Friday, October 16, 2009 - 08:16 PM UTC
Hah I managed to escape the day job! Well a belated good morning to you all
Hello again Scott! How are you doing? Thanks for the tips on the graphite powder, I will give it ago on a build soon! Do you fix it with anything, such as hairspray or something similar, as you would on an art piece?
Hello Alexander! Hi Cristian! Well, the question of the kugelblende and co-axial mounted Mg34's pokes it's awkward head from the apertures! I believe that the Tiger 1 was only ever hull.and with the 'Late AFV variant' Mg34 with the 'slotted' cooling sleeve, rather than the 'pierced' version. There has been quite a bit of debate about the Tigers Mg34 compliment, and the changing of the co-ax's turret mount and sleeve for the AA fittings! This appears to be a hazy subject, Of note on the Tigers of the s.SS.Pz.-Abt.101, is that the majority of images do not show the Mg AA mounted, despite the constant threat of 'Jabo' attack. You can spot a few with the AA mount cradle on the commanders cupola, and the image set of the 2nd Kompanie as it climbs the winding hill on route 316 towards Morgny on the 7th of June '1944', the AA fitting of the Mg is clearly illustrated.
Okay enough diversionary banter! The Aber and the Lion Marc 'kugelblende' mounted Mg34's both fit the DML Tiger ball mount, though the construction and the length of each one differ. The Lion Marc depiction, being a two part construction, and longer, whereas the Aber is a single turning in brass, and shorter with a 'tail' to fit into the main body of the kits Mg's body, and breech.
There are quite a few manufactures to choose from, when it comes to Mg's for Tigers etc! Griffon, Adlers Nest, JB Models,(unbelievable value, I might say) Aber, Lion Marc, etc, all fit and all add that little extra crispness to a build, depending on funds, as the cost of the Mg's are not cheap, and ceiling at about 10-12 Euro's!
I will try and dig a few more images of the choice from the hard drive!
Hello Jamal! Looks like you have an eye for a bargain eh? I totally agree with you on the 'limited production' of DML's Tiger 1 kit's, as I believe, that if they lengthened the runs or 're-boxed' some perhaps? (That would alter the price of a few of the 'rarer' Tiger kits, in all those dusty closets... Are they meant to be built, or left to accrue value, surely savings bonds are a better option?) I t must be one of the most popular modelling subjects globally, and the right kits and production variants, fly off the shelves! So why miss out on profits, by 'bottleneck' production runs that create a cycle of 'over-inflated' privately sold Tigers, I think a lot of modellers suffer this way, as not everyone gets access to trade samples, review kits, and large expendable incomes!
Right what I want you all to do know, is close you eyes and make a wish to the slumbering Dragon beneath the mountain... And pray for an announcement, before Christmas of a new Tiger offering (Mid or early we are not fussy) before this window of opportunity closes, and we have to buy another Stug,or PzIV ! Right I had better shut up before the 'Cybermen come!!!
Don't go away I will be back... Tonight! Promise. Cheers Phil.
Hello again Scott! How are you doing? Thanks for the tips on the graphite powder, I will give it ago on a build soon! Do you fix it with anything, such as hairspray or something similar, as you would on an art piece?
Hello Alexander! Hi Cristian! Well, the question of the kugelblende and co-axial mounted Mg34's pokes it's awkward head from the apertures! I believe that the Tiger 1 was only ever hull.and with the 'Late AFV variant' Mg34 with the 'slotted' cooling sleeve, rather than the 'pierced' version. There has been quite a bit of debate about the Tigers Mg34 compliment, and the changing of the co-ax's turret mount and sleeve for the AA fittings! This appears to be a hazy subject, Of note on the Tigers of the s.SS.Pz.-Abt.101, is that the majority of images do not show the Mg AA mounted, despite the constant threat of 'Jabo' attack. You can spot a few with the AA mount cradle on the commanders cupola, and the image set of the 2nd Kompanie as it climbs the winding hill on route 316 towards Morgny on the 7th of June '1944', the AA fitting of the Mg is clearly illustrated.
Okay enough diversionary banter! The Aber and the Lion Marc 'kugelblende' mounted Mg34's both fit the DML Tiger ball mount, though the construction and the length of each one differ. The Lion Marc depiction, being a two part construction, and longer, whereas the Aber is a single turning in brass, and shorter with a 'tail' to fit into the main body of the kits Mg's body, and breech.
There are quite a few manufactures to choose from, when it comes to Mg's for Tigers etc! Griffon, Adlers Nest, JB Models,(unbelievable value, I might say) Aber, Lion Marc, etc, all fit and all add that little extra crispness to a build, depending on funds, as the cost of the Mg's are not cheap, and ceiling at about 10-12 Euro's!
I will try and dig a few more images of the choice from the hard drive!
Hello Jamal! Looks like you have an eye for a bargain eh? I totally agree with you on the 'limited production' of DML's Tiger 1 kit's, as I believe, that if they lengthened the runs or 're-boxed' some perhaps? (That would alter the price of a few of the 'rarer' Tiger kits, in all those dusty closets... Are they meant to be built, or left to accrue value, surely savings bonds are a better option?) I t must be one of the most popular modelling subjects globally, and the right kits and production variants, fly off the shelves! So why miss out on profits, by 'bottleneck' production runs that create a cycle of 'over-inflated' privately sold Tigers, I think a lot of modellers suffer this way, as not everyone gets access to trade samples, review kits, and large expendable incomes!
Right what I want you all to do know, is close you eyes and make a wish to the slumbering Dragon beneath the mountain... And pray for an announcement, before Christmas of a new Tiger offering (Mid or early we are not fussy) before this window of opportunity closes, and we have to buy another Stug,or PzIV ! Right I had better shut up before the 'Cybermen come!!!
Don't go away I will be back... Tonight! Promise. Cheers Phil.
Jupiterblitz
Joined: December 30, 2007
KitMaker: 885 posts
Armorama: 796 posts
KitMaker: 885 posts
Armorama: 796 posts
Posted: Friday, October 16, 2009 - 09:54 PM UTC
Hello Phil,
these metal barrels are really a nice feature, I too have thought about to upgrade my Tiger II with it.
But here in Germany an MG34 set by Adlers Nest is offered for ~20 Euro...the Griffon set might be a good bargain...
Will follow your next steps.
these metal barrels are really a nice feature, I too have thought about to upgrade my Tiger II with it.
But here in Germany an MG34 set by Adlers Nest is offered for ~20 Euro...the Griffon set might be a good bargain...
Will follow your next steps.
Canjuaan
Baden-Württemberg, Germany
Joined: June 08, 2007
KitMaker: 228 posts
Armorama: 223 posts
Joined: June 08, 2007
KitMaker: 228 posts
Armorama: 223 posts
Posted: Saturday, October 17, 2009 - 12:24 AM UTC
Personally, I like the ABER best. It's also reasonably priced.
Excellent thread, I follow it all the time! Keep up the great work.
Johannes
Excellent thread, I follow it all the time! Keep up the great work.
Johannes
vanhall
Groningen, Netherlands
Joined: January 23, 2007
KitMaker: 406 posts
Armorama: 391 posts
Joined: January 23, 2007
KitMaker: 406 posts
Armorama: 391 posts
Posted: Saturday, October 17, 2009 - 03:07 AM UTC
Quoted Text
Hello Phil,
these metal barrels are really a nice feature, I too have thought about to upgrade my Tiger II with it.
But here in Germany an MG34 set by Adlers Nest is offered for ~20 Euro...the Griffon set might be a good bargain...
Will follow your next steps.
Schatton modellbau.de do a very nice 'MG34-Panzermantel Späte Ausführung':
Plus it's half the price of Griffon's. I got mine from Germany, here:
http://www.modellbau-koenig.de/catalog/product_info.php/manufacturers_id/107/products_id/11447
barkmann424
England - North West, United Kingdom
Joined: November 23, 2008
KitMaker: 357 posts
Armorama: 353 posts
Joined: November 23, 2008
KitMaker: 357 posts
Armorama: 353 posts
Posted: Saturday, October 17, 2009 - 10:22 AM UTC
Good evening to one and all!
Hello Marco! How are you doing? Thanks for looking in, if you want to add that little extra brass mg crispness to your excellent big cat builds, then you are definitely in the right part of the world. JB Model, have a great range of barrels etc, all amazing value, the co-axial mg34 stubs were 0.6 Euro for 2!
Hi Johannes! Great to see you along for the 'marsch' , thanks for posting that 'nifty' SBS storyboard, very useful! Your are spot on with the Aber mg barrels, I think I was quoted 8.5 Euro for the 2, about the low end of a LionMarc 2 piece barrel, and you only get 1 in the pack!
Good evening Grant! Once again your amazing powers of sourcing, Tiger AM apparel comes to the fore. I think I will be paying a visit to 'Modelling King' again rather soon, never thanked you properly for the 'Kurzmaul' tip off! How is you gorgeous mid tiger of the s.Pz.Abt.507 coming along? The detail is mouthwatering.
Well I have been juggling,'121' and '213' between weathering and building on both, and here is where they are both up to!
'213' is first up... Back to tracks again! As you can see 92 is a good number for the Friulmodel tracks, on the larger 700mm idler. This gives representation of 'taught sag' with the Idler arm set at maximum tension.
Now the for the turret stowage bin on this Tiger, I have selected the Aber version, this appears to be the most finely detailed of the three up for selection, Aber,Voyager, and Lion Roar. All like mini kits within themselves.
The Aber rommelkiste, is truly a work of art, brass origami if you will! Now lets see if I can get it together, without it looking as though it's not been through the mangle of a cauldron battle... Looks like a job for the dusty soldering iron eh? Any handy tips and techniques for this modelling 'dark art' would be most welcome!
Now all those spare track links from the Friul set can be drilled trough, and have these beautiful Adlers nest turned brass track pins inserted!
Nice eh? I wonder if you could get a micro circlip on the end though? Another company that produces turned brass track pins for the Tiger 1 is 'Fukuya' can't think why we don't hear much of this manufacturer in the west? I think you can get them for a little less than the Adlers Nest offering, though not much less if I remember correctly!
Well goodnight you kind patient folk... Off to take some images of '121' and then hit the sack. See you all in the morning... Thanks again for following this saga as it unfolds and unravels.
Cheers Phil.
muchachos
Ontario, Canada
Joined: May 21, 2008
KitMaker: 537 posts
Armorama: 439 posts
Joined: May 21, 2008
KitMaker: 537 posts
Armorama: 439 posts
Posted: Saturday, October 17, 2009 - 10:35 AM UTC
Quoted Text
Hello again Scott! How are you doing? Thanks for the tips on the graphite powder, I will give it a go on a build soon! Do you fix it with anything, such as hairspray or something similar, as you would on an art piece?
Hi Phil! I'm doing just great, thanks! What about you? I don't fix it with anything, as it seems to stay on quite well without it. It is pretty much a pencil lead ground up, as far as we modellers are concerned, so it sticks pretty well.
This thread reminds me of a PMMS review, where Terry shows the alternatives for the included kit pieces... It's great stuff, but I am perpetually jealous of all of your AM!
SCOTT
barkmann424
England - North West, United Kingdom
Joined: November 23, 2008
KitMaker: 357 posts
Armorama: 353 posts
Joined: November 23, 2008
KitMaker: 357 posts
Armorama: 353 posts
Posted: Friday, October 23, 2009 - 07:55 PM UTC
Hello to one and all!
I have finally managed to re-discover my workbench! So once again apologies for my absence...
Hi Scott! I am in avery fortunate posistion with this blog, in that a lot of the AM has been supplied or donated, in order to build up a wider picture of the items available, for detailing Tiger 1's, when you start sifting through what is available, one thing that is very apparent is the large selection of AM out there, and the difficulty in obtaining it at times. Another point of interest is that with focusing on one subject is that it gives you more time (when available) to research and source for the projects. So sorry for releasing the little green beastie, with the glut of PE and AM details.
Right then! What has been going on with the kitties!
'121' hasbeen broken back down into separate parts : running gear,hull and turret. Now we can crack on with the weathering and detail painting.
One particular area that needs some attention is the lower hull sides behind the roadwheels and under the sponsons. This is first given astreaked 'dot filter' in order to simulate the general mixof grime and filth thrown up by the tracks.
I have used a variety of rust and earth shaded Mig Productions Oil colours for this, along with MIG's thinner for washes.
Some of the oils medium is drawn from it by placing a blob onto some cardboard, this helps obtain a definite 'matt' finish to the streaking.
Before the 'dot's'are applied the area is lightly flooded with thinner enabling the oil paint to flow, and to avoid overstaining the basecoat.
Place the mix of colours onto the prepared area in a 'random' fashion, paying mind to the vehicles areas of detail and posible lubrication staining.
Then with vertical strockes of a 'damp' brush loaded with thinners, ease the oil colours in a downwards motion, cleaning the brush on a parer towel between streaks, to help avoid 'muddying' the appearance... We can use pigments for that latter!
When this is done you should have a rather pleasing subtly streaked area, soon to be covered by the roadwheels. Though this can be seen in part on the Tiger 1, and adds to the look of the finished vehicle,tying in the hull and the running gear.
The start of a sooty rusted streaked look, is started on with the same method on the exhaust shrouds.
And carrying with the finishing of this Tiger, some of the stowed items need to be painted. This is started with basecoating the 'metal' parts of the items with thinned Vallejo German camo Black/Brown #70822. In order to stop any 'overpaint' onto the hull, a piece of post it is slipped underneath or behind the parts, stopping any paint getting on the Tiger.
Right then! This should help me ease back into the flow of this blog, should be back tomorrow, with some more on both Tigers.
Thanks for your patience with these stops and starts, and thanks once again for taking the time to drop by!
Cheers Phil.
adamsmasher
Illinois, United States
Joined: June 27, 2009
KitMaker: 192 posts
Armorama: 54 posts
Joined: June 27, 2009
KitMaker: 192 posts
Armorama: 54 posts
Posted: Friday, October 23, 2009 - 08:13 PM UTC
Thanks for the update, Phil!
barkmann424
England - North West, United Kingdom
Joined: November 23, 2008
KitMaker: 357 posts
Armorama: 353 posts
Joined: November 23, 2008
KitMaker: 357 posts
Armorama: 353 posts
Posted: Tuesday, October 27, 2009 - 04:04 AM UTC
G'day to you all! I managed to escape the day job again!
Hi Adam! I should be able to get updates together quicker now, as a work project I am doing is almost complete! So I should be able to give all these Tigers the attention they deserve!
Okay then update time... #6383 modded, weathering on the lower hull continues. After the oils filters have thoroughly dried, to give a subtle streaked effect, it is time for some mud and dirt accumulation via the use of the MIG pigment system. I would use Tamiya's weathering powders... But although they have a good range, the way they are supplied makes them less versatile in their possible uses.
So we will stick with the loose pigments and mineral thinners...
First as we are looking for a slightly different effect than the previous Tiger #6383 OOB, AB applied spatter technique. I have in mind a layered drying, rain streaked effect... Not dissimilar to a lot of the excellent Char types we have been seeing recently. The soil of Normandy is apparently chalky, light and clay heavy in areas... So we mix our pigment palette accordingly... On the Tiger that is!
Apply some mineral thinner onto the bottom of the lower hull, allowing it to 'flourish' and 'bloom' away from the suspension arms upwards to the sponson.
Then randomly put down a mix of the lighter shades of pigments onto the damp surface.
Work in a few more dabs of dry pigments until you have a good wet palette to work with.
Now taking a clean soaked brush, start removing some of the pigment slurry, with downwards strokes of the brush, using varying pressure, cleaning every 3-4 strokes.
Continue this along the the hull side, and re-visit any areas that still look a bit 'clumpy ' working in the 'mix' to suit the level of accumulated filth you want.
Leave to dry overnight and! A Tiger ready to escape out of the pocket and over the Seine with some of the Normandy Bocage attached!
Using some of the 'recycled' mix, you can add a first coat of pigments, to the bow of the Tiger, before the final placing of the 12 spare track links, and their subsequent weathering in situ.
Okay then best let this stage dry, then get on with it later.
I have made a start on the Turret Stowage Bin on '213', prior to the soldering (what am I letting myself in for now!) so back real soon... Without burnt fingers and melted brass!
Thank you all for stopping by, see you all soon. Phil.
Canjuaan
Baden-Württemberg, Germany
Joined: June 08, 2007
KitMaker: 228 posts
Armorama: 223 posts
Joined: June 08, 2007
KitMaker: 228 posts
Armorama: 223 posts
Posted: Tuesday, October 27, 2009 - 05:34 AM UTC
Hi Phil,
nice job again
I did a little tutorial on PE and soldering for a German forum a couple of weeks ago. And guess what PE-set was used for the demonstration? The ABER Tiger I stowage bin. Don't know if you understand German, but I guess most of the text isn't necessary for you and the pics speak pretty much for themselves.
Check it out here: My soldering / PE SBS.
If you have questions on a specific step in the making, let me know and I'll translate or explain (at least I'll try ).
Cheers and keep it up,
Johannes
barkmann424
England - North West, United Kingdom
Joined: November 23, 2008
KitMaker: 357 posts
Armorama: 353 posts
Joined: November 23, 2008
KitMaker: 357 posts
Armorama: 353 posts
Posted: Thursday, October 29, 2009 - 07:19 PM UTC
Good morning to one and all!
And a big thanks to you Johannes,your timely intervention with that excellent SBS tutorial on soldering... Of all things the ABER 'rommelkiste' will help immensely.
I have to admit though that I did use the translate button, as even living in the old West Germany, for nigh on eighteen months, my command of the German language was very rarely expanded upon, as the very kind folk of Stukenbrok, on the whole spoke with me in fluent English, and I never had the opportunity to develop a deeper understanding and use... Other than reading signage, ordering the odd Detmolder or three, and general getting by in basic German. Something I will surely try and develop over the coming years. Thanks again for the link, it is something i will refer back to many times in the near future.
Now a package came the other day... And hidden withing it's cardboard depth was... A very rare Item!
I have been trying for a while to get a set of these tracks. The WWII productions resin 'click together' Tiger 1 Late Tracks. It says in the instructions that 15 minutes is all the time needed to assemble them, and that a quick blast with a toothbrush removes any casting flash. This was not really evident in this set, and only the odd air bubble.
In comparison to the Friulmodel Late Tiger set, you can see that the WWII Productions tracks are finer in their look, and noticeably crisper also. Very similar to the Look of the MasterClub set. One thing missing though are the manufacturers casting marks on the cleat/face! Do not worry I won't be adding them!
The surface also has a slight cast in texture, that does look very effective, especially on the inside face of the track.
Two lengths of track have been made up both with 94 links, and a further 12 for the bow plate spare track length. As you can see they sit with a good looking 'taught sag' , and the fit the sprocket snugly, and the guide horns follow the roadwheels and idler well, with no trouble. 9/10 I will have to get some more... Though that is a bit like nailing Jelly to a wall!
One thing I am looking into for the '121' build is the cut branches, that appear to be attached, on the 'torched' image of the Tiger in Villers Bocage, that we are portraying.
What do you all use for this? I was thinking of some paper leaves and wire armatures, or is their better alternatives around today?
Right then I have kept you busy folk far far too long, and I had best get some more done on the Tigers! I have got a busy weekend ahead, but will try to get some updates posted.
Thank you all once again for dropping in...Cheers/Prost Phil!
barkmann424
England - North West, United Kingdom
Joined: November 23, 2008
KitMaker: 357 posts
Armorama: 353 posts
Joined: November 23, 2008
KitMaker: 357 posts
Armorama: 353 posts
Posted: Sunday, November 01, 2009 - 10:40 AM UTC
Evening all!
A very quick update on the continuing weathering of the running gear...
Now that the pigments and washes are dry enough to handle, a little bit more can be added with some oil streaking from lubrication points and leaks.
This is done with heavily thinned oils, of a grayish/ brown black appearance, mixed with enamel thinners and clear satin enamel. Once again placed onto a thinner dampened area, and dragged down to accentuate the suggestion of dripping liquids on the vertical plane of the lower hull side plate.
Now we can put roadwheels and tracks on!
So there we are... Told you it was a quick one! The MasterClub tracks are awesome, and have a great look and feel to them, now when we are a bit further along, we can compare them in situ, against the DS tracks! I know what I think .
Right then chaps, time to melt some brass!
Back ASAP with a bit more madness, thanks for looking in... Cheers Phil!
panamadan
Minnesota, United States
Joined: July 20, 2004
KitMaker: 1,513 posts
Armorama: 1,449 posts
Joined: July 20, 2004
KitMaker: 1,513 posts
Armorama: 1,449 posts
Posted: Sunday, November 01, 2009 - 11:50 AM UTC
Impressive Phil!
Dan
Dan
SSJugend
California, United States
Joined: April 02, 2006
KitMaker: 123 posts
Armorama: 111 posts
Joined: April 02, 2006
KitMaker: 123 posts
Armorama: 111 posts
Posted: Sunday, November 01, 2009 - 12:00 PM UTC
Love the work and that camo!!
Keep it up!
Russ
Keep it up!
Russ
H_Ackermans
Gelderland, Netherlands
Joined: July 11, 2006
KitMaker: 2,229 posts
Armorama: 2,221 posts
Joined: July 11, 2006
KitMaker: 2,229 posts
Armorama: 2,221 posts
Posted: Sunday, November 01, 2009 - 12:19 PM UTC
Great work, just breathtaking, I especially admire the weathering, as it is so restrained in appearance yet extremely powerful in what it portrays.
About that branch/twig foliage, some electrical wire, very thin, could be used, and leaves can be made out of unused tea from a teabag.
For "bigger" branches, you could use very small twigs used in railroad scenery. These are dried outer most tiny branches, very delicate but a real natural product so looks te business.
I know Verlinden had a set of this, immensly expensive in comparison to what railroad scenery makers have.
spitfire303
Vendee, France
Joined: December 22, 2006
KitMaker: 1,437 posts
Armorama: 1,406 posts
Joined: December 22, 2006
KitMaker: 1,437 posts
Armorama: 1,406 posts
Posted: Sunday, November 01, 2009 - 01:06 PM UTC
it looks so good!!! I may use some tips of yours
vanhall
Groningen, Netherlands
Joined: January 23, 2007
KitMaker: 406 posts
Armorama: 391 posts
Joined: January 23, 2007
KitMaker: 406 posts
Armorama: 391 posts
Posted: Tuesday, November 03, 2009 - 03:54 PM UTC
Great stuff Phil. Top streaky weathering, pity it's now mostly hidden.. But at least we know it's there and more importantly; how it's done.. .
If you ever get all these Tigers on a dio, I've got a nice little 1/35th 'Deutsche Heereskarte Frankreich 1:200.000' for you..
(not that you can see if it's really France or not )
If you ever get all these Tigers on a dio, I've got a nice little 1/35th 'Deutsche Heereskarte Frankreich 1:200.000' for you..
(not that you can see if it's really France or not )
wittyguy
United States
Joined: February 19, 2009
KitMaker: 5 posts
Armorama: 4 posts
Joined: February 19, 2009
KitMaker: 5 posts
Armorama: 4 posts
Posted: Thursday, November 05, 2009 - 01:52 PM UTC
Dragon USA has just put this Tiger I on sale together with a whole bunch of other new kits in their 'Happy Holideals'! Plus they are encouraging us to get it from our local hobby store. My LHS is actually selling them at lower price listed, sweet!
http://www.dragonmodelsusa.com/dmlusa/shocktober09b.asp
Jason
http://www.dragonmodelsusa.com/dmlusa/shocktober09b.asp
Jason
thebear
Quebec, Canada
Joined: November 15, 2002
KitMaker: 3,960 posts
Armorama: 3,579 posts
Joined: November 15, 2002
KitMaker: 3,960 posts
Armorama: 3,579 posts
Posted: Friday, November 06, 2009 - 03:58 AM UTC
Hi Phil ..Lookin' good!! This thread is just getting to be the best Tiger build reference on the net ...
I got a question for you ...the new CH Wittman Tiger ...does it have the right zimmerit for his tank or am I better just using my older Tiger without zimmerit to make a better representation? I haven't got my pictures available right now (away from my computer) , Just wondering before I send my hard earned money.
Rick
barkmann424
England - North West, United Kingdom
Joined: November 23, 2008
KitMaker: 357 posts
Armorama: 353 posts
Joined: November 23, 2008
KitMaker: 357 posts
Armorama: 353 posts
Posted: Friday, November 06, 2009 - 11:36 AM UTC
Hello All!
Nearly got a clear path to workbench for the weekend, so I will post some updates on the current builds in the morning.
Hi Dan! Good to hear from you my 'Track Mentor', your valuable input on the track wear issue, really added a great deal to these builds, and made me think a little more into running gear wear and depiction, depending upon the vehicles location.
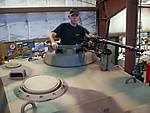
Hello Russel! Thanks for the kind words on the Tri-Colour... I bet sitting/standing in that cupola felt awesome?
Hi Herbert! Thank you ever so much for the very poignant comments on the weathering, I tend to just build up layers as I keep revisiting the Tiger, one area at a time.
Thanks also for the tips on the cut foliage, construction, I will give it a go.
Hello Pawel! Good to see you back at the bench, feel free to use any of this stuff, I use a lot of your techniques! Best to share eh?
Hi Grant! Cheers for the words of encouragement on the weathering, I know that it will not be very visible, but you know me! It helps me sleep... That cart sounds like an excellent idea! I have been looking at some 6pdr's and carriers today, so hopefully soon, we can put a section of the N175 Circa June 1944 together!
Hey Jason! that is an excellent price for #6383... Over on these 'blighted' shores it is still priced at around £40+ I'm sure that a lot of these will be flying off the shelves 'Stateside' eh?
Hello there Richard! How is it going? ... The new CH Wittmann's last Tiger, the Befehlswagen #6610 has the same turret shell as #6383. David tells us that the mantlet and rear hull plate have been re-tooled, and that a 25mm turret roof has been added along with an AA Mg34. If you want to tackle this Tiger, it should only require a little attention to the turrets forwards portion, where the first 2 or 3 rows of Zimmerit follow the shape of the leading edge and around the lifting lugs/pintles. The decal options sound interesting, in that you get a set of '007''s Tactical Markings in solid white, and yellow with white outline... Good to see a bit of revisionist options included!
Right then folks, lets get to modelling! See you all tomorrow... Cheers Phil.
thebear
Quebec, Canada
Joined: November 15, 2002
KitMaker: 3,960 posts
Armorama: 3,579 posts
Joined: November 15, 2002
KitMaker: 3,960 posts
Armorama: 3,579 posts
Posted: Friday, November 06, 2009 - 12:28 PM UTC
Hi Phil ...thanks for the info ..I'm doing good except for a change in scenery( separation) but setting up shop again slowly ..