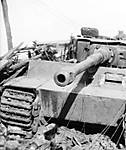
Hello all! Wish my hand was numb again, been drilling friulmodel track links and MasterClub most of the day, and my fingers are creasing me Still they are worth it in the end eh? I will be able to compare the different links in images tomorrow, along with some other stuff... Those vision ports on the modded #6383 are becoming endangered. I have been playing around with some RTV rubber, and trying a few casts on some 'unpasted' turrets, not going to bad so far, just the casting in resin, thats the trick part I hear!
Hi Geraint Your explanation of the track wear seems to fit with all the variables I have been given, It does seem to appear more on the Late 'Gummi' wheeled Tigers than the Mids with the rubber tyred roadwheel. I keep meaning to look at a few Panthers and KT's to see if they also exhibit a similar wear pattern.
Hi Jim thanks for the comments, they mean a lot. I am really looking forwards to the final weathering on your AFV club Tiger. That camo job is excellent, top notch. I will go through David Byrdens SBS on the DS tracks but I am a little unsure as wether I will use them or the Magic Tracks yet... It depends on if my sore fingers are up to all those guide horns! Though they could be put on and then Thanks for the vote on the Magic Tracks Karl, If they don't get on this Tiger they will be showcased on the other #6383. I'm glad you are enjoying this Tigerfest also Karl, it is madness but of the good kind I hope!
I have a set of Lifecolor German Tank paint sets, and will use them on one Tiger I have sets of Vallejo and Tamiya ready to go... Which leaves a fourth paint option, well Van it is an OOB so... Hmmmm! Gunze Sangyo have a newer range of Panzer Colours one of them H403 is on the instructions, and it would be of use to many I expect, to compare all these options we now have for Dunkelgelb open to us now.
Maybe we could compare some weathering options also? As there seems to be an ever expanding number of companies producing weathering pigments and mediums recently. Does anybody remember Carrs Railway Weathering Powders? I found some in an old forgotten model box the other day... May well give these a go on something.
Thanks for the input guys, it helps with the therapy
Cheers Phil.
Hosted by Darren Baker
DML#6383 Tiger 1 Turret Zimmerit Mod
barkmann424
England - North West, United Kingdom
Joined: November 23, 2008
KitMaker: 357 posts
Armorama: 353 posts
Joined: November 23, 2008
KitMaker: 357 posts
Armorama: 353 posts
Posted: Tuesday, March 24, 2009 - 10:59 AM UTC
Warning
Joined: August 15, 2008
KitMaker: 107 posts
Armorama: 76 posts
KitMaker: 107 posts
Armorama: 76 posts
Posted: Tuesday, March 24, 2009 - 08:05 PM UTC
Quoted Text
I will go through David Byrdens SBS on the DS tracks but I am a little unsure as wether I will use them or the Magic Tracks yet... It depends on if my sore fingers are up to all those guide horns!
Surely the OOB Tiger should get the tracks that came in the kit... Shouldn't it?
DS tracks are quite nice and work well but will have to be glued to the roadwheels in order to portray the proper sag. I've found that glueing the tracks together, dry fitting them to the tank and adjusting and fixing the idler, packing the outside areas of the tracks with ice-lolly sticks (or spare balsa) to portray the sag and then gluing them to the roadwheels is a good method, though others will, I'm sure, have better ideas.
barkmann424
England - North West, United Kingdom
Joined: November 23, 2008
KitMaker: 357 posts
Armorama: 353 posts
Joined: November 23, 2008
KitMaker: 357 posts
Armorama: 353 posts
Posted: Wednesday, March 25, 2009 - 10:07 AM UTC
Sorry Warning You are absolutely correct an OOB is an OOB! This will get the DS tracks. Thanks for getting us back on track! I,m along way from my last OOB so thanks for the clarification of what we are attempting here. I will have the other tracks put together for comparison with the DS A.S.A.P. The Friulmodel set are near finished and the MasterClub fly together... Just the Magic Tracks which can be a little time consuming, all those guide horns! You can understand why DS is first option in the Tiger 1 kits now, they do offer an easier time for some modellers who are put off by the time and effort spent constructing or preparing individual track links of DML or other AM manufacturers. I will also prime this in Gunze Sangyo Mr Basecoat that is white. This will give us a good basecoat to work up from, without starting dark, the white will hopefully enable the tone to be played with somewhat without over darkening the heavy pattern of the zimmerit. Right back to the tracks and camera!
Cheers for perservering, will be back on track fully soon! Phil.
bizzychicken
Wales, United Kingdom
Joined: September 06, 2008
KitMaker: 967 posts
Armorama: 842 posts
Joined: September 06, 2008
KitMaker: 967 posts
Armorama: 842 posts
Posted: Wednesday, March 25, 2009 - 06:05 PM UTC
Hi Phil just geting over one long Drink binge, I feel even more of a fool now . Back to modelling, got nothing else to do at mo The DS tracks, Im sorry but I cant remember were I read it. Maybe this will jog your Memory, I know you got loads on. Babies and all! I'm sure someone said something about warming the DS tracks and using the Track former from one of the early Dragon 3 in 1 kits. The former was to be used with "Magic Tracks". This can also be used with the DS tracks. I hope this jogs your memory. Warm the DS tracks in hot water and use the Track former and let the DS tracks cool. I know I did'nt dream this, but I can't remember were I read it It must have been on a newish build thread, because its definantly to do with DS tracksLOL Geraint. I will also try and find out about the track wear on late Panthers, you know me and my Panthers. Paint? So many paint makers only one air brush Weathering sticks and stuff, you did say it was a Tigerfest try the lot! LOL
barkmann424
England - North West, United Kingdom
Joined: November 23, 2008
KitMaker: 357 posts
Armorama: 353 posts
Joined: November 23, 2008
KitMaker: 357 posts
Armorama: 353 posts
Posted: Wednesday, March 25, 2009 - 10:37 PM UTC
Hi Geraint! That is some hangover you must be nursing? I will give that a go with the heat forming of the DS tracks, sounds good! I have been attacking the inside portion of the Friulmodel track set with some files and sanding blocks, to try and represent this wear pattern that is to be seen on a lot of Late Tigers. Thinking further into this, the proportion of 'unweighted' track on a 'gummi' wheeled Tiger 1 as opposed to a rubber tyred roadwheeled Early or Mid, is quite a difference, so as you and Panamadan and some fella's over on Missing-Lynx have deduced, the pressure from the 'contact patch' of the inner roadwheels on the Late steel-wheeled Tiger 1's , along with the natural give in the track whilst moving, and track tension issues would perhaps combined... give us this band of wear on the inner track tread surface! There sorted I will have to 'wear' the DS tracks accordingly also, I will endeavour to get some images of the progress made later on tonight.
Thanks for looking... Phil.
seabee1526
Michigan, United States
Joined: September 14, 2007
KitMaker: 185 posts
Armorama: 130 posts
Joined: September 14, 2007
KitMaker: 185 posts
Armorama: 130 posts
Posted: Thursday, March 26, 2009 - 09:54 AM UTC
Shortening of the DS tracks will present a problem or no?
bizzychicken
Wales, United Kingdom
Joined: September 06, 2008
KitMaker: 967 posts
Armorama: 842 posts
Joined: September 06, 2008
KitMaker: 967 posts
Armorama: 842 posts
Posted: Thursday, March 26, 2009 - 11:54 AM UTC
Hi Phil. Glad you know what I mean about the track former, wish I could remember were I seen it I'm looking forward to seeing some new progress shots. At this stage you seem to do alot of modelling work but not alot to show for your hard work. Keep it up! looking forward to the paint job. I remember Herbert saying something about Chilling on the washes on Zim. Will be intresting to see How Dragons Zim, being quite deep takes to a wash. Not seen any photos of Panthers with uneven track wear? All the photos Ive got Of Panthers with resilient all steel road wheels are quite new machines. Uneven Track wear doesn't seem to have been a problem with Panther, not from the Images I've looked at? Of course lots of images I have not seen. Even quite Beaten up A's and G seem to have good looking Tracks. Can't even find any images without good looking chevrons on they Tracks. Dont think Panthers had as long a shelf life as Tigers LOL Geraint
barkmann424
England - North West, United Kingdom
Joined: November 23, 2008
KitMaker: 357 posts
Armorama: 353 posts
Joined: November 23, 2008
KitMaker: 357 posts
Armorama: 353 posts
Posted: Monday, March 30, 2009 - 02:14 AM UTC
Hi all! Right lets get back on track!
First up on this subject for the OOB #6383 is the shortening of the DS tracks supplied with the more recent releases of Dragons Tiger 1's.
Here is the best site with the SBS for the shortening of the DS tracks. David Byrden's excellent Tiger1 Info, a real boon for anyone building a Tiger 1.
http://tiger1.info/EN/DragonDSLateTracks.html
So Steven, the task of shortening the DS track is not that difficult, though on one effort I did in the past, the over zealous application of Tamiya Extra Thin Cement attacked some of the guide horns, making them fall off! So you will notice that I am using Tamiyas Standard Cement, as it stays where it is told to!
And thats that really (cheers for showing us how David!) not too much in the way of trouble... Just have to get them on now...
Geraint I have experimented with the 'hot water forming' of the DS tracks... And it works! Though really boiling water does cause shrinkage to some of the edge detail on the DS
Track, so it is a good idea to leave it to stand till it is slightly less than schorchio! And hold the 'to be formed' part of the track in the water a little longer. Running the heated area under cold water whilst still on the Magic Track template, cures (is this the correct technical term?) the formed curve of the DS track!
And back to Geraint's request for more 'in progress' images... I am sorry for the Blue Peter approach (here is one I finished earlier) not much time spare at present, but I am getting back on schedule, so more WIP shots to come.
Cheers for looking, Phil.
recceboy
Alberta, Canada
Joined: July 20, 2006
KitMaker: 706 posts
Armorama: 665 posts
Joined: July 20, 2006
KitMaker: 706 posts
Armorama: 665 posts
Posted: Monday, March 30, 2009 - 05:48 AM UTC
Looking good thanks with the WIP photos.
Cheers
Anthony
Cheers
Anthony
seabee1526
Michigan, United States
Joined: September 14, 2007
KitMaker: 185 posts
Armorama: 130 posts
Joined: September 14, 2007
KitMaker: 185 posts
Armorama: 130 posts
Posted: Monday, March 30, 2009 - 07:10 AM UTC
2 links from both sides and hot but not rolling boil water while held on the track form. The rest will be held down by CA on the road wheels. I think I can do that....
bizzychicken
Wales, United Kingdom
Joined: September 06, 2008
KitMaker: 967 posts
Armorama: 842 posts
Joined: September 06, 2008
KitMaker: 967 posts
Armorama: 842 posts
Posted: Monday, March 30, 2009 - 08:07 AM UTC
Hi Phil, for some reason cant see your "Blue Peter" shots just empty white blocks? glad the Hot Water track Former worked LOL Geraint
bizzychicken
Wales, United Kingdom
Joined: September 06, 2008
KitMaker: 967 posts
Armorama: 842 posts
Joined: September 06, 2008
KitMaker: 967 posts
Armorama: 842 posts
Posted: Monday, March 30, 2009 - 08:11 AM UTC
Phil, some off the shots are slowly appearing. I think my computer is having a bit of a strannnnge slooooow daaay . Better give her a clean up. Catch you later
bizzychicken
Wales, United Kingdom
Joined: September 06, 2008
KitMaker: 967 posts
Armorama: 842 posts
Joined: September 06, 2008
KitMaker: 967 posts
Armorama: 842 posts
Posted: Monday, March 30, 2009 - 08:43 AM UTC
Hi Phil, nice one the curve has formed lovely, glad it works.Is that the Drive and Idler done? Ive got a set from the Panther D with Zim. I'm changing them for newer Magic Tracks with chevrons and Keeping my Fruils for a Panther F. The detail on the Panther DS tracks are nice, just to early for what I want. Ive heard that the Panther DS ones are a link out, so thanks for the tutorial on your DS tracks. Cheers Geraint
barkmann424
England - North West, United Kingdom
Joined: November 23, 2008
KitMaker: 357 posts
Armorama: 353 posts
Joined: November 23, 2008
KitMaker: 357 posts
Armorama: 353 posts
Posted: Thursday, April 02, 2009 - 11:04 AM UTC
Back again! Right thiskitty is now shod with it's work boots on... On the left hand side I have put on a set with 2 links taken from the length of the DS track, and on the right hand 3 links removed. The idler is still only 'dry' fitted so the remaining slack will be removed when fixed... Don't worry the tracks will be of equal link count when painting begins!
It has come to life a bit more now that it has it's tracks on eh?
Here is an interesting comparison of a 'formed' and 'unformed' DS track, the forming looks as though it will really pay off when the time of permanent fixing of the tracks happens.
Cheers for that tip off Geraint! Much obliged.
This is probably might be the time to slip in a couple of images of the other tracks to be used on these Tigers, I was hoping to get some Model Kasten's and AFV club's together for a broader comparison, but because of 'customs difficulties' they will have been across the Atlantic and back more than Richard Branson in a power boat! Anyway enough sedition, (though Austrailia sounds good this time of year! (It's a Tollpuddle Martyr thing )) here are the assembled tracks, labelled for ease of identification.
Right folks that's all for now, a little bit of PE on the turret stowage bin and a few wing nuts... And this baby will be ready for it's primer... Finally you holler!
Okay back A.S.A.P... Phil, cheers for dropping by.
vanhall
Groningen, Netherlands
Joined: January 23, 2007
KitMaker: 406 posts
Armorama: 391 posts
Joined: January 23, 2007
KitMaker: 406 posts
Armorama: 391 posts
Posted: Thursday, April 02, 2009 - 12:02 PM UTC
Let the painting commence... Looking forward to it.
Nice to see the tracks all together, and in 4 different materials..
I reckon I like them green resin ones the best..
Nice to see the tracks all together, and in 4 different materials..
I reckon I like them green resin ones the best..
seabee1526
Michigan, United States
Joined: September 14, 2007
KitMaker: 185 posts
Armorama: 130 posts
Joined: September 14, 2007
KitMaker: 185 posts
Armorama: 130 posts
Posted: Friday, April 03, 2009 - 08:31 AM UTC
What's the verdict...do you like this whole DS track idea?
bizzychicken
Wales, United Kingdom
Joined: September 06, 2008
KitMaker: 967 posts
Armorama: 842 posts
Joined: September 06, 2008
KitMaker: 967 posts
Armorama: 842 posts
Posted: Sunday, April 05, 2009 - 02:01 AM UTC
Hi Phil. Can't see the different tracks, the white box and red cross? I Know you haven't finnished the DS tracks, they' re looking good, whats you're verdit on them? The OOTB Tiger's looking great, can't wait to see it primed and painted. Cheers for the tumbs up on the tracks, wasn't my idea just nice to have been able to jog your memory. Going to give the What if campaign a go, got a Panther F I'm going to play with, maybe some sort of SP type weapons platform. Cheers Geraint
barkmann424
England - North West, United Kingdom
Joined: November 23, 2008
KitMaker: 357 posts
Armorama: 353 posts
Joined: November 23, 2008
KitMaker: 357 posts
Armorama: 353 posts
Posted: Sunday, April 05, 2009 - 12:02 PM UTC
Hello All! Right the question of these tricky DS tracks! Well Steven...
Right next up priming! I have dug this 'aromatic' GS Mr Hobby primer from the paint box, I have not yet received the GS paints intended for this Tiger (but they are on the way, I am assured) I thinned it to 50/50 (with MIBK... Old supplies from printing days) and it sprayed extremely well! I will try it with the correct thinner when it gets here! On a note of caution, don't spray it indoors, it is quite pungent. Anyway it covers really well, even thinly applied and gives a very fine 'tooth' without graining or attacking the styrene.
There we go painting underway, albeit in a 'fashion'. To pre-shade or not to pre-shade that is a good question. Starting this one from a 'bright' base-coat should prove interesting as it will keep a level of brightness to the 'Dunkelgelb' overcoat for a longer period during the weathering process than a darker base-coat gives... We will have to see what happens.
While we wait for the GS paints to arrive, it looks as though I will have to find some other Tiger to mess with! Those 'Hollands Pie Tin' turret vision slits look like a good candidate eh? This could be fun
See you all soon! Phil... Tanks for looking.
Quoted Text
... No I don't like them, whilst the tooling and the detail on them are benchmark, they just don't do it for me. I think that the problem is they essentially rubber bands, and with a '21st Century' slant of new materials and rocket science manufacturing techniques, they are still rubber bands! And because of the confusion that still exists after 4 incarnations of DML Tiger 1's with these tracks included, with no re-tool for the length or highlighted fix within the box, to me they let the excellent grey styrene bits of the DML Tiger 1 down. And with the prices of the DML big cats creeping up with 'market forces' I would personally prefer Magic Tracks, even with all those guide horns! Articulation within a scale track... For me, will always have the upper hand on simulation... Sorry, but that's my feelings on DS tracks really. And as for sag, gravity and articulation is the best option, rather than gluing a pliable length of 'rubber' between track contact points. This image probably gives the best indicator of the 'behavior' of the differing tracks over contours convex and concave. Once again Geraint, thanks for providing us with that tip on taming these DS tracks a little. Thanks to Vanhall for letting me in on the secret of 'The Green Resin' truly excellent product, easy to assemble, very little clean up, and amazingly crisp... Cheers Grant.What's the verdict...do you like this whole DS track idea?
Right next up priming! I have dug this 'aromatic' GS Mr Hobby primer from the paint box, I have not yet received the GS paints intended for this Tiger (but they are on the way, I am assured) I thinned it to 50/50 (with MIBK... Old supplies from printing days) and it sprayed extremely well! I will try it with the correct thinner when it gets here! On a note of caution, don't spray it indoors, it is quite pungent. Anyway it covers really well, even thinly applied and gives a very fine 'tooth' without graining or attacking the styrene.
There we go painting underway, albeit in a 'fashion'. To pre-shade or not to pre-shade that is a good question. Starting this one from a 'bright' base-coat should prove interesting as it will keep a level of brightness to the 'Dunkelgelb' overcoat for a longer period during the weathering process than a darker base-coat gives... We will have to see what happens.
While we wait for the GS paints to arrive, it looks as though I will have to find some other Tiger to mess with! Those 'Hollands Pie Tin' turret vision slits look like a good candidate eh? This could be fun
See you all soon! Phil... Tanks for looking.
pokdub
Dublin, Ireland
Joined: February 04, 2009
KitMaker: 13 posts
Armorama: 11 posts
Joined: February 04, 2009
KitMaker: 13 posts
Armorama: 11 posts
Posted: Sunday, April 05, 2009 - 11:16 PM UTC
Phil,
Just a quick note to acknowledge, that apart from the Tiger builds themselves, I am very impressed with your photo compositions. There is a lot of thought and setup involved in this alone. The pic of the three sagging tracks above is a fine example of your thought process.
I am sure there are a lot of other enthusiasts out there who are quietly watching this exercise unfold.
I for one, have gone and sourced by pieces for a Tiger build, but will wait until your creations finish, at which point you will set me a goal.
Rgds
Peter
tomapaul
Bucuresti, Romania
Joined: September 17, 2007
KitMaker: 425 posts
Armorama: 304 posts
Joined: September 17, 2007
KitMaker: 425 posts
Armorama: 304 posts
Posted: Monday, April 06, 2009 - 04:46 AM UTC
Quoted Text
Phil,
Just a quick note to acknowledge, that apart from the Tiger builds themselves, I am very impressed with your photo compositions. There is a lot of thought and setup involved in this alone. The pic of the three sagging tracks above is a fine example of your thought process.
I am sure there are a lot of other enthusiasts out there who are quietly watching this exercise unfold.
I for one, have gone and sourced by pieces for a Tiger build, but will wait until your creations finish, at which point you will set me a goal.
Rgds
Peter
Yup!This sure is one of the best WIP I've seen in the last months. Bookmark No wonder it has 17000+ views.
The tracks from Masterclub are pretty good but I'm surprised to see flash marks on every link.
bizzychicken
Wales, United Kingdom
Joined: September 06, 2008
KitMaker: 967 posts
Armorama: 842 posts
Joined: September 06, 2008
KitMaker: 967 posts
Armorama: 842 posts
Posted: Monday, April 06, 2009 - 05:15 AM UTC
Yes I'm suprised to see flash on every Master club track too, being they're Resin. Nice to see how good DM "Magic Tracks" actually look agaist the others.For me its still the Fruils, there is just something about Fruils, using metal to make metal tracks just works! Geraint
barkmann424
England - North West, United Kingdom
Joined: November 23, 2008
KitMaker: 357 posts
Armorama: 353 posts
Joined: November 23, 2008
KitMaker: 357 posts
Armorama: 353 posts
Posted: Monday, April 06, 2009 - 11:29 AM UTC
Hi Peter! Thank you very much for your kind comments, it really means a lot, I will try and keep displaying the builds in a 'spatial' fashion, what I have been trying to do with the images is make it look as though you can handle the parts and areas being worked on. As being a modeller (like everyone else here I expect! ) I really like to get a physical grip on the kit as well as a 360 degree view, the one thing I think we all have in common is 'spatial awareness', that is difficult to depict in 2D images... I suppose it's like taking the box lid off in the Hobby Shop and leafing trough the sprue bags (probably the bit I miss most with 'Online Shopping )
Paul and Geraint The MasterClub tracks do indeed have a small flash mark from the mould, though this is easily removed with a fine grade padded sanding stick. I have found it easier to do this when the tracks are assembled, as it can be quite fiddly cleaning up the individual links. I will post an image of this when 213 gets shod. The Friulmodel tracks are indeed excellent, and do have a bit of 'magic' about them (they would also make stunning bracelets if cast in silver eh? Try walking round with one on your wrist, the weight is really impressive, my mother-in-law thought they were jewelry! ) Though drilling the links for the wire is a painful process on the fingers after a while.
The Magic Tracks do hold their own with detail, though the ones in the image are the older set from #6253, as I haven't had the time (or patience) to clean up and stick 400 guide horn on 200 tracks just yet, though it will have to be done shortly for the Modded #6383.
Okay enough of my waffling, back to building... See you all tomorrow, and thanks again for your comments.
Cheers Phil.
bizzychicken
Wales, United Kingdom
Joined: September 06, 2008
KitMaker: 967 posts
Armorama: 842 posts
Joined: September 06, 2008
KitMaker: 967 posts
Armorama: 842 posts
Posted: Monday, April 06, 2009 - 12:03 PM UTC
Good night Phil. Honestly thanks for one of if not the best post I've had the pleasure to watch.Hope To see this whole Dio nailed. For one, the amount of of unselfish work and passing on your trade secrets. Makes this A winner. Many thanks. Keep it up and I'm sure it will pay off. What do they say... You only get out what you put in! Awsome work! Cheers your friend Geraint
barkmann424
England - North West, United Kingdom
Joined: November 23, 2008
KitMaker: 357 posts
Armorama: 353 posts
Joined: November 23, 2008
KitMaker: 357 posts
Armorama: 353 posts
Posted: Thursday, April 09, 2009 - 10:29 PM UTC
Hello Again! I apologise for the short absence... Thank you again Geraint for the encouraging words, they do fuel the build. The #6383 OOB is now fully primered and ready for a pre-shade.
Now this is the part of the blog where you will all think that I have lost the plot completely!
Well I had an idea, when the Mr Base White 1000 went down so smooth, bright and thin. With the depth of the moulded zimmerit being quite deep, I thought about how to shade the areas that are zimmerited, as any over washing could darken off the model considerably, giving it an autumnal 'muddy' appearance rather than a brighter 'dusty' summer look... So with such a stark bright pallette to start from, I thought that we could play around with pre-shading. I have used GS Mr Hobby Chocolate Brown (Shockoladenbraun) ...well it is Easter after all.thinned 60/40 with Mr Colour Thinner for the shade tone, and worked it into heavier 'blotches' than I would normally do on a grey or red/brown basecoat. We will have to see how this comes out in the wash eh?
There is a method in this madness you know! I have approached this in the same way that I build up colour when painting in opaque layers on canvas or board. Much in the same way most of us paint figures faces in oil or layered acrylics. Hopefully this will give a warmth and depth to the horizontal planes, while not killing the vertical zimmerited surfaces... Ah well there is always windex!
These came the other day... Very interesting stuff, the weathering pack looks extremely good fun! The rust is excellent when stippled.
The 'aroma' of the pot contents are interesting... This might not go down so well when sprayed in the kitchen! The thinner smells like Methyl Isobutyl Ketone to me, not good stuff. Though I have experimented thinning it with Vallejo thinner, and up to now the test pieces have not evolved into anything nasty, and dried rapidly... Though as it is an OOB build for this Tiger, I will use their 'aromatic' thinner.
Right off to give the 'Dunkelgelb' a blast...
Phil
iwatajim
United Kingdom
Joined: December 15, 2008
KitMaker: 246 posts
Armorama: 171 posts
Joined: December 15, 2008
KitMaker: 246 posts
Armorama: 171 posts
Posted: Thursday, April 09, 2009 - 11:38 PM UTC
Hi there Phil.
Fantastic work. I really like your approach to pre-shading. Can't wait to see the results once the camo is on. What scheme are you going for?
Your work continues to be an inspiration. Thanks once again for taking the time to share.
Cheers, Jim.
Fantastic work. I really like your approach to pre-shading. Can't wait to see the results once the camo is on. What scheme are you going for?
Your work continues to be an inspiration. Thanks once again for taking the time to share.
Cheers, Jim.