_GOTOBOTTOM
Constructive Feedback
For in-progress or completed build photos. Give and get contructive feedback!
DML 6354 M4A3 105 HVSS
Damraska
Visit this Community
California, United States
Joined: October 06, 2006
KitMaker: 580 posts
Armorama: 499 posts
Posted: Saturday, August 01, 2009 - 02:35 PM UTC
This week, while waiting for books to arrive and paint to dry, I decided to finish one of my old projects, an M4A3 105 HVSS. I began work about a year ago but lost interest fairly quickly so progress slowed to a crawl. However, even at that slow pace, it was approaching completion.

The kit, DML 6354, generally received positive reviews. For those who keep score, the kit includes undersized final drive covers, an overly narrow mantlet, and some problematic decal options. Here are some useful reviews:

http://www.perthmilitarymodelling.com/reviews/vehicles/misc/m4a3105hvss/m4a3105hvss.htm

http://www.network54.com/Forum/477322/message/1163250265/Kit%2C+DML+6354%2C+Sherman+M4A3+%28105mm%29+HVSS


I started by dealing with the undersized final drives. The picture above shows DML, Academy, and Italeri parts for comparison. First, I sliced off all the bolts. Next, I cut very thin strips of 0.3mm plastic card and glued three layers around the edge of each drive. After that set up I sanded both sides flat and used thinned Squadron White Putty on the front to fill tiny cracks and even everything out. After another round of sanding I added cast texture to the front using Mr. Surfacer 1000. Finally, after lightly sanding the cast texture, I put back the bolts. This method does not produce a perfectly accurate final drive but, in my opinion, it looks better.
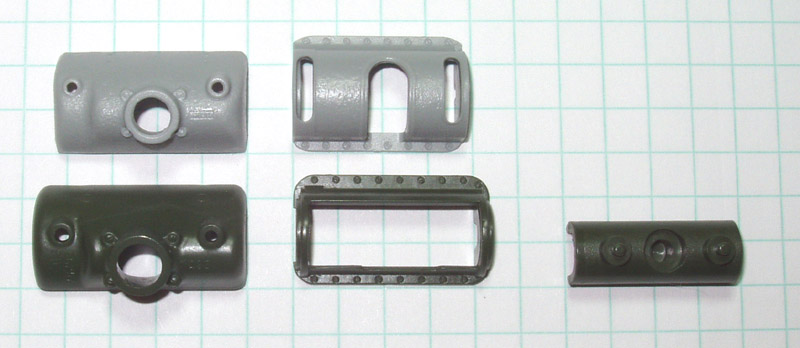


According to Terry Ashley, the kit mantlet comes in about 2.5mm too narrow. The picture above shows a comparison of M4A3(105) mantlets from DML (gray) and Academy (green).
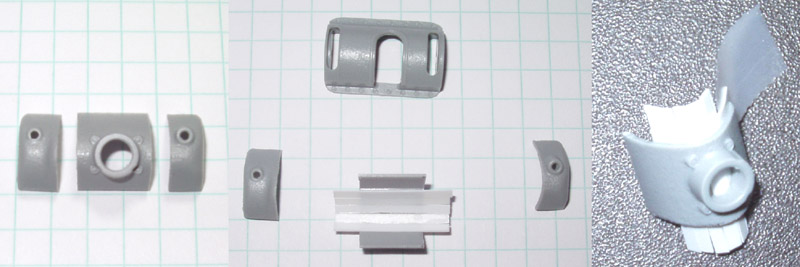


I started correcting the DML mantlet by sawing it in three. Next, I used strips of 0.3mm card to make a brace behind the mantlet. With that dry, I added 0.3mm strip to the side of the mantlet, building it out in three layers that match the cross section of the part.
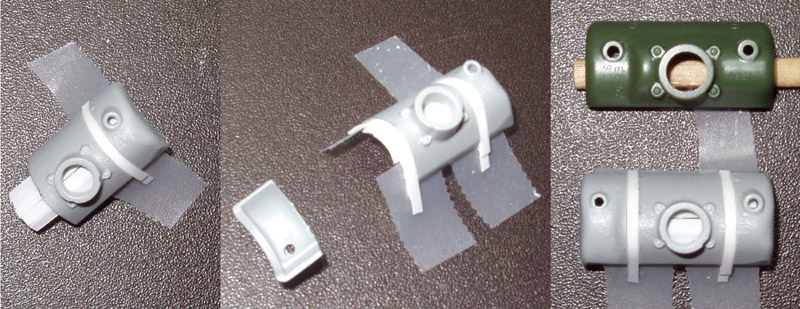


With the mantlet built out, I glued the outer piece in place. After repeating the process on the other side the mantlet matched the Academy part in width. I finished the process with some putty and sanding to even everything out. I also drilled out the hole for the main gun.
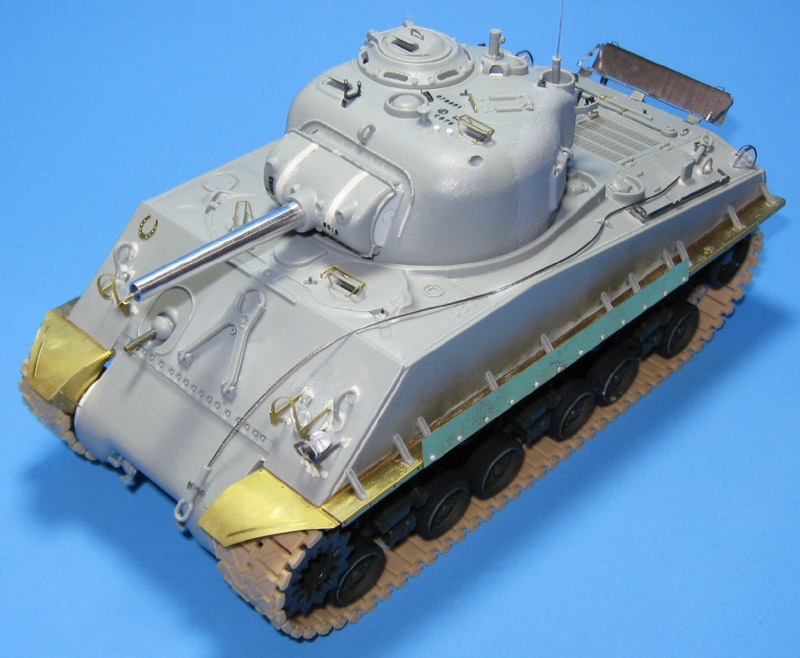


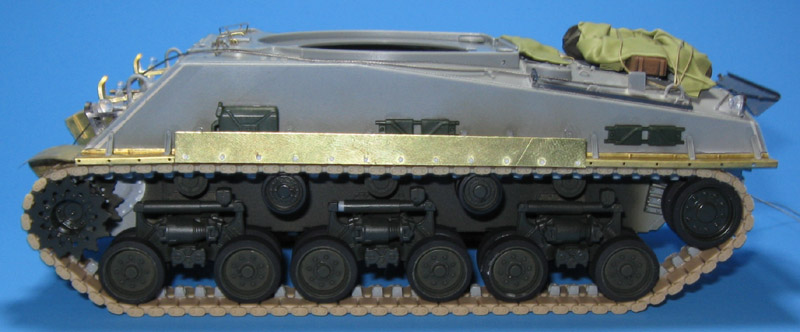
Then magic happens and I suddenly have a completed model with all the photo etch parts from an Eduard detail set in place.

More about that mantlet: According to Terry Ashley or Perth Military Modeling the mantlet is too narrow but the rotor shield is just right. However, after building out the mantlet, the holes for the machine gun and sight no longer line up with those in the rotor shield. Also, the rotor shield just looks too narrow with that big mantlet over it. I ended up building out the rotor shield on one side to make it look better. I think something is still not right.
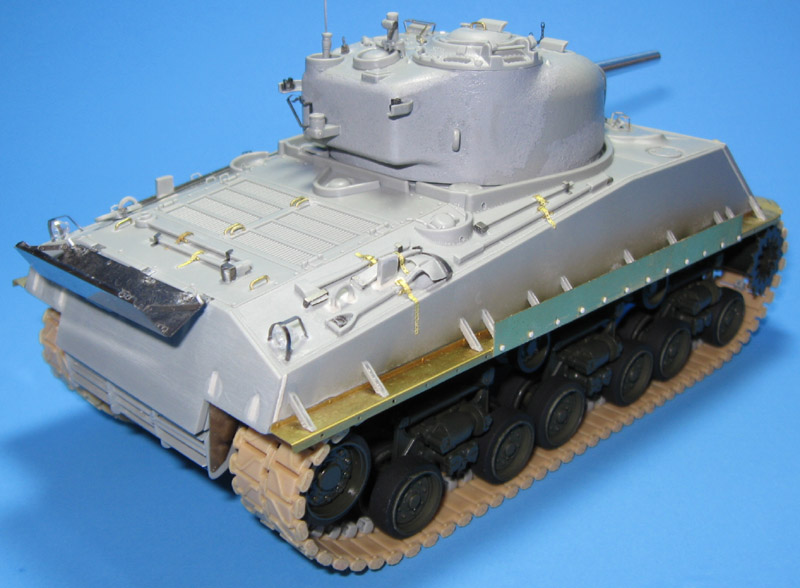


The DML HVSS suspension units have _way_ more detail than those in the Academy M4A3(105) kit. Not even close. They also require much more effort to build and align correctly.

The one piece DS tracks look _awesome_ but cleaning up and installing the guide teeth takes some modeling stamina. When I finally put the tracks on the tank I discovered two things: One, the tracks would not fit over the return rollers. I had to remove a couple guide teeth to get the tracks on. Two, my tracks are too long by 2 to 3 links! That really surprised me. Fortunately, DS tracks glue with liquid cement and stick really well so I do not anticipate trouble correcting this.

I positioned the rear shelf in the "up" position so I can paint the engine crank. With that done I will push it down and add stowage.
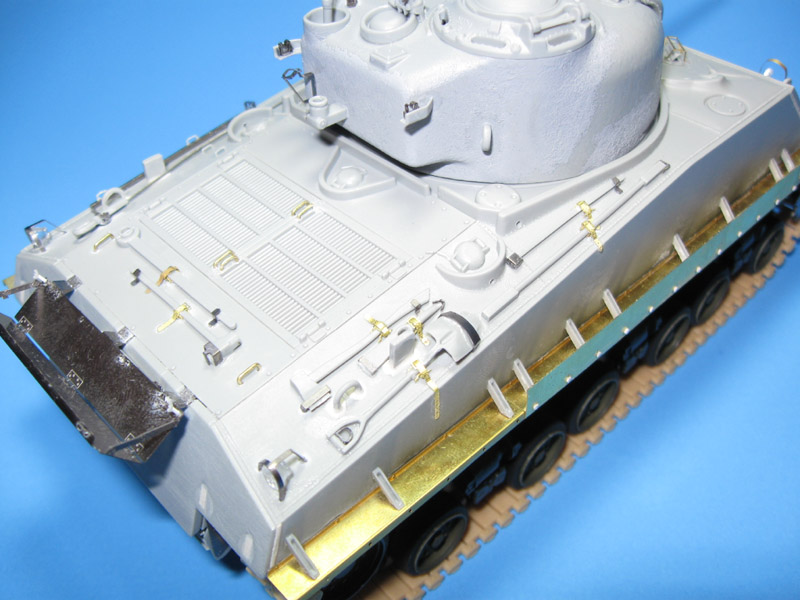


I used leftover tool belts from a Voyager photo etch set. A very well designed Eduard photo etch set provided everything else. The Eduard set includes correct parts for stowing the lower wrecking bar but I screwed them up.
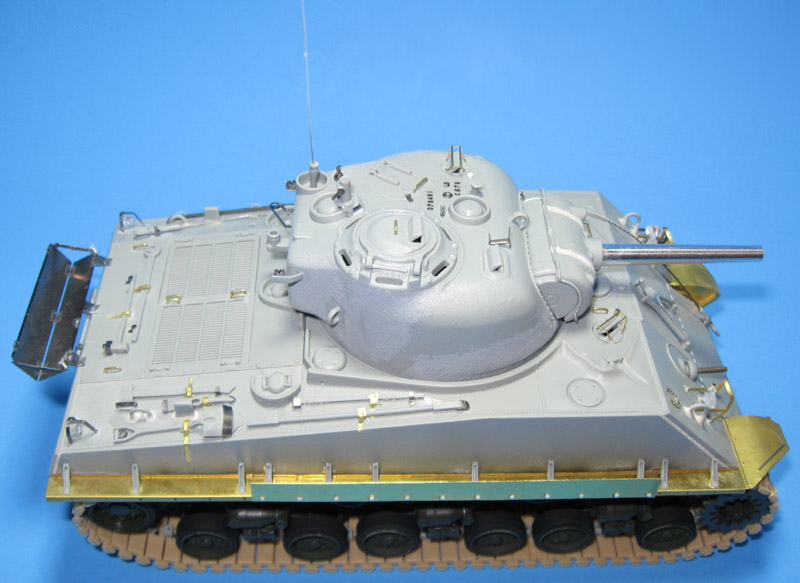


I used Archer Surface Details for the first time to make the casting marks on the turret and mantlet. I brushed on a coat of Testors Gloss Clear Acrylic to the target areas, let it dry about an hour, then applied the surface details using Microset and Microsol. They look _fantastic_. Two big thumbs up.
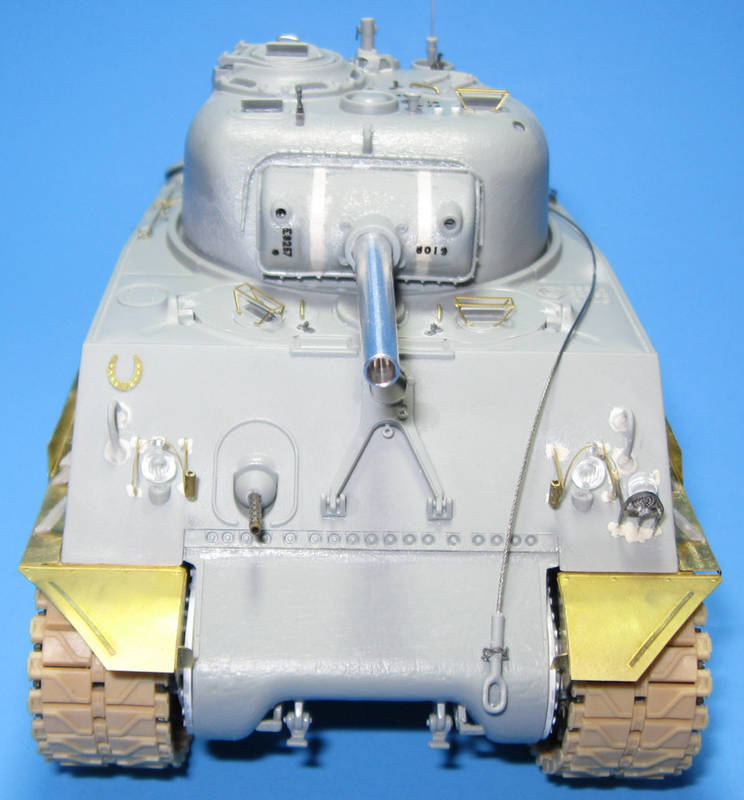


And so the project stands. I still need to sand down the welds around the brush guards, add casting marks to the transmission cover, and fix the inside face of the fenders. I'm not sure what DML was going for there. Either I built it wrong, they made it wrong, or they worked from an example I have not seen.

If I screwed anything up, please let me know. Even if I cannot fix it here, I would like to know for next time. More next weekend.

-Doug
GeraldOwens
Visit this Community
Florida, United States
Joined: March 30, 2006
KitMaker: 3,736 posts
Armorama: 3,697 posts
Posted: Saturday, August 01, 2009 - 11:32 PM UTC
Good work, overall. Many of the glitches on the Dragon Shermans are being fixed piecemeal--the final drives in more recently released kits have been redone, for instance.
Hard to be sure, but in the final shot, the travel lock does not appear to line up with the gun above it. Could be an optical illusion if the turret is not pointed exactly forward, I suppose. Still, you might want to check with the old Mk I eyeball.
sgtreef
Visit this Community
Oklahoma, United States
Joined: March 01, 2002
KitMaker: 6,043 posts
Armorama: 4,347 posts
Posted: Sunday, August 02, 2009 - 01:19 AM UTC
Nice work on it.

A good kit really.

I built mine a year ago no problems really.

Keep at it.
Damraska
Visit this Community
California, United States
Joined: October 06, 2006
KitMaker: 580 posts
Armorama: 499 posts
Posted: Sunday, August 02, 2009 - 03:03 PM UTC

Quoted Text

Hard to be sure, but in the final shot, the travel lock does not appear to line up with the gun above it.


Thank you for spotting that problem, Gerald. That was exactly the kind of feedback I was hoping for and I definitely need to move the travel lock.


Quoted Text

Nice work on it. A good kit really. I built mine a year ago no problems really.


Thank you, Jeff, and I agree. I thought the kit was just fine--a straight forward build.

-Doug
alewar
Visit this Community
Canelones, Uruguay
Joined: December 27, 2006
KitMaker: 773 posts
Armorama: 765 posts
Posted: Monday, August 03, 2009 - 04:04 AM UTC
Nice build Doug. I have a Sherman in my list too.
Damraska
Visit this Community
California, United States
Joined: October 06, 2006
KitMaker: 580 posts
Armorama: 499 posts
Posted: Tuesday, August 04, 2009 - 05:42 PM UTC

Quoted Text

Nice build Doug. I have a Sherman in my list too.


Thank you, Alvaro. I built my first Sherman back in the winter of 2007. The project was so easy and fast I built another, and another, and so on. This is my 5th. As I learn more about Shermans I try to make each one a little better and more accurate. I am not really a Shermaholic--I think they are kinda ugly--but I get more practice painting this way.

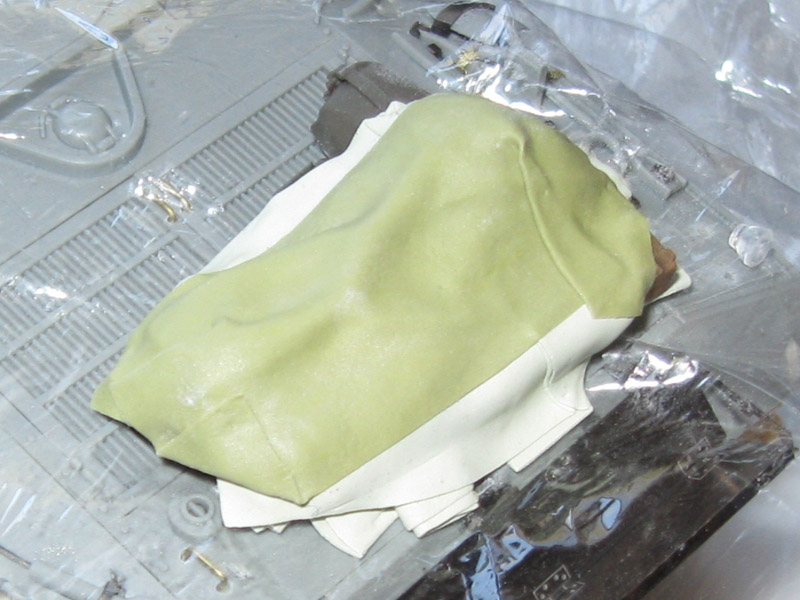
My first attempt at stowage:


This was my first attempt to use a technique described by Jon Hayward. You can find a link to the video in this thread:

https://armorama.kitmaker.net/forums/143280&page=1

-Doug
Damraska
Visit this Community
California, United States
Joined: October 06, 2006
KitMaker: 580 posts
Armorama: 499 posts
Posted: Wednesday, August 05, 2009 - 08:36 AM UTC
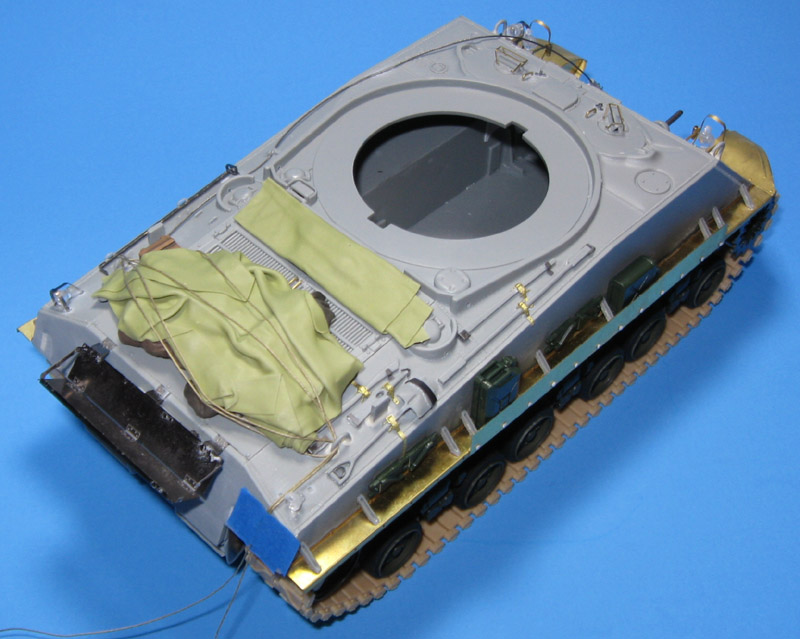
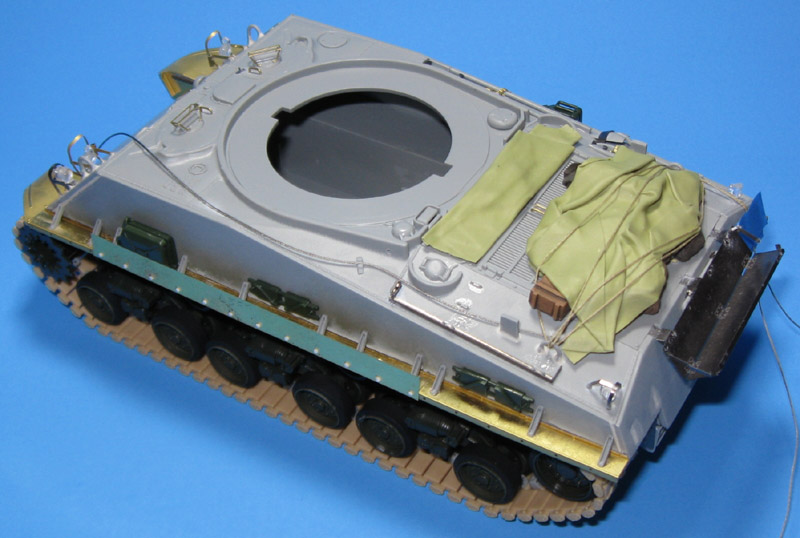
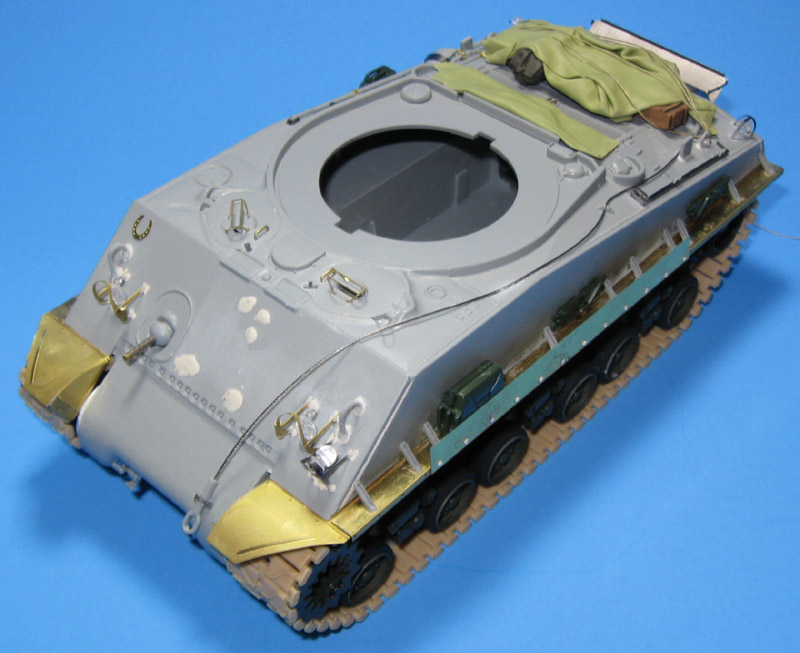
I tossed the first stowage bundle and tried again with much better results.


This bundle has much more character.


I also started building stowage for the fenders.


I sliced the travel lock off the bow and began repair work.


I shortened both track runs by two links. They are now nice and tight.

-Doug
Damraska
Visit this Community
California, United States
Joined: October 06, 2006
KitMaker: 580 posts
Armorama: 499 posts
Posted: Friday, August 21, 2009 - 11:30 AM UTC
First coat of paint...


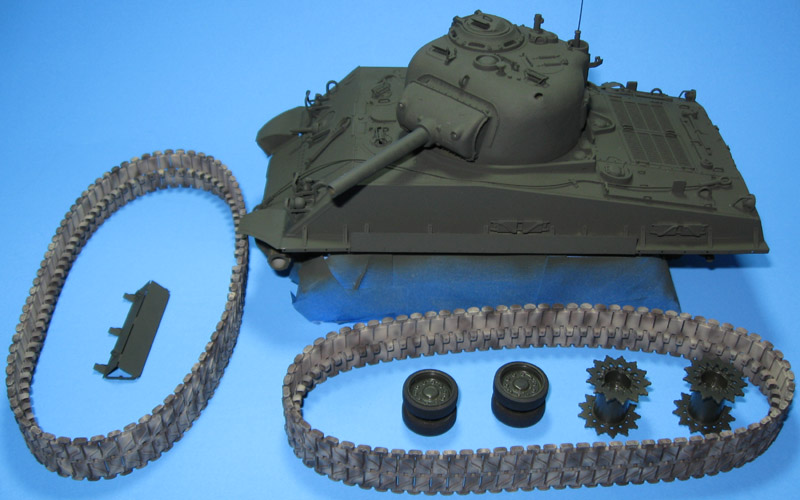
Unfortunately, the paint revealed a few boo boos. I hope to correct those today and finish with the airbrushing tonight or tomorrow. The tracks look a bit funky now, but all will be well in the end.

-Doug
Damraska
Visit this Community
California, United States
Joined: October 06, 2006
KitMaker: 580 posts
Armorama: 499 posts
Posted: Saturday, October 17, 2009 - 09:31 PM UTC
A new job and numerous concurrent projects equals slow progress.


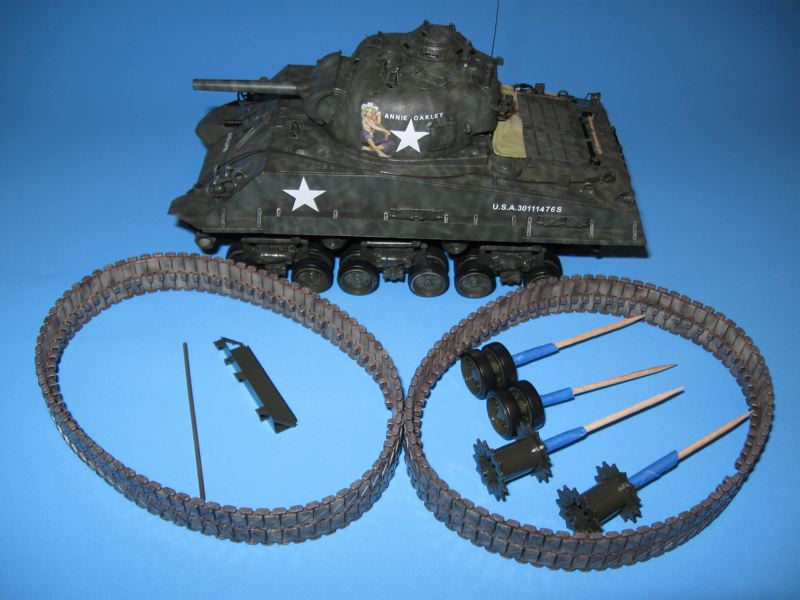
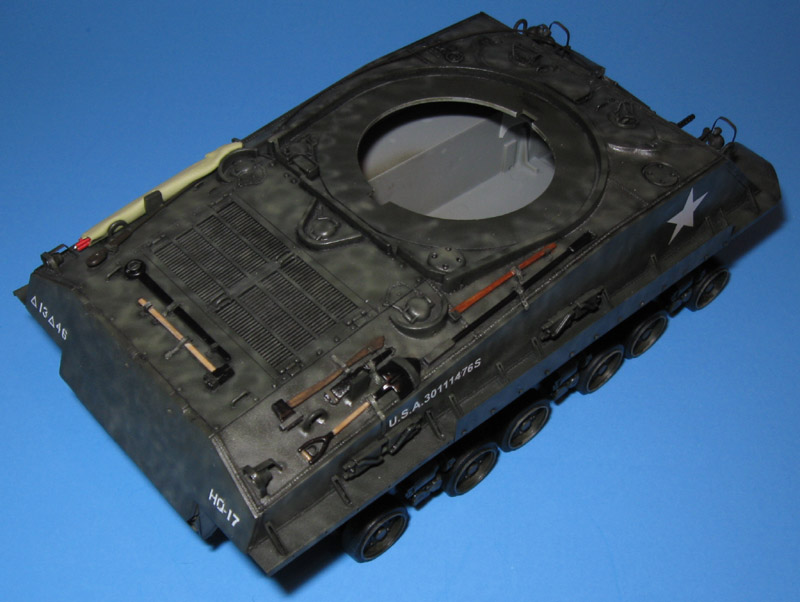
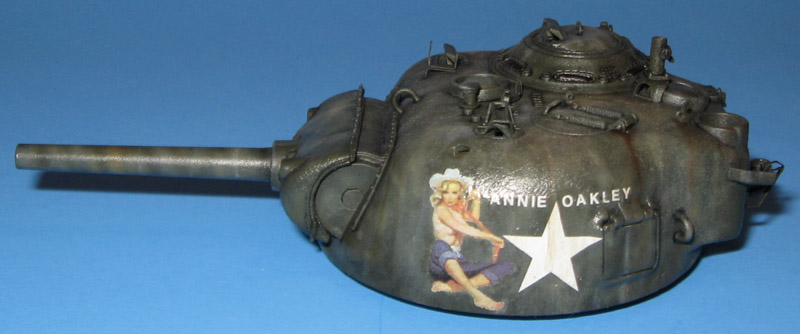
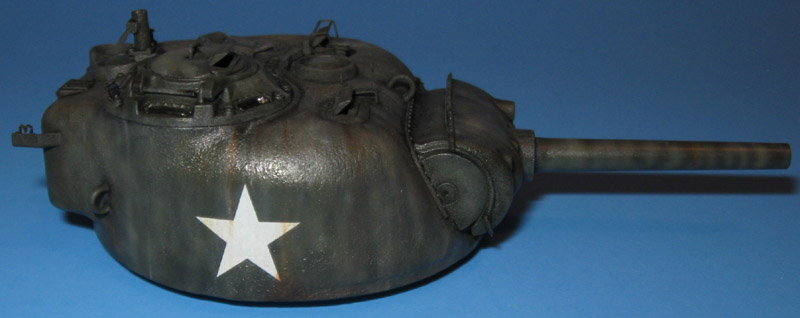
I completed all airbrush work on the tank itself, painted the details, weathered the tracks, and sealed everything with Testors Gloss Clear Acrylic. Most decals came with the kit. The hull stars and left hand bumper codes came from a DML M2A1 halftrack kit. The pinup came from a sheet produced by Starship Modeler. The name was made by burnishing Woodland Scenics dry transfer letters onto decal paper and then applying them as decals.

The kit comes with one relatively accurate decal scheme, "Andy", but the bumper codes are wrong. I corrected the bumper codes, switched the tank number, and changed the serial number slightly, thus resulting in another M4A3(105) from the same unit. I seriously doubt any of these tanks wore pinup art but it's my model and if I want a pretty girl on the side, I am putting a pretty girl on the side. So there.

The pinup was actually a bit of a problem because the image was not properly cropped in Photoshop, leaving an ugly white halo. After applying the decal and making it conform to the turret contours with some Micro Sol, I went back and painted out the halo by hand. Do not attempt this unless you have very steady hands and remove most of the paint from the brush before each pass.

-Doug
HONEYCUT
Visit this Community
Victoria, Australia
Joined: May 07, 2003
KitMaker: 4,002 posts
Armorama: 2,947 posts
Posted: Saturday, October 17, 2009 - 11:27 PM UTC
Hey Doug
That looks peachy mate.
I love the efforts you have made with corrections to the kit, but one often overlooked is that the crank handle would only be present on radial engined Shemans (M4, M4A1) and should be removed completely.
I like the paint scheme you have there.
Brad
Damraska
Visit this Community
California, United States
Joined: October 06, 2006
KitMaker: 580 posts
Armorama: 499 posts
Posted: Sunday, October 18, 2009 - 12:30 AM UTC

Quoted Text

I love the efforts you have made with corrections to the kit, but one often overlooked is that the crank handle would only be present on radial engined Shemans (M4, M4A1) and should be removed completely.


Hi Brad and thank you for that information. I have learned something today, and thankfully before the point of no return. The luggage rack always hides that spot in photos so I never even thought to question the placement.

Damn. That's going to set me back two weeks to sand out and repaint. Oh well. It will give me more time to work on stowage items and maybe throw together an ammo trailer.


Quoted Text

I like the paint scheme you have there.


She's purdy.

-Doug
Damraska
Visit this Community
California, United States
Joined: October 06, 2006
KitMaker: 580 posts
Armorama: 499 posts
Posted: Sunday, November 29, 2009 - 05:44 PM UTC
Slow but steady progress...


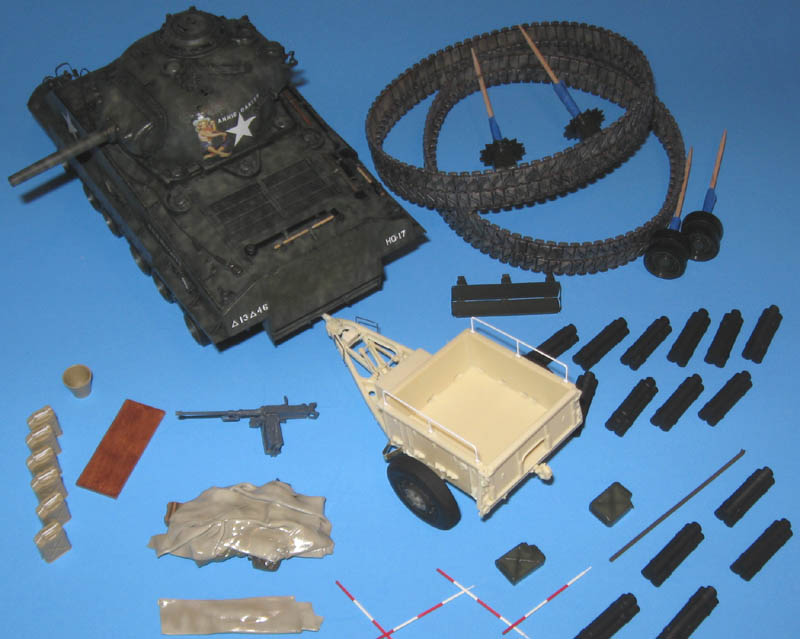
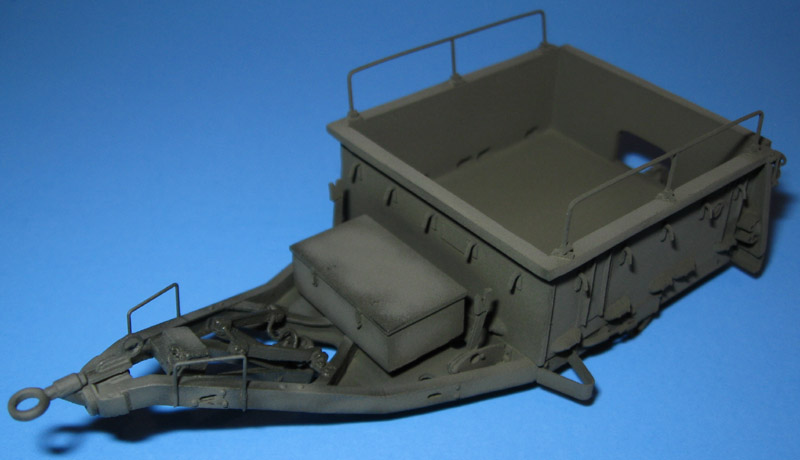
I removed the engine crank, puttied and sanded out the rear end, repainted, resealed, and put some washes on the hull. The M10 Ammunition Trailer from Masters Productions went together with only minor problems. A few of the fine tubular parts broke or deformed so I replaced them. The ammunition load is a Tiger Models product. The machine gun and painted gas cans came from Academy sets. The pail and unfinished gas cans from a Tamiya set. The ranging poles were made from steel tubing and rod.

-Doug
alewar
Visit this Community
Canelones, Uruguay
Joined: December 27, 2006
KitMaker: 773 posts
Armorama: 765 posts
Posted: Monday, November 30, 2009 - 01:02 AM UTC
Nice job . I like your details and paint work. I don't know why, but I love this kind of trailers.

Hummm, if I do "one" Sherman (M4 w/75mm now in my pile) I can become a Shermaholic?....
Damraska
Visit this Community
California, United States
Joined: October 06, 2006
KitMaker: 580 posts
Armorama: 499 posts
Posted: Friday, December 04, 2009 - 03:58 PM UTC

Quoted Text

Nice job . I like your details and paint work. I don't know why, but I love this kind of trailers.

Hummm, if I do "one" Sherman (M4 w/75mm now in my pile) I can become a Shermaholic?....


Thanks, Alvaro. FYI, the Masters Productions M10 Trailer is significantly better than the one from CGM Productions. The M10 from Tiger Models also looks very nice, but I do not own one (yet).

Shermaholism is more a state of mind than a measure of what a person builds. I complete about one Sherman every 6 months but do not consider myself a Shermaholic. If you have ever considered modeling every variant of the Sherman tank, you probably have the disease. (If you actually intend to do so, you are insane.)

Maybe I am a Shermaholic in denial. Nah. I can quite whenever I want...

-Doug
Damraska
Visit this Community
California, United States
Joined: October 06, 2006
KitMaker: 580 posts
Armorama: 499 posts
Posted: Sunday, January 17, 2010 - 01:02 AM UTC
More slow progress.


I made up the last of the stowage bundles for the ranging stakes.


I added some light weathering to the turret with oil paints. I am shooting for a visually interesting but fairly new look. When I hit the turret with flat clear coat it should lighten up and hopefully achieve the desired effect.


The ammunition trailer ready for a gloss clear coat, washes, and oil paints. I intend to weather the heck out of this thing, in contrast to the tank.


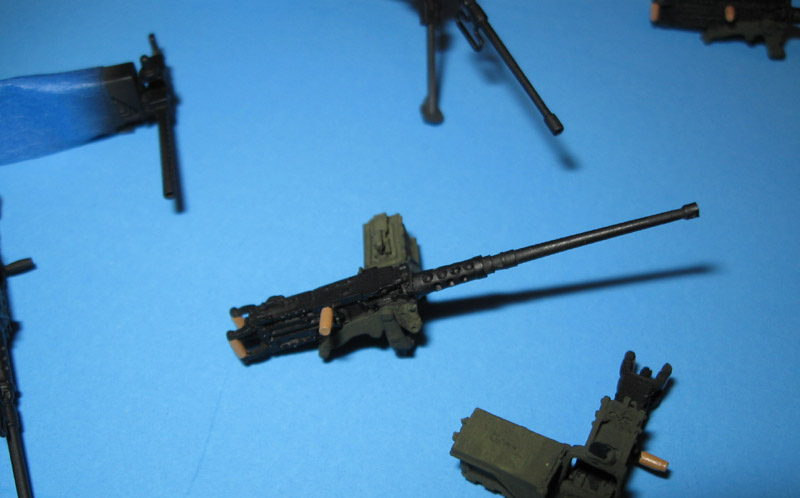
I like to build things in batches. I also like to retrofit older models. This is one of about 10 machine guns built and painted as a group. One will go with this tank, one to a Firefly completed last year, one to an M4A2 completed in 2007, and one to a Staghound I started last night at 1am. The rest will be finished and stowed for future use. The guns are a mixture of parts from Academy and Verlinden with some photo etch from Eduard thrown in for good measure. No two are exactly the same.

-Doug
alewar
Visit this Community
Canelones, Uruguay
Joined: December 27, 2006
KitMaker: 773 posts
Armorama: 765 posts
Posted: Monday, January 18, 2010 - 04:11 AM UTC
Hi Doug, I can't wait for the coat matt pics!
rfbaer
Visit this Community
Texas, United States
Joined: June 12, 2007
KitMaker: 1,866 posts
Armorama: 1,696 posts
Posted: Tuesday, January 19, 2010 - 05:15 AM UTC
Looking really, really good!
INDIA11A
Visit this Community
Ontario, Canada
Joined: January 09, 2005
KitMaker: 577 posts
Armorama: 446 posts
Posted: Wednesday, January 27, 2010 - 03:50 AM UTC
Nice job. I have one on the shelf waiting. And yes I too am a Shermaholic and insane (must build all variants and nationalities, must be done!!)

Anyway excellent job, now back to the world of Shermies...maybe that one variant that was used by lower slobovia in 1947....


Doug
Battleship_Al
Visit this Community
Washington, United States
Joined: October 25, 2009
KitMaker: 133 posts
Armorama: 97 posts
Posted: Saturday, January 30, 2010 - 07:14 AM UTC
Looks great Doug. I am going to have to pick one of these kits up when my buget allows.
 _GOTOTOP