Campaigns
Where Armorama group builds can be discussed, organized, and updates posted.
All Hail the Abrams!
mikey
Visit this Community
Idaho, United States
Joined: March 14, 2006
KitMaker: 229 posts
Armorama: 227 posts
Posted: Monday, October 26, 2009 - 05:07 AM UTC
Well, looks like I am the first to post some pics on this campaign.
Dragon M1A2 Sep with warrior tank crewmen and the Legends Tusk set.


Legends Tusk set


Warriors Tank crews

mikey
Visit this Community
Idaho, United States
Joined: March 14, 2006
KitMaker: 229 posts
Armorama: 227 posts
Posted: Monday, October 26, 2009 - 05:13 AM UTC
I have to say that I have really enjoyed this Dragon kit. The detail has been crisp with minimum flash. Why does Dragon insist on the little things, like the little wire handles that get lost in the carpet!
mikey
Visit this Community
Idaho, United States
Joined: March 14, 2006
KitMaker: 229 posts
Armorama: 227 posts
Posted: Monday, October 26, 2009 - 05:18 AM UTC
The rear deck needs a little work, maybe it was just me but I had some problems getting part # U13, U14 & U16 to fit right. Also I had to do some major trimming/sanding to get W14 to fit right.
mikey
Visit this Community
Idaho, United States
Joined: March 14, 2006
KitMaker: 229 posts
Armorama: 227 posts
Posted: Monday, October 26, 2009 - 05:24 AM UTC
Legends Belly armor is just cool. Actually the whole add-on is just great. Minimum flash through out the kit. What I don't like is the way the casting sprue was part of the belly panels itself. They come in two pieces while I have seen one aftermarket product that had the sprue piece on the side and it was all one piece. I had to do some cutting to seperate the two and make it look right and then lots of squadron putty to cover the seams and the cutting marks.


mikey
Visit this Community
Idaho, United States
Joined: March 14, 2006
KitMaker: 229 posts
Armorama: 227 posts
Posted: Monday, October 26, 2009 - 05:28 AM UTC
I need some help on the gas caps. Can anyone tell me if I have them positioned right? I like the fender details like the rod that helps hold the skirts up. Dragon sure can pack a kit with detail!
mikey
Visit this Community
Idaho, United States
Joined: March 14, 2006
KitMaker: 229 posts
Armorama: 227 posts
Posted: Monday, October 26, 2009 - 05:43 AM UTC
And finally, the rear grill assembly. Dragon and their attention to detail!! As I was cutting out the rear grill pieces part # U12 and U11 I realized how fragile they are!! So, if anyone is building this kit, get a fresh x-acto blade and cut out the grill as one piece, not screen by screen as I found out.

I am going to attribute this to battle damage. I hope.


This overhead view of the front shows the anti-skid as well as the details of the rods and hold down fixtures. I had to ask Gino about p/n D4. Turns out that is a track link that crews use to hold up the fender when perfoming maintenace. Who Knew? Enjoy everyone.
Grumpyoldman
Staff MemberConsigliere
KITMAKER NETWORK
Visit this Community
Florida, United States
Joined: October 17, 2003
KitMaker: 15,338 posts
Armorama: 7,297 posts
Posted: Monday, October 26, 2009 - 08:26 AM UTC
Nice to see this Campaign, as the very first Campaign I entered, was an M1 Abrams Campaign.

The one requirement back then was we needed to have Armorama members names on the vehicle.
It was a great idea as I got to know many of the members better. (I just joined the site back then, and really didn't know anyone here.)


CMOT
Staff MemberEditor-in-Chief
ARMORAMA
Visit this Community
England - South West, United Kingdom
Joined: May 14, 2006
KitMaker: 10,954 posts
Armorama: 8,571 posts
Posted: Monday, October 26, 2009 - 10:32 AM UTC
It looks as if you are off and flying there Mike, and I may have a spare set of the parts you damaged, if I have I will get them off to you as soon as possible. I may need an extension on this campaign as I was not expecting anything to happen for at least 3 months.
Removed by original poster on 10/31/09 - 01:43:18 (GMT).
mikey
Visit this Community
Idaho, United States
Joined: March 14, 2006
KitMaker: 229 posts
Armorama: 227 posts
Posted: Monday, October 26, 2009 - 02:16 PM UTC

Quoted Text

It looks as if you are off and flying there Mike, and I may have a spare set of the parts you damaged, if I have I will get them off to you as soon as possible. I may need an extension on this campaign as I was not expecting anything to happen for at least 3 months.


Darren, thanks for the offer, you don't have to do that. I can't imagine the postage you have to pay just for some plastic being sent across the pond.
Bearkill
Visit this Community
Iowa, United States
Joined: September 16, 2009
KitMaker: 7 posts
Armorama: 5 posts
Posted: Tuesday, October 27, 2009 - 08:03 AM UTC
Hi all, was wondering being a fairly new member to this site, if it was to late to join this campaign, I started a M1A1 AIM about 6 weeks ago an have done some documenting of is build, except for the tracks I have kept it SOB, as I am getting back into building armor after a very long break from building. Happy tankin

GaryKato
Visit this Community
California, United States
Joined: December 06, 2004
KitMaker: 3,694 posts
Armorama: 2,693 posts
Posted: Tuesday, October 27, 2009 - 08:47 AM UTC
The campaign just started. To join, click on the CAMPAIGNS tag, click on the Abrams campaign, then click on the "ENLIST" button.
mikey
Visit this Community
Idaho, United States
Joined: March 14, 2006
KitMaker: 229 posts
Armorama: 227 posts
Posted: Friday, October 30, 2009 - 03:32 AM UTC
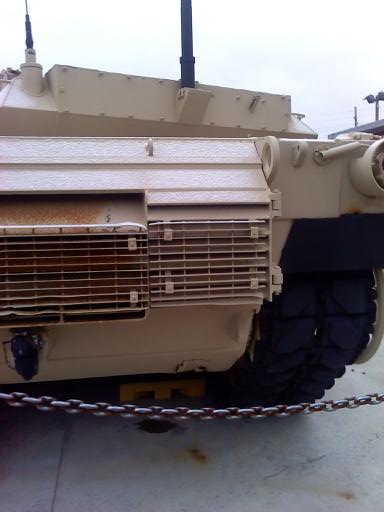
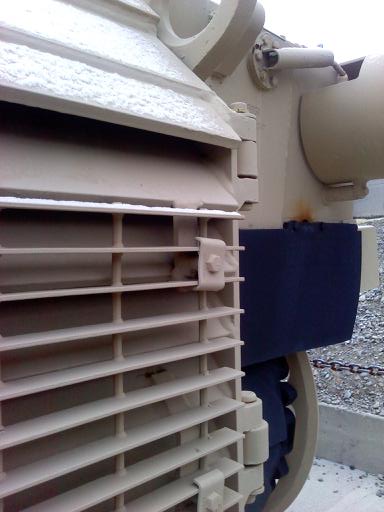
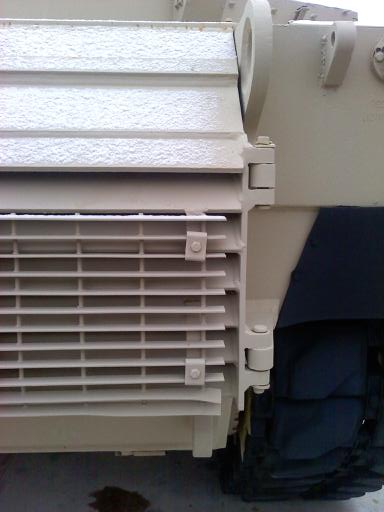
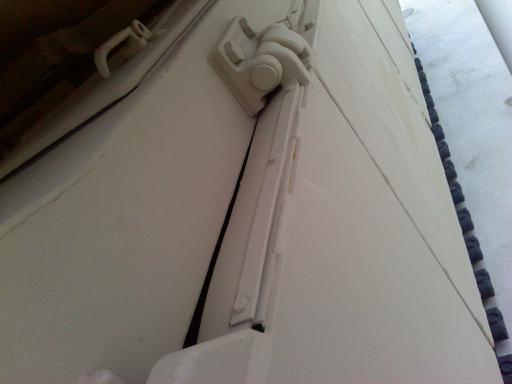
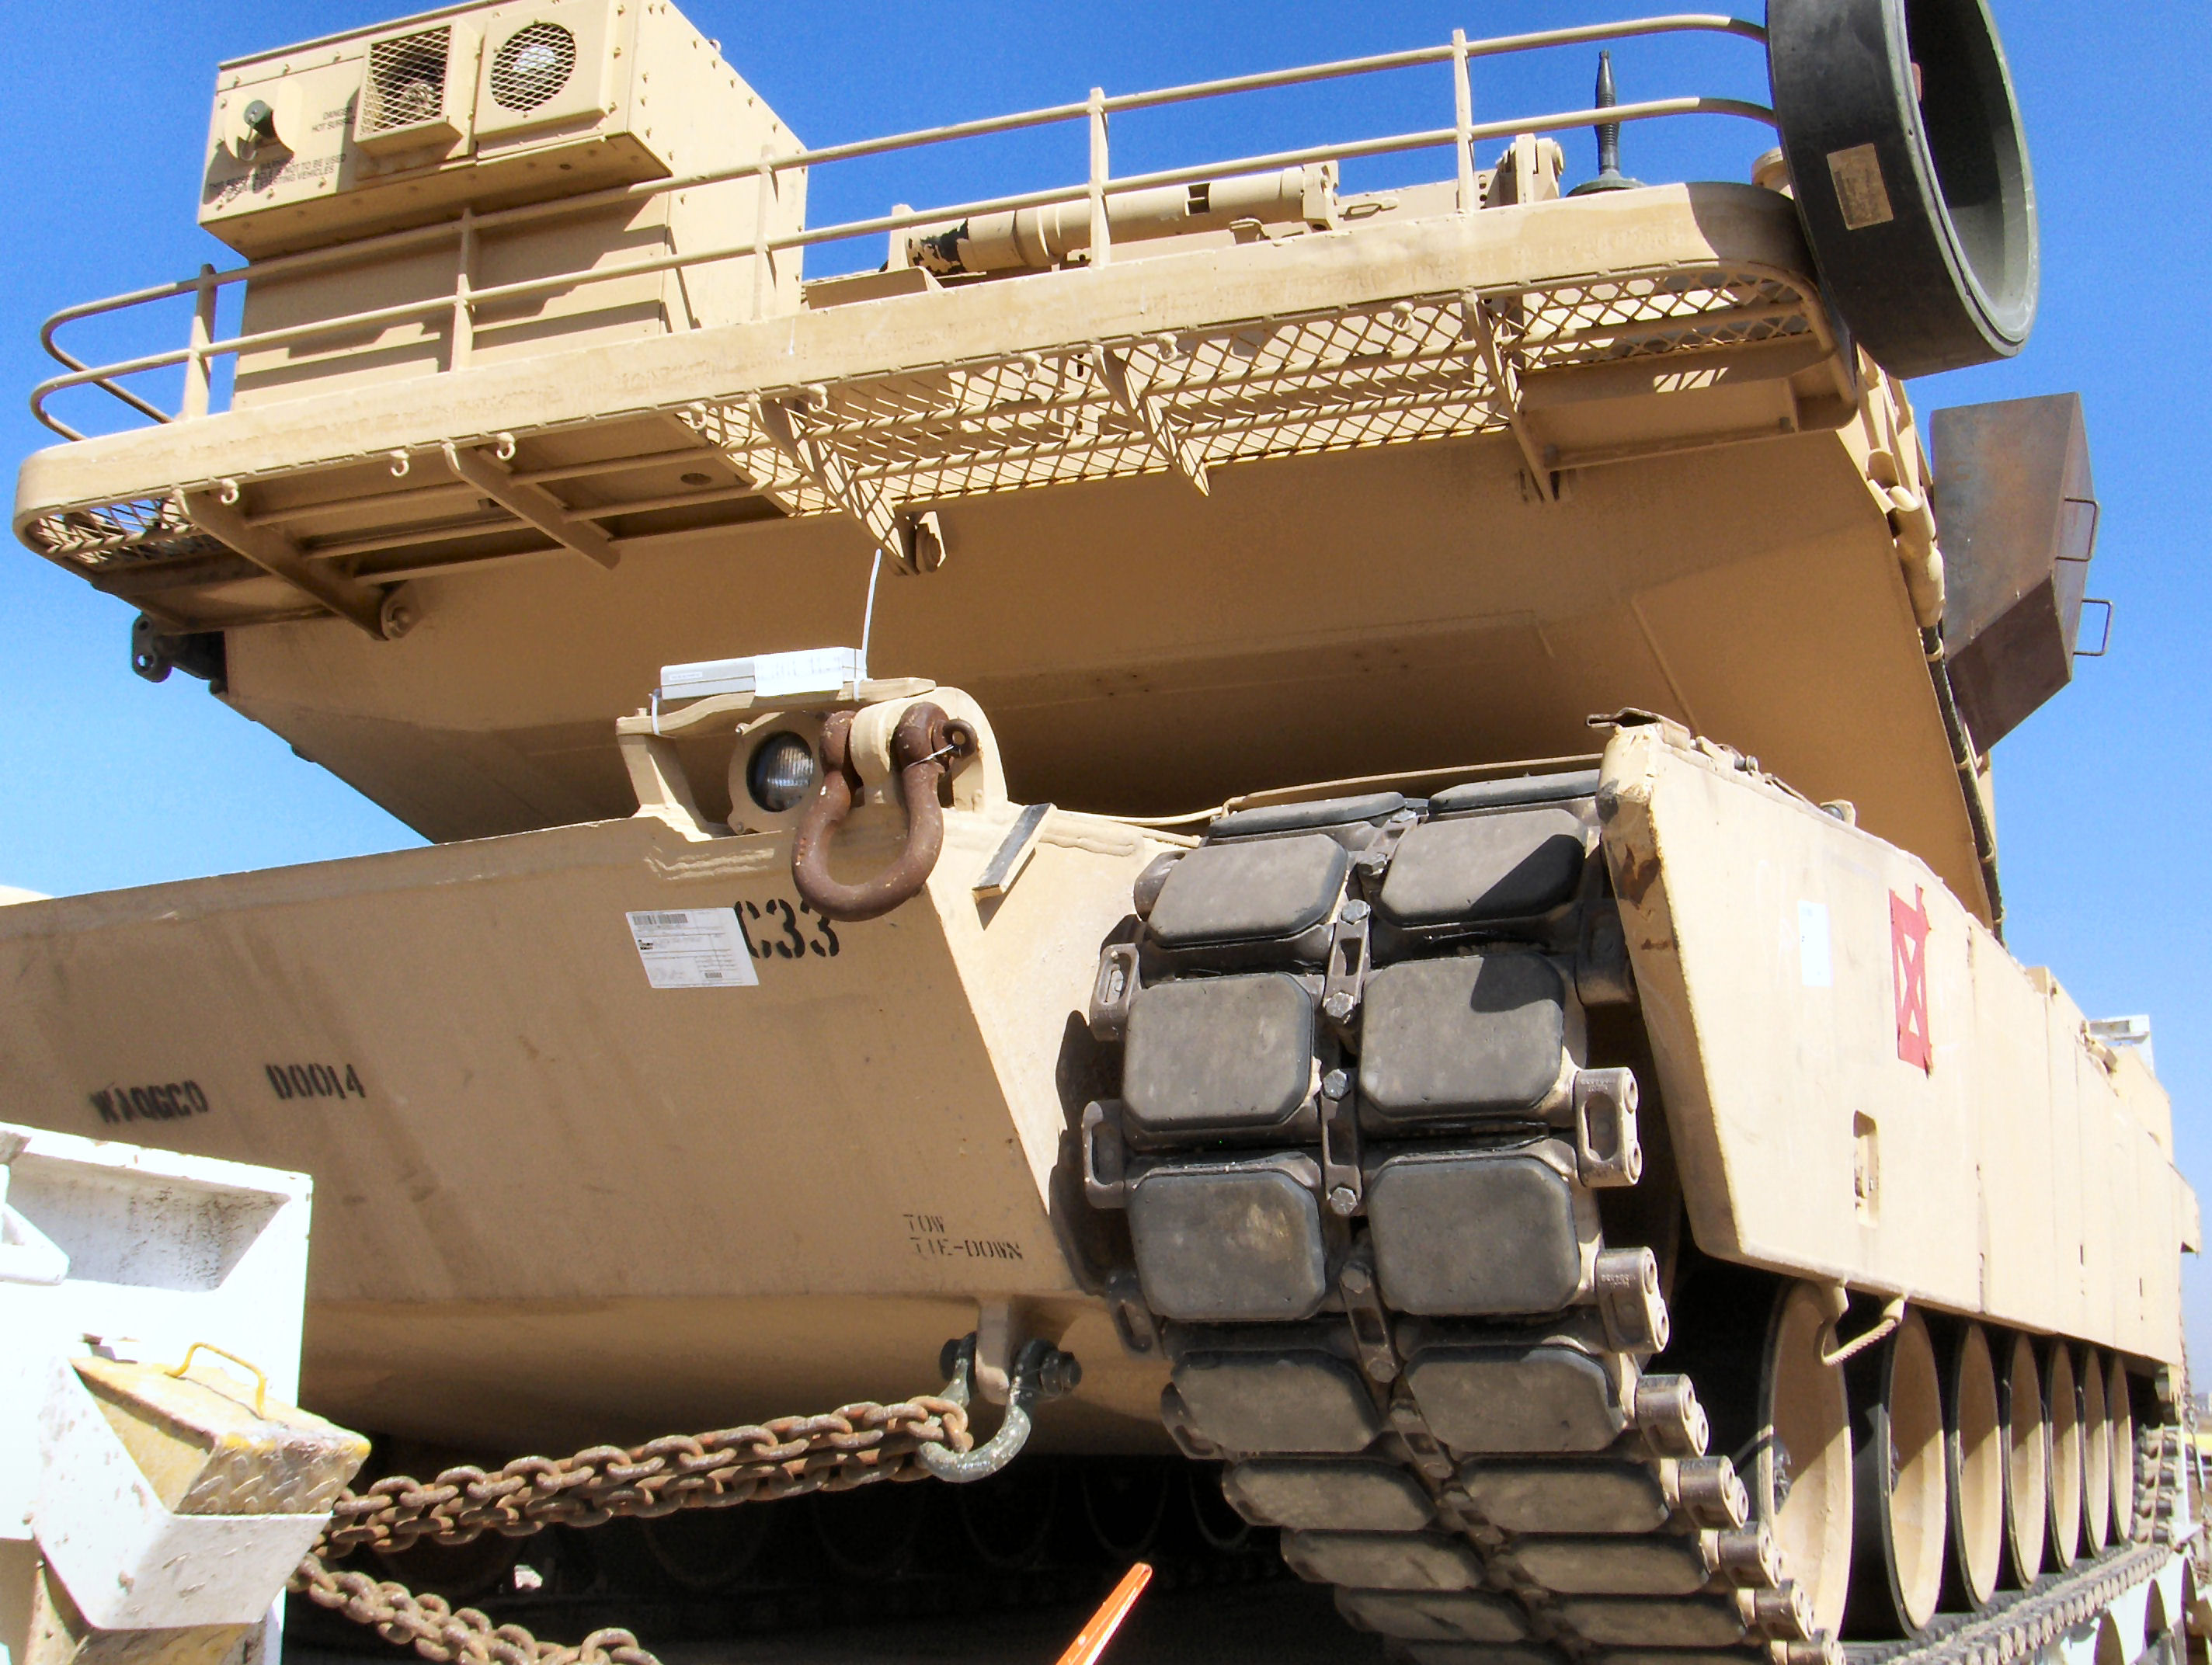
Here are some rear grill photos of an M1 Abrams for some detail shots. Also some of the fenders for the top detail if any one needs them.


mikey
Visit this Community
Idaho, United States
Joined: March 14, 2006
KitMaker: 229 posts
Armorama: 227 posts
Posted: Friday, October 30, 2009 - 03:34 AM UTC
I thought the photos might be of use to those who like a good detail shot. Since I am working on putting photoetch detail to the tops of my fenders. I hate photo etch!!
GaryKato
Visit this Community
California, United States
Joined: December 06, 2004
KitMaker: 3,694 posts
Armorama: 2,693 posts
Posted: Friday, October 30, 2009 - 04:56 AM UTC

Quoted Text

Hi all, was wondering being a fairly new member to this site, if it was to late to join this campaign, I started a M1A1 AIM about 6 weeks ago an have done some documenting of is build, except for the tracks I have kept it SOB, as I am getting back into building armor after a very long break from building. Happy tankin


I should have read your message more thoroughly. You aren't supposed to start a campaign kit until the campaign starts. The decision is up to the Campaign Leader.
majjanelson
Visit this Community
South Carolina, United States
Joined: December 14, 2006
KitMaker: 1,355 posts
Armorama: 979 posts
Posted: Friday, October 30, 2009 - 05:30 AM UTC
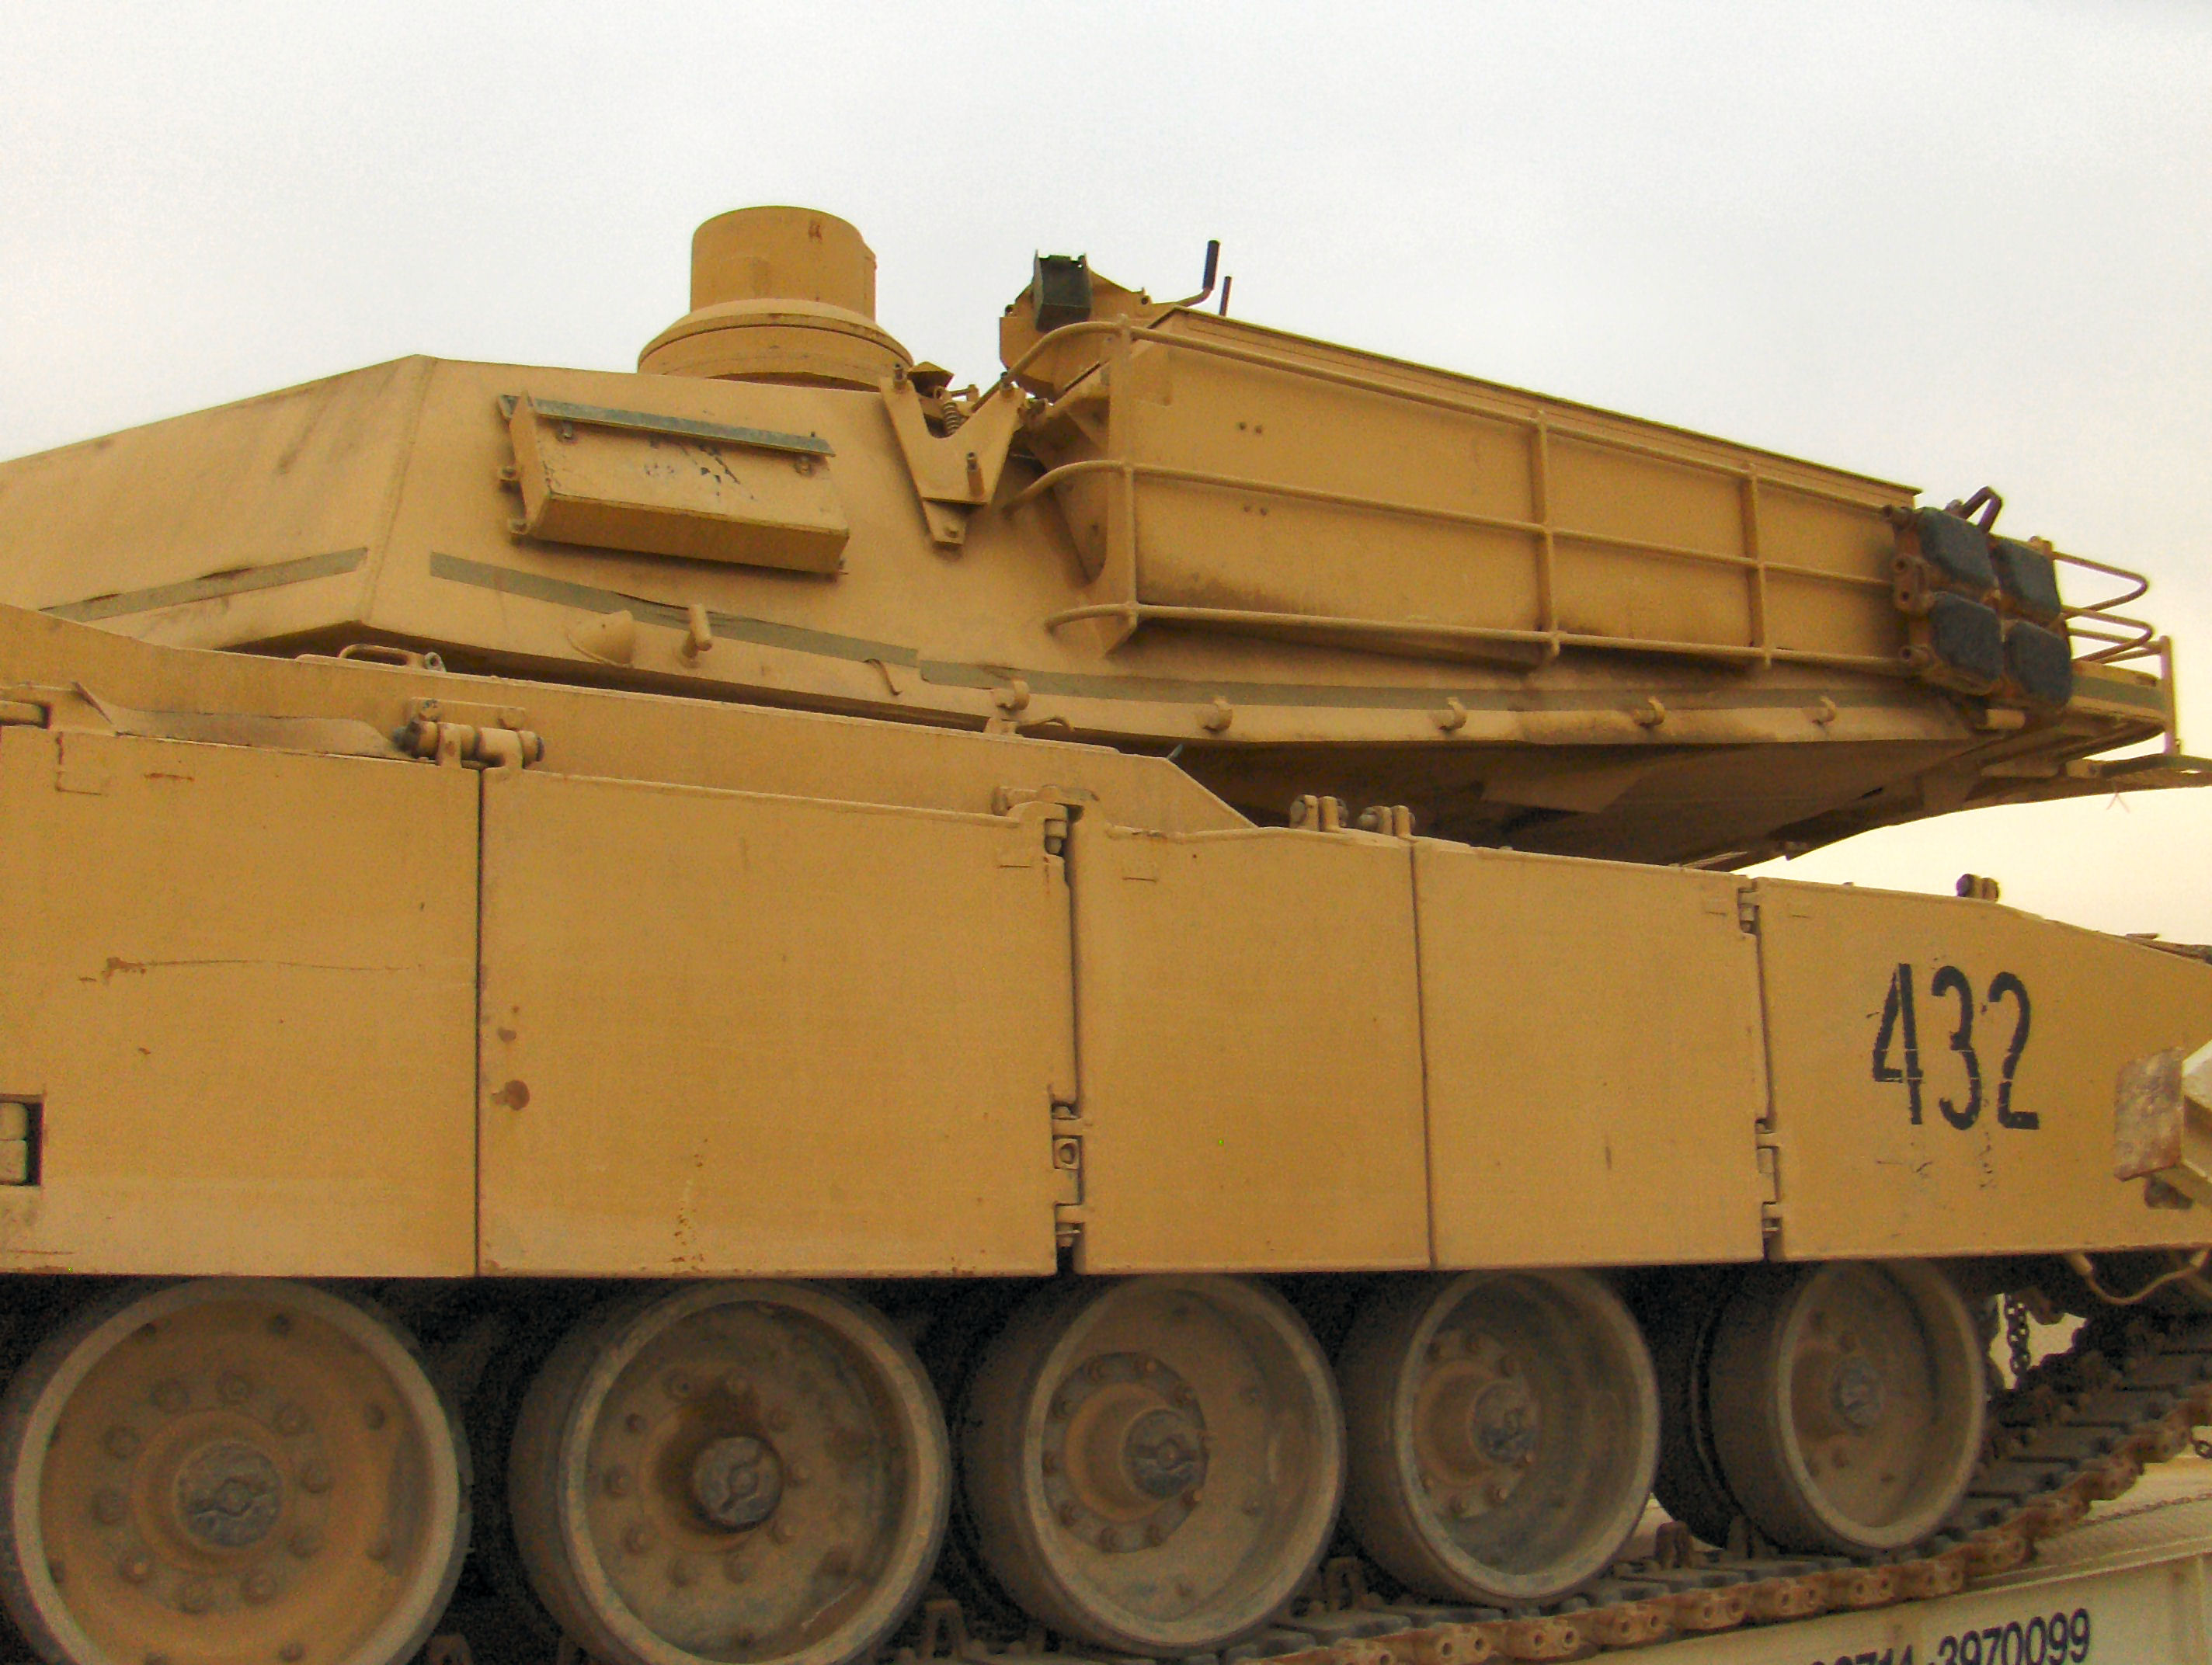
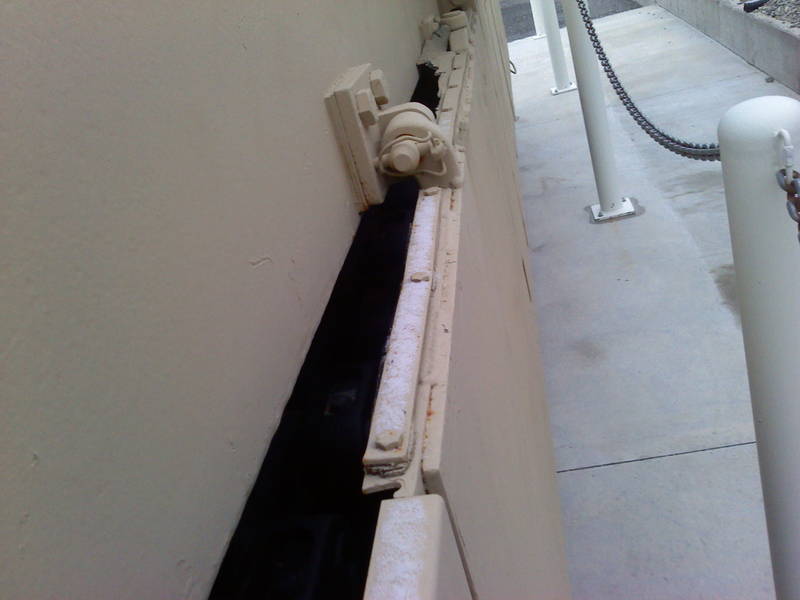
These skirts have most of the rubber seal strip rotted away (black areas) while there is a small section with tan paint on it at the far end:

These are some of the un-armored skirts and the rubber seal strip is wider (but painted tan):

This picture from Prime Portal shows the narrower seal strip and bolted mounting strip that is offset from the edge of the skirt (on the DML AIM and SEP kits the armored skirts have a weld seam around the edge):

So the photoetch mounting strips should be offset for the armored skirts vs, the regular skirts.
sgtsauer
#065
Visit this Community
Missouri, United States
Joined: March 30, 2002
KitMaker: 2,605 posts
Armorama: 1,814 posts
Posted: Friday, October 30, 2009 - 02:16 PM UTC
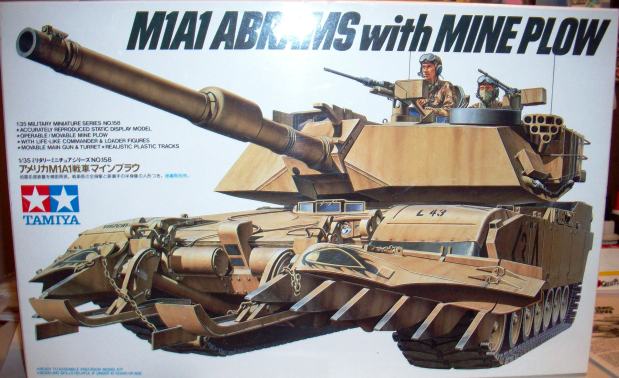
Here is the kit I'm building for the campaign.


It will be out-of-box. I'm building it for a guy who used to work for me. Years ago, he was an M1A1 crewman in Germany.

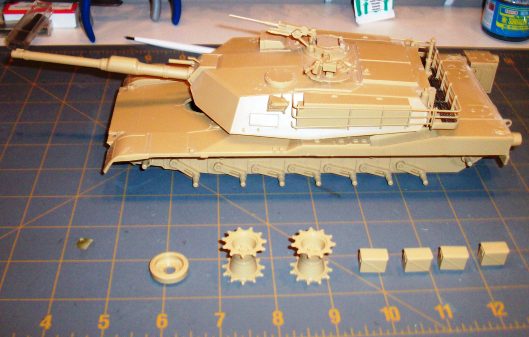
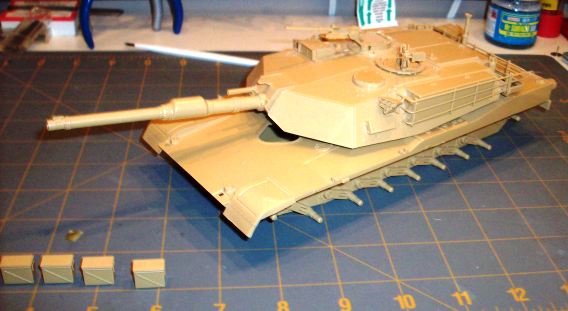
Here are some in progress pictures. I have some assembly to do still before priming. I broke the barrel off of the loaders M240. That will be a last minute repair before priming as well.


sgtsauer
#065
Visit this Community
Missouri, United States
Joined: March 30, 2002
KitMaker: 2,605 posts
Armorama: 1,814 posts
Posted: Sunday, November 01, 2009 - 08:19 AM UTC
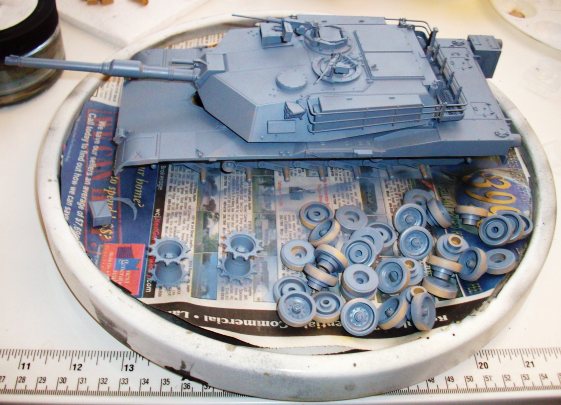
31 OCT 09 UPDATE

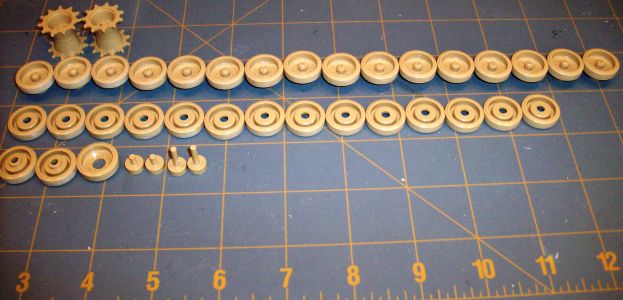
On Saturday, I removed all of the road wheels, return rollers, etc from the sprues and did some assembly.

I reattached the barrel that got broke off of the loaders M240 machine gun as well.

In the process of cleaning flash and mold seams from the tow cables, I broke both of them and had to repair them as well.

I also did a quick shoot of primer over the model and associated parts.

I will start shooting color today at some point.

Here are a couple of pics.


mikey
Visit this Community
Idaho, United States
Joined: March 14, 2006
KitMaker: 229 posts
Armorama: 227 posts
Posted: Sunday, November 01, 2009 - 11:43 AM UTC
[quote]These skirts have most of the rubber seal strip rotted away (black areas) while there is a small section with tan paint on it at the far end:

These are some of the un-armored skirts and the rubber seal strip is wider (but painted tan):

This picture from Prime Portal shows the narrower seal strip and bolted mounting strip that is offset from the edge of the skirt (on the DML AIM and SEP kits the armored skirts have a weld seam around the edge):

So the photoetch mounting strips should be offset for the armored skirts vs, the regular skirts.
So Jeff, are there two types of skirting on the Abrams at one time or the other? I am kind of confused.
majjanelson
Visit this Community
South Carolina, United States
Joined: December 14, 2006
KitMaker: 1,355 posts
Armorama: 979 posts
Posted: Sunday, November 01, 2009 - 04:49 PM UTC
Mike,
[quoteSo Jeff, are there two types of skirting on the Abrams at one time or the other? I am kind of confused.[/quote]

I apologize if I've caused any confusion.

AFAIK, all models of the Abrams have two types of armored skirt: some that are "thick" for protecting the crew and some that are "thin" for areas that are less critical such as the engine compartment.

The thick armor skirts have a small weld line around their entire edge. The first four skirts on the right side are "thick" (pictures from Prime Portal):

...and the first two on the left side are "thick" (in the lower right of this picture you can just barely tell the thick edges and the thin edges):

This picture is taken from the last skirt on the right side and shows the bottom edges in the lower right:

With all of this said, the photoetch strips on top of the first two left side skirts and the first four right side skirts should be mounted in towards the tank.
The photoetch strips on top of the remaining skirts on the left and right sides should be mounted out away the tank.
If you are building the DML AIM or SEP kits, they appear to have this all correct.
Does this make any more sense?
sgtsauer
#065
Visit this Community
Missouri, United States
Joined: March 30, 2002
KitMaker: 2,605 posts
Armorama: 1,814 posts
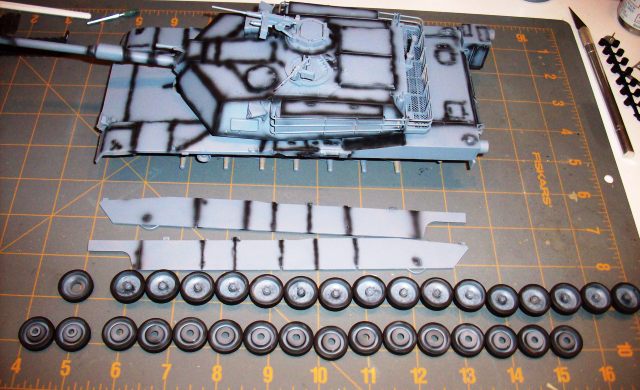
Posted: Sunday, November 01, 2009 - 05:18 PM UTC
Shot some pre-shading tonight and flat black for the road wheels. I will start putting some actual color on it tomorrow.

mikey
Visit this Community
Idaho, United States
Joined: March 14, 2006
KitMaker: 229 posts
Armorama: 227 posts
Posted: Monday, November 02, 2009 - 05:18 AM UTC
Thanks Jeff, that makes it alot easier to understand. That is interesting that they have the skirts to protect vital areas. I thought it was all across for the whole tank so what you provided clears it up. Amazing what you learn on a model forum, almost as good as the History channel.
mikey
Visit this Community
Idaho, United States
Joined: March 14, 2006
KitMaker: 229 posts
Armorama: 227 posts
Posted: Monday, November 02, 2009 - 05:38 AM UTC
Brent, I loved that Tamiya kit. It was a fun build so enjoy, the mineplow was a real treat.
mikey
Visit this Community
Idaho, United States
Joined: March 14, 2006
KitMaker: 229 posts
Armorama: 227 posts
Posted: Monday, November 02, 2009 - 05:40 AM UTC
Brent, when I built my Tamiya Abrams I put the APU right where you did, GIno commented on it and said it should be in the stowage basket. The pics posted show it. Hope that helps and it isn't to late to change it.
stufer
Visit this Community
England - East Anglia, United Kingdom
Joined: May 25, 2003
KitMaker: 416 posts
Armorama: 342 posts
Posted: Monday, November 02, 2009 - 06:05 AM UTC
hey mike!

i think brent's M1A1 is an ODS era model,and these had the APU mounted at the rear.M1A1s in OIF and OEF have the bustle rack mounted version,but i have no idea when this change took place

HTH

steve