Hello,
First I want to say this looks like a great build so far. You seem to have done a good bit of homework on your subject.
If this is you first ( or even 2nd or 3rd ) build, may I make a suggestion? I would suggest spending a little less time on super detailing and possibly put those efforts into learning more finnishing ( painting ) techniques? It is true that details like those that you are applying make for a nice model. However, if your model is full of great detail but has a lack luster paint job, it will not live up to all of the effort that you have put into the physical details. However, a model with less detail but a stuning paint job and finnish, looks so much better than the reverse.
You can take a model with less detail and make it look stunning with an excelent pait job. However, a super detailed model with a mediocre paint job will not stand out as much.
This is just my opinion. I do not know if this helps but I hope it gives a new -or- different perspective on the process.
Constructive Feedback
For in-progress or completed build photos. Give and get contructive feedback!
For in-progress or completed build photos. Give and get contructive feedback!
Hosted by Darren Baker, Dave O'Meara
DML Henschel Jagdtiger Build
collin26

Joined: March 24, 2007
KitMaker: 317 posts
Armorama: 259 posts

Posted: Tuesday, August 10, 2010 - 04:42 AM UTC
Posted: Tuesday, August 10, 2010 - 05:06 AM UTC
Quoted Text
Quoted TextJeremy are you going to try to add your own Zim to this build? I look forward to watching your progress.
Correct if I'm wrong please,but I don't think any Henschel's had zimm
I believe that some/all had Zim uip to the mid turret housing (Best term I can think of), I have however been wrong before.

vonHengest

Joined: June 29, 2010
KitMaker: 5,854 posts
Armorama: 4,817 posts

Posted: Tuesday, August 10, 2010 - 05:19 AM UTC
Quoted Text
Jeremy, you mention in your posts your frustrations with the putty and brother, I feel your pain. Just a tip I found to help out with the application of the putty and to minimize or completely eliminate sanding altogether is as follows: Place some putty ( I also use squadron) on a palate of some sort and thin it out a bit with some acetone (nail polish remover.) next I use a putty knife or a toothpick depending on how big the gap is and fill the seam/hole. Let it dry for about 10 to 20 min and then take a cotton swab and dampen it in the acetone. Take the swab and gently use it to wipe away the excess putty from the seam. Dont push to hard or you will remove the putty from inside whatever you are trying to fill. On smaller gaps you won't even need to sand! One word of advice, once it dries there is usualy some shrinkage so you might need to repeat the process twice, but it beats sanding away those fine details.
Much thanks Brandon, I really needed this info. I look forward to trying it out once I get out of "Campaign Mode"
Quoted Text
Jeremy are you going to try to add your own Zim to this build? I look forward to watching your progress.
Darren, I am depicting the X8 with this build which did not have Zimmerit. However I am going to be building another one of these kits to depict a unit from the 653rd and I will be adding my own Zimmerit to that build.
I have never tried this, so if you have any insight into application techniques I'm all ears.
Quoted Text
Correct if I'm wrong please,but I don't think any Henschel's had zimm
Anthony: Zimm was applied to Henschel Jagdtigers, however it only was applied partway up the hull sides which made it look very different from the technique used on the Porsche Jagdtigers. I believe that only the 653rd used Zimm on their Jagdtigers, while the 512th did not.
Quoted Text
this Jagdtiger is looking great. the tip about thinning the putty with nail polish remover is a good one indeed. there are some occasions though where you may have to sand an area and "rescribe" the detailed textures back in. some modelers use a hobby knife but i bought a scribing tool with 10 different scribing bits (some round, diamond or square shaped ends). i think i bought it at an artist supply store... it was many decades ago. mine looks kind of like this:
cheers, mh
Great info MH, I'll look around the art stores this week if I get a chance. I was trying to use my #11 blade, and you can probably guess how that was going...
Quoted Text
Hello,
First I want to say this looks like a great build so far. You seem to have done a good bit of homework on your subject.
If this is you first ( or even 2nd or 3rd ) build, may I make a suggestion? I would suggest spending a little less time on super detailing and possibly put those efforts into learning more finnishing ( painting ) techniques? It is true that details like those that you are applying make for a nice model. However, if your model is full of great detail but has a lack luster paint job, it will not live up to all of the effort that you have put into the physical details. However, a model with less detail but a stuning paint job and finnish, looks so much better than the reverse.
You can take a model with less detail and make it look stunning with an excelent pait job. However, a super detailed model with a mediocre paint job will not stand out as much.
This is just my opinion. I do not know if this helps but I hope it gives a new -or- different perspective on the process.
Thanks Iain, and this is good advice. I'm not really trying to superdetail this kit. I replaced the kit barrel because it didn't have the rifling in it, which makes a big difference on a gun this big, I replaced the tracks with Friul because believe it or not it's easier for me than the individual links and I like the feel of them, and I replaced the tow cables because the kit ones look out of scale. There really isn't any superdetailing going on here although it may seem like it.
I am currently trying out different paints and using my airbrushes so that I can get used to them and develop my technique, just like you were talking about. I will be using Lifecolor acrylic paints on this kit after applying a coat of Mr Surfacer. I have been spending quite a bit of time reading about people's painting, masking, and weathering techniques and hopefully I can put them to good use and give you guys something nice to look at

It's reassuring to hear that the overall consensus from all of you who have posted here is that I'm going in the right direction with this build. I very much appreciate all the feedback I have been getting, as well as the interest in my build. I will see what I can do to speed up my campaign entries so that I can return to this build and give you all some more updates.
Cheers
Jeremy

Tojo72

Joined: June 06, 2006
KitMaker: 4,691 posts
Armorama: 3,509 posts

Posted: Tuesday, August 10, 2010 - 05:27 AM UTC
Hey guys,did some quick research and came up with this:
http://germanmilitaryhistory.devhub.com/blog/421988-jagdtiger-miscellany/
It says Porsches had zimm,but no Henschels had it.
thanks
http://germanmilitaryhistory.devhub.com/blog/421988-jagdtiger-miscellany/
It says Porsches had zimm,but no Henschels had it.
thanks
Posted: Tuesday, August 10, 2010 - 05:28 AM UTC
I had my first attempt at doing my own Zim in the last week, and for a first effort I am happy with it. I used decorators caulk and a Tamiya zim tool and while I have seen a lot better efforts you cannot improve until you have done it the first time. My efforts will be seen in the engineers campaign when I upload the pictures.

vonHengest

Joined: June 29, 2010
KitMaker: 5,854 posts
Armorama: 4,817 posts

Posted: Tuesday, August 10, 2010 - 01:41 PM UTC
Anthony: Thanks for looking into it. For some reason I thought I remembered having some references of Henschel suspension Jagdtigers with Zimm applied. I looked through all of my books and digital references and I can't find one iota of information to support this. Good call my good man, this would have been a major "oops" if I applied it to my next project. 

Darren: I look forward to seeing it. I have collected the LionRoar set of Zimm application tools which I think should work very well. I will probably end up using caulk as you did when I make my first attempt. After discussing Zimmerit with Anthony, it looks like I will need to dig out one of my Tiger II's to experiment on.


Darren: I look forward to seeing it. I have collected the LionRoar set of Zimm application tools which I think should work very well. I will probably end up using caulk as you did when I make my first attempt. After discussing Zimmerit with Anthony, it looks like I will need to dig out one of my Tiger II's to experiment on.

vonHengest

Joined: June 29, 2010
KitMaker: 5,854 posts
Armorama: 4,817 posts

Posted: Saturday, August 14, 2010 - 11:51 AM UTC
Darren: I checked out your Zimm and I think it's looking good. It would be nice if normal cameras had a better zoom function so we could take a closer look at it.
Guys I know I said I was putting this project on a brief hiatus, but I have something I wanted to try out at the request of a fellow modeler here on Armorama. I think it may be of interest to a few more of you. Should have it posted in a few days.
Cheers
Jeremy
Guys I know I said I was putting this project on a brief hiatus, but I have something I wanted to try out at the request of a fellow modeler here on Armorama. I think it may be of interest to a few more of you. Should have it posted in a few days.
Cheers
Jeremy
Posted: Saturday, August 14, 2010 - 12:08 PM UTC
Jeremy if you are going to practice applying zim I suggest practice on a sheet of plasticard or milk carton.

vonHengest

Joined: June 29, 2010
KitMaker: 5,854 posts
Armorama: 4,817 posts

Posted: Saturday, August 14, 2010 - 12:19 PM UTC
Good tip Darren, and thanks. I'm trying to find out what the best material to use for Zimm is.
Posted: Saturday, August 14, 2010 - 03:11 PM UTC
I went for decorators caulk for a couple of reasons; I knew it would accept paint due to its primary use, and it is cheap in the UK at £1 a tube which as long as it is sealed correctly will put a cote on 40 models let alone one. I even considered plaster of paris but felt that as it shrinks when curing it would most likely crack off of or not stick to the plastic, caulk on the other hand has a texture like silicone sealant when first applied and as it drys it cures hard and stays stuck.

vonHengest

Joined: June 29, 2010
KitMaker: 5,854 posts
Armorama: 4,817 posts

Posted: Saturday, August 14, 2010 - 06:09 PM UTC
That sounds like a smart move there Darren. I'll give it a try when I'm ready to start my first Zimm project. I just noticed that most of the up and coming campaigns are allied based, so I may pull out a Tiger II and work on it as a side project. I'll be following your campaign build to see how everything turns out.
Posted: Saturday, August 14, 2010 - 09:26 PM UTC
Never mind the Tiger II get back to the Mk IV.

vonHengest

Joined: June 29, 2010
KitMaker: 5,854 posts
Armorama: 4,817 posts

Posted: Sunday, August 15, 2010 - 12:00 PM UTC
I hear ya Darren 


vonHengest

Joined: June 29, 2010
KitMaker: 5,854 posts
Armorama: 4,817 posts

Posted: Tuesday, October 12, 2010 - 05:06 PM UTC
Ok guys, time for a little surprise as I take a break from my campaign builds 
I am going to walk you through my trial of Tankrats Black4Track.
Here is my set of assembled Friuls for one side of my Jagdtiger build
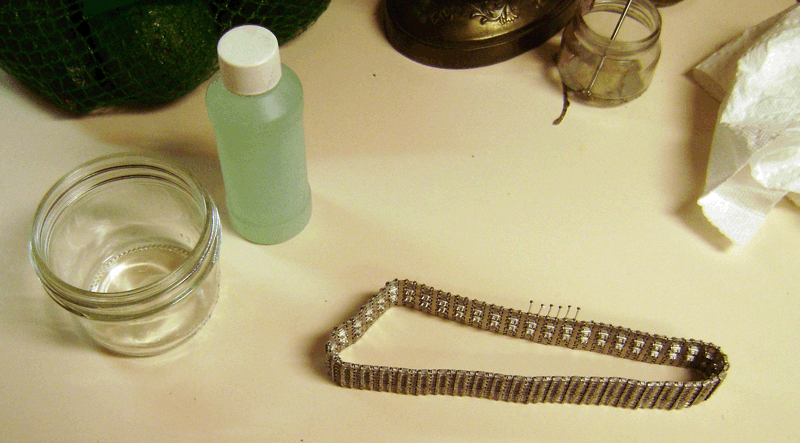
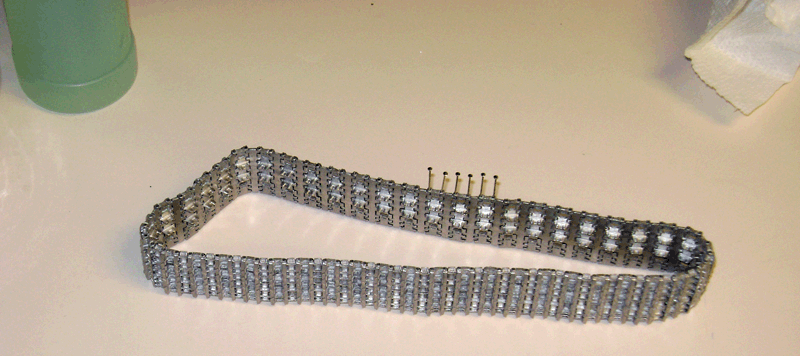
Nice and shiny after being scrubbed generously with dishwashing detergent!!
15 seconds!? I barely had time to turn my camera back on!
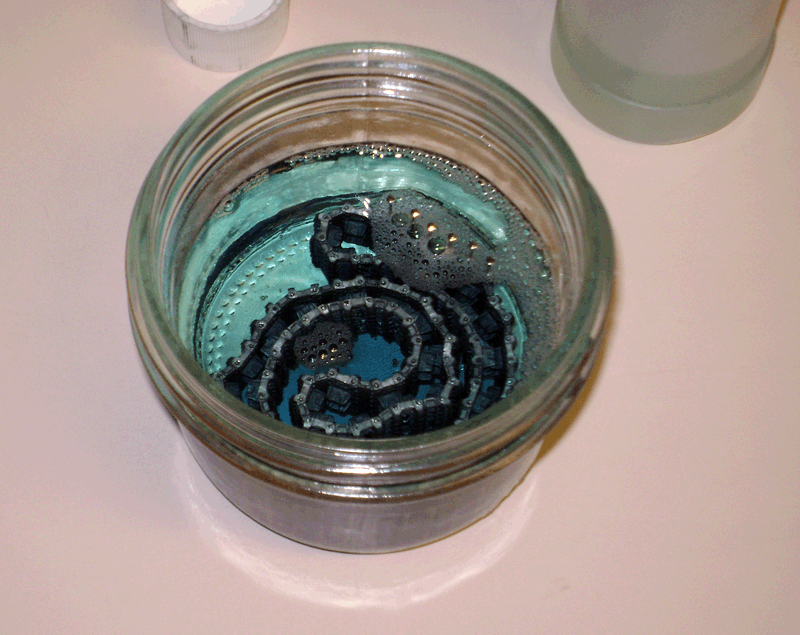
Check out these beauties!! (Notice the blue color of the liquid, it starts as green but changes as the metal blackens)
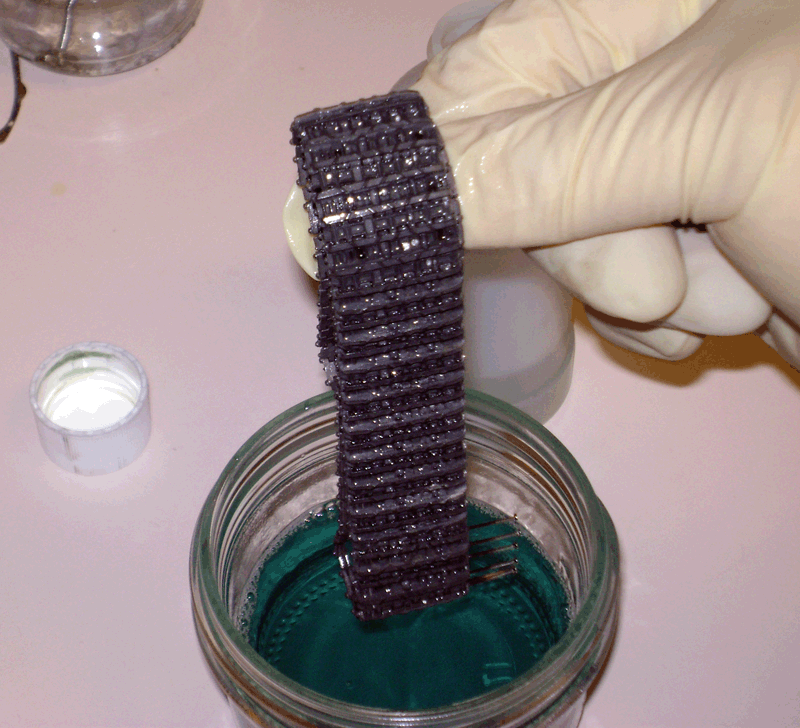

I am going to walk you through my trial of Tankrats Black4Track.
Here is my set of assembled Friuls for one side of my Jagdtiger build

Nice and shiny after being scrubbed generously with dishwashing detergent!!

15 seconds!? I barely had time to turn my camera back on!


Check out these beauties!! (Notice the blue color of the liquid, it starts as green but changes as the metal blackens)


vonHengest

Joined: June 29, 2010
KitMaker: 5,854 posts
Armorama: 4,817 posts

Posted: Tuesday, October 12, 2010 - 05:17 PM UTC
Looking good, but notice a few spots in the track details where the metal is still shiny?
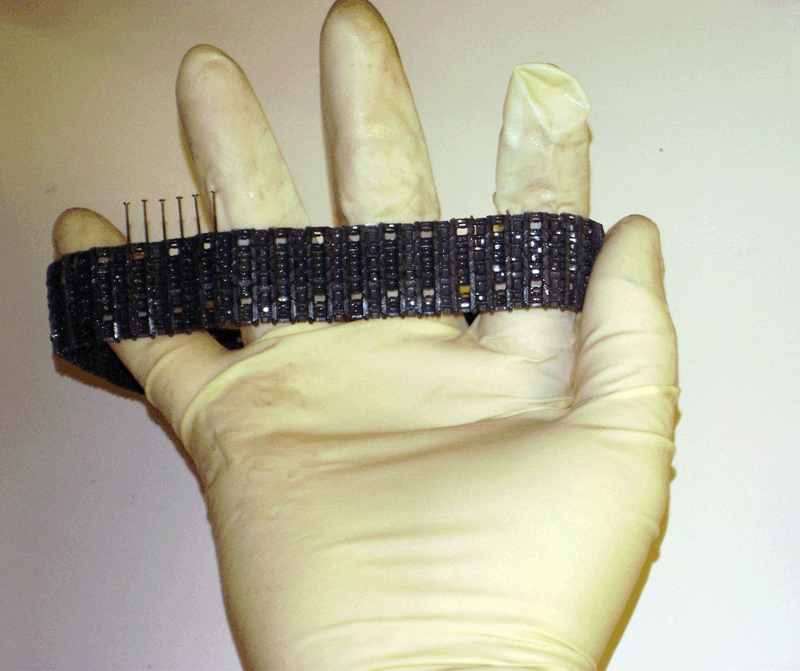
Even more on the other side...

Overall good looking, and no problems on the flat surface, so...
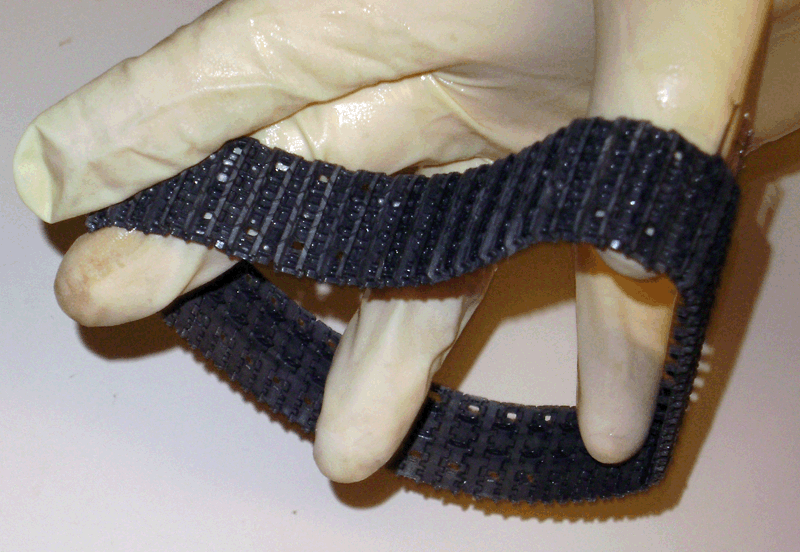
I realized that even though I scrubbed the tracks thoroughly, I had not sufficiently scrubbed many of the fine details on the top parts of these beautifully cast track links. I had to rescrub them with a more diluted mixture of soap and water to ensure that it penetrated the offending areas.
Once again scrubbed and rinsed, I dipped them back into the solution for another 15 seconds, which I do not recommend doing as I noticed white streaks swirling around in the solution.
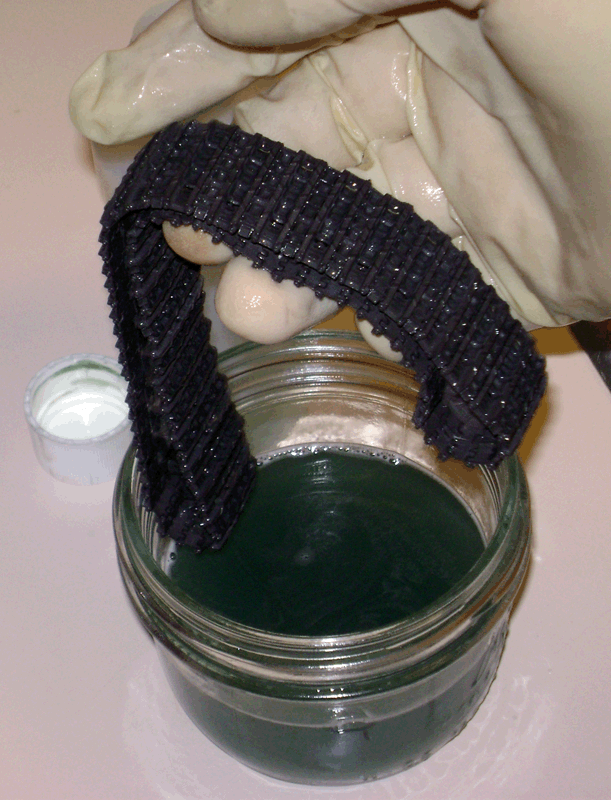
Here they are after rinsing and drying....
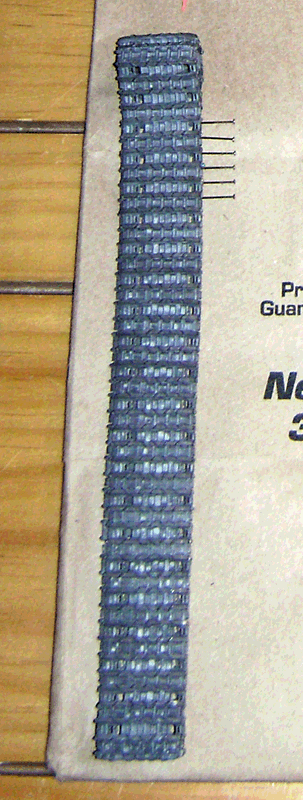
Of note, a small amount of the liquid must be left in the container to recharge the solution after use. Once you pour the used solution back in, it will turn back to its former green color. I highly recommend recharging the solution this way between each use, even if you do what I have done and have to redip the tracks.
Another note I would like to mention: I would advice waiting to glue then ends of the pins in place until AFTER you have dipped the tracks in the Black4Track solution. Otherwise the glue will prevent the solution from reaching the metal around the pins and you will be left with bright silver spots that you will have to carefully paint and/or weather.
One final note worth mentioning, DO NOT let this stuff drip on your countertops as it will instantly stain them. I was able to successfully remove the offending stains with bleach.
Anyways, hope you guys enjoyed and found this useful. Until next time ladies and gents

Even more on the other side...

Overall good looking, and no problems on the flat surface, so...

I realized that even though I scrubbed the tracks thoroughly, I had not sufficiently scrubbed many of the fine details on the top parts of these beautifully cast track links. I had to rescrub them with a more diluted mixture of soap and water to ensure that it penetrated the offending areas.
Once again scrubbed and rinsed, I dipped them back into the solution for another 15 seconds, which I do not recommend doing as I noticed white streaks swirling around in the solution.

Here they are after rinsing and drying....

Of note, a small amount of the liquid must be left in the container to recharge the solution after use. Once you pour the used solution back in, it will turn back to its former green color. I highly recommend recharging the solution this way between each use, even if you do what I have done and have to redip the tracks.
Another note I would like to mention: I would advice waiting to glue then ends of the pins in place until AFTER you have dipped the tracks in the Black4Track solution. Otherwise the glue will prevent the solution from reaching the metal around the pins and you will be left with bright silver spots that you will have to carefully paint and/or weather.
One final note worth mentioning, DO NOT let this stuff drip on your countertops as it will instantly stain them. I was able to successfully remove the offending stains with bleach.
Anyways, hope you guys enjoyed and found this useful. Until next time ladies and gents


vonHengest

Joined: June 29, 2010
KitMaker: 5,854 posts
Armorama: 4,817 posts

Posted: Wednesday, October 13, 2010 - 06:17 AM UTC
Hey guys, a quick matter that just came to my attention:
It has been pointed out that my tracks look like they have a blueish tint in the pictures. This is in fact an effect of my environmental lighting and camera.
The tracks are actually a handsome warm brownish-gray color.
It has been pointed out that my tracks look like they have a blueish tint in the pictures. This is in fact an effect of my environmental lighting and camera.
The tracks are actually a handsome warm brownish-gray color.
stansmith

Joined: July 18, 2010
KitMaker: 611 posts
Armorama: 584 posts

Posted: Wednesday, October 13, 2010 - 06:37 AM UTC
hi jeremy, this stuff looks pretty nifty. can you use on plastic tracks, like indy/magic tracks? or only just metal tracks?
cheers
cheers


vonHengest

Joined: June 29, 2010
KitMaker: 5,854 posts
Armorama: 4,817 posts

Posted: Wednesday, October 13, 2010 - 07:23 AM UTC
Hi Stan, and thanks! This stuff is indeed pretty nifty 
Blackening agents only affects metal tracks. For plastic/vinyl indy tracks you will have to paint them. However being able to paint the tracks gives you better control over the colour of the tracks, as opposed to using solutions on the metal tracks which will only yield a finite amount of possible colours.

Blackening agents only affects metal tracks. For plastic/vinyl indy tracks you will have to paint them. However being able to paint the tracks gives you better control over the colour of the tracks, as opposed to using solutions on the metal tracks which will only yield a finite amount of possible colours.

PvtMutt

Joined: July 01, 2006
KitMaker: 614 posts
Armorama: 601 posts

Posted: Wednesday, October 13, 2010 - 01:11 PM UTC
Jer one last suggestion if I may.
I Blacken all my metal tracks but the first one I ever did, I noticed that the pins were being eaten up by the acid in this stuff so from then on after rinsing I gave them a good soak and scrubbing in soda water to kill the acid remaining,(1 level teaspoon of baking soda to a glass of water) and then a final rinse.
Tony the Mutt:)

vonHengest

Joined: June 29, 2010
KitMaker: 5,854 posts
Armorama: 4,817 posts

Posted: Wednesday, October 13, 2010 - 01:16 PM UTC
Tony: Much thanks for the tip! Black4Track isn't an acid as far as I know, so this shouldn't be a problem. I'm looking at the pins right now and they look perfect, and have been blackened part way up their shafts just like the rest of the tracks 


PvtMutt

Joined: July 01, 2006
KitMaker: 614 posts
Armorama: 601 posts

Posted: Wednesday, October 13, 2010 - 01:21 PM UTC
I use both Blacken It and Black4Tracks and they both really foam up the soda water when you drop them in so there's something in there that eats on those pins.
It was just a suggestion not an command.
Tony the Mutt
It was just a suggestion not an command.

Tony the Mutt


vonHengest

Joined: June 29, 2010
KitMaker: 5,854 posts
Armorama: 4,817 posts

Posted: Wednesday, October 13, 2010 - 01:56 PM UTC
Lol, I don't have any problem with your suggestion. I'm not really sure what's in this stuff. I'm not having a problem with it, but I also scrubbed it down with dishwashing liquid after I finished soaking the track run, which may have saved me from having problems by neutralizing anything problematic with the water. I think I'm going to dip them again tonight without scrubbing afterward and see what happens over the next day or so 

 |


