DML Henschel Jagdtiger Build
Texas, United States
Joined: June 29, 2010
KitMaker: 5,854 posts
Armorama: 4,817 posts
Posted: Monday, July 05, 2010 - 04:08 PM UTC
Alright, I am brand new to this whole forum thing, and really to model building in general. This is essentially my first model, and I would appreciate any pointers/feedback that I can get. I'm hoping it will help motivate me to push forward into unknown territory and actually finish the kit

*I will post pics within the next few days once I get a chance to take some pictures for you all and figure out how to post them on here.
The kit is the DML 6285 Henschel Jagdtiger. My plan is to build the X8 before it's surrender in Iserlorn. I am using Friulmodel tracks, Eureka tow cables, and an aftermarket metal barrel (what's up with Dragon's aluminum kit barrel not being rifled?). Otherwise the kit is being built up box stock.
I am trying to figure out how to use putty properly, as well as how to make weld beads. I am using Squadron putty for filling in the few gaps, and am working with Milliput to create the weld beads.
*pictures to come soon!
North Carolina, United States
Joined: June 06, 2006
KitMaker: 4,691 posts
Armorama: 3,509 posts
Posted: Tuesday, July 06, 2010 - 01:11 AM UTC
Best wishes on your project,I'm just finishing up the Tamiya Jagdtiger,I'll try to help if I could,looking foward to some progress pics.
Texas, United States
Joined: June 29, 2010
KitMaker: 5,854 posts
Armorama: 4,817 posts
Posted: Tuesday, July 06, 2010 - 07:32 AM UTC
Thanks Anthony, judging from your avatar it looks like you're a Jagdtiger fan. Look forward to hearing what you have to say, and I'd like to check out your build if you have a thread or pics.
I'll see if I can get some pics up for you tonight.
Texas, United States
Joined: June 29, 2010
KitMaker: 5,854 posts
Armorama: 4,817 posts
Posted: Tuesday, July 06, 2010 - 12:23 PM UTC
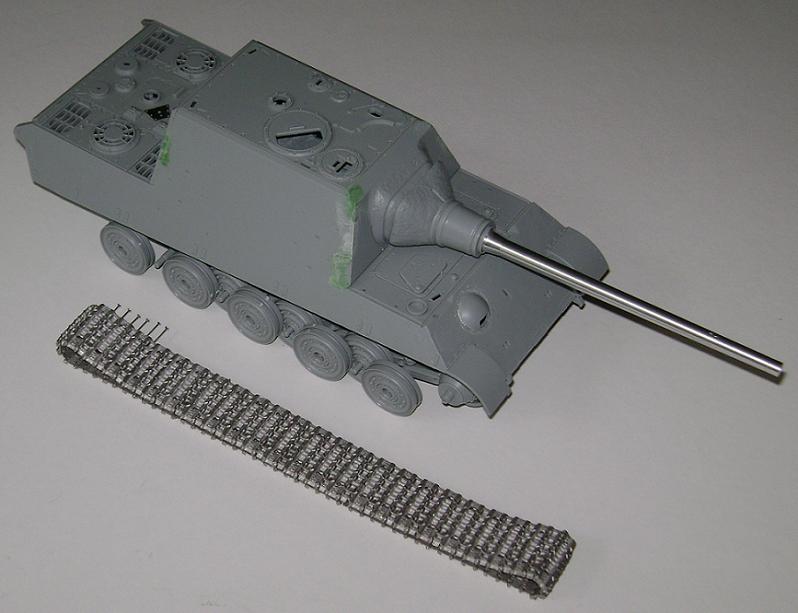
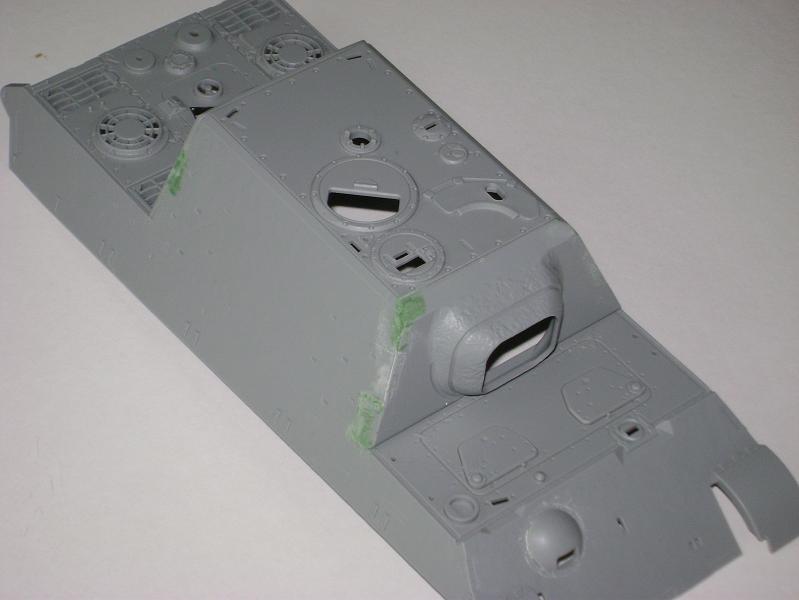
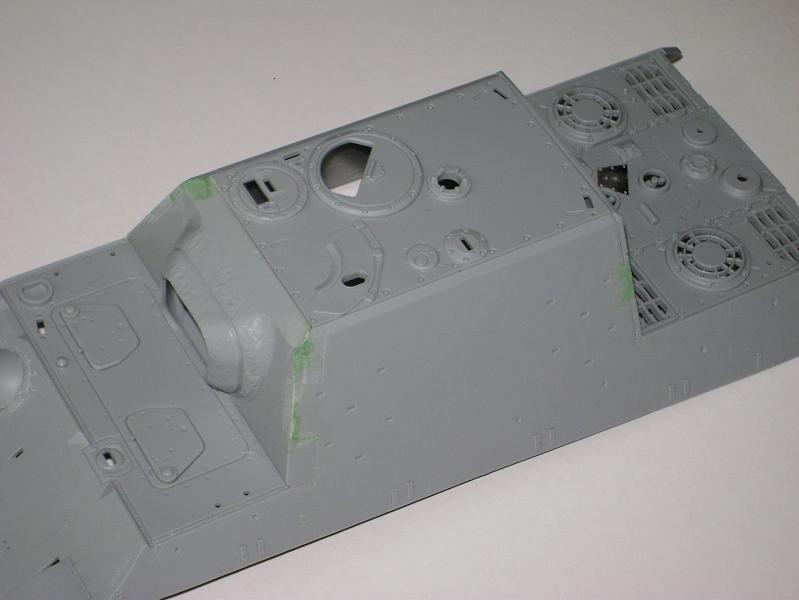
This is a quick mock up of what I've been working on so far. I've sanded most of the wheels using an emery stick. I'm waiting to glue them on until after I've done most of my painting.
I'm not sure how many track links the Jagdtiger has. I used my best judgement and am going to go with that unless one of you can give me some further guidance.
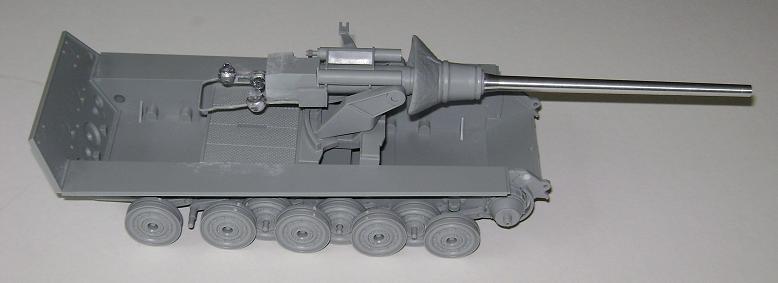
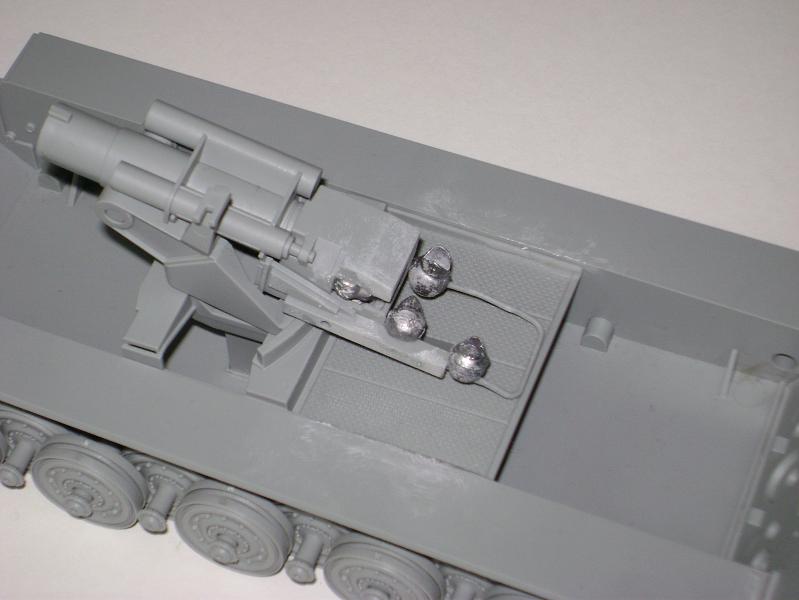
The barrel didn't have a mounting peg at the end of it, so I tacked it in place with some CA gel and put a small glob of milliput under the barrel inside of the mantlet to stabilize and reinforce it. This way I can move the gun without fear of the barrel falling off.
I am also trying to create weld beads using the milliput. If you look closely around the mg blister you can see a ring of white residue. This is from a bead of milliput I used to make a weld bead. It looked pretty good, but my reference photos showed the weld bead to be significantly smaller than the one I made so I scraped it off to try again. I am using a small crafting stylus to create the texture.
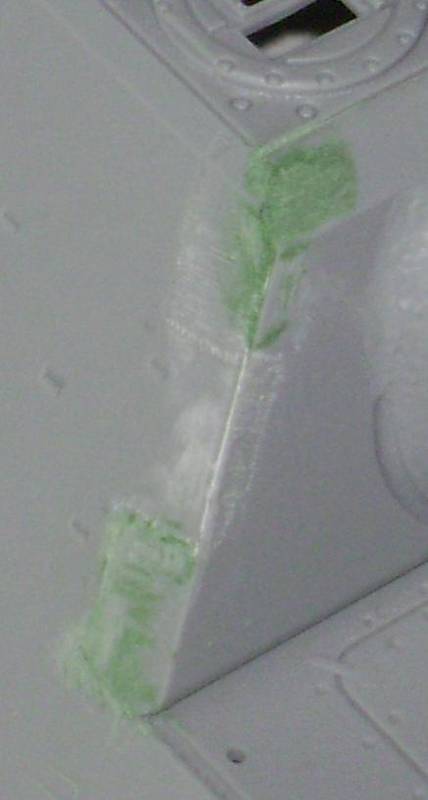
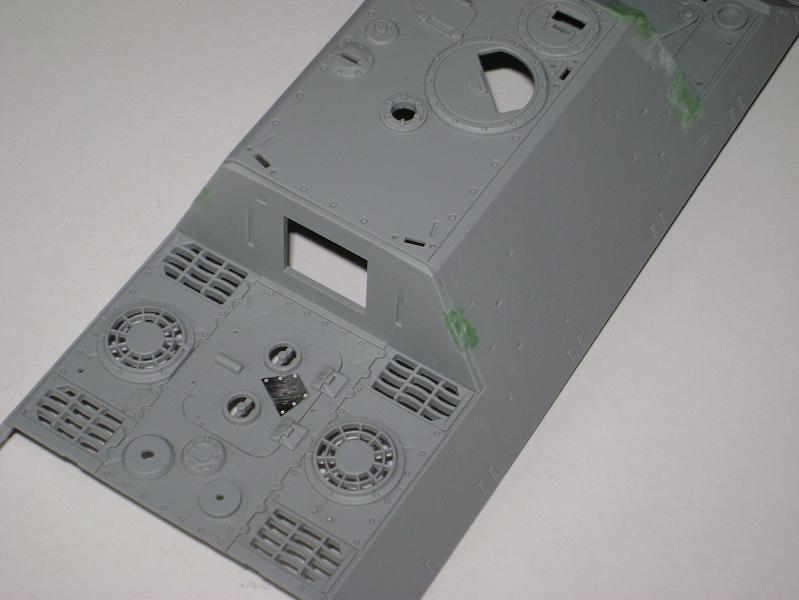
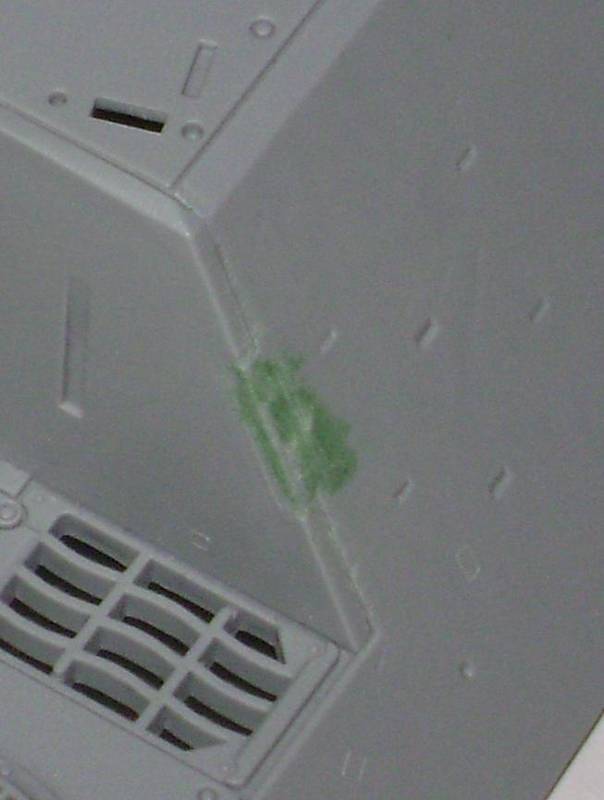
I am trying to fill the gaps around the upper hull plates on the front and back. I am using the Squadron green putty. It's been pretty messy and I'm losing some of the detail. I'm not sure what to do about it.(Just fyi, I had to twist the hull to get the front plate to line up correctly. Even with doing this, the lower tab on the LH side stuck out too far and I had to sand it down significantly to get it relatively flush with the rest of the hull. Needless to say I lost the nice detailing of the "grinding" marks.)
Any thoughts on anything?
Texas, United States
Joined: June 29, 2010
KitMaker: 5,854 posts
Armorama: 4,817 posts
Posted: Tuesday, July 06, 2010 - 12:26 PM UTC
Texas, United States
Joined: June 29, 2010
KitMaker: 5,854 posts
Armorama: 4,817 posts
Posted: Tuesday, July 06, 2010 - 12:36 PM UTC

#011
Jerusalem, Israel
Joined: February 06, 2009
KitMaker: 1,507 posts
Armorama: 1,304 posts
Posted: Tuesday, July 06, 2010 - 01:50 PM UTC
great idea on balancing the gun!
George: "If we do happen to step on a mine, Sir, what do we do ?"
Blackadder: "Normal procedure, Lieutenant, is to jump 200 feet in the air and scatter oneself over a wide area."
Texas, United States
Joined: June 29, 2010
KitMaker: 5,854 posts
Armorama: 4,817 posts
Posted: Tuesday, July 06, 2010 - 01:56 PM UTC
Thanks Matan, I'm happy it's worked out so nicely this far

Georgia, United States
Joined: January 31, 2010
KitMaker: 2,191 posts
Armorama: 1,814 posts
Posted: Tuesday, July 06, 2010 - 03:52 PM UTC
You said this was your first model. My advice would be to just complete it. Don't try to super-detail the first one. It will bog you down, and you'll get frustrated. There's lots of models out there. Don't be worried about adding weld beads on the first one. Make some models. In a few years with some real experience under your belt, go back and get another Dragon JagdTiger and super-detail THAT one. Then you can compare how your skills have improved.
It's too easy to read on here how people do this or that, and think you can just do it just like them your first time.

I would know.

Join AMPS.
http://www.amps-armor.org/ampssite
Texas, United States
Joined: June 29, 2010
KitMaker: 5,854 posts
Armorama: 4,817 posts
Posted: Wednesday, July 07, 2010 - 03:25 AM UTC
It definitely sounds like you speak from experience! I'm not really going to get too into detailing it, but I do know that the lack of weld beads is going to drive me nuts when I look at it, so this makes a good test bed for me

Texas, United States
Joined: June 29, 2010
KitMaker: 5,854 posts
Armorama: 4,817 posts
Posted: Thursday, July 08, 2010 - 04:52 PM UTC
I made a new weld bead around the mg blister today, I'll post a picture tomorrow and see what you guys think.

#003
Donegal, Ireland
Joined: May 14, 2002
KitMaker: 9,763 posts
Armorama: 7,444 posts
Posted: Thursday, July 08, 2010 - 11:56 PM UTC
Nice build Jeremy. I built this 1.5 years ago, just to work on some weld beads as well. I used the Lee Lloyd method ... the article is here on Armorama. I wouldn´t bother with weighting the gun barrel ... just glue it in place ... unless you like playing with the models
 Link to my build
 Its still not progressed any since the last post though.


IPMS Stockholm
"The problem with common sense, is that it is not that common"
Texas, United States
Joined: June 29, 2010
KitMaker: 5,854 posts
Armorama: 4,817 posts
Posted: Friday, July 09, 2010 - 04:56 AM UTC
Thanks Frank, and I'll have to check out the Lee Lloyd method when I get a chance. All of these processes are new to me, and I'm trying to get a feel for at least some of them.
Btw, I remember seeing your build about a year ago when I first got my Jagdtiger kit. Thanks for posting your link

Texas, United States
Joined: June 29, 2010
KitMaker: 5,854 posts
Armorama: 4,817 posts
Posted: Monday, July 12, 2010 - 12:23 PM UTC
Frank, I've been studying the Lee Lloyd method for creating weld beads and it is very similar to what I was trying to do. It addressed a problem I was having with the putty sticking to my fingers after being applied to the model. I was using a small stylus to create the pattern, but the pattern is not nearly as affective looking as the one created using a modified needle in Lee's technique.
What tool did you use for creating the texture pattern in your weld beads?
*If anybody is wondering what the Lee Lloyd method is, you can check it out
here.
Kentucky, United States
Joined: October 04, 2009
KitMaker: 110 posts
Armorama: 59 posts
Posted: Monday, July 12, 2010 - 02:42 PM UTC
Looking good so far Jeremy. It almost makes me want to strip mine down and fix the seams, throw some Aber at it and repaint it! Looking forward to the next update.
Clint
Texas, United States
Joined: June 29, 2010
KitMaker: 5,854 posts
Armorama: 4,817 posts
Posted: Monday, July 12, 2010 - 06:24 PM UTC
Clint: Thanks, I'll post more pics as I experiment with these techniques. And it sounds like you're a big PE nut, I actually chose this model because it didn't really need any. I love what you did with the PE on your Panther though

*For those of you who haven't looked at Clint's build yet you should check it out,
Panther G
#003
Donegal, Ireland
Joined: May 14, 2002
KitMaker: 9,763 posts
Armorama: 7,444 posts
Posted: Monday, July 12, 2010 - 09:55 PM UTC
[quote]What tool did you use for creating the texture pattern in your weld beads?quote]
I used the same tool as Lee used ... a shaped hypodermic needle, as can be seen on
Page 2 on the article 
IPMS Stockholm
"The problem with common sense, is that it is not that common"
Texas, United States
Joined: June 29, 2010
KitMaker: 5,854 posts
Armorama: 4,817 posts
Posted: Monday, July 19, 2010 - 01:45 PM UTC
Ok, so same tool then. I may have to find a different source, maybe some small diameter brass/copper piping.
It never ceases to amaze me how I get hit with everything the moment I have a chance to do something

Metro Manila, Philippines
Joined: July 29, 2002
KitMaker: 1,460 posts
Armorama: 1,080 posts
Posted: Friday, July 23, 2010 - 02:04 AM UTC
Hi,
I was just passing through this site again (after a very very long hiatus -- and stil in hiatus). I think you are on the right track...nice start. I'm attaching a link on how I built my DML Jagdtiger hoping it may be of help.
https://armorama.kitmaker.net/forums/71928#602383 BTW, there was a problem before on the length of the barrel not sure if they fixed it already.
Texas, United States
Joined: June 29, 2010
KitMaker: 5,854 posts
Armorama: 4,817 posts
Posted: Friday, July 23, 2010 - 07:03 AM UTC
Thanks for stopping by Arvin. I'm glad you think I'm on the right track, this is pretty unfamiliar territory for me. Regarding the gun, this kit corrected the error that has been ever-present in the Jagdtiger models. I actually used an aftermarket barrel that has the rifling in it, and I measured and compared to many photos to make sure that is was in the correct position and the correct length.
I checked out your Jagdtiger build, and really like the interior. I'm hoping to build another one in the future with a resin interior.
Feel free to drop by again anytime you feel like offering some constructive criticism.
Texas, United States
Joined: June 29, 2010
KitMaker: 5,854 posts
Armorama: 4,817 posts
Posted: Friday, July 30, 2010 - 04:47 PM UTC
Just wanted to let you guys know that I am going to be pretty swamped between campaigns and work for the next couple of months so I'm putting these two projects on a brief hiatus. Thanks for your support and look forward to picking these builds back up

Utah, United States
Joined: February 15, 2008
KitMaker: 199 posts
Armorama: 136 posts
Posted: Monday, August 09, 2010 - 06:32 PM UTC
Jeremy, you mention in your posts your frustrations with the putty and brother, I feel your pain. Just a tip I found to help out with the application of the putty and to minimize or completely eliminate sanding altogether is as follows: Place some putty ( I also use squadron) on a palate of some sort and thin it out a bit with some acetone (nail polish remover.) next I use a putty knife or a toothpick depending on how big the gap is and fill the seam/hole. Let it dry for about 10 to 20 min and then take a cotton swab and dampen it in the acetone. Take the swab and gently use it to wipe away the excess putty from the seam. Dont push to hard or you will remove the putty from inside whatever you are trying to fill. On smaller gaps you won't even need to sand! One word of advice, once it dries there is usualy some shrinkage so you might need to repeat the process twice, but it beats sanding away those fine details.
CMOT
 Editor-in-Chief
England - South West, United Kingdom
Joined: May 14, 2006
KitMaker: 10,954 posts
Armorama: 8,571 posts
Posted: Monday, August 09, 2010 - 07:03 PM UTC
Jeremy are you going to try to add your own Zim to this build? I look forward to watching your progress.
North Carolina, United States
Joined: June 06, 2006
KitMaker: 4,691 posts
Armorama: 3,509 posts
Posted: Tuesday, August 10, 2010 - 04:18 AM UTC
Quoted Text
Jeremy are you going to try to add your own Zim to this build? I look forward to watching your progress.
Correct if I'm wrong please,but I don't think any Henschel's had zimm

Alberta, Canada
Joined: July 23, 2010
KitMaker: 786 posts
Armorama: 753 posts
Posted: Tuesday, August 10, 2010 - 04:31 AM UTC
this Jagdtiger is looking great. the tip about thinning the putty with nail polish remover is a good one indeed. there are some occasions though where you may have to sand an area and "rescribe" the detailed textures back in. some modelers use a hobby knife but i bought a scribing tool with 10 different scribing bits (some round, diamond or square shaped ends). i think i bought it at an artist supply store... it was many decades ago. mine looks kind of like this:

cheers, mh
the opposite of courage in our society is not cowardice, it is conformity.


