Dublin, Ireland
Joined: November 27, 2004
KitMaker: 6,048 posts
Armorama: 4,619 posts
Posted: Tuesday, August 16, 2011 - 04:58 AM UTC
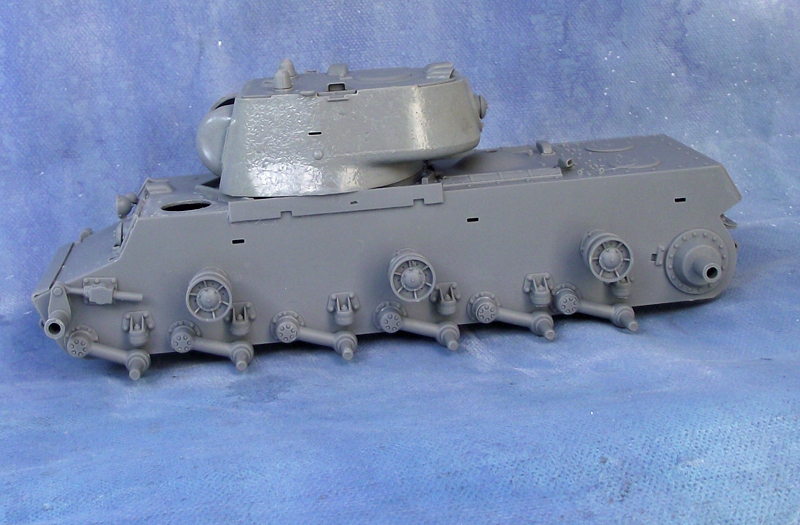
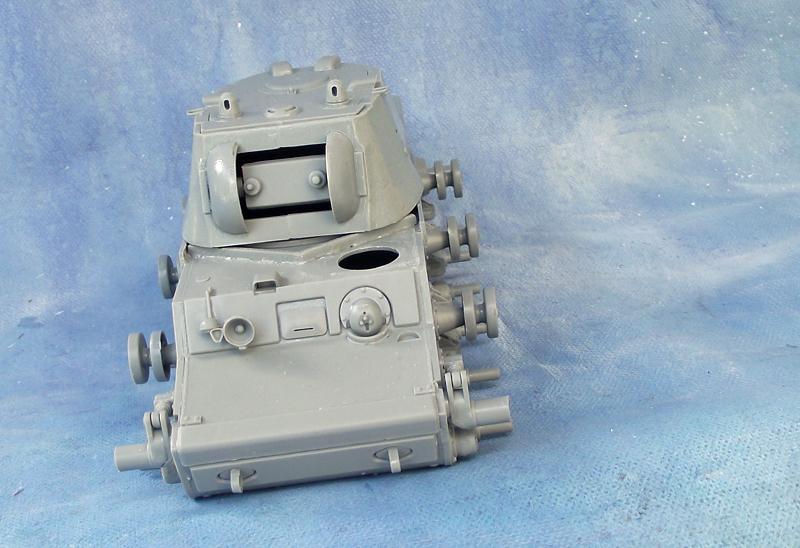
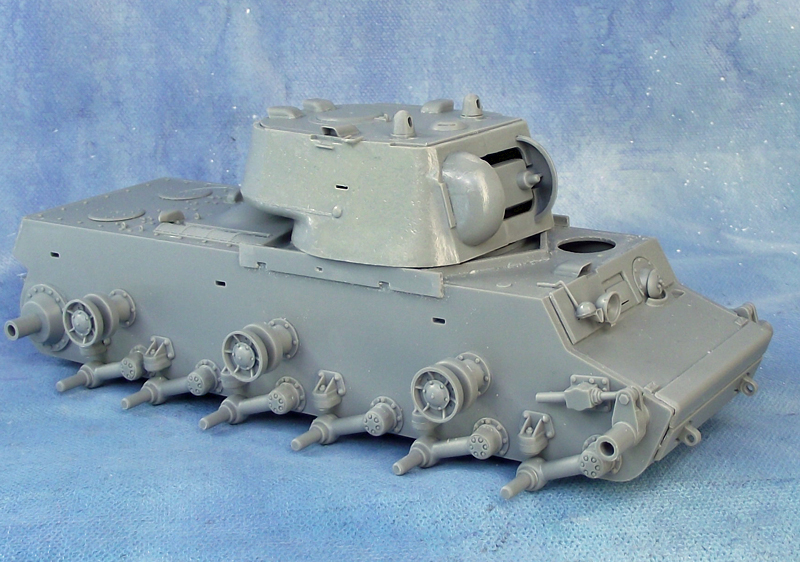
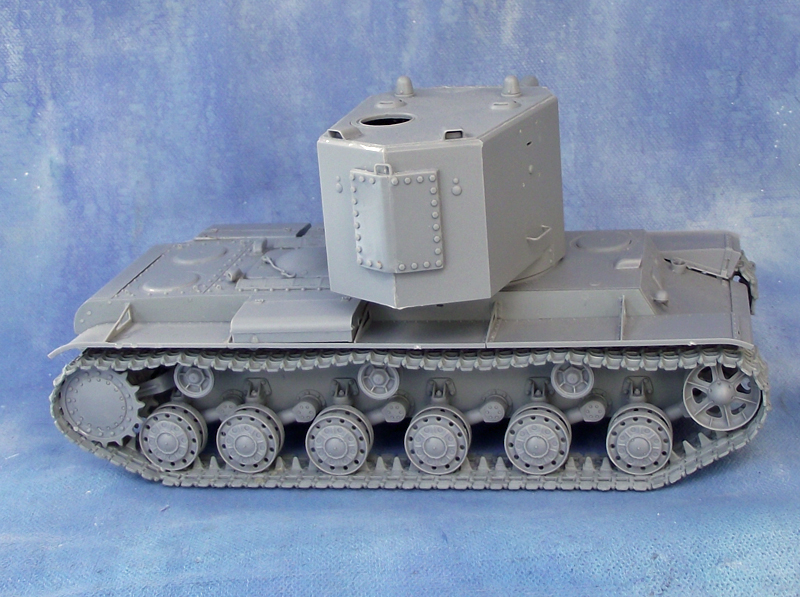
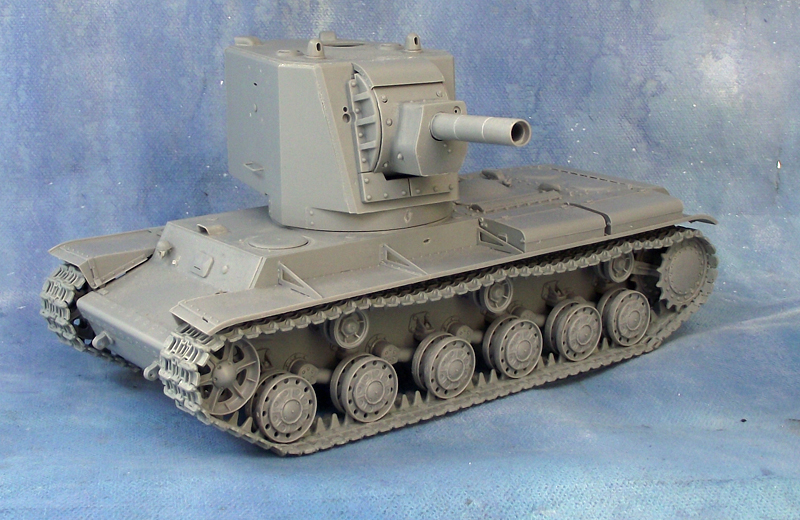
A little late in the build process to start a blog with these but I'm going to try the hairspray method snow camo on at least one of these- Probably the KV-2
I found this photo on the web while researching
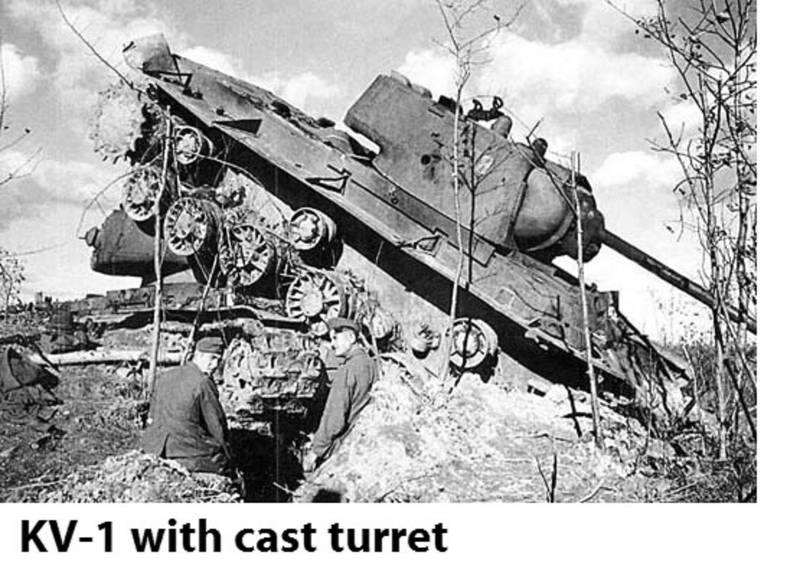
It was labelled as Kursk but is that too late for this variant-Lightweight cast turret?
I built these straight out of the box- The KV-2 is 98% there and the KV-1 about 90%
Pat
work to become not to acquire
United Kingdom
Joined: April 02, 2010
KitMaker: 234 posts
Armorama: 207 posts
Posted: Tuesday, August 16, 2011 - 06:26 PM UTC
Hi
Look good there, which colour gree are you going to use.
Ho did you et on with the "Magic" tracks, I have yet to build a set that wasn't either half a link to long or half a link too short, is got so bad that I won't by a Dragon kit unless it has DS tracks in the box
Paul

#003
Donegal, Ireland
Joined: May 14, 2002
KitMaker: 9,763 posts
Armorama: 7,444 posts
Posted: Tuesday, August 16, 2011 - 09:26 PM UTC
Quoted Text
A little late in the build process to start a blog with these but I'm going to try the hairspray method snow camo on at least one of these- Probably the KV-2
Not at all. So many of these KVs have been built online, and as you built out of the box, theres no need to show it again, so this is the perfect place to start the blog .... painting and weathering ... especially as you will attempt the hairspray method. Im sure many would follow that thread???
Two nice builds .... will you pose them as in the ref image? Would be pretty cool and different. Would take up a little less less space as well. Looking forward to more blogging!


IPMS Stockholm
"The problem with common sense, is that it is not that common"
Dublin, Ireland
Joined: November 27, 2004
KitMaker: 6,048 posts
Armorama: 4,619 posts
Posted: Tuesday, August 16, 2011 - 10:38 PM UTC
Quoted Text
Hi
Look good there, which colour gree are you going to use.
Ho did you get on with the "Magic" tracks, I have yet to build a set that wasn't either half a link to long or half a link too short, is got so bad that I won't by a Dragon kit unless it has DS tracks in the box
Paul
Hi Paul- well I'm going to be lazy and use an aerosol I found in a model shop that specialises in wargaming- for the basecoat -Flames of War Russian Armour Green.
As for the tracks - since this is a Trumpeter kit it doesn't come with Magic tracks just rubber band and link and length plastic tracks which I used and they fit perfectly
@ Frank thanks- yeah I suppose no point rehashing the build. I will though that these trumpeter kits are fantastic out of the box. I know Neil Stokes has a tweaks list for improvements on his
4BO Green site but I wanted a quick build.
Quoted Text
Two nice builds .... will you pose them as in the ref image? Would be pretty cool and different
No Frank I want to get my money's worth from the two kits so that means two different displays


Pat
work to become not to acquire
CMOT
 Editor-in-Chief
England - South West, United Kingdom
Joined: May 14, 2006
KitMaker: 10,954 posts
Armorama: 8,571 posts
Posted: Wednesday, August 17, 2011 - 01:33 AM UTC
Well well Pat building Russian armour next your be building a modern vehicle!

Have you tried the hairspray method before? If not the AK Interactive DVD "Winter Techniques" is an excellent teaching aid. I will be watching to see how you get on, good luck.

#284
Northern Ireland, United Kingdom
Joined: October 04, 2006
KitMaker: 3,094 posts
Armorama: 2,942 posts
Posted: Wednesday, August 17, 2011 - 02:21 AM UTC
Pat, I'm hoping to (eventually) do a hairspray finish on a KV-2 so I'll be watching this for sure. Good luck with the build.
On The Bench:
Ethiopian BMP-1 (Trumpeter 1/35)
AMX-13/75 (Takom 1/35)
Dublin, Ireland
Joined: November 27, 2004
KitMaker: 6,048 posts
Armorama: 4,619 posts
Posted: Wednesday, August 17, 2011 - 08:16 AM UTC
Quoted Text
Well well Pat building Russian armour next your be building a modern vehicle!  Have you tried the hairspray method before? If not the AK Interactive DVD "Winter Techniques" is an excellent teaching aid. I will be watching to see how you get on, good luck.
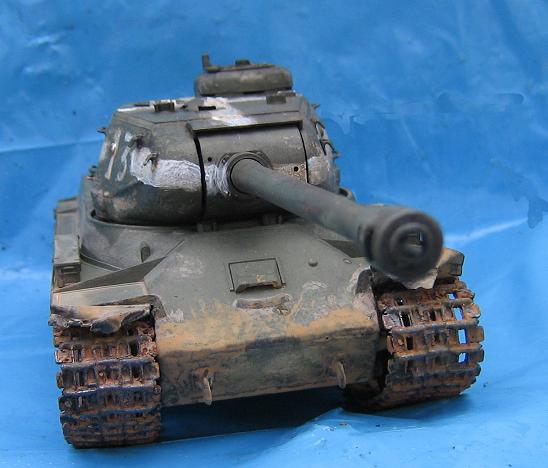
Darren I think my LHS might hasve that DVD I'll check tomorrow. This isn't my first Soviet Armour build though I built the Italeri ISU 152 and JS II and I have their tamiya doppelgangers in my stash:) I also have .....wait for it..... a couple of T-55s as well as a trumpeter pt76 and T-62

Pat
work to become not to acquire

#130
Noord-Holland, Netherlands
Joined: June 07, 2002
KitMaker: 8,797 posts
Armorama: 4,190 posts
Posted: Wednesday, August 17, 2011 - 08:47 AM UTC
Ola pat
That is neat work. I have built a few of the Trumpy KV's and I like them a lot. They do built up nice. Looking forward to the paintjob.. especially the wintercamo one with the HS technique.
Greetz Robert "FAUST" Blokker
"Wees niet onverstandig, haastig of voortvarend; alles sal regkom, as ons almal ons plig doen".
FUTBOL KAVGADIR!!!!!!!
Dublin, Ireland
Joined: November 27, 2004
KitMaker: 6,048 posts
Armorama: 4,619 posts
Posted: Thursday, August 18, 2011 - 05:50 AM UTC
I had a great sense of achievement last night having actually finished building a model. I washed the KV-1 with soapy water to remove any oily fingerprints. Some people skip this stage but I eat bacon while I model so I can't affoprd to skip it

Today was so humid that there still drops of moisture on it. So While I was waiting I got my old Italeri JS II out and tested the hairspray method on it.
I had a quick look at Mike Renaldi working hios magic on this
video then I took my wife's hairspray (She has plenty-she's a hairdresser) and gave the tank a quick coating all over. Then I let it dry and gave it an uneven coat from a GamesWorkshop Skull White spray can. The I just went at with a cheap paintbrush and water.
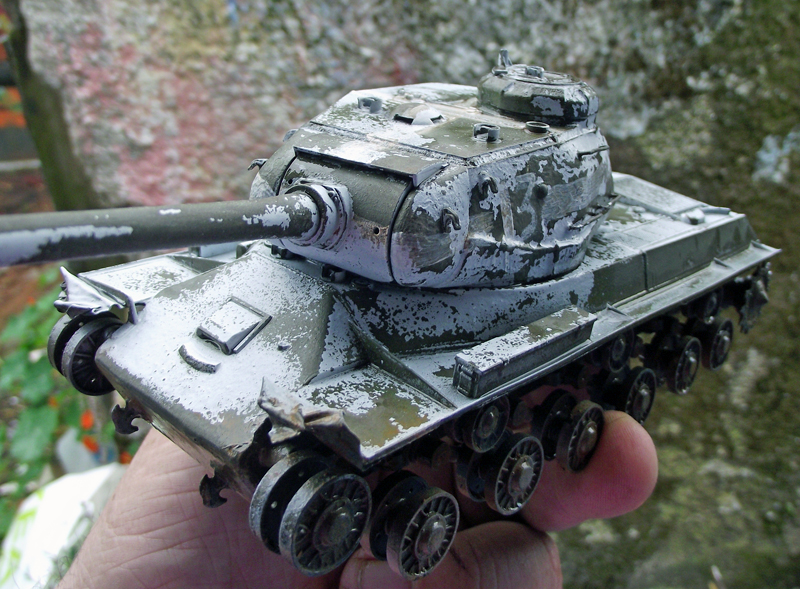
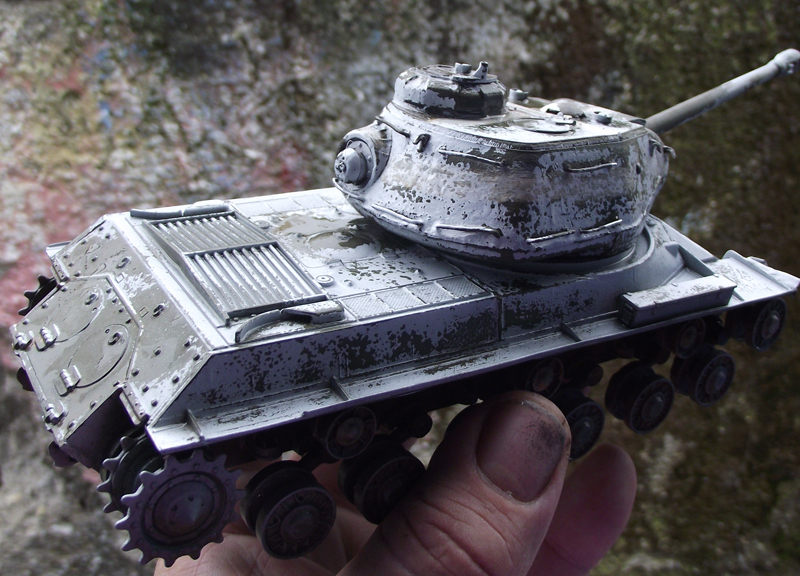
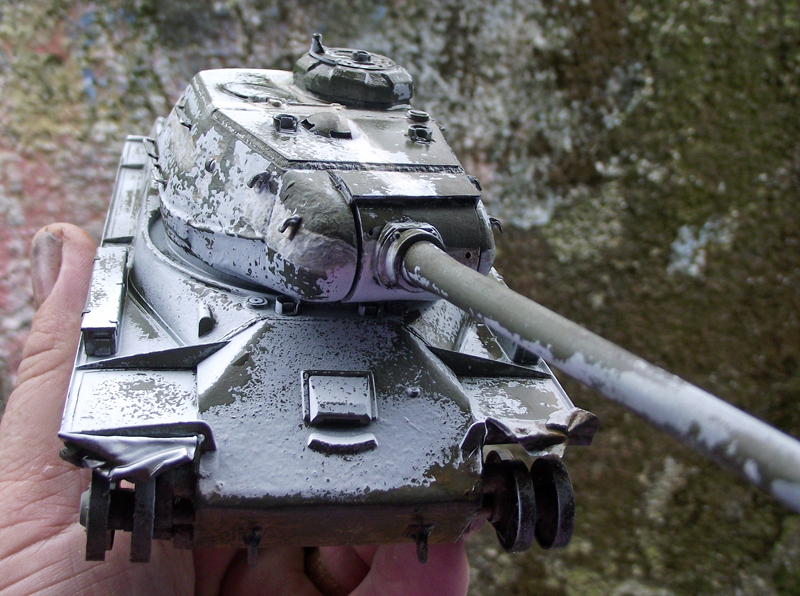
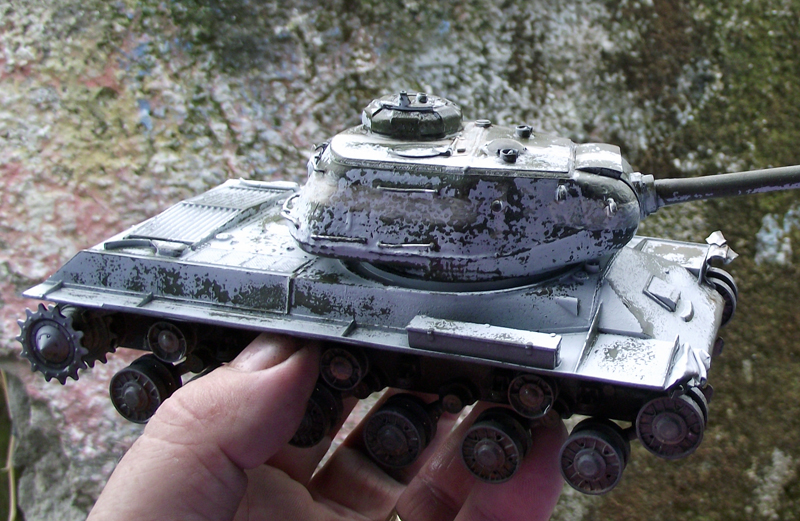
When I tackle the KV-1 I'll be more selective in the areas I scrub at but I think I have the method right.
I suppose the longer you leave it the harder it is to scrub away.
Weirdly the colour scheme echoes the moss covered wall outside my backdoor

It was raining so I took the photos standing at my back door.
Pat
work to become not to acquire
Dublin, Ireland
Joined: November 27, 2004
KitMaker: 6,048 posts
Armorama: 4,619 posts
Posted: Thursday, August 18, 2011 - 11:04 AM UTC
Pat
work to become not to acquire
CMOT
 Editor-in-Chief
England - South West, United Kingdom
Joined: May 14, 2006
KitMaker: 10,954 posts
Armorama: 8,571 posts
Posted: Thursday, August 18, 2011 - 11:40 AM UTC
Pat the groove around the middle of barrel should be filled.
Dublin, Ireland
Joined: November 27, 2004
KitMaker: 6,048 posts
Armorama: 4,619 posts
Posted: Thursday, August 18, 2011 - 01:10 PM UTC
Quoted Text
Pat the groove around the middle of barrel should be filled.
Thanks Darren, I actually knew this but somehow forgot to fill the grooves.
According to Neil Stokes:
Quoted Text
The (kit) barrel also features deep grooves around the circumference of the barrel, representing the joints between the sections of the barrel sleeve. In reality, these joints were barely visible.
It also shouldn't have the armoured band around the muzzle. I did find one photo showing the grooves
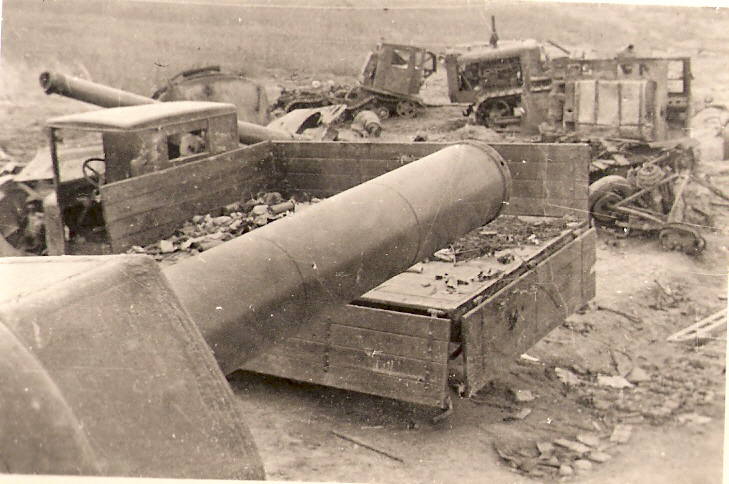
but I will fill them as they are way too prominent and file off the armoured collar.
Pat
work to become not to acquire
New Jersey, United States
Joined: November 01, 2005
KitMaker: 266 posts
Armorama: 262 posts
Posted: Thursday, August 18, 2011 - 03:17 PM UTC
Hi Pat...the 'grooves' are actually join lines between the three sections of the barrel sleeve. The sections were welded together and the joints ground down. On some vehicles they're barely visible, on others a little more so as your photo shows, but nowhere near the trenches that the Trumpeter kit (and most aftermarket barrels) depict.
Cheers,
Neil
Dublin, Ireland
Joined: November 27, 2004
KitMaker: 6,048 posts
Armorama: 4,619 posts
Posted: Friday, August 19, 2011 - 04:26 AM UTC
Thanks Neil, I'm going to try sorting it today.
Pat
work to become not to acquire
New South Wales, Australia
Joined: July 13, 2011
KitMaker: 103 posts
Armorama: 80 posts
Posted: Monday, August 22, 2011 - 12:35 AM UTC
Hi Pat
Did you just use those two spray cans (Flames of war: soviet and CHaos Black) to paint that KV-2? It looks great already!
Dublin, Ireland
Joined: November 27, 2004
KitMaker: 6,048 posts
Armorama: 4,619 posts
Posted: Monday, August 22, 2011 - 01:51 AM UTC
Thanks Ted. Yes just those two. I do have an airbrush but I'm not very expert with it and you can get good results with aerosols with practice
In this pic I have added some oil filters
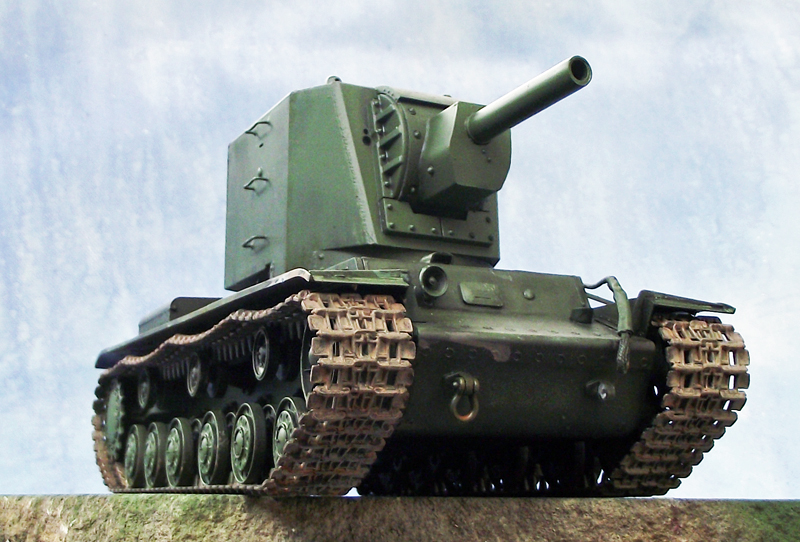
.
I noticed one of my shackles has broken off

Pat
work to become not to acquire

#130
Noord-Holland, Netherlands
Joined: June 07, 2002
KitMaker: 8,797 posts
Armorama: 4,190 posts
Posted: Monday, August 22, 2011 - 10:59 AM UTC
Holy crap pat that is some awesome result with spray cans.
great base and the filters really make it lighter and more lifely. Should be a good undercoat for the whitewash.
It is a pitty you don't feel at home completely yet with the airbrush. I bet you could do some magic with it. If you already can get this result from spraycans you should be Rembrandt with something that gives you more control over the applying of paint.
Looking forward to the rest.
With friendly greetz
Robert
Greetz Robert "FAUST" Blokker
"Wees niet onverstandig, haastig of voortvarend; alles sal regkom, as ons almal ons plig doen".
FUTBOL KAVGADIR!!!!!!!
Dublin, Ireland
Joined: November 27, 2004
KitMaker: 6,048 posts
Armorama: 4,619 posts
Posted: Tuesday, September 20, 2011 - 10:06 AM UTC
Quoted Text
Holy crap pat that is some awesome result with spray cans.
great base and the filters really make it lighter and more lifely. Should be a good undercoat for the whitewash.
It is a pitty you don't feel at home completely yet with the airbrush. I bet you could do some magic with it. If you already can get this result from spraycans you should be Rembrandt with something that gives you more control over the applying of paint.
Looking forward to the rest.
With friendly greetz
Robert
Thanks Robert sorry for the late reply- I guess four years of Art College weren't wasted for me

I did the hairspray and overspray with white paint a few days ago but the result was awful. I used a spray can of white paint and it proved nearly impossible to scrub off and when I finally made a dent in it too much came off. I also managed to break some fender supports and grab handles.
So I tried again tonight
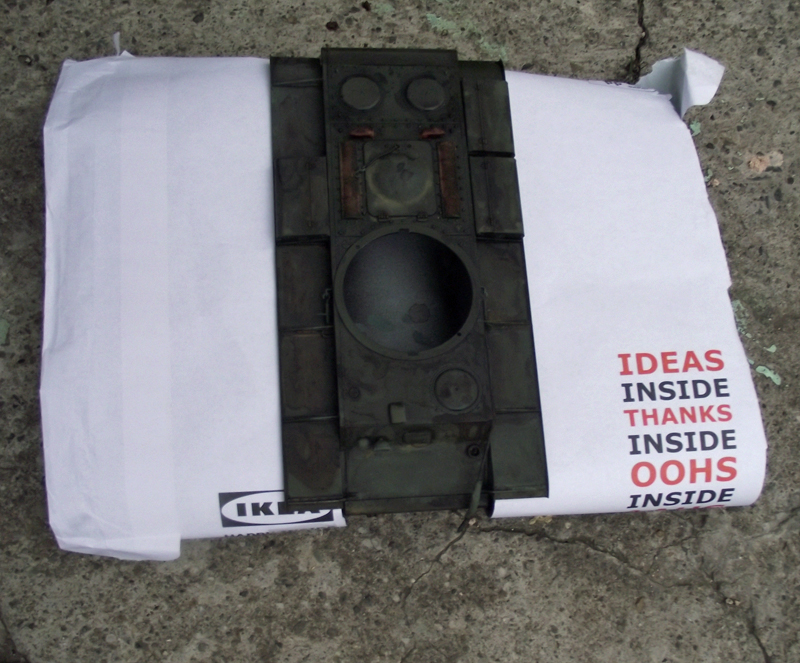
Hull with tracks masked off
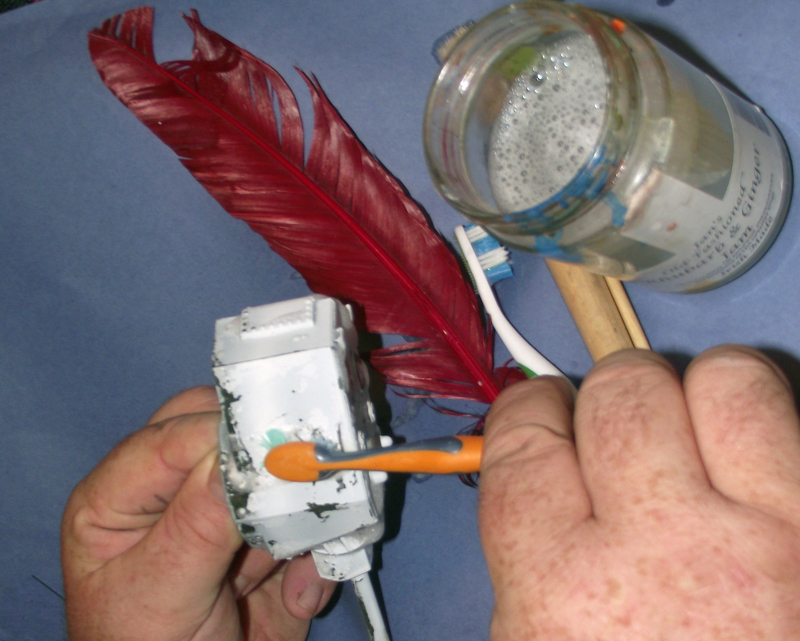
Working with various brushes
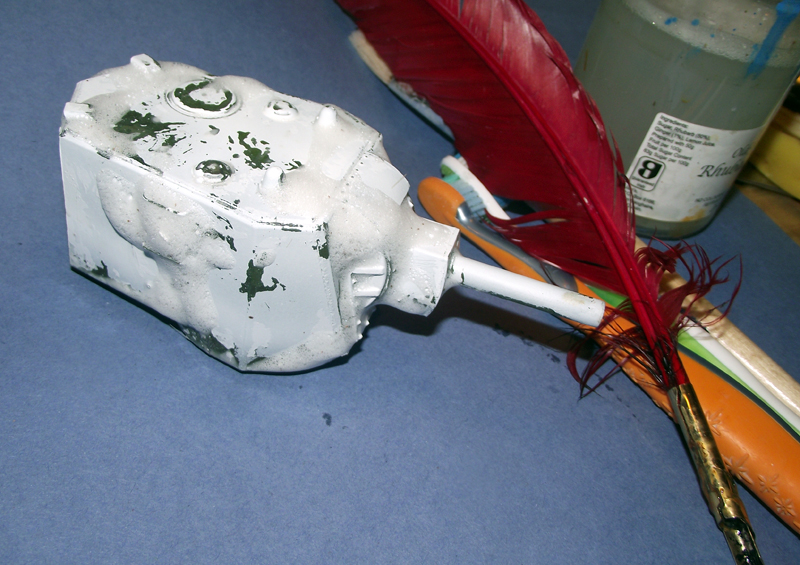
Too dark to take photos of the results now so I'll leave that til tomorrow
I used the nib of the quill to scratch away the white paint in tough spots
Pat
work to become not to acquire
CMOT
 Editor-in-Chief
England - South West, United Kingdom
Joined: May 14, 2006
KitMaker: 10,954 posts
Armorama: 8,571 posts
Posted: Tuesday, September 20, 2011 - 11:44 AM UTC
Pat I used the hairspray method to remove green paint from over the black rubber side skirts and mud flaps on a T80. I found that I got the best results by putting on two layers of hairspray, and I left the paint over the hairspray to dry for a little over and hour before attacking it.
Dublin, Ireland
Joined: November 27, 2004
KitMaker: 6,048 posts
Armorama: 4,619 posts
Posted: Wednesday, September 21, 2011 - 04:06 AM UTC
I had a look in your gallery Darren- that's a good result- couple of questions. Did you let each layer of hair spray dry and for how long? And what type of paint did you paint over it and how did you apply it?
Here are two shots of the result- not great photos as the weather is awful here in Dublin

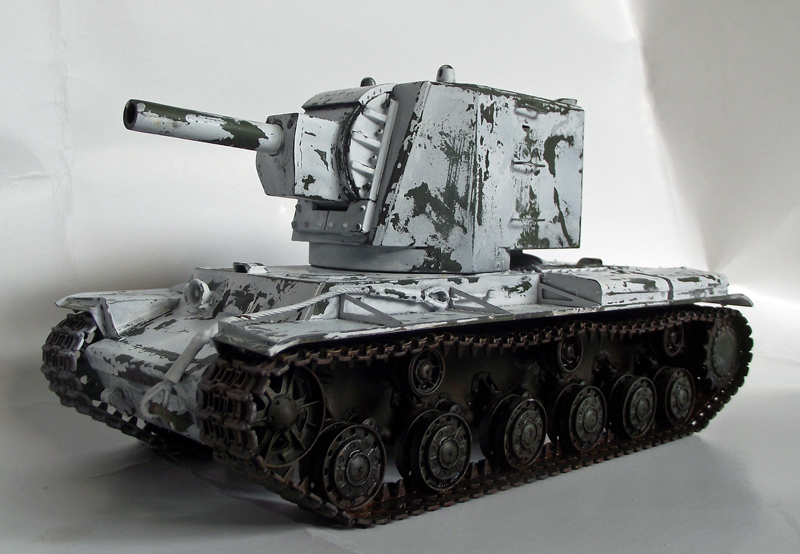
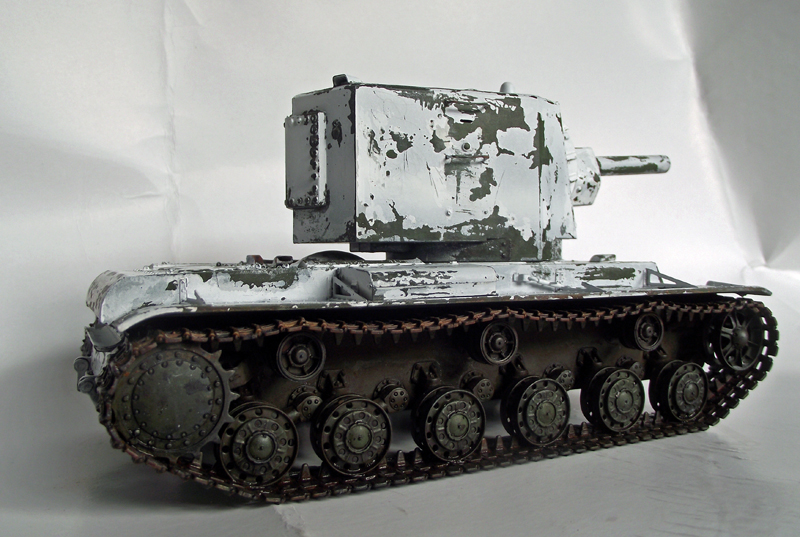
Pat
work to become not to acquire

#284
Northern Ireland, United Kingdom
Joined: October 04, 2006
KitMaker: 3,094 posts
Armorama: 2,942 posts
Posted: Wednesday, September 21, 2011 - 04:37 AM UTC
Hey Pat, thats looking good, suitably scratched and worn!
I've had some bad experiences with hairspray myself. One brand lifted everything off including primer! I guess I go about it in the same way Darren does, although usually I only go for one coat. Then I leave it to dry before going at it with a frayed old brush and a toothpick. I find the toothpick to be quite effective at creating all sorts of scratches.
On The Bench:
Ethiopian BMP-1 (Trumpeter 1/35)
AMX-13/75 (Takom 1/35)
Dublin, Ireland
Joined: November 27, 2004
KitMaker: 6,048 posts
Armorama: 4,619 posts
Posted: Wednesday, September 21, 2011 - 05:00 AM UTC
Thanks Karl, I was using everything from paintbrushes, old toothbrushes, wooden sticks and an old quill pen but the tool I found most useful was an old hardened clogged up paint brush to scratch the white wash.
The contrast looks very stark at the moment but I'm going to try out AK interactive's "Winter Streaking Grime" to tone it down.
Pat
work to become not to acquire

#284
Northern Ireland, United Kingdom
Joined: October 04, 2006
KitMaker: 3,094 posts
Armorama: 2,942 posts
Posted: Wednesday, September 21, 2011 - 05:07 AM UTC
Quoted Text
Thanks Karl, I was using everything from paintbrushes, old toothbrushes, wooden sticks and an old quill pen but the tool I found most useful was an old hardened clogged up paint brush to scratch the white wash.
The contrast looks very stark at the moment but I'm going to try out AK interactive's "Winter Streaking Grime" to tone it down.
About toning it down- I'm doing a couple of 1/35 helmets at the minute with the hairspray technique. I whitewashed them and then chipped them off. I sealed my work with some matt varnish and then drybrushed using some white- this tones it down right away but also suggests that some residue from the white paint has been left. I'll be adding some washes to them later but the drybrushing certainly looked quite good after the chipping.
On The Bench:
Ethiopian BMP-1 (Trumpeter 1/35)
AMX-13/75 (Takom 1/35)
Virginia, United States
Joined: February 05, 2002
KitMaker: 6,149 posts
Armorama: 4,573 posts
Posted: Wednesday, September 21, 2011 - 05:34 AM UTC
Pat-- as always, splendid workmanship! I am closely following your procedures as I hope to replicate on my latest Sherman.
Well done
DJ
DJ Judge
COL (R), USA
"Tanker Boots do not a Tanker Make."
CMOT
 Editor-in-Chief
England - South West, United Kingdom
Joined: May 14, 2006
KitMaker: 10,954 posts
Armorama: 8,571 posts
Posted: Wednesday, September 21, 2011 - 05:44 AM UTC
Tamiya base paint allowed to dry for 48 hours two layers of hairspray with a couple of hours between them next day Tamiya paint applied and given an hour or so to cure before I attacked it with a hogs hair brushes of various size. I hope it helps Pat


 Have you tried the hairspray method before? If not the AK Interactive DVD "Winter Techniques" is an excellent teaching aid. I will be watching to see how you get on, good luck.


Have you tried the hairspray method before? If not the AK Interactive DVD "Winter Techniques" is an excellent teaching aid. I will be watching to see how you get on, good luck.


 It was raining so I took the photos standing at my back door.


 .
.


