Hi guys
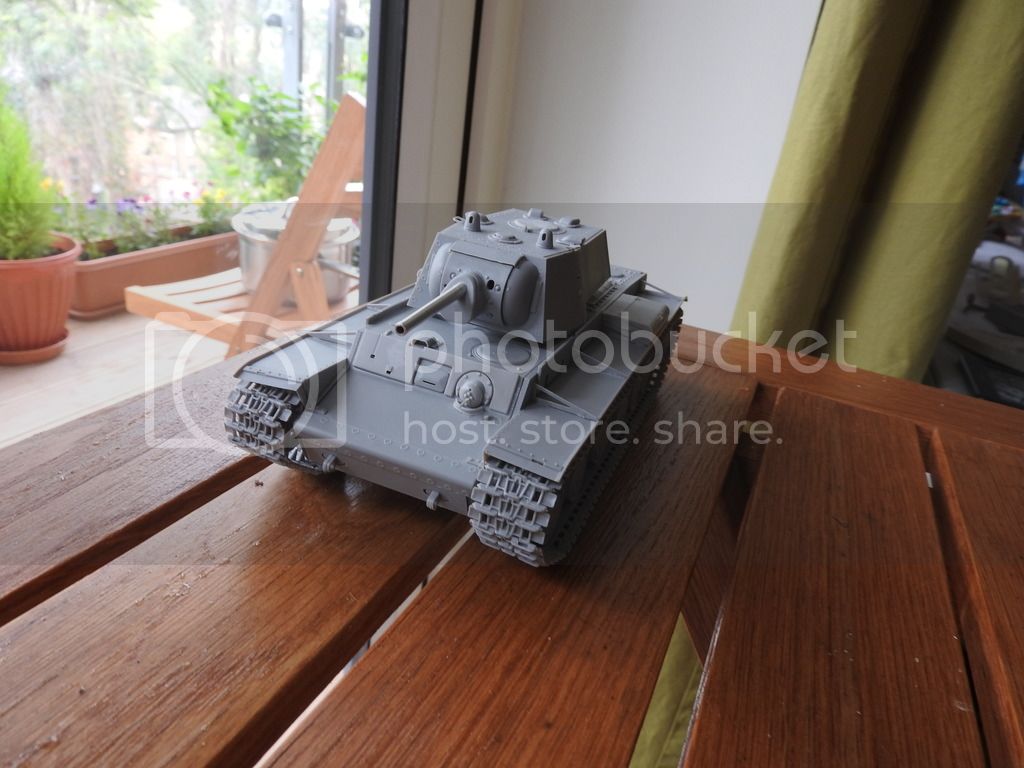
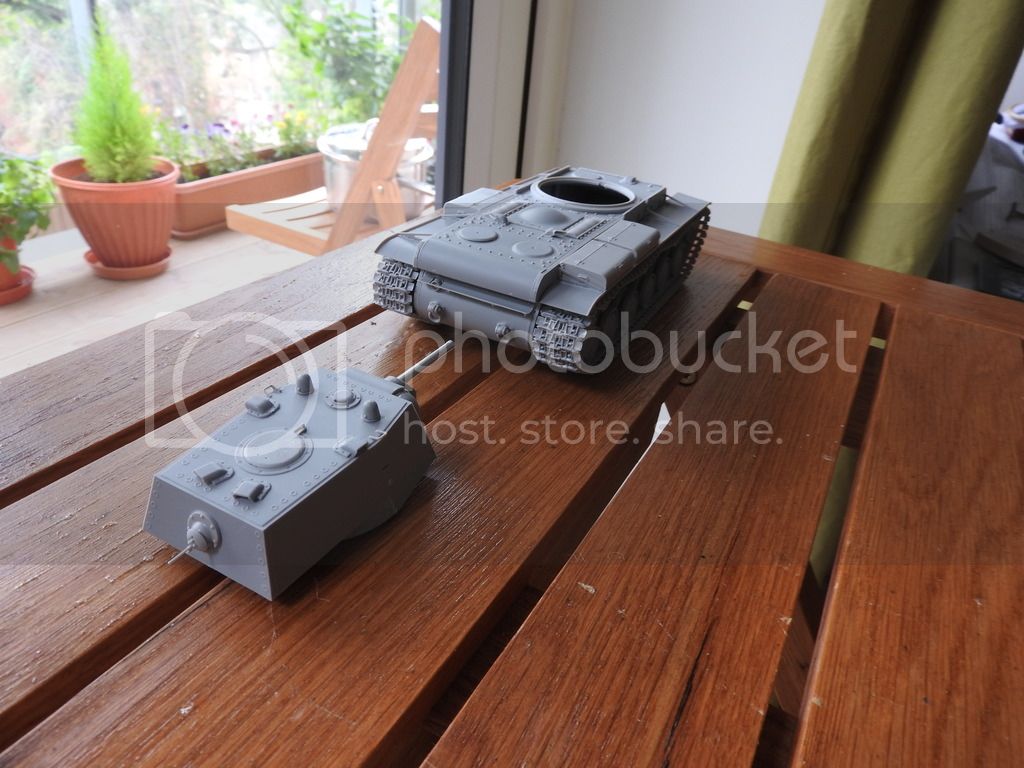
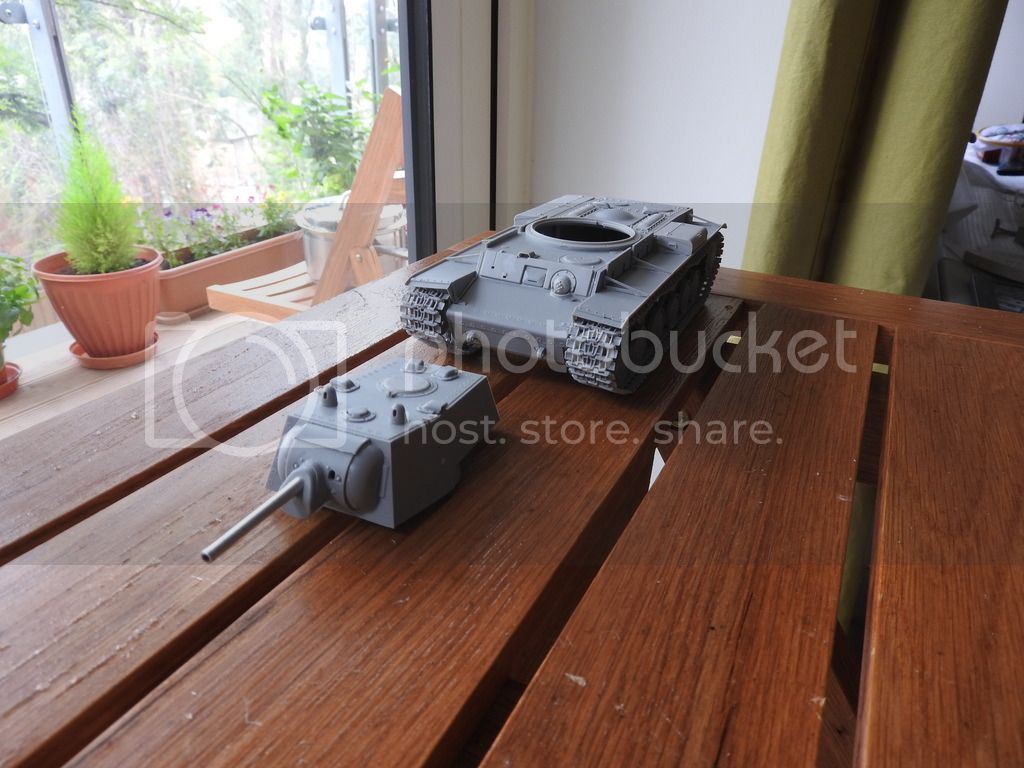
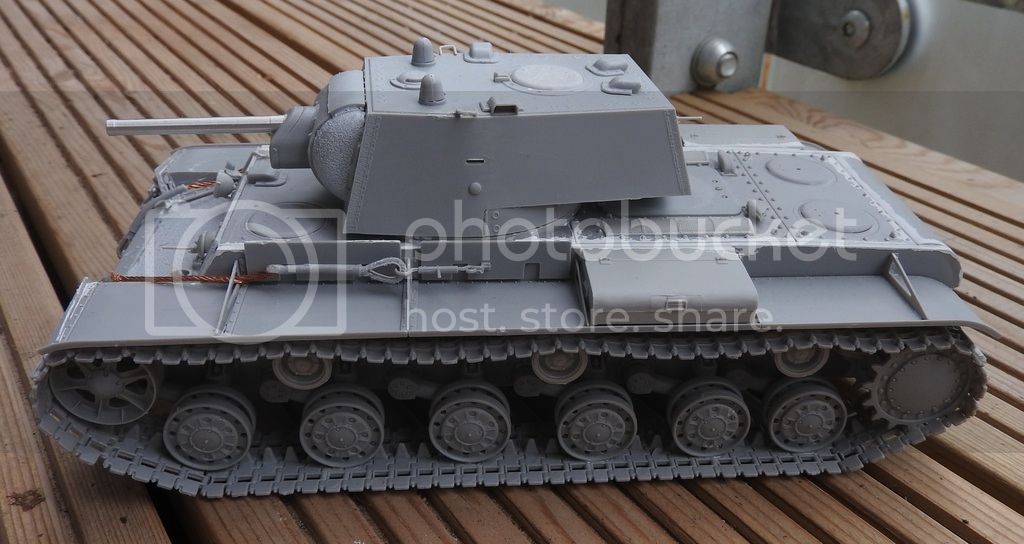
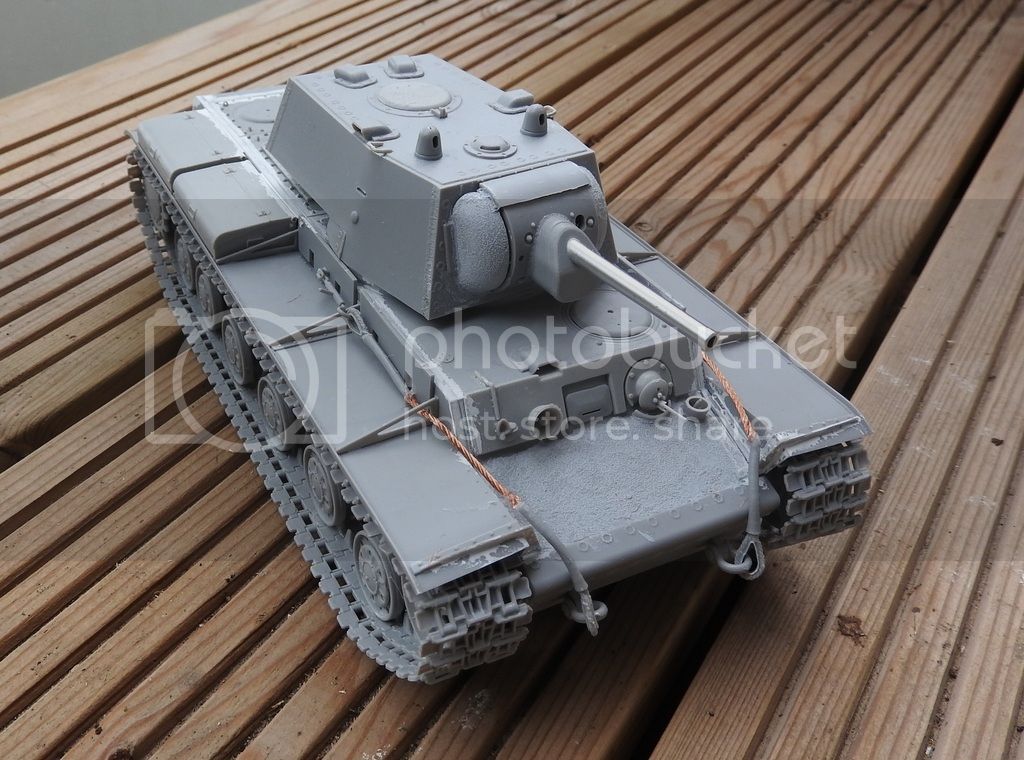
It's been a little while without any update from me. We have had relatives staying with us which has put my modelling time right down. However I have been plodding along through the build and there are now just a few details left to add, then some work with filler, then hopefully we'll be ready for painting.
These photos should be better than the last lot
Campaigns
Where Armorama group builds can be discussed, organized, and updates posted.
Hosted by Darren Baker, Richard S.
Big country, big tanks
David1988
England - East Anglia, United Kingdom
Joined: September 18, 2014
KitMaker: 91 posts
Armorama: 91 posts
Joined: September 18, 2014
KitMaker: 91 posts
Armorama: 91 posts
Posted: Saturday, October 10, 2015 - 03:11 AM UTC
Black_sheep
Bayern, Germany
Joined: December 11, 2009
KitMaker: 823 posts
Armorama: 170 posts
Joined: December 11, 2009
KitMaker: 823 posts
Armorama: 170 posts
Posted: Sunday, October 18, 2015 - 12:23 AM UTC
@Matthew: Thanks mate for your kind words. I also wait for a paint update of your Stalin!
Today there is my progress report of my Azeri T-72AV: As the turred was a solid block I drilled open the commanders and loaders hatch in order to be able to install a crew for this vehicle. It was quite some work *couch couch* but now I do have what I want. The vehicle build is now almost finished, just the machinegun, the log and the towcable have to be installed then the work with glue and file is over. I chose to take the crew figures from TANK´s "Russian Modern tank crew 1993 - 2005 as it fits closely to the uniforms of Azerbaidjian exept for the helmets. These looks very US-like and I opted to use HORNET excellent modern US-tanker heads for them. The driver got the one with driving glasses. I will install the microfones at the very end of painting as they will otherwise very easily break as my experiences tell me. Have a look:
Cheers!
Thomas
Black_sheep
Bayern, Germany
Joined: December 11, 2009
KitMaker: 823 posts
Armorama: 170 posts
Joined: December 11, 2009
KitMaker: 823 posts
Armorama: 170 posts
Posted: Friday, October 23, 2015 - 02:17 PM UTC
David1988
England - East Anglia, United Kingdom
Joined: September 18, 2014
KitMaker: 91 posts
Armorama: 91 posts
Joined: September 18, 2014
KitMaker: 91 posts
Armorama: 91 posts
Posted: Friday, October 23, 2015 - 09:40 PM UTC
Hi all,
I am calling the construction phase on my KV-1 complete. After I took these photos I just dabbed on a bit more filler and casting texture, when that dries, I think I can prime it
URL=http://s44.photobucket.com/user/Davey1988123/media/kv-1/DSCN0349_zpsyhavoyzm.jpg.html][/URL]
I have taken a bit of time to look back through the other builds and, Matthew, I have to say your IS-2 is looking fantastic! The Zvezda kit is unrecognisable with all the detailing and of course Mr. Surfacer.
Thomas, your T-72 is also looking great in primer. I always thought the T-72A with ERA is a tricky subject as different examples seem to have the ERA mounted in different arrangements and different ways
I do hope everyone is having a nice weekend.
David
Black_sheep
Bayern, Germany
Joined: December 11, 2009
KitMaker: 823 posts
Armorama: 170 posts
Joined: December 11, 2009
KitMaker: 823 posts
Armorama: 170 posts
Posted: Saturday, October 24, 2015 - 12:57 AM UTC
Hey David,
great job until now with your beast I wand to see him in full 4BO now :-)
Yes the T-72 with ERA is a bit tricky especially in this Azerbaidjiani version I chose with its unusual camouflage colours. I have some pictures of a recent parade out of the internet and this is my source how to place the ERA blocks at the hull. As far as I can see from the pictures there are vehicles with different fittings. Some with storage boxes some without and some with the new windsensors and some now... I decided to just use the normal outfit I have in the kit which is also possible as I have seen some of these vehicles too in the pictures.
Cheers
Thomas
Black_sheep
Bayern, Germany
Joined: December 11, 2009
KitMaker: 823 posts
Armorama: 170 posts
Joined: December 11, 2009
KitMaker: 823 posts
Armorama: 170 posts
Posted: Monday, October 26, 2015 - 01:25 AM UTC
Last weekend I started to paint my Azerbajian tank crew. I had a few pictures of real tank crew members and some friendly guys helped me out with more clear pictures of the uniform details so I was able to finish up the driver, gunner and commander this evening. It was a bit difficult for me as a beginner in figure painting to finish up the black uniform properly with lights and shadows. I didn´t want do overdo it so I tried it with Vallejos german tanker black and tanker black highlight colors and I´m very satisfied.
The tank badge at their left breast is the same as the former soviet style rhomboid with a tank inside. The white nameplate is, although it looks like usual nameplates out of cloth, obviously not not sewn on the uniform but attached but attached by needle. I therefore used lead foil from a used up whine bottle to create this one.
I hope you like this one, comments welcome:
and this is how the real guys look alike:
Northern_Lad
United Kingdom
Joined: September 17, 2012
KitMaker: 462 posts
Armorama: 417 posts
Joined: September 17, 2012
KitMaker: 462 posts
Armorama: 417 posts
Posted: Sunday, November 01, 2015 - 11:19 PM UTC
There is some great work going on in this thread. I really like the Tamiya T72 with ERA. The KV1 is a very nice and clean build. Also the 1:72 revell/armory T-72B is looking good too.
I must admit I have un-enrolled myself from this campaign and another half dozen campaigns spread across Armorama and Aeroscale. It was all getting too stressful. I like modelling because I can de-stress. The campaigns were, unfortunately, taking things in the opposite direction. So In future I’m just going to build what I want when I want, without deadlines.
Stalin would have had me shot, right?! For unpatriotic tendencies…
If anyone’s interested, the Zvezda JS2 with AM goodies now has paint and decals. The Friuls are complete, weathered, and fitted. What remains is the endless weathering for the rest of the tank. I’ll try to post a photo sometime soon.
Cheers
Matthew
Posted: Monday, November 02, 2015 - 05:38 AM UTC
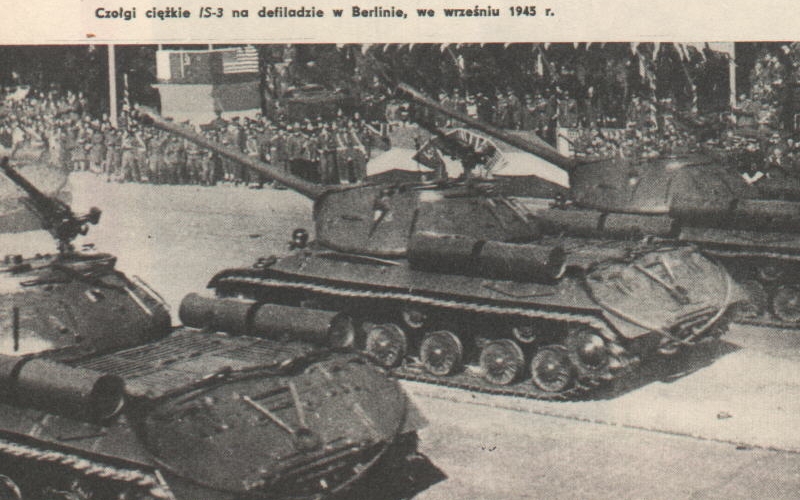
I finished the JS-3 as seen in the Berlin Victory Parade in July of 1945. I used several historical photos and videos as references. I finished the high surfaces in a semi gloss to give it that parade polish, and finished the tracks and rear end with rubble dust pigment. The juxtaposition of the polished front end and dirty rear ends was particularly interesting to me, and is clearly seen in the pictures and footage.
TankSGT
New Jersey, United States
Joined: July 25, 2006
KitMaker: 1,139 posts
Armorama: 946 posts
Joined: July 25, 2006
KitMaker: 1,139 posts
Armorama: 946 posts
Posted: Tuesday, November 03, 2015 - 04:15 PM UTC
Shawn, the Stalin came out really nice. I like your figure pose.
Tom
Tom
Anmoga
Spain / España
Joined: November 18, 2004
KitMaker: 456 posts
Armorama: 333 posts
Joined: November 18, 2004
KitMaker: 456 posts
Armorama: 333 posts
Posted: Friday, November 06, 2015 - 06:06 PM UTC
I don't know what I did with the photo I took before cutting any pieces from the sprues tree.
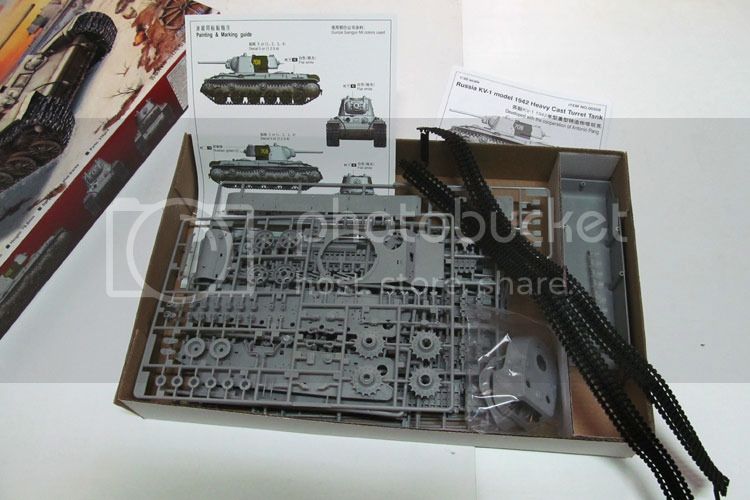
I am uploading the photos of the current state of my KV-85 which is with some pieces cutted from the sprues trees but nothing has been trimmed yet.
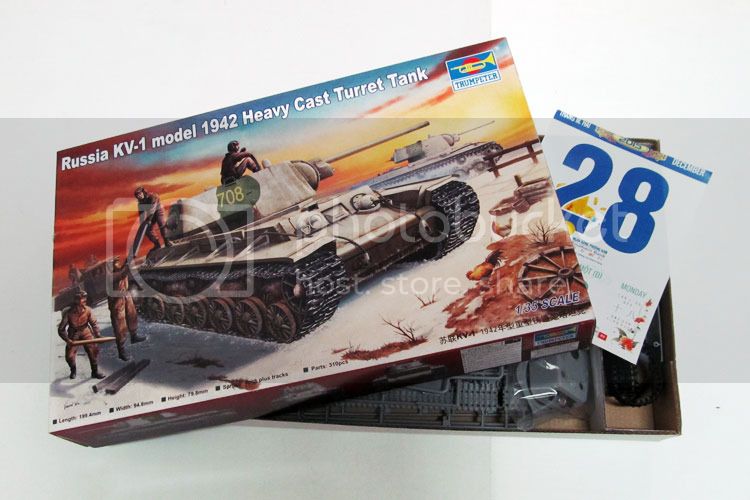
I am also uploading a photo of my flight tickets to China, where I bought the kit with some Bronco stamps stating "Only sales in mainland China", which are from 18th August 2015.
I hope there are no issues in doing this kit for the campaign.
Best regards,
Angel
Black_sheep
Bayern, Germany
Joined: December 11, 2009
KitMaker: 823 posts
Armorama: 170 posts
Joined: December 11, 2009
KitMaker: 823 posts
Armorama: 170 posts
Posted: Friday, November 06, 2015 - 11:30 PM UTC
@Matthew: I´m glad you like my work at my T-72AV. I will speak to Stalin they will change the sentence to just 10 years forced labour in a comfortable Gulag in Siberia
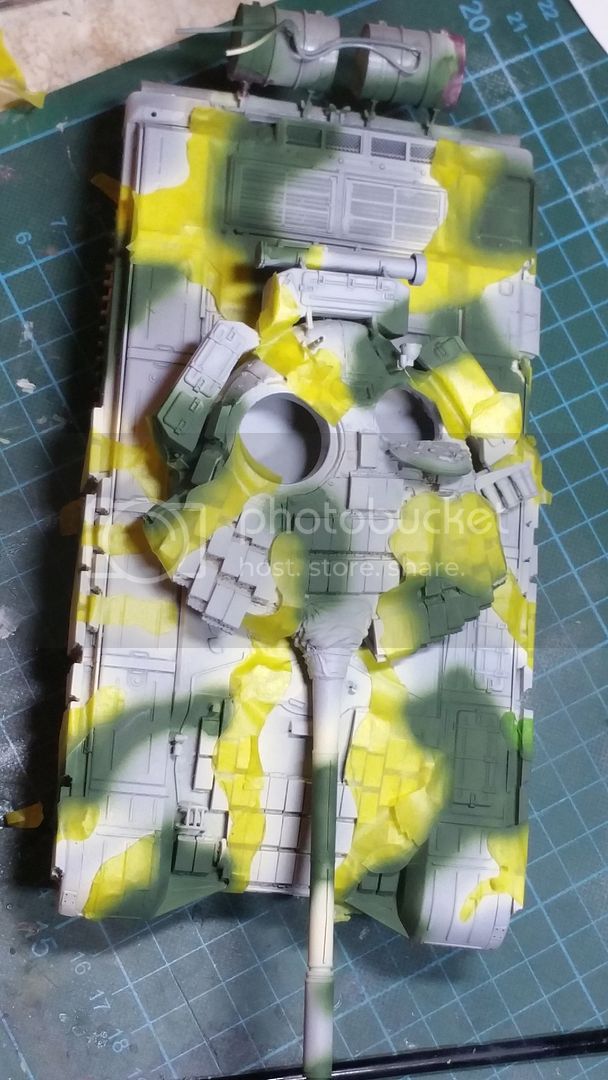
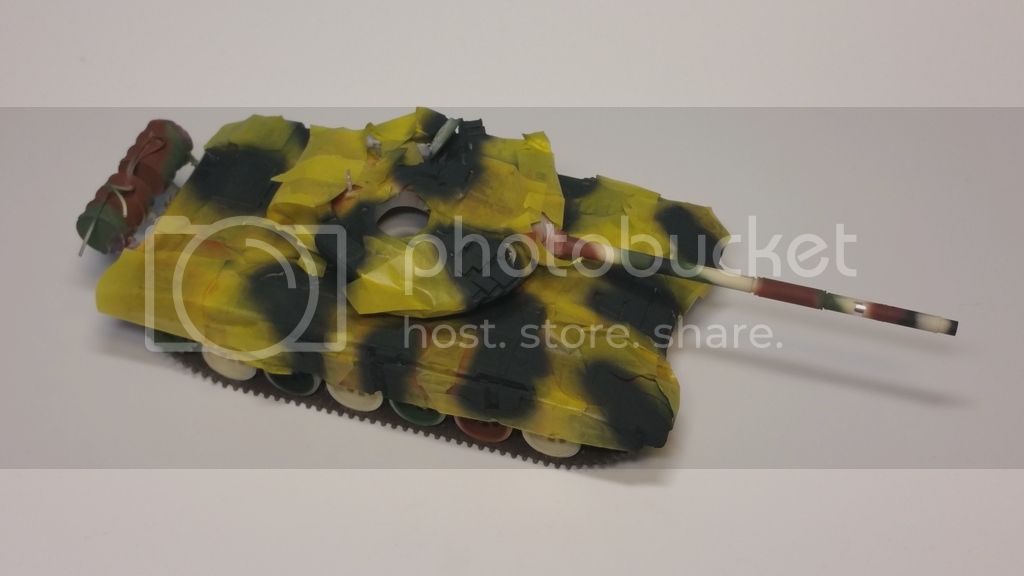
This is my newest update: I had a masking battle with Kamoi tape and my tank. It was everything else than an easy job because there are almost no smooth surfaces and I´m sure there will be a lot of correction work later after removing all the tapes after the green, brown and black colors.
Unfortunately the color lifted at the metal barrel although it was primed with Mr. Surfacer... I have to spray the colors with airbrush and make it hard edged with the brush after.
wish me luck now...
Black_sheep
Bayern, Germany
Joined: December 11, 2009
KitMaker: 823 posts
Armorama: 170 posts
Joined: December 11, 2009
KitMaker: 823 posts
Armorama: 170 posts
Posted: Sunday, November 08, 2015 - 04:34 PM UTC
Update about what happened during my weekend´s work:
After masking up the first colour layer with very light brown color I masked these areas and continued with the green color:
...after this I masked the green areas again and continued with the brown color:
...after this I masked the brown areas again and continued with the final black color:
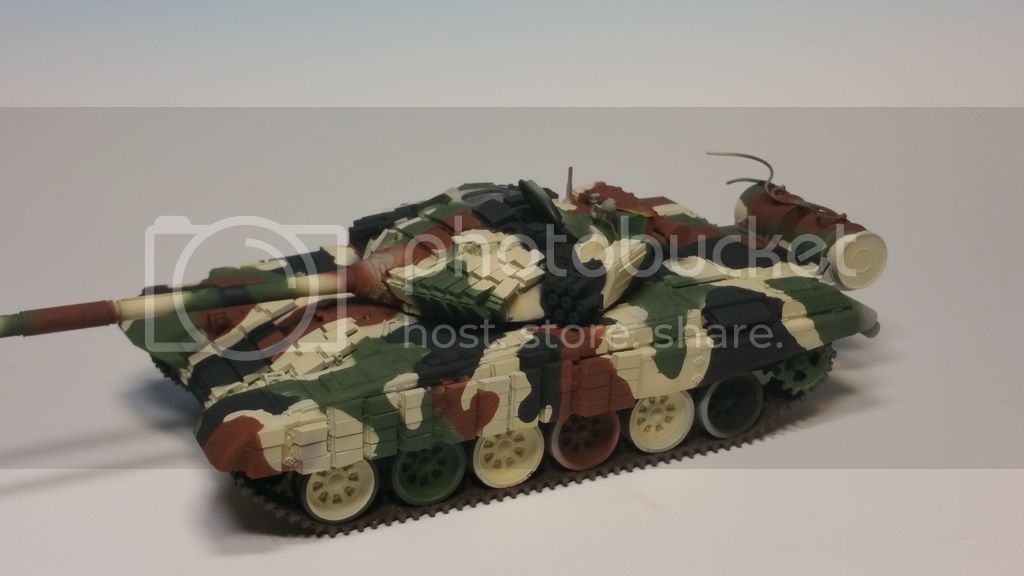
...and this morning as I was very curios about the final result I was not able to wait until I return back from work this evening I removed all the masks to see the outcome of my first masking job ever and I can say I´m very pleased about it; just a few spots here and there which need to be improved with a fine brush but nothing serious. For me it looks like a current time Azerbaijan tank:
What do you think?
TankSGT
New Jersey, United States
Joined: July 25, 2006
KitMaker: 1,139 posts
Armorama: 946 posts
Joined: July 25, 2006
KitMaker: 1,139 posts
Armorama: 946 posts
Posted: Sunday, November 08, 2015 - 04:54 PM UTC
Looks good the masking worked out great. Its a hell of a cammo job. The bright colors and ERA blocks make it look sort of like a Lego tank.
I know its still a long way from finished and will be toned down. Again it looks good.
Tom
I know its still a long way from finished and will be toned down. Again it looks good.
Tom
Black_sheep
Bayern, Germany
Joined: December 11, 2009
KitMaker: 823 posts
Armorama: 170 posts
Joined: December 11, 2009
KitMaker: 823 posts
Armorama: 170 posts
Posted: Tuesday, November 10, 2015 - 12:30 AM UTC
Hi Thomas,
I´m glad you like it. Yes the color contrast look a bit stark right now like LEGO but this will improve after the oilwashing.
Cheers
I´m glad you like it. Yes the color contrast look a bit stark right now like LEGO but this will improve after the oilwashing.
Cheers
ltb073
New York, United States
Joined: March 08, 2010
KitMaker: 3,662 posts
Armorama: 3,078 posts
Joined: March 08, 2010
KitMaker: 3,662 posts
Armorama: 3,078 posts
Posted: Saturday, November 14, 2015 - 08:51 PM UTC
Black_sheep
Bayern, Germany
Joined: December 11, 2009
KitMaker: 823 posts
Armorama: 170 posts
Joined: December 11, 2009
KitMaker: 823 posts
Armorama: 170 posts
Posted: Saturday, November 21, 2015 - 09:17 PM UTC
Well Gentlemen,
I finished my Azerbaijani Army T-72AV today. After A thorough wash with burnt umber oils I glued in the Lenses from SKP, glued the upper hull together with the lower one, made an antenna out of wire at the turrets antenna socket and installed the crew. I was hesitating to weather it; as I have some pictures of an Army parade in 2014 I also wanted to keep this vehicle rather clean as it is. I just did some small diesel stains at the tank filler caps and got the tow chain a bit rusty.
I hope you like the final result, There is always room for improvement but I was happy that my masking experiment worked this way and I do have the courage now to mask another vehicle next time.
I hope you all like my efforts! Best Regards from rainy Germany
Thomas
David1988
England - East Anglia, United Kingdom
Joined: September 18, 2014
KitMaker: 91 posts
Armorama: 91 posts
Joined: September 18, 2014
KitMaker: 91 posts
Armorama: 91 posts
Posted: Saturday, December 05, 2015 - 07:26 PM UTC
Hi guys! I hope everyone is well.
Well there have been some fantastic pictures put up since I last posted here. The T-72AV looks great, Thomas, it is quite a vivid and interesting colour scheme!
The IS-3 has also come out very realistically given that it is a parade vehicle, Shawn. I was watching an interesting documentary about the end of WWII which suggested that the Red Army took great efforts to ensure that the Western allies would not know that the new IS-3 tanks would be present at the parade - when they travelled to the starting line, much of the vehicles was covered up by canvas. The result was that the IS-3 tanks were the heaviest vehicles present at the parade and made a great impression on the spectators.
Good luck to Angel and Sal who have joined recently - hoping to see more of your builds soon!
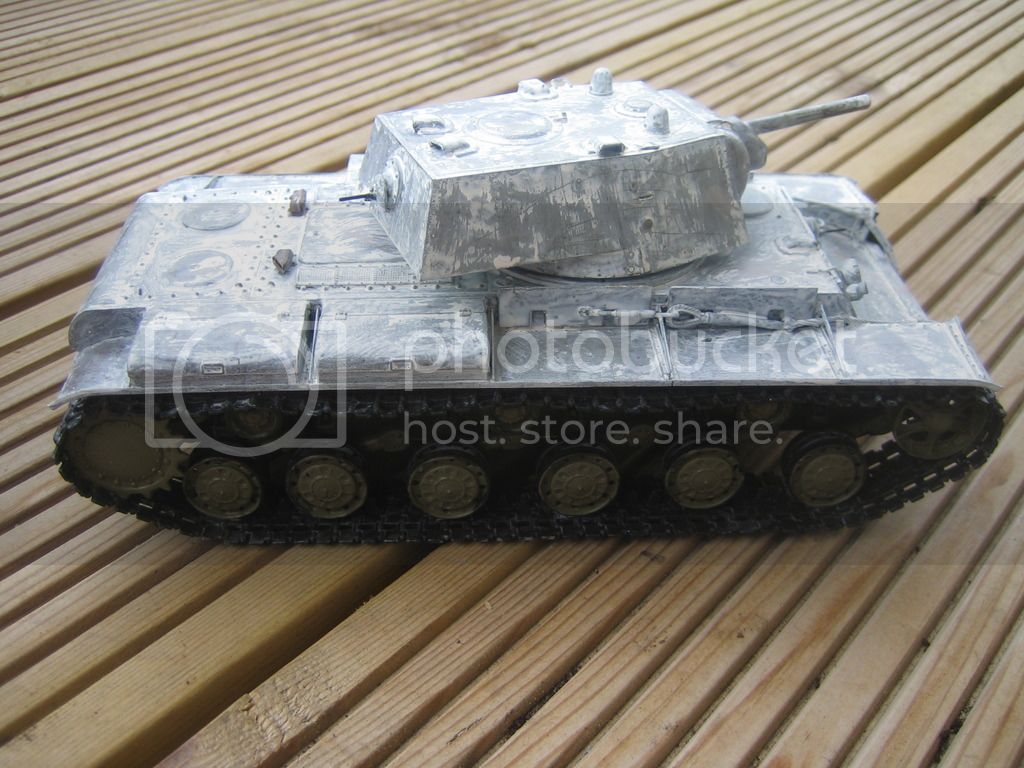
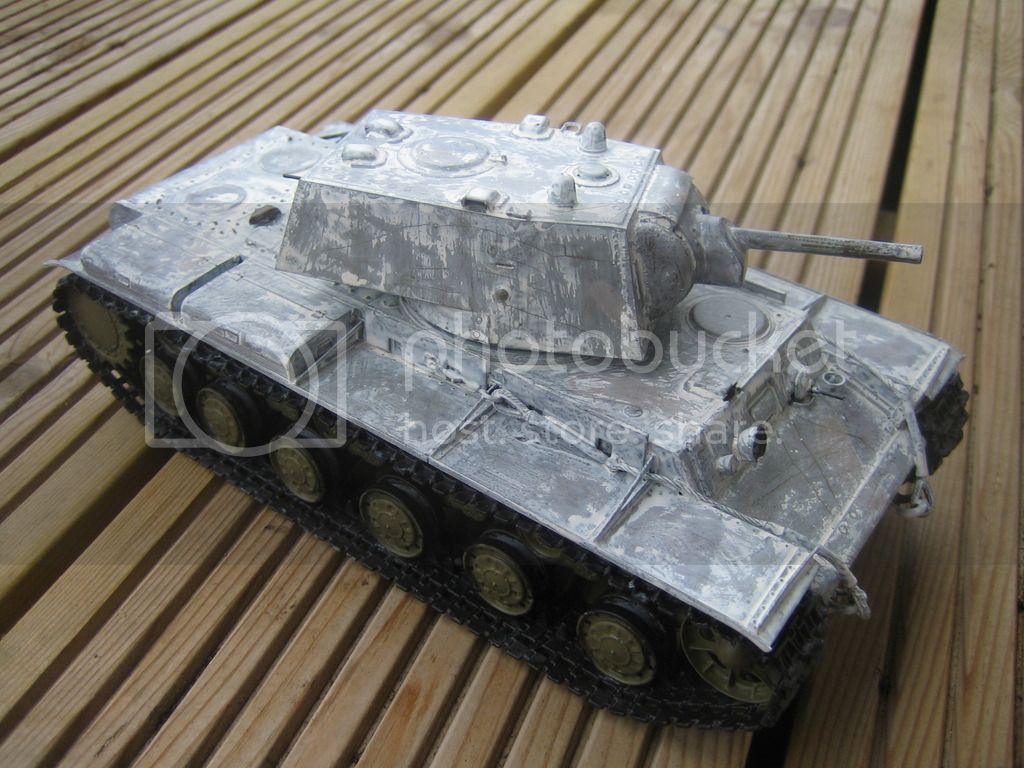
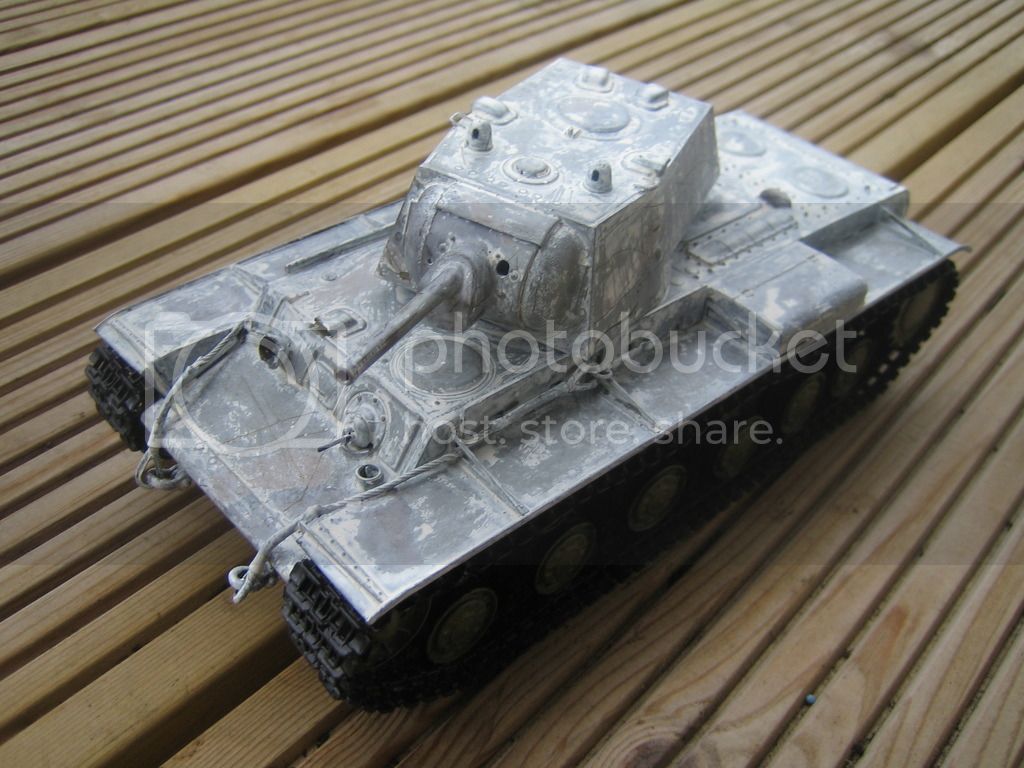
Well I have still been plodding along. After a base coat of 4BO a very rough camouflage of dark and mid brown was applied followed by an all-over whitewash. This was done with a product from Ammo which is washable with water and can be scratched off until sealed with a varnish. This time I did not follow the instructions, which say to leave it for 24 hours before washing, instead I left it for about 12 hours and then used warm water to help it wash off better. I wanted quite a worn whitewash so some of the camouflage would show through. I also took modelling tweezers and the blade of a hobby knife and made scratches on the side of the turret, for example, where you would expect the tank to be scraped by tree branches and so on.
Here are the photos - these are with a less good camera as my better half took the better one to visit her relatives. It has also not helped that finding natural light in my country is a challenge at this time of year
Next I want to apply pigments.
David
Bluestab
South Carolina, United States
Joined: December 03, 2009
KitMaker: 2,160 posts
Armorama: 1,906 posts
Joined: December 03, 2009
KitMaker: 2,160 posts
Armorama: 1,906 posts
Posted: Sunday, December 06, 2015 - 12:51 AM UTC
I'm in with a Trumpy Kv-2. It's the captured one with the German cupola and ammo rack for the rear. The Soviet version was out of stock at the time so I bought it with the idea of building it as a Soviet vehicle. I'm not sure if I'll do that...easier to just catch the Soviet version in-stock. So unless I change my mind during the build I'll be doing the captured version.
I should start ...well I'm not really sure. I've got a full plate at them moment. I could start tonight or next month.
panzerbob01
Louisiana, United States
Joined: March 06, 2010
KitMaker: 3,128 posts
Armorama: 2,959 posts
Joined: March 06, 2010
KitMaker: 3,128 posts
Armorama: 2,959 posts
Posted: Wednesday, December 09, 2015 - 10:04 AM UTC
Mr. Moderator!
Hi! I very suddenly realized, as I was rushing along through building the Trumpeter "Russia KV "Big Turret" kit 00311 that I just picked up Friday last while out here in Prescott AZ for the week that you are actually running a campaign for BIG Tanks!
The KV "Big Turret" was the early version KV-2 - and at about 53 tons+ empty, it certainly counted as a Heavy Tank in 1939, when the Sov's started working on it as a "Bunker Buster" assault tank.
Any way.... Seeing as it is a Heavy, and there is this campaign devoted to this sort of heavy stuff.. I thought that I might petition, plead, grovel, beg,to be allowed to jump in! It would certainly be pleading and begging, as, while I started this nice-and-rather-easy old kit just Monday night(PH Day!), I did not even take a start pic at that time (hey - I'm building this spur-of-moment on the fly while doing serious stuff during a short visit to Prescott to work on my retirement home...!)... and I AM actually mostly done with the assembly (save for adding a bunch of PE and a metal barrel which I just ordered TODAY!)... But, hey! All I can do is ask!
Up to this point, I've done about 90% of the major stuff other than building the link-and-length tracks the kit supplies - all OOTB. My plan from here is to complete with the styrene fenders, and add on PE mesh screens and various tool-boxes and details and put in a metal barrel. The paint plan is... surprise... a ca 1941 BO4 green. That's the color these apparently came in. Followed by some dirt and dust.
It's my available heavy option and this campaign seems to be suddenly tailor-made for me to post this in!
Here's my 3-day WIP pic just taken at 2123hrs AZ time this evening (the ale is not part of the build, but Mudshark's Full Moon Belgian style wheat is walloping good as fuel for plastic work! ):
Hope you'll let me in!
Cheers!
Bob
ltb073
New York, United States
Joined: March 08, 2010
KitMaker: 3,662 posts
Armorama: 3,078 posts
Joined: March 08, 2010
KitMaker: 3,662 posts
Armorama: 3,078 posts
Posted: Friday, December 18, 2015 - 10:37 PM UTC
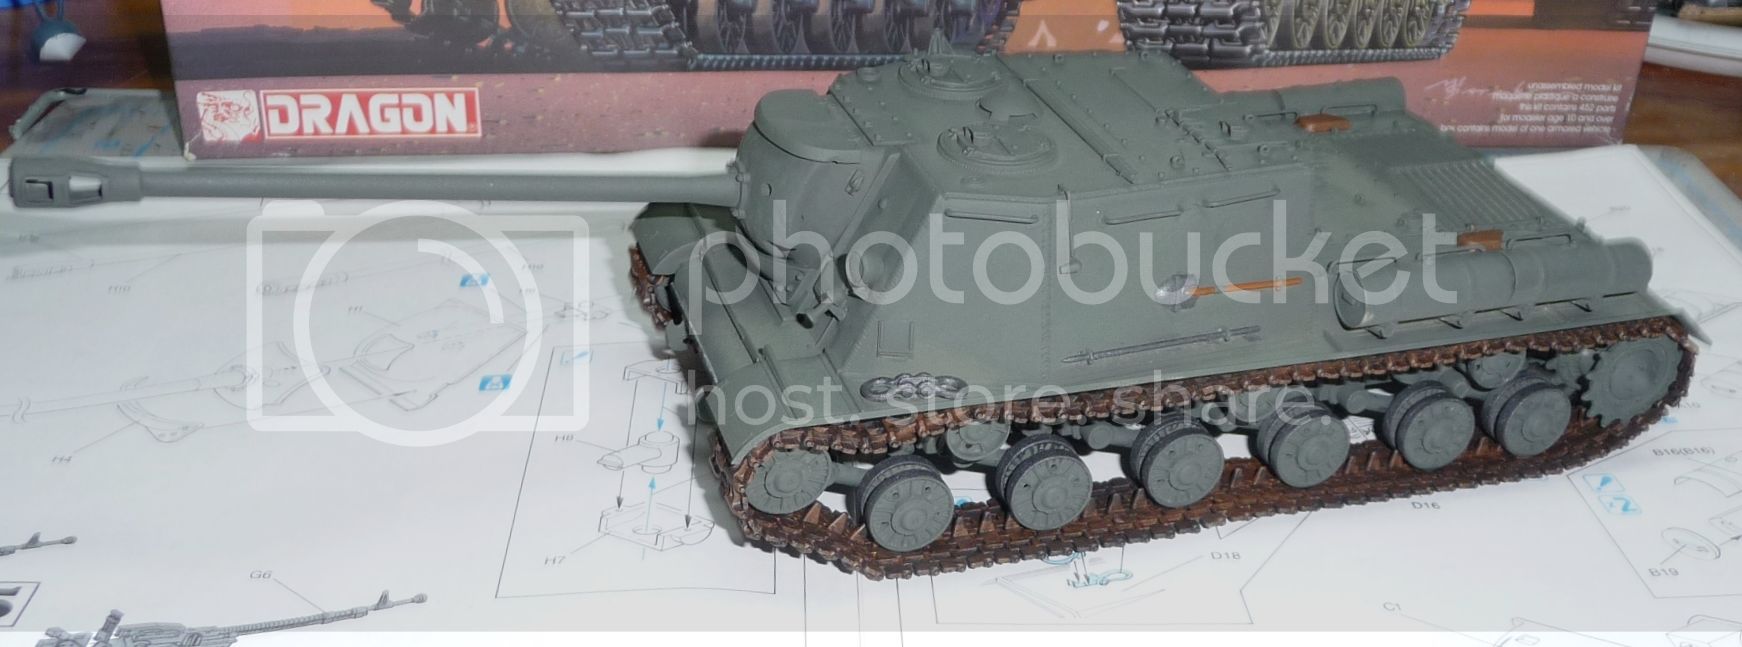
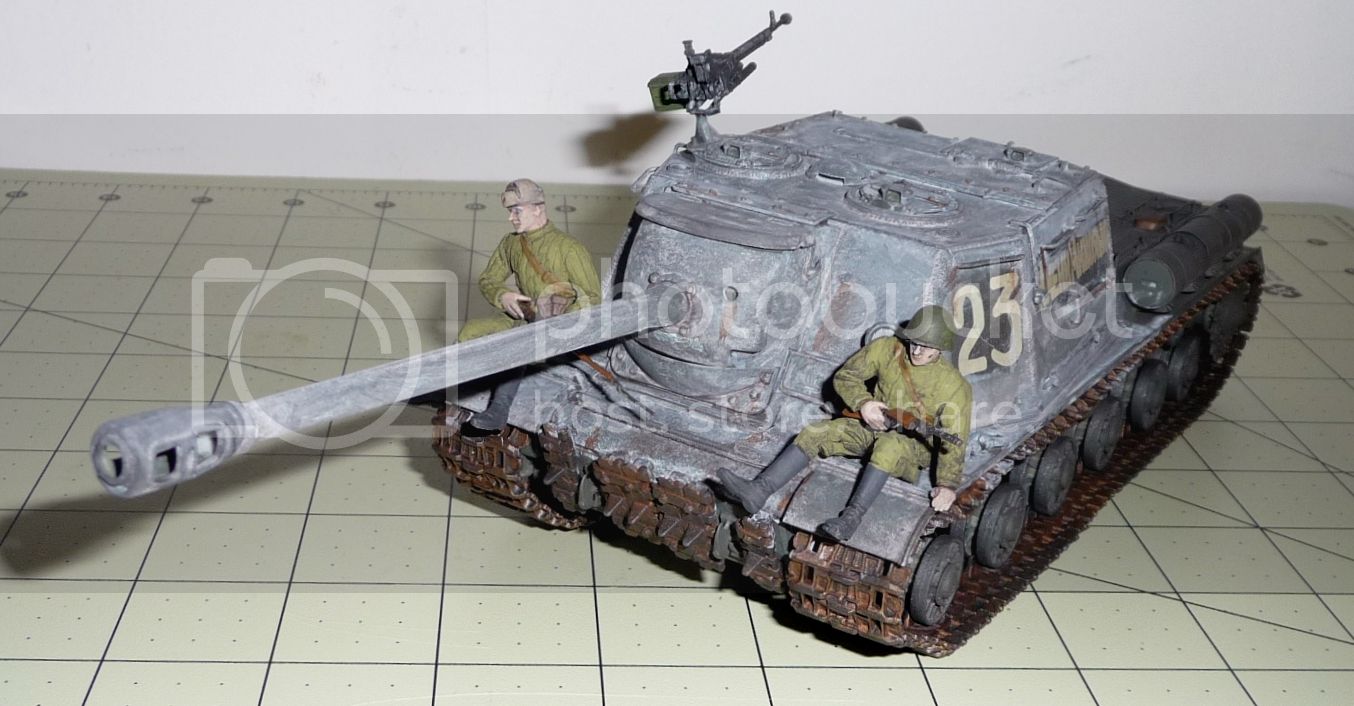
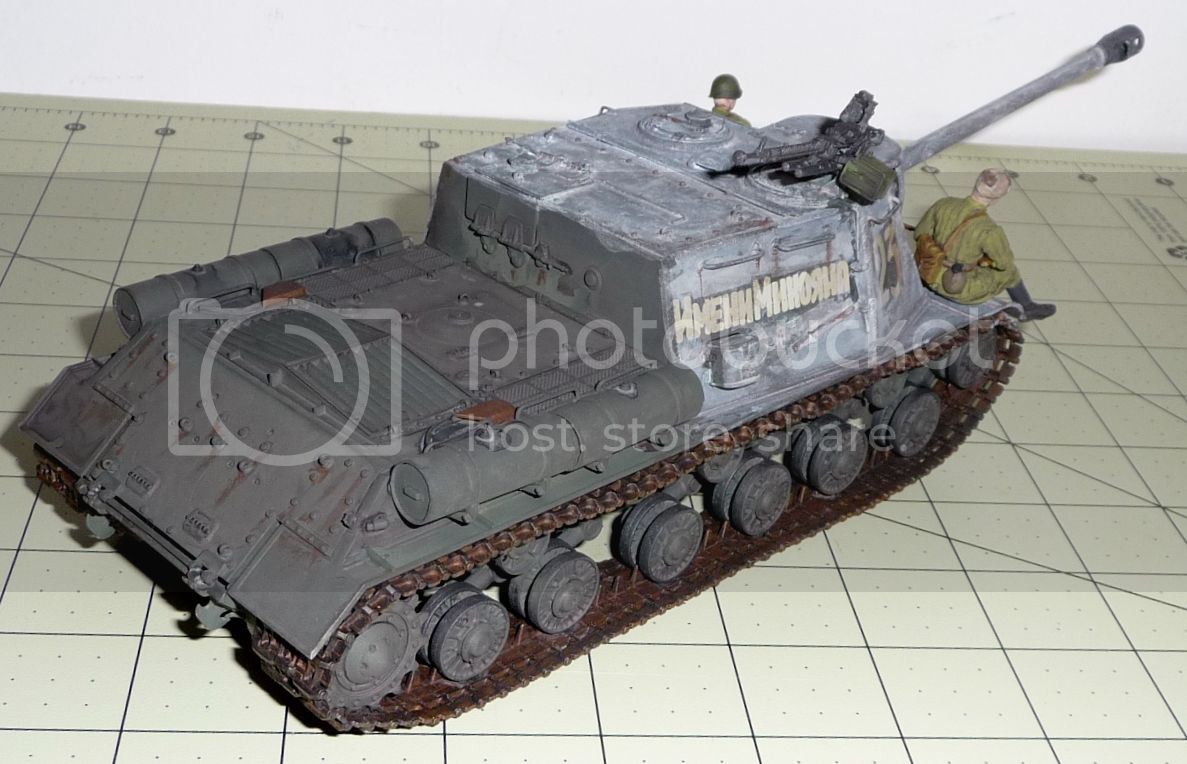
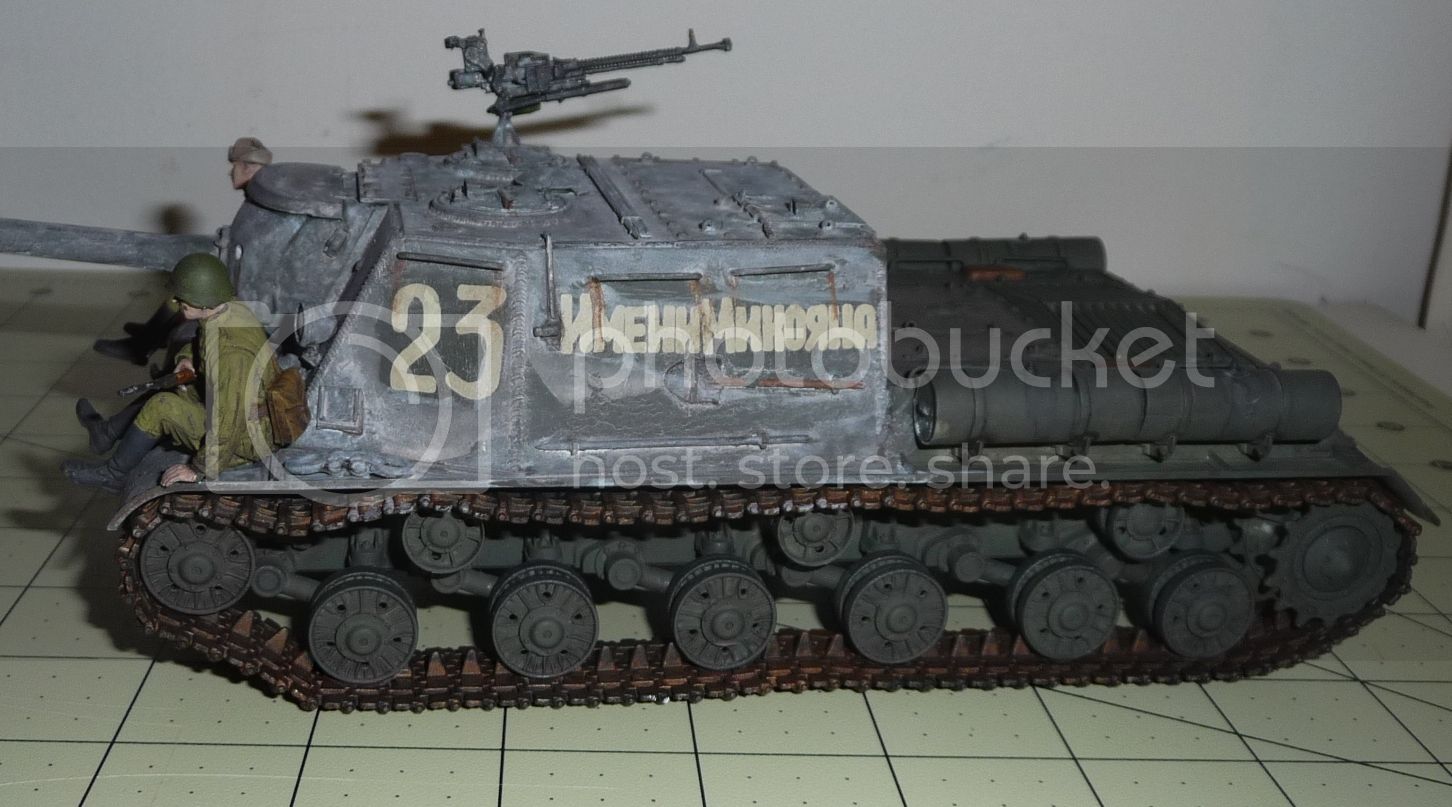
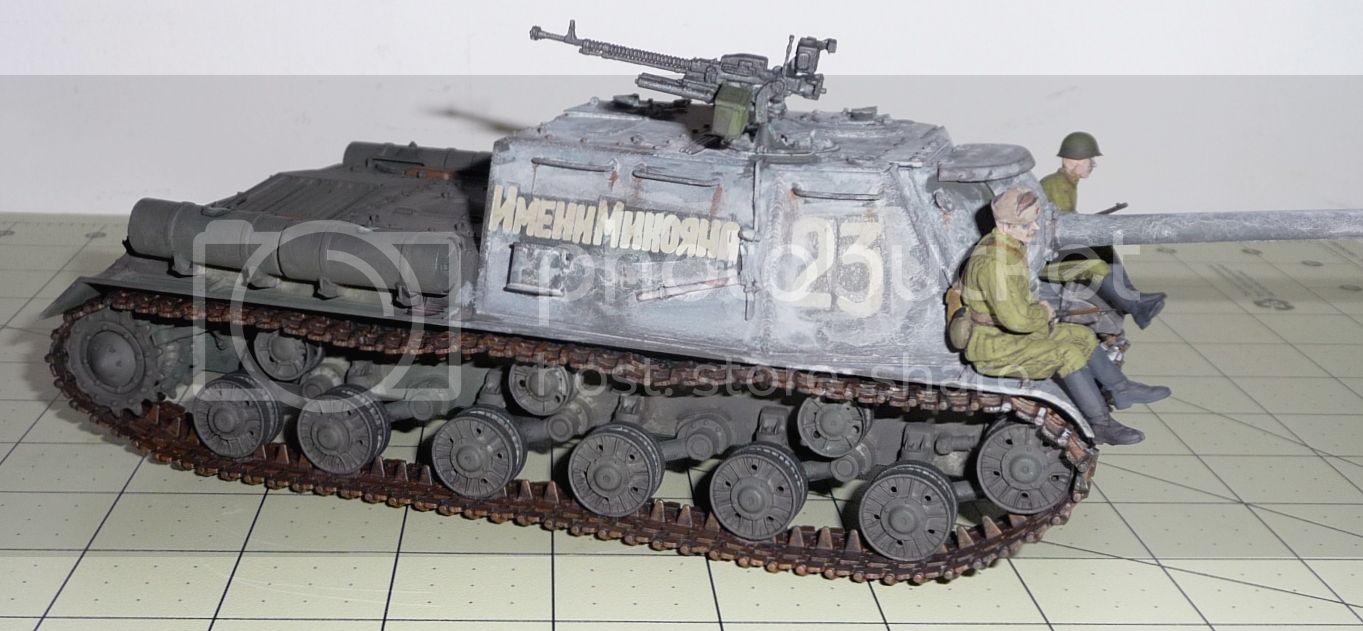
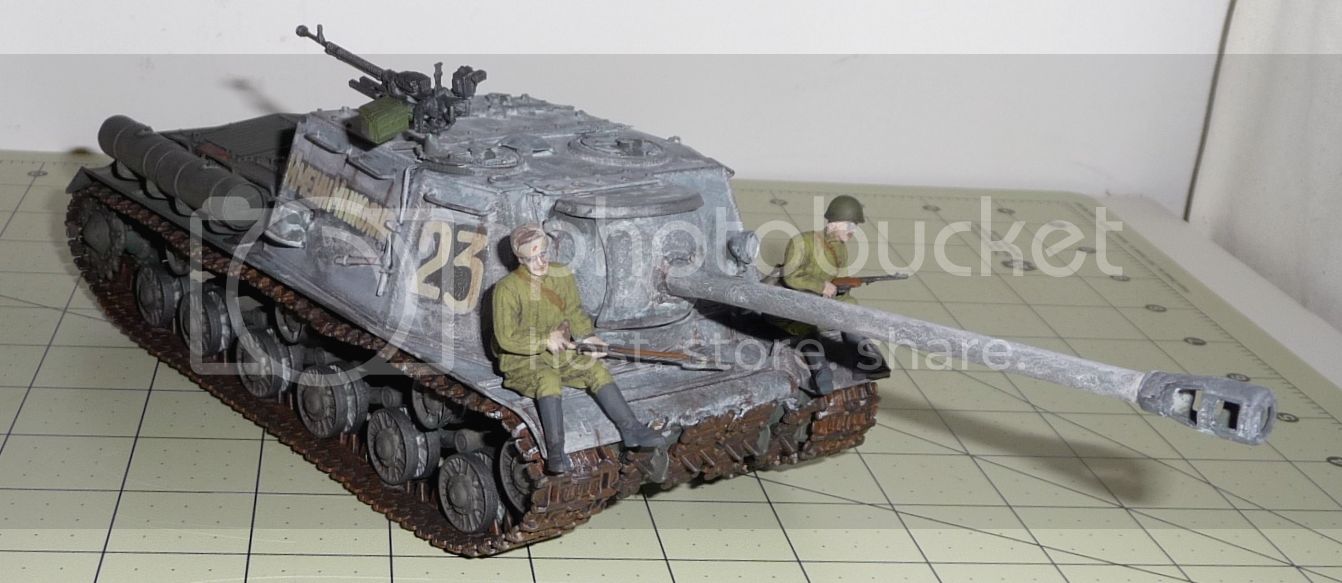
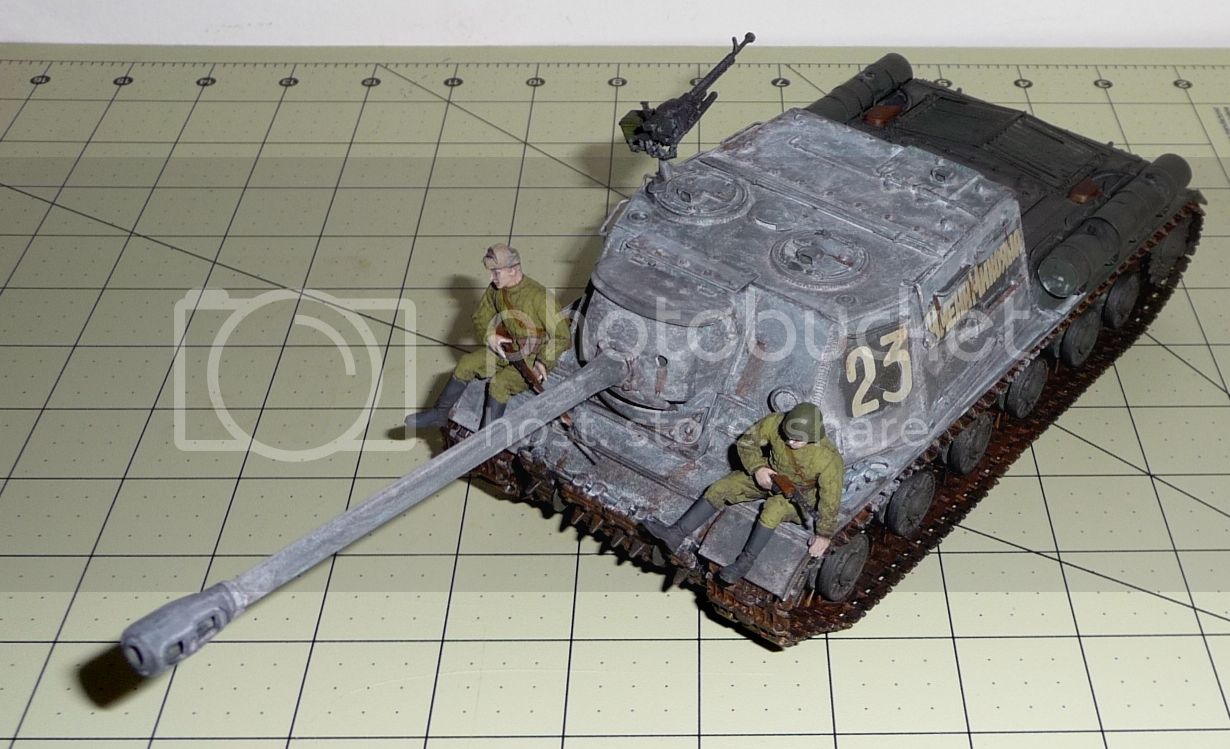
I got a lot done on my build since the start photo
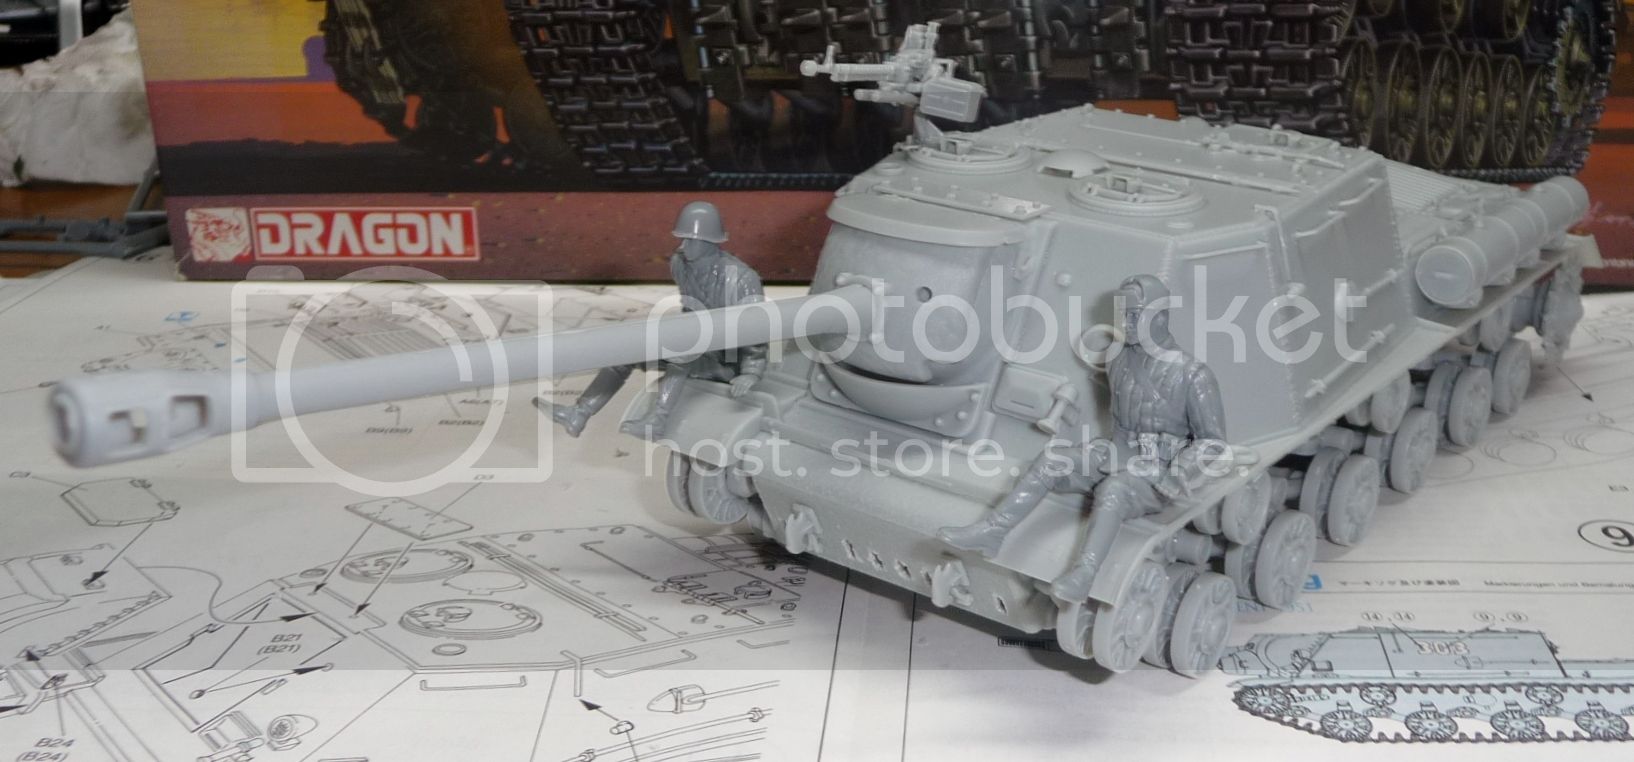
This had to be one off the simplest Dragon kits eever
Added the dudes sitting on the fenders had them sitting around in the stash
Some color
They show this in the instructions with a white washe front and I have seen some photos with some heavy mud weathering so that will be next
This had to be one off the simplest Dragon kits eever
Added the dudes sitting on the fenders had them sitting around in the stash
Some color
They show this in the instructions with a white washe front and I have seen some photos with some heavy mud weathering so that will be next
David1988
England - East Anglia, United Kingdom
Joined: September 18, 2014
KitMaker: 91 posts
Armorama: 91 posts
Joined: September 18, 2014
KitMaker: 91 posts
Armorama: 91 posts
Posted: Tuesday, December 22, 2015 - 06:20 AM UTC
Hi guys! I hope everyone is well and on the road to a happy Christmas.
Well, I think my KV is done! I put metallic pigments on the tracks and then added a little bit of snow from bicarbonate of soda. I wanted quite a "clean" look, perhaps from deep winter, when the ground would have frozen solid.
I will try to pop a better picture as a "finish" shot into the gallery once the festive season is over
Great to see some more builds in progress in the campaign!
David
ltb073
New York, United States
Joined: March 08, 2010
KitMaker: 3,662 posts
Armorama: 3,078 posts
Joined: March 08, 2010
KitMaker: 3,662 posts
Armorama: 3,078 posts
Posted: Wednesday, December 23, 2015 - 06:44 AM UTC
David1988
England - East Anglia, United Kingdom
Joined: September 18, 2014
KitMaker: 91 posts
Armorama: 91 posts
Joined: September 18, 2014
KitMaker: 91 posts
Armorama: 91 posts
Posted: Sunday, December 27, 2015 - 05:16 PM UTC
Hi Sal,
Nice ISU Particulaly I like the streaks on the back of the vehicle (I always have trouble making them look natural, which yours do) Some mud on the tracks would look great IMHO although personally I left my KV clean this time, perhaps from the ground being frozen solid in deep winter.
Kanguroo
Vietnam
Joined: May 07, 2006
KitMaker: 416 posts
Armorama: 312 posts
Joined: May 07, 2006
KitMaker: 416 posts
Armorama: 312 posts
Posted: Monday, December 28, 2015 - 07:40 PM UTC
Nito74
Lisboa, Portugal
Joined: March 04, 2008
KitMaker: 5,386 posts
Armorama: 4,727 posts
Joined: March 04, 2008
KitMaker: 5,386 posts
Armorama: 4,727 posts
Posted: Tuesday, December 29, 2015 - 07:14 AM UTC
that's ok Bob.
@Sal:
I did that same kit, but in the Orange Box version, same version and same markings as you last year..
@Sal:
I did that same kit, but in the Orange Box version, same version and same markings as you last year..