Texas, United States
Joined: February 22, 2008
KitMaker: 5,026 posts
Armorama: 1,604 posts
Posted: Sunday, July 24, 2016 - 05:53 AM UTC

I finally was able to get photobucket to cooperate. Here is the first coat on the turret.
If it aint broke dont fix it.

#041
Kobenhavn, Denmark
Joined: July 20, 2006
KitMaker: 10,069 posts
Armorama: 4,677 posts
Posted: Sunday, July 24, 2016 - 11:31 AM UTC
Bob, good to hear the new airbrush is working. Airbrushing is always the Achilles heel of my projects.
Speaking of airbrushing. I am making slow progress and still have a lot of corrections to make. More to follow later.


Campaign'oholic - 252+ campaigns completed
Texas, United States
Joined: February 22, 2008
KitMaker: 5,026 posts
Armorama: 1,604 posts
Posted: Sunday, July 24, 2016 - 07:01 PM UTC
Jesper, your camo is looking really good. I am using some old unfinished kits to practice on to see if I can do both free hand and taped camo.
Bob
If it aint broke dont fix it.
United Kingdom
Joined: September 17, 2012
KitMaker: 462 posts
Armorama: 417 posts
Posted: Monday, July 25, 2016 - 12:18 PM UTC
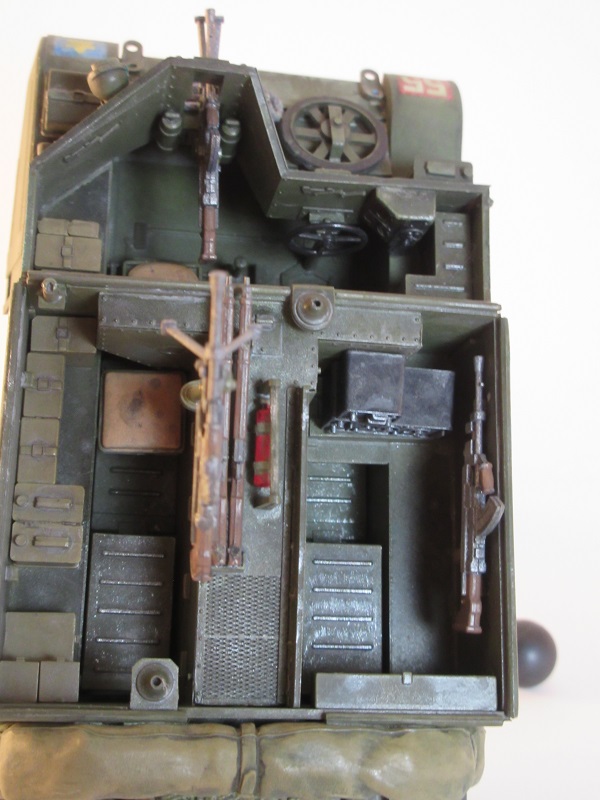
After a bit of time off, I have had opportunity again to get back to the T54 mod 1949. Here are a few progress pictures showing the smoke canisters at the back and the very fiddly mechanism for opening them.


Next up cleaning up the Tank resin T54 spider wheels and build the Friuls…
Cheers
Matthew

#460
California, United States
Joined: September 16, 2014
KitMaker: 1,156 posts
Armorama: 1,024 posts
Posted: Wednesday, July 27, 2016 - 03:37 AM UTC
Quoted Text
Thanks guys. Mark, I have to give credit to Michael Rinaldi and his Tank Art series, it has been an invaluable learning tool for me, this is only the second model I have tried the HS chipping technique on, it, is really just a matter of keeping things in scale, knowing when to stop and move on. I read through the books several times before trying. 
I have the Rinaldi books too but have not been able to get the kind of results you have achieved. Your interior looks very realistic & lived in.
Bryan - I never thought much of these Super Shermans until I saw yours. What a great job!
Bob - I'm glad to see someone else is working on the Churchill. Mine has been sitting waiting for decals for a couple of months. I'll be watching you progress with interest.
Vintage Paul
I'd happily live in the past but for air conditioning, the internet, mobile phones, modern medicine & dentistry and, and, and . . .
Texas, United States
Joined: February 22, 2008
KitMaker: 5,026 posts
Armorama: 1,604 posts
Posted: Wednesday, July 27, 2016 - 07:52 AM UTC
@ Matthew: your T54 details are really adding depth to the build.
@ Paul: my Churchill will be OOB since I have nothing in the stash to add to the build. I will be watching for your decal posts.
Bob
If it aint broke dont fix it.

#041
Kobenhavn, Denmark
Joined: July 20, 2006
KitMaker: 10,069 posts
Armorama: 4,677 posts
Posted: Wednesday, July 27, 2016 - 12:28 PM UTC
Thanks for the comment, Bob. Still some way to go before I am satisfied.
Matthew, awesome details. That will really be stunning with finished.
Campaign'oholic - 252+ campaigns completed
United States
Joined: August 28, 2015
KitMaker: 319 posts
Armorama: 308 posts
Posted: Wednesday, July 27, 2016 - 10:25 PM UTC
Hi everyone! I wanted to drop a line and thank everyone for the kind comments concerning my M51 build. I had a great time with the build. I'm very glad you all like how it turned out! My next project is the Meng AMX 30B2 for the fighting frogs campaign. It will be my first Meng kit so I am excited to start but am waiting because I promised the wife a would take a break for a couple of weeks before I disappear back into the man cave

A lot of very nice build going on. The chipping and paintwork on the half track is amazing! I hope I develop thoes skills. Keep up the good work everyone!

#460
California, United States
Joined: September 16, 2014
KitMaker: 1,156 posts
Armorama: 1,024 posts
Posted: Thursday, July 28, 2016 - 02:29 AM UTC
Quoted Text
@ Matthew: your T54 details are really adding depth to the build.
@ Paul: my Churchill will be OOB since I have nothing in the stash to add to the build. I will be watching for your decal posts.
Bob
I wrecked the barrel on this one. I used some putty in the gaps and sanded it to an hourglass shaped oval despite my best intensions not to do so. I ended up fitting one of the excellent RB replacements.
My modeling skills are modest but I do enjoy the builds. I'll have some more progress on this one soon.
Vintage Paul
I'd happily live in the past but for air conditioning, the internet, mobile phones, modern medicine & dentistry and, and, and . . .
South Carolina, United States
Joined: December 03, 2009
KitMaker: 2,160 posts
Armorama: 1,906 posts
Posted: Thursday, July 28, 2016 - 07:48 AM UTC
Okay I've put this off long enough. I'll be building Tamiya's SU-76M in 1/35 scale. It is planned to be part of another project that won't be detailed here.
The kit appears pretty typical of current Tamiya offerings. The instructions look good. They have a jig for tracks...but we'll get to that.

We'll start at the beginning. On the left is the gun mount. The right is the front glacis.

Those bits assembled. Next, we'll do the compartment wall, which also served as the base for the gun-mount.

Compartment wall assembled. There really wasn't much to assemble. Next up is the lower hull. Tamiya has gone with a multi-piece hull...which I hate.

The hull really went together well....well done Tamiya. The compartment wall was added.

That's where I am right now. So far, the fit is as good as you'd expect out of Tamiya.
United States
Joined: August 28, 2015
KitMaker: 319 posts
Armorama: 308 posts
Posted: Thursday, July 28, 2016 - 08:00 AM UTC
Another kit I want to build! Great choice Alex
ColinEdm
 Associate Editor
Alberta, Canada
Joined: October 15, 2013
KitMaker: 1,355 posts
Armorama: 1,229 posts
Posted: Saturday, July 30, 2016 - 07:57 AM UTC
First round of oil dot filter and pinwash applied. Now to let it dry, clearcoat and then a bit more streaking and dirtying up the running gear and undercarriage. I see there is still some silvering of the deacal on the rear door even after coats of Future and Matte clear, damn old decals :-(.


The voices are back.....excellent....

#041
Kobenhavn, Denmark
Joined: July 20, 2006
KitMaker: 10,069 posts
Armorama: 4,677 posts
Posted: Saturday, July 30, 2016 - 01:04 PM UTC
Awesome weathering, Colin. Looks Great!
Campaign'oholic - 252+ campaigns completed
Western Australia, Australia
Joined: May 05, 2006
KitMaker: 900 posts
Armorama: 510 posts
Posted: Saturday, July 30, 2016 - 02:03 PM UTC
Real life means this build is now proceeding exceedingly slow. Have gotten as far as finishing the tow cable, and winding most of it on to the drum.

Still haven't had a chance to get my airbrush working properly and apply a flat coat. That's all that is required to be able to mount the body to the chassis and call this model done.
Don't you feel more like you do now than you did when you came in?
ColinEdm
 Associate Editor
Alberta, Canada
Joined: October 15, 2013
KitMaker: 1,355 posts
Armorama: 1,229 posts
Posted: Saturday, July 30, 2016 - 06:03 PM UTC
Thanks Jesper. The camo on your Bradley turned out great, looking forward to seeing the next stage.
Matt, I am in awe of your scrathbuilding skills with all those details you are adding!
Iain, coming along nicely, I like the cable eye you made, I never would have thought to do that.
The voices are back.....excellent....
tatbaqui
 News Writer
#040
Metro Manila, Philippines
Joined: May 06, 2007
KitMaker: 2,713 posts
Armorama: 2,451 posts
Posted: Sunday, July 31, 2016 - 04:32 AM UTC
Great weathering you have there Colin -- me like very much! 👍👍👍
ColinEdm
 Associate Editor
Alberta, Canada
Joined: October 15, 2013
KitMaker: 1,355 posts
Armorama: 1,229 posts
Posted: Sunday, July 31, 2016 - 07:49 AM UTC
Quoted Text
Great weathering you have there Colin -- me like very much! 👍👍👍
Thanks Tat!
The voices are back.....excellent....
United States
Joined: August 28, 2015
KitMaker: 319 posts
Armorama: 308 posts
Posted: Sunday, July 31, 2016 - 09:24 AM UTC
Colin, truly excellent work!
Nova Scotia, Canada
Joined: February 07, 2015
KitMaker: 58 posts
Armorama: 27 posts
Posted: Tuesday, August 02, 2016 - 06:38 AM UTC
Hi Everybody

I've completed my universal carrier. Its been a fun build and I tried weathering with oils for the first time. Here are some pictures.


Pictures added to the gallery, thanks for the fun build
Ron

#041
Kobenhavn, Denmark
Joined: July 20, 2006
KitMaker: 10,069 posts
Armorama: 4,677 posts
Posted: Wednesday, August 03, 2016 - 11:14 PM UTC
Nice build, Ron!
I have made a bit more progress. Nice are some detail painting and touch ups.
More to follow.


Campaign'oholic - 252+ campaigns completed
Oklahoma, United States
Joined: September 30, 2015
KitMaker: 2,493 posts
Armorama: 2,344 posts
Posted: Wednesday, August 03, 2016 - 11:38 PM UTC
I really like that camo scheme, Jesper.
"Only the dead have seen the end of war." - Plato

#501
Kerala, India / भारत
Joined: August 25, 2009
KitMaker: 292 posts
Armorama: 91 posts
Posted: Thursday, August 04, 2016 - 02:10 AM UTC
Some really impressive builds going on here. I better pull up socks and get to it

Where my build stands now. For more pics and the build log, please visit
[b]HERE[b] tatbaqui
 News Writer
#040
Metro Manila, Philippines
Joined: May 06, 2007
KitMaker: 2,713 posts
Armorama: 2,451 posts
Posted: Thursday, August 04, 2016 - 03:48 AM UTC
Looks cool Ron!
Nice camo Jesper. The white ones -- was it AB'd freehand?
Cheers,
Tat
United States
Joined: August 28, 2015
KitMaker: 319 posts
Armorama: 308 posts
Posted: Thursday, August 04, 2016 - 07:24 AM UTC
Looks good Ron! I knew that panel fading would look nice after weathering!

#041
Kobenhavn, Denmark
Joined: July 20, 2006
KitMaker: 10,069 posts
Armorama: 4,677 posts
Posted: Thursday, August 04, 2016 - 03:05 PM UTC
Thanks for the comments, Tat and Dustin.
I did the camo freehand. The white paint had a slightly different density and acted up on me a bit. I had to go over it a couple of times to fix corrections. In the end I am pretty satisfied.
The alternative was to use putty, but I often find it difficult to get the same feathering effect around the putty.
Campaign'oholic - 252+ campaigns completed


