Campaigns
Where Armorama group builds can be discussed, organized, and updates posted.
Where Armorama group builds can be discussed, organized, and updates posted.
Hosted by Darren Baker, Richard S.
Tamiya Campaign
Posted: Thursday, August 04, 2016 - 04:46 PM UTC
Looks good Jesper. Weathering should further correct if needed. 


sherb

Joined: August 25, 2004
KitMaker: 752 posts
Armorama: 378 posts

Posted: Saturday, August 06, 2016 - 12:59 AM UTC
ltb073

Joined: March 08, 2010
KitMaker: 3,662 posts
Armorama: 3,078 posts

Posted: Saturday, August 06, 2016 - 06:31 AM UTC
Chaman911

Joined: August 28, 2015
KitMaker: 319 posts
Armorama: 308 posts
Posted: Sunday, August 07, 2016 - 10:07 PM UTC
Looking good Sherb 

Posted: Tuesday, August 09, 2016 - 10:25 AM UTC
Hello,
Looks good Sherb, I like seeing those extra gear on board!
Well, I have to start on my build lest I miss out on this campaign the second time around.
I have initially planned to do StuG -- come to think of it, I've committed that StuG on a couple of campaigns but never really got across the start line. Will have to get that StUG some build time soon.
Anyways I decided to just keep to a simple build:
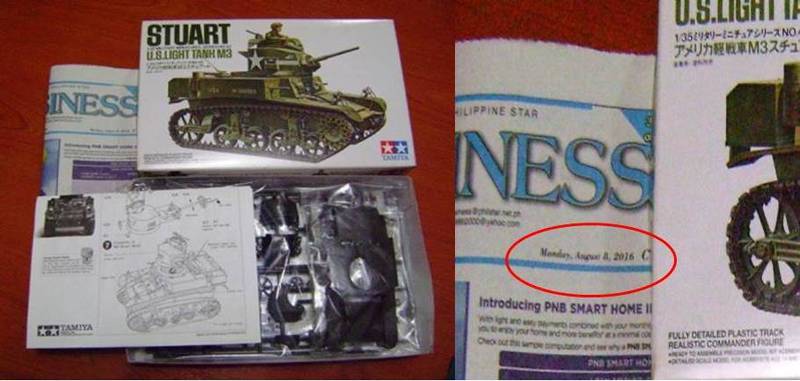
It's been a long while since Tamiya had this kit out:

For a kit of this vintage I saw no issues on the plastic -- no warped panels, flash very close to none at all. Visible seam lines are very thin and easily cleaned up. Fit is good. Overall the build's gone perfectly well so far:

I've got a couple more steps and the build phase should be done. More to come.
Cheers,
Tat
Looks good Sherb, I like seeing those extra gear on board!
Well, I have to start on my build lest I miss out on this campaign the second time around.
I have initially planned to do StuG -- come to think of it, I've committed that StuG on a couple of campaigns but never really got across the start line. Will have to get that StUG some build time soon.
Anyways I decided to just keep to a simple build:

It's been a long while since Tamiya had this kit out:
For a kit of this vintage I saw no issues on the plastic -- no warped panels, flash very close to none at all. Visible seam lines are very thin and easily cleaned up. Fit is good. Overall the build's gone perfectly well so far:
I've got a couple more steps and the build phase should be done. More to come.
Cheers,
Tat
Posted: Tuesday, August 09, 2016 - 11:19 AM UTC
Been a while. It's been hot, been working late and been working on my new toy:


but here's where I am at right now.

Mostly done on the left fender now. While searching for pictures of this type of vehicle, I found few and all with a mix of features of 54/55. That said, this won't be accurate, but should make for a nice looking build. Figuring out how to mount the snorkel there took me a while.

Some construction on the turret. Pulled the flamethrower from a Skif kit and the ammo bins/smaller IR light from a Trumpeter kit. Did my best to fit the flamethrower level with the gun, but didn't turn out so well. It's a bit higher.The arm for the search light had to be relocated to the mantlet with the putty for the dust cover. Not to mention the arm is a odd shape to it which I did with brass rod.
Now to do some more work on the hull.


but here's where I am at right now.

Mostly done on the left fender now. While searching for pictures of this type of vehicle, I found few and all with a mix of features of 54/55. That said, this won't be accurate, but should make for a nice looking build. Figuring out how to mount the snorkel there took me a while.

Some construction on the turret. Pulled the flamethrower from a Skif kit and the ammo bins/smaller IR light from a Trumpeter kit. Did my best to fit the flamethrower level with the gun, but didn't turn out so well. It's a bit higher.The arm for the search light had to be relocated to the mantlet with the putty for the dust cover. Not to mention the arm is a odd shape to it which I did with brass rod.
Now to do some more work on the hull.
Posted: Tuesday, August 09, 2016 - 11:22 AM UTC
Pave-Hawk

Joined: May 05, 2006
KitMaker: 900 posts
Armorama: 510 posts

Posted: Wednesday, August 10, 2016 - 05:28 AM UTC
andromeda673

Joined: July 30, 2013
KitMaker: 584 posts
Armorama: 525 posts

Posted: Thursday, August 11, 2016 - 07:05 AM UTC
nice work boys!!!!! some good looking and finished builds here. I'm actually pulling the pin on my corsair, shelving it, and then picking up my new kit for this build on Sunday.
Stay tuned I guess, I believe that I can get it done!
Stay tuned I guess, I believe that I can get it done!
Pave-Hawk

Joined: May 05, 2006
KitMaker: 900 posts
Armorama: 510 posts

Posted: Friday, August 12, 2016 - 01:04 PM UTC
There a few touch ups I can probably do, and I am in the process of trying to make a rolled up version of the canvas roof to stow somewhere but if that is unsuccessful, I will leave the roof open anyway.
So I am calling this sucker done.
Alterations to the base kit include:
Eduard Photo Etch set
tow cable from steel fishing cable
cable eye from brass tube
A radiator built from the cut off grill that was replaced with a photo etch piece


Will upload some images to the campaign gallery
So I am calling this sucker done.
Alterations to the base kit include:
Eduard Photo Etch set
tow cable from steel fishing cable
cable eye from brass tube
A radiator built from the cut off grill that was replaced with a photo etch piece


Will upload some images to the campaign gallery
Posted: Friday, August 12, 2016 - 02:39 PM UTC
Iain, nice build. Nice detail additions to this old kit. Well done.
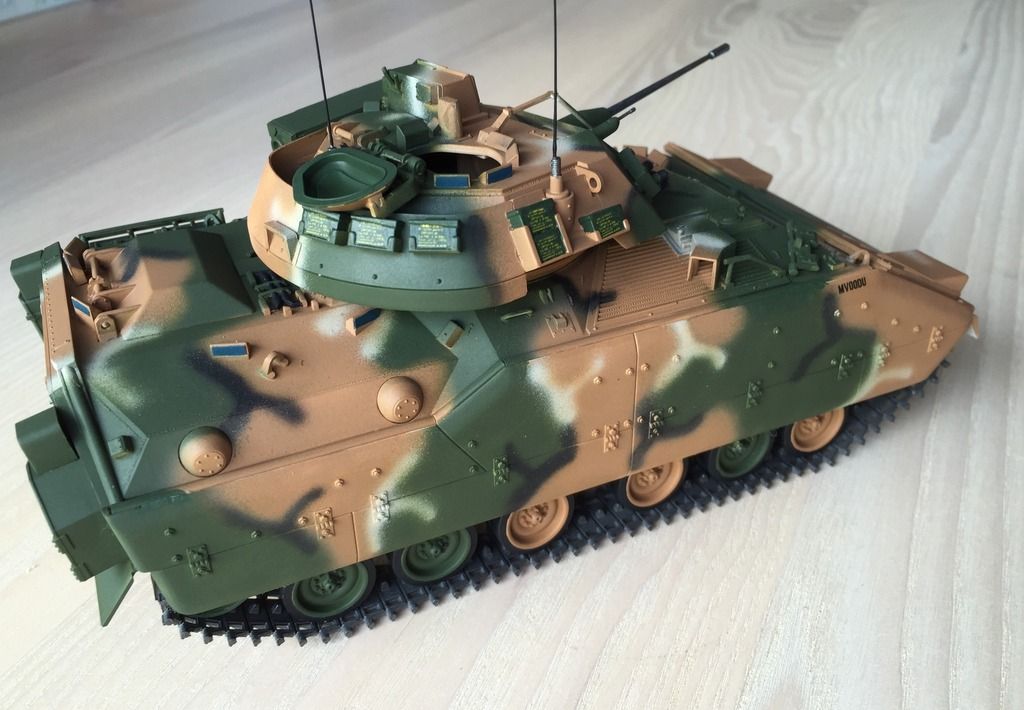
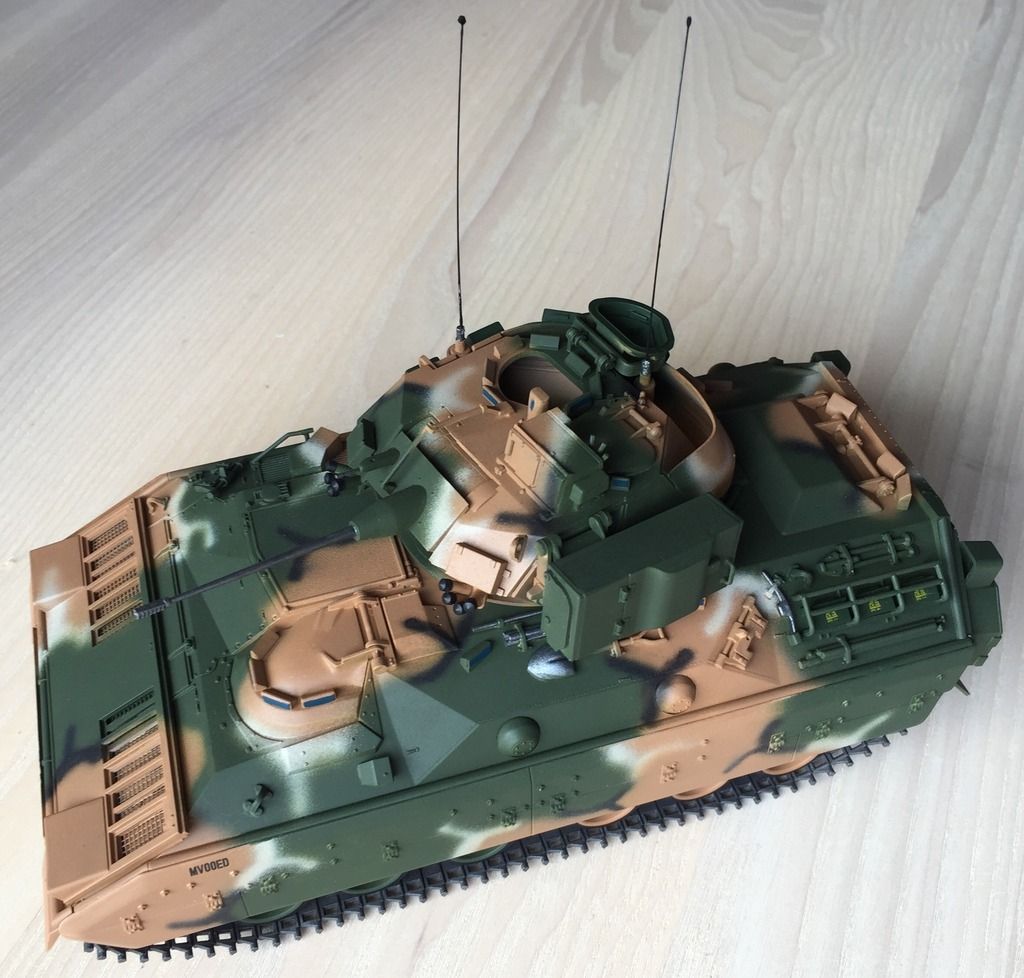
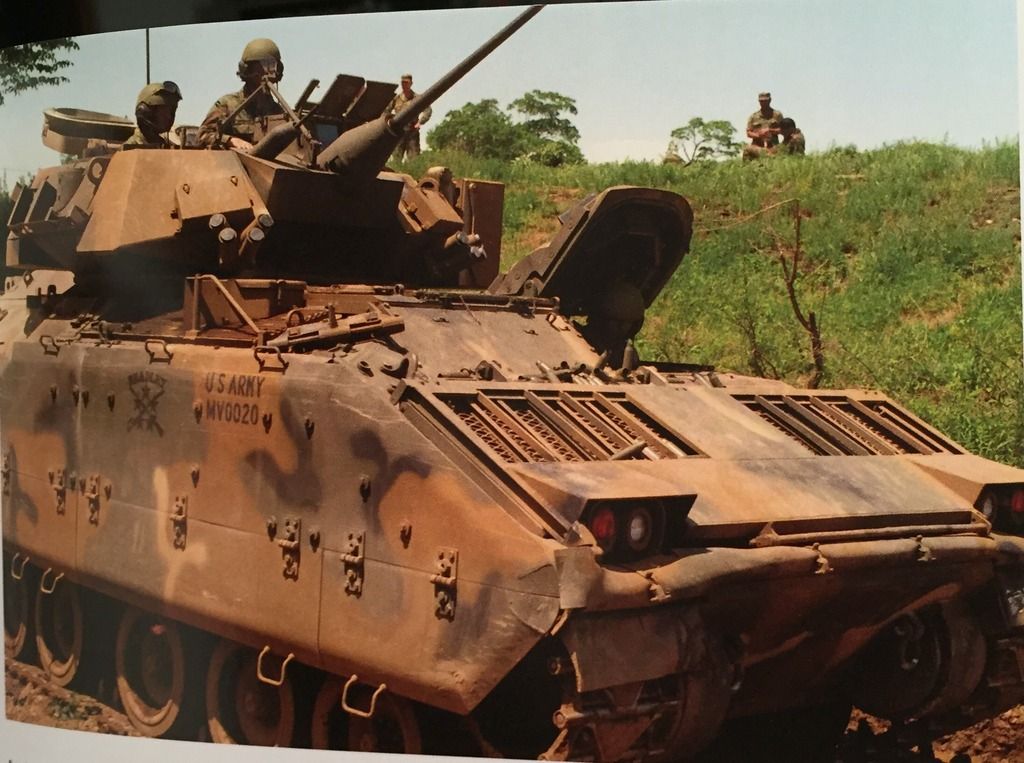
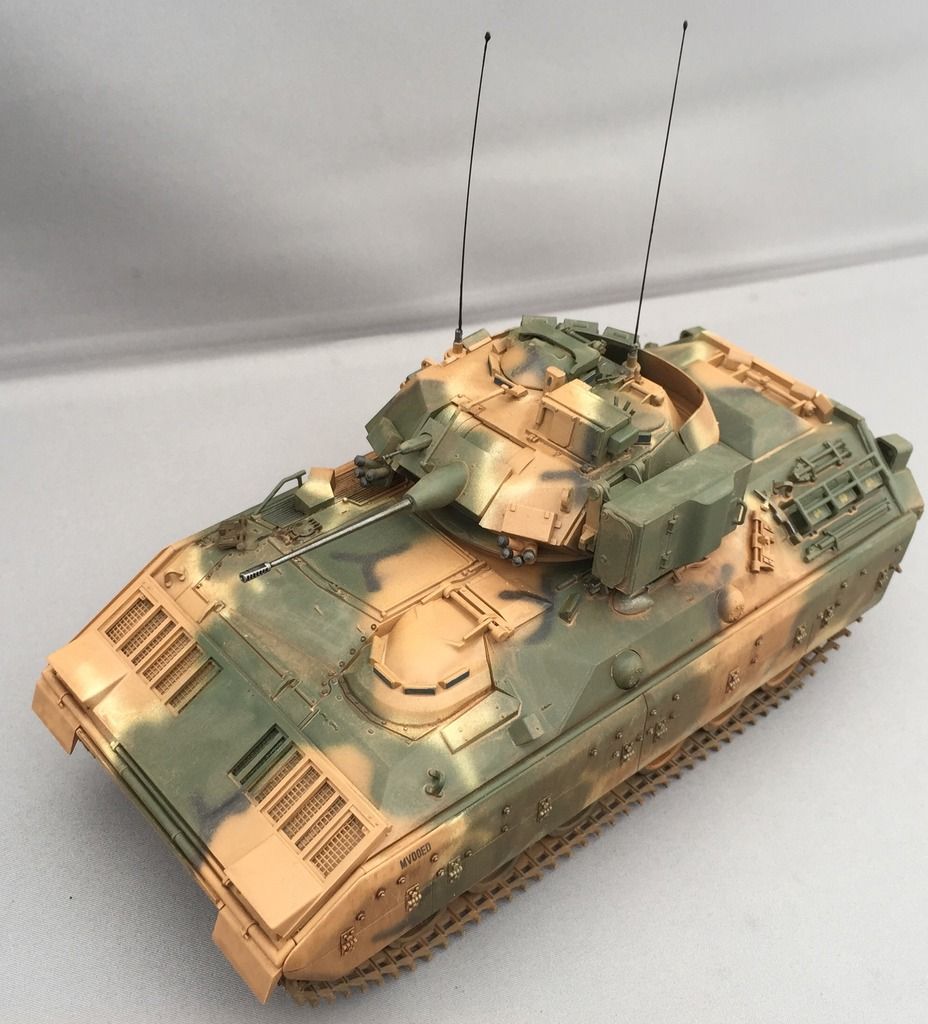
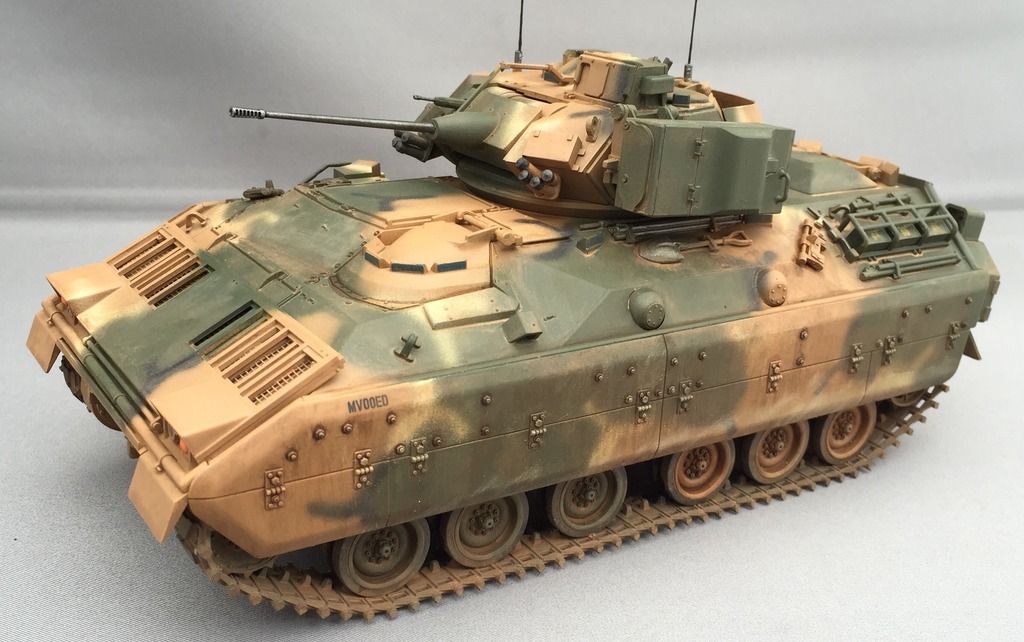
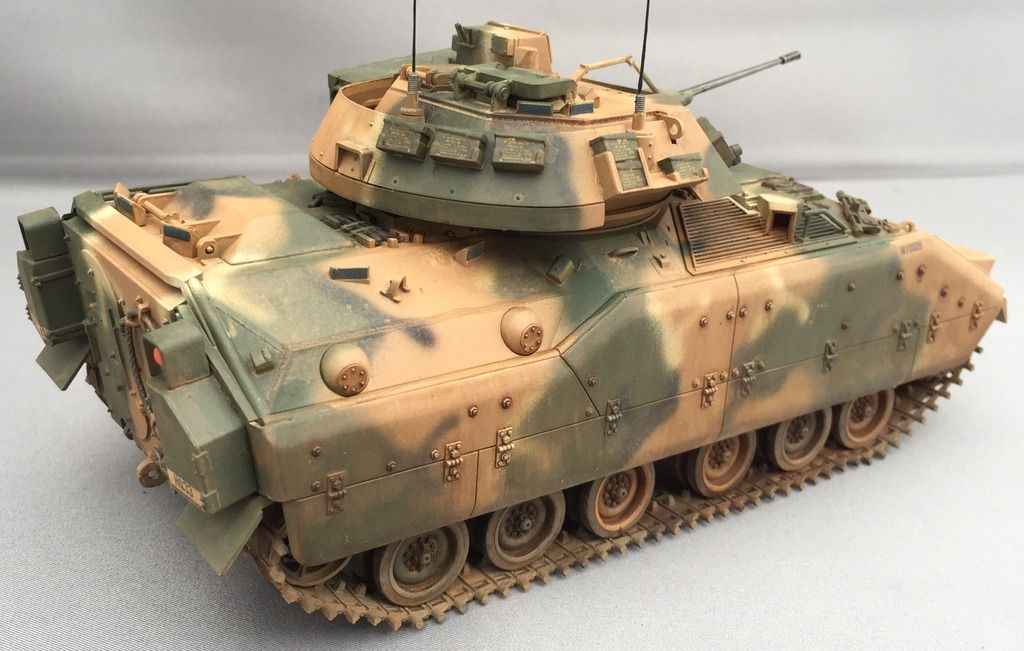
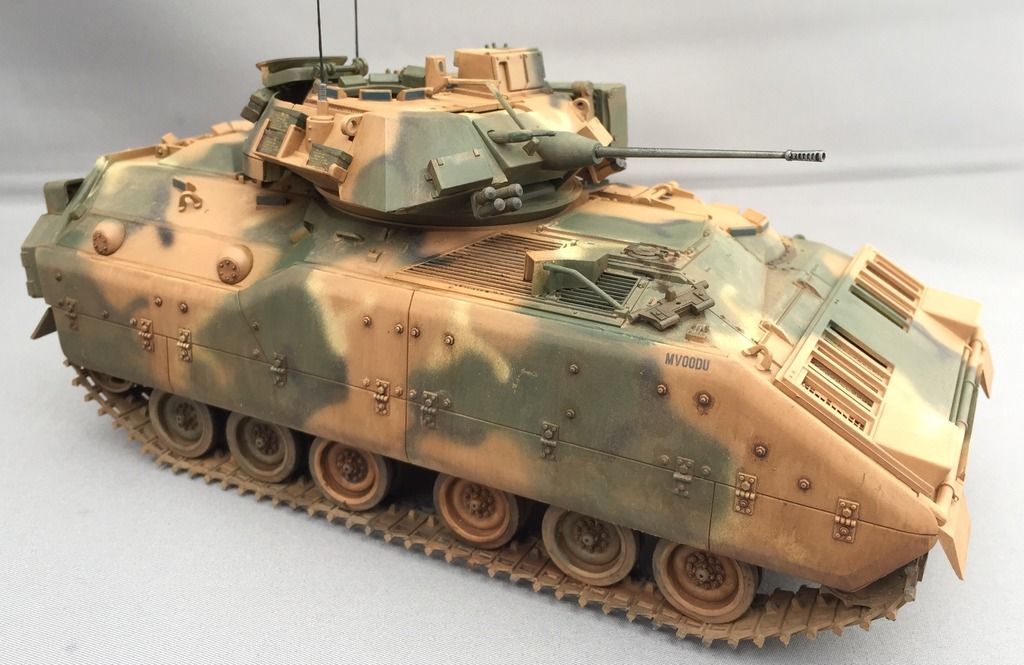
I am also calling my old Tamiya kit done. The venerable 1/35 Bradley. Build straight OOB.
Below the picture I used for inspiration. I was not building that exact vehicle, but something similar. I wanted to try the very cool camouflage and I am happy with how it came out.
Thanks for a great campaign. Looking forward to see many more builds.


Pave-Hawk

Joined: May 05, 2006
KitMaker: 900 posts
Armorama: 510 posts

Posted: Friday, August 12, 2016 - 04:59 PM UTC
That's a really nice model Jesper, the camo looks really good.
Posted: Saturday, August 13, 2016 - 12:34 AM UTC
Jesper,
The weathering really pulled that paint job together. Looks great!

The weathering really pulled that paint job together. Looks great!

Posted: Saturday, August 13, 2016 - 01:30 AM UTC
Thanks for the comments, guys. Much appreciated. I also ended up being very satisfied with the final result.
Posted: Saturday, August 13, 2016 - 02:26 AM UTC
Wow Jesper, that's one amazing paint job 
This is where I have reached so far in my entry for the GB

Follow thislink to my build blog.

This is where I have reached so far in my entry for the GB

Follow thislink to my build blog.
Posted: Saturday, August 13, 2016 - 04:15 AM UTC
Nice finish Jesper -- congrats!
Raj, your camo colors look cool!
Cheers,
Tat
Raj, your camo colors look cool!
Cheers,
Tat
Posted: Saturday, August 13, 2016 - 12:31 PM UTC
Thanks for the comments, Tat and Raj.
Raj, the Tiger is coming along great. Looking forward to see more.
Raj, the Tiger is coming along great. Looking forward to see more.
erichvon

Joined: January 17, 2006
KitMaker: 1,694 posts
Armorama: 1,584 posts

Posted: Saturday, August 13, 2016 - 03:03 PM UTC
Jesper, that cam looks really nice. Colin the weathering on the 251/9 is superb. It looks tired. Well used with none of the over the top chipping etc some favour where it looks as though the vehicles been in service for 40 years without a repspray trampled on by people in steel boots. Next time you do a build it would be nice if you could do a step by step so we can see how you manage it and we could perhaps give it a go. Weathering is one of my weakest areas so any help on the subject is always appreciated.
I don't know how I missed this campaign so I'll jump in even though I'm late to the party. I've been building for a couple of other campaigns but I've finished those now. I've got quite a bit of Tamiya stuff to build in the stash. I've just checked the end date and it's still quite a way off which gives me time to build something more substantial. I've got quite a few smaller kits Flak 37, Kubelwagen, Field Kitchen etc and a few tanks but at the moment I think I'll go with the Sdkfz 7/2 armoured cab with the mounted Flak 37 and use the Luftwaffe crew from the individual Flak 37 kit which I bought on a whim because it was cheap on ebay. Could be subject to change but I think that's what I'll go with for now. I should be able to finish it in six weeks no problem(Famous last words lol)as I've not got any other commitments campaignwise now and no pressing builds for myself.
I don't know how I missed this campaign so I'll jump in even though I'm late to the party. I've been building for a couple of other campaigns but I've finished those now. I've got quite a bit of Tamiya stuff to build in the stash. I've just checked the end date and it's still quite a way off which gives me time to build something more substantial. I've got quite a few smaller kits Flak 37, Kubelwagen, Field Kitchen etc and a few tanks but at the moment I think I'll go with the Sdkfz 7/2 armoured cab with the mounted Flak 37 and use the Luftwaffe crew from the individual Flak 37 kit which I bought on a whim because it was cheap on ebay. Could be subject to change but I think that's what I'll go with for now. I should be able to finish it in six weeks no problem(Famous last words lol)as I've not got any other commitments campaignwise now and no pressing builds for myself.
erichvon

Joined: January 17, 2006
KitMaker: 1,694 posts
Armorama: 1,584 posts

Posted: Saturday, August 13, 2016 - 03:09 PM UTC
Jesper, just noticed the finished pics. Only noticed the earlier ones. The end result is superb mate. Really like what you've done with it. I built this kit many years ago on one of my rare forays into modern stuff and remember it was quite a nice kit to build. I love the finished model. With the weathering the camouflage is quite subdued which looks really effective. Really like it.
Posted: Saturday, August 13, 2016 - 04:46 PM UTC
Thanks, Karl. Much appreciated.

ColinEdm


Joined: October 15, 2013
KitMaker: 1,355 posts
Armorama: 1,229 posts

Posted: Saturday, August 13, 2016 - 07:08 PM UTC
Quoted Text
Jesper, that cam looks really nice. Colin the weathering on the 251/9 is superb. It looks tired. Well used with none of the over the top chipping etc some favour where it looks as though the vehicles been in service for 40 years without a repspray trampled on by people in steel boots. Next time you do a build it would be nice if you could do a step by step so we can see how you manage it and we could perhaps give it a go. Weathering is one of my weakest areas so any help on the subject is always appreciated.
Karl thank you for the kind words! I have two build blogs on the go right now so I will try to do a SBS for the weathering with those.
Jesper, that Bradley came out beautiful! The weathering and dust really ties everything together. Iain, well done! Raj, looking really good so far! Ron, well done on you Bren Carrier!
andromeda673

Joined: July 30, 2013
KitMaker: 584 posts
Armorama: 525 posts

Posted: Sunday, August 14, 2016 - 02:02 AM UTC

ColinEdm


Joined: October 15, 2013
KitMaker: 1,355 posts
Armorama: 1,229 posts

Posted: Sunday, August 14, 2016 - 03:27 AM UTC
Inching toward completion...muddying things up a bit:

Just flicking on a mix of pigment fixer and pigments, start off with lightest colour for the widest pattern to show dried mud, then a couple of subsequently darker colours in smaller areas to represent wetter mud.

Just flicking on a mix of pigment fixer and pigments, start off with lightest colour for the widest pattern to show dried mud, then a couple of subsequently darker colours in smaller areas to represent wetter mud.
Posted: Sunday, August 14, 2016 - 04:14 AM UTC
Very nice Colin -- your pic just gave me another technique to try! 


ColinEdm


Joined: October 15, 2013
KitMaker: 1,355 posts
Armorama: 1,229 posts

Posted: Sunday, August 14, 2016 - 06:30 AM UTC
Quoted Text
Very nice Colin -- your pic just gave me another technique to try!
Cheers Tat!

 |


