#501
Kerala, India / भारत
Joined: August 25, 2009
KitMaker: 292 posts
Armorama: 91 posts
Posted: Sunday, September 11, 2016 - 10:44 PM UTC
@Dustin @Jesper
Thank you for your kind words.
@Paul
Thanks. This was the Tiger I was trying to create from sPz Abt 505

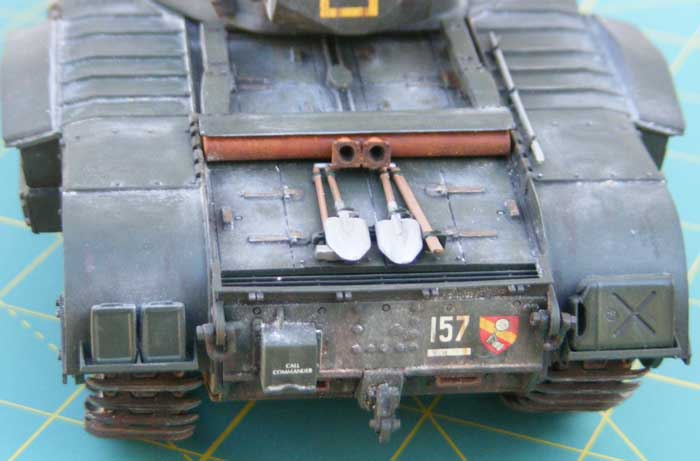
Love your Churchill. Can't wait to see it finished.
Cheers


#460
California, United States
Joined: September 16, 2014
KitMaker: 1,156 posts
Armorama: 1,024 posts
Posted: Monday, September 12, 2016 - 01:33 AM UTC
Vintage Paul
I'd happily live in the past but for air conditioning, the internet, mobile phones, modern medicine & dentistry and, and, and . . .

#041
Kobenhavn, Denmark
Joined: July 20, 2006
KitMaker: 10,069 posts
Armorama: 4,677 posts
Posted: Monday, September 12, 2016 - 01:58 AM UTC
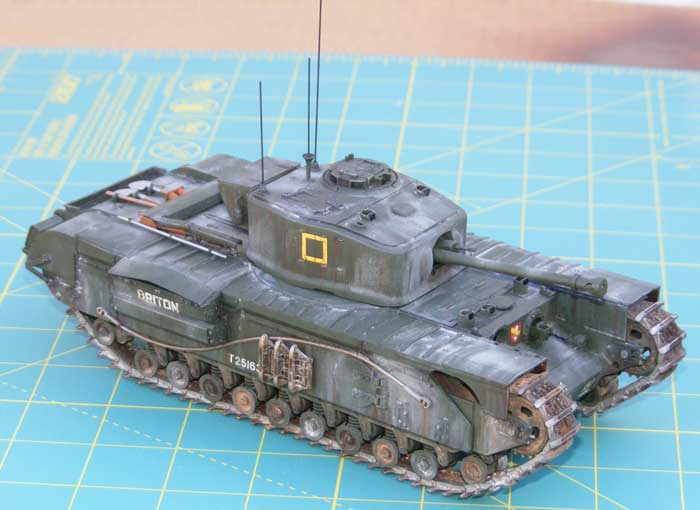
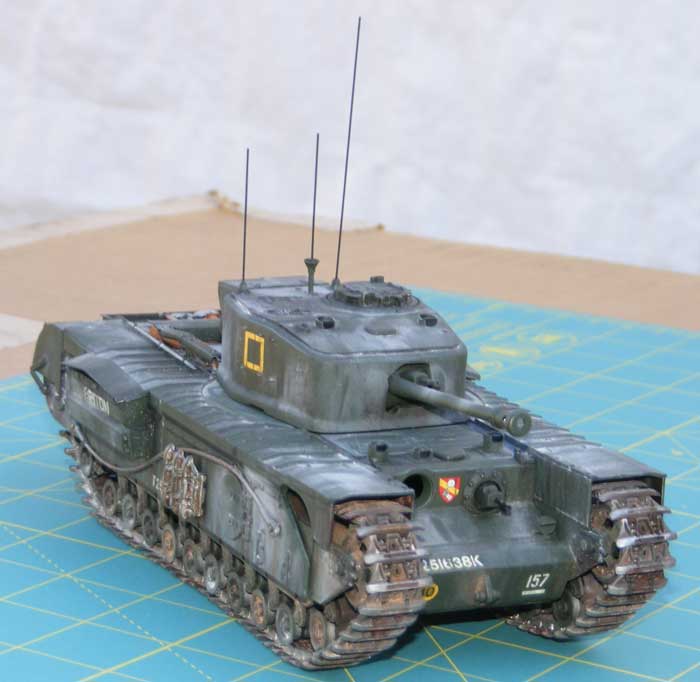
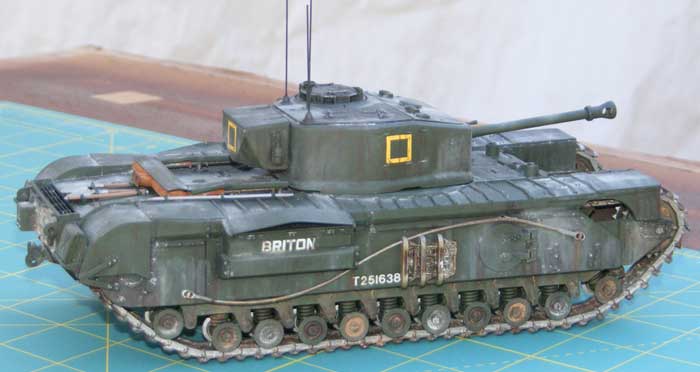
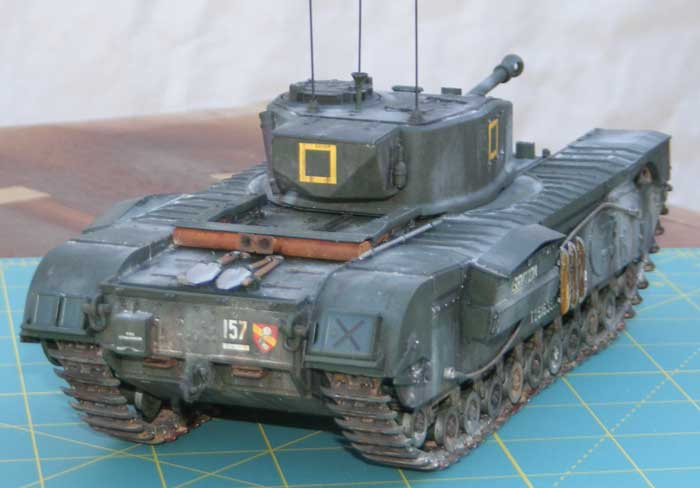
Nice build, Paul! I think the weathering looks good.
Thanks for sharing

Campaign'oholic - 252+ campaigns completed
Wisconsin, United States
Joined: July 30, 2013
KitMaker: 584 posts
Armorama: 525 posts
Posted: Monday, September 12, 2016 - 09:41 PM UTC
congrats on that Churchill.........nice weathering, and well done!


#460
California, United States
Joined: September 16, 2014
KitMaker: 1,156 posts
Armorama: 1,024 posts
Posted: Monday, September 12, 2016 - 10:00 PM UTC
Thanks guys, I was trying to make the model look like it had been in a couple of different types of terrain since hitting the beach, like it had been on the move.
Vintage Paul
I'd happily live in the past but for air conditioning, the internet, mobile phones, modern medicine & dentistry and, and, and . . .

#401
Washington, United States
Joined: December 08, 2013
KitMaker: 323 posts
Armorama: 221 posts
Posted: Monday, September 12, 2016 - 10:09 PM UTC
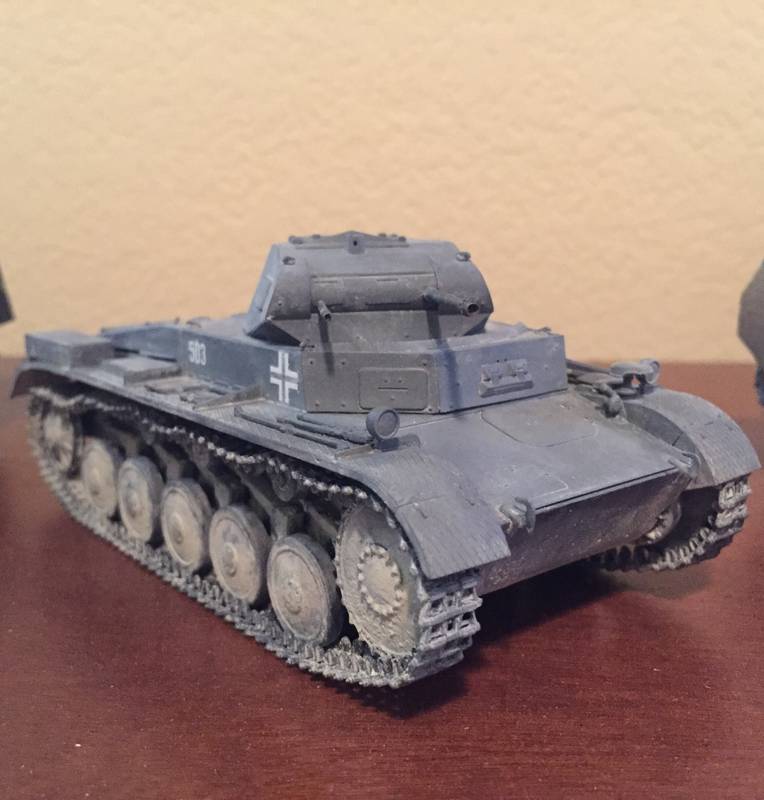
My build for this campaign is the Panzer II Ausf. C from the French Campaign. It was a fast build, but I ended up replacing the tracks and barrels. Still working on finishing up the detailing.

#460
California, United States
Joined: September 16, 2014
KitMaker: 1,156 posts
Armorama: 1,024 posts
Posted: Monday, September 12, 2016 - 10:16 PM UTC
Very nice! Did you use Fruil tracks? I just finished the older (1971) Tamiya Panzer II F for the Back to Basics campaign and found the Fruils would not fit the sprockets. I ended up trimming off some of the teeth where they couldn't be seen. Did your tracks fit OK?
Vintage Paul
I'd happily live in the past but for air conditioning, the internet, mobile phones, modern medicine & dentistry and, and, and . . .
Wisconsin, United States
Joined: July 30, 2013
KitMaker: 584 posts
Armorama: 525 posts
Posted: Tuesday, September 13, 2016 - 05:56 AM UTC
Well got the final coat of gloss on, hopefully tomorrow I can get the dull coat on, and then I can move onto the next project.
Thanks for looking!


#460
California, United States
Joined: September 16, 2014
KitMaker: 1,156 posts
Armorama: 1,024 posts
Posted: Tuesday, September 13, 2016 - 09:31 PM UTC
G.Houle – This thing is starting to look really good. What marking did you have in mind?
Vintage Paul
I'd happily live in the past but for air conditioning, the internet, mobile phones, modern medicine & dentistry and, and, and . . .

#401
Washington, United States
Joined: December 08, 2013
KitMaker: 323 posts
Armorama: 221 posts
Posted: Tuesday, September 13, 2016 - 09:33 PM UTC
Quoted Text
Very nice! Did you use Fruil tracks? I just finished the older (1971) Tamiya Panzer II F for the Back to Basics campaign and found the Fruils would not fit the sprockets. I ended up trimming off some of the teeth where they couldn't be seen. Did your tracks fit OK?
Paul, thanks. I actually used a set of Bronco indy tracks. They worked really well and were easy to assemble. Im so used to working with tracks from larger tanks that I found ir challenging working with the smaller tracks.

#460
California, United States
Joined: September 16, 2014
KitMaker: 1,156 posts
Armorama: 1,024 posts
Posted: Tuesday, September 13, 2016 - 10:48 PM UTC
The Broncos are plastic? How sturdy are they? I built a set of Modelkasten plastic tracks that proved so weak I could not even assemble them to the model. I have some Bronco track kits but have never tried to assemble them.
Vintage Paul
I'd happily live in the past but for air conditioning, the internet, mobile phones, modern medicine & dentistry and, and, and . . .

#123
New Mexico, United States
Joined: November 17, 2008
KitMaker: 1,202 posts
Armorama: 635 posts
Posted: Wednesday, September 14, 2016 - 05:45 AM UTC
Hudson,
I like the way the track's steel and weathering turned out on the Churchill! Any tips to share?
Great job.
Take care,
Don "Lakota"

Working on Campaigns:
1/72 Hasegawa Ki-84 Frank
1/144 Dragon Armor
Wisconsin, United States
Joined: July 30, 2013
KitMaker: 584 posts
Armorama: 525 posts
Posted: Wednesday, September 14, 2016 - 06:34 AM UTC
Quoted Text
G.Houle – This thing is starting to look really good. What marking did you have in mind?
I went with the stock decals, the markings I choose are for the 1st tank battalion, I did manage to get the flat coat on tonight, and hopefully this weekend I can get the wash applied and start the weathering.
Thank you!!!!!

Putrajaya, Malaysia
Joined: March 04, 2004
KitMaker: 2,511 posts
Armorama: 913 posts
Posted: Wednesday, September 14, 2016 - 07:35 AM UTC
Guys..i just realized that this campaign existed and i just noticed this thread just now. It just happened that i in the process of finishing 2 tamiya 1/48 kits : - M4 Sherman and Jagdpanther. So without giving any doubt i enroll into this campaign (if permitted by the manager)
I started the build a month ago...almost complete..
M4 sherman was build OOB.


Jagdpanther i build OOB except for the addition of the PE for engine grille.


will try to finish this build on this weekend.
Sil
The more i know, the less I understand!!!!

#401
Washington, United States
Joined: December 08, 2013
KitMaker: 323 posts
Armorama: 221 posts
Posted: Wednesday, September 14, 2016 - 09:41 PM UTC

#460
California, United States
Joined: September 16, 2014
KitMaker: 1,156 posts
Armorama: 1,024 posts
Posted: Thursday, September 15, 2016 - 01:27 AM UTC
Quoted Text
Hudson,
I like the way the track's steel and weathering turned out on the Churchill! Any tips to share?
Great job.
Take care,
Don "Lakota" 
Sil - Great work on your 1/48 scale builds. I'm alway a bit surprised when to hear such convincing models are so small.
Shawn - I love your Pz II C from the French campaign. I gotta get me one of those!
Don - I started with metal Fruil tracks. These were tougher to build than most Fruil tracks as the pins only went through the center portion. They were OK to cut but needed extra work to get a firm glue joint to hold the wires in place. This ended up taking several work sessions and even in final assembly one pin worked loose and had to be reglued. Nothing difficult about the process, just tough on the schedule.
The finish started with a long bath in MIG burnishing fluid. I let the tracks get good and dark. After a good rinse and dry, they got a brushing with MIG Track Wash which is a dark brown color that creeps well. It gives some additional depth to the gaps between the links and darkens odd spots. Then a random application of dark & light rust washes followed by a semi-dry brushing on the high spots & inner wear areas with steel paint. Finally just before assembly to the model European Dirt & Light Dust pigments applied here and there to match the rest of the tank.
Its as complicated to do as it seems tapping out the words. The metal burnishing did most of the hard work.
Vintage Paul
I'd happily live in the past but for air conditioning, the internet, mobile phones, modern medicine & dentistry and, and, and . . .
Wisconsin, United States
Joined: July 30, 2013
KitMaker: 584 posts
Armorama: 525 posts
Posted: Friday, September 16, 2016 - 07:21 AM UTC
Vietnam
Joined: May 07, 2006
KitMaker: 416 posts
Armorama: 312 posts
Posted: Friday, September 16, 2016 - 08:32 PM UTC
Hi,
Too many completed nice models here. Your models - Raj, Paul O'Neil, Shawn, Zaidi, G.Houle - actually make a new routine to me.
I've just picked a Tamiya kit for this campaign.


@ G.Houle: I'm sorry, which code of brown color do you use on the 1/35th JGSDF Type-10?
Regards,
K.
Putrajaya, Malaysia
Joined: March 04, 2004
KitMaker: 2,511 posts
Armorama: 913 posts
Posted: Saturday, September 17, 2016 - 10:44 AM UTC
Good luck guys,,lots of nice work in this campaign.
Tamiya kit is easy to build making this campaign so much fun...
anyway, i decided to stop this project as i think no more weathering i shall apply to my build
so here it goes...2 kit in a row
jadgpanther (late) and m4 sherman


Thanks for looking..and good luck to the others....
Sil
The more i know, the less I understand!!!!
Alberta, Canada
Joined: November 18, 2003
KitMaker: 61 posts
Armorama: 57 posts
Posted: Saturday, September 17, 2016 - 08:20 PM UTC
Talk about getting in under the wire. Here is my entry, an oldie but a goodie the Tamiya Chally 1. It will be built straight from the box with no add on's .

Wisconsin, United States
Joined: July 30, 2013
KitMaker: 584 posts
Armorama: 525 posts
Posted: Sunday, September 18, 2016 - 04:19 AM UTC
Quoted Text
Hi,
Too many completed nice models here. Your models - Raj, Paul O'Neil, Shawn, Zaidi, G.Houle - actually make a new routine to me.
I've just picked a Tamiya kit for this campaign.


@ G.Houle: I'm sorry, which code of brown color do you use on the 1/35th JGSDF Type-10?
Regards,
K.
Thank you for the kind words, I used the factory call out, XF72 JGSDF brown
Vietnam
Joined: May 07, 2006
KitMaker: 416 posts
Armorama: 312 posts
Posted: Monday, September 19, 2016 - 07:38 AM UTC
Quoted Text
Thank you for the kind words, I used the factory call out, XF72 JGSDF brown
Thank for your info. I'll match the similarity in my enamel Tamiya and lacquer Mr.Hobby paints.

Regards,
K.
Wisconsin, United States
Joined: July 30, 2013
KitMaker: 584 posts
Armorama: 525 posts
Posted: Monday, September 19, 2016 - 07:20 PM UTC
Quoted Text
Quoted Text
Thank you for the kind words, I used the factory call out, XF72 JGSDF brown
Thank for your info. I'll match the similarity in my enamel Tamiya and lacquer Mr.Hobby paints. 
Regards,
K.
I went back and looked at the color call outs again, and it's actually TS-90 but I don't use spray paints. I wish I could recall what I used on my 1/35th version because I think those colors look much more similar to the real thing........but hey I build for the fun and the mental release.

Illinois, United States
Joined: November 20, 2012
KitMaker: 203 posts
Armorama: 198 posts
Posted: Monday, September 19, 2016 - 08:27 PM UTC
Paul, love how the churchill came out, tracks and weathering esp nice.

BTW, what color did you use for the british bronze green? looks really good.
Shawn, great PzII some really nice tonal variation on the grey finish, was that done with pigments,filters,both?
G.Houle love the Type 10 "twins", really nice finishes on those.
Sil, great looking camo and finishes on both of those!
Getting close to wrapping up my char b1 and it's inspiring to see all of these excellent builds getting done.


#460
California, United States
Joined: September 16, 2014
KitMaker: 1,156 posts
Armorama: 1,024 posts
Posted: Monday, September 19, 2016 - 11:35 PM UTC
Quoted Text
Paul, love how the churchill came out, tracks and weathering esp nice. 
BTW, what color did you use for the british bronze green? looks really good.
Getting close to wrapping up my char b1 and it's inspiring to see all of these excellent builds getting done. 
The basic color on the Churchill was the one called out in the destructions, XF-2 Dark Green. It is kinda hard to tell under all of the gump added later.
I am really looking forward to seeing your Char. I have one of these kits in the pile but have not felt ready to tackle it yet as the paint scheme looks well above my current skill set . . .
Vintage Paul
I'd happily live in the past but for air conditioning, the internet, mobile phones, modern medicine & dentistry and, and, and . . .


