

1⁄35Realistic Tarps!
69
Comments
Preparing the tarp
For this article I am building a tarp for a pallet holding a 44 gallon drum, some scratched ammo boxes and some Friul tracks (Photo 6). These items have great scope for raised edges and depressions, which add realism to the finished item. Put the model onto the tarp and work out the area required, allowing for seams, folds and depressions, then add another 10% to be on the safe side. I want part of the items on the pallet to be in view, so I cut it accordingly. (Photo 7).Optional Extras
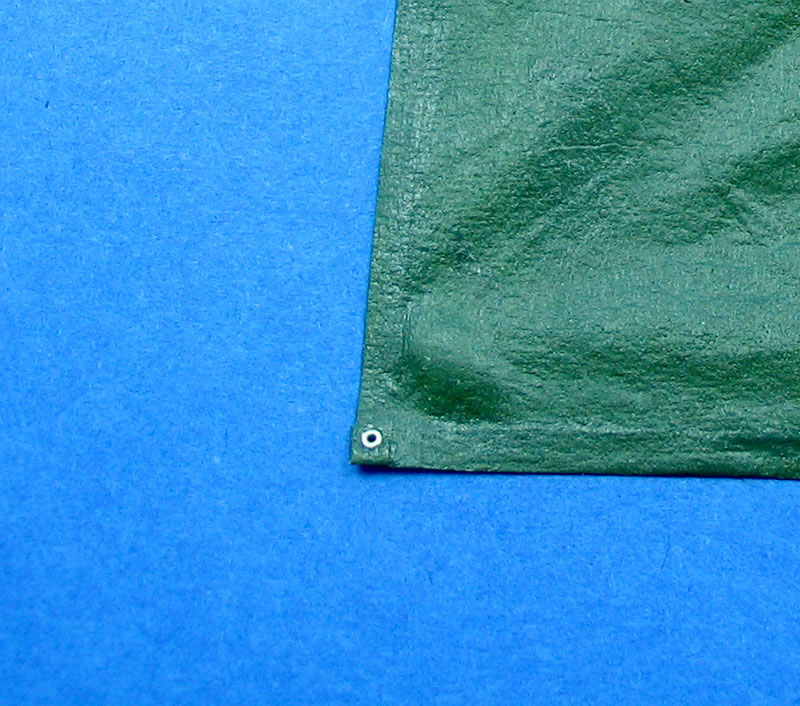
At this point you can put in seams, repaired areas, or eyelets. For seams, score a line with the BACK of a blade about 1.5mm from each edge, and glue it down with PVA. Then take each folded seam and fold it over itself AGAIN, and glue down. (Photo 8). For patches, take a spare piece of sprayed tarp, cut the size and shape you want, and paint it a darker green (straight XF-26 Deep Green in this case) than the original, (dont forget the edges, or they will be white). Glue it to the tarp, and with the point of a straight scalpel blade, make the stitches around the edge. (Photo 9). For eyelets, take small rings from and old PE fret and glue them at corners and points in between along the seams. Take a sharp pick or pin and punch out the tarp hole through the ring. You can now run ropes through these eyelets. (I use rigging rope from the shipbuilders). (Photo 10). Once done with all the extras, seal both sides with a good coat of future. Rub down the length of each seam with a Q-tip to raise it. It should now be looking quite tarp like. (Photo 11). Before fitting to the model you will need to create the normal folds that appear in a stored tarp by folding it into halves and quarters, and sharpen each crease between finger and thumb. Do this several times to really form the creases, then flatten the tarp again to eliminate some of the sharpness to create a used effect. (Photo 12).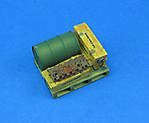 Photograph 6
 Photograph 7
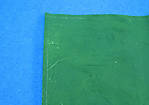 Photograph 8
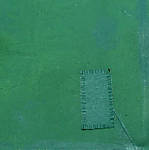 Photograph 9


About the Author


FROM: ENGLAND - EAST MIDLANDS, UNITED KINGDOM
Spent time in specialised sales to militay, non-destructive testing, risk engineering, engineering underwriting surveys on mines and mineral processing plants. Modelling from Airfix days, I took a 25yr break and came back to the hobby 18month ago. Currently working on a Sturmtiger with fully detaile...
Comments


I happend to have an old Fug5 radio fret from Aber and it had a few 'rings' on it. If anyone has any thoughts on where to get more eyelets of this size in bulk I would love to hear. Its possible I could have a fret made commercially by Scalelink that would have hundreds on it, but there would need to be a demand. As tarps are common across several modelling areas (air, ships etc) maybe we could get them interested. Or if there was something else currently unavailable I could add it to the fret to increase demand and commercial viability. Thoughts?
Brian[/quote]
Another thought is the BRAVO 6 Smoke Grenade set as the pull rings for the grenade pins are small rings of PE.[/quote]
Good source is the Royal Model 1/35 PE eyelet set, here:
LINK
DEC 26, 2015 - 03:16 PM

Anyone tried this with acrylic Gesso in place of the sealer? I mixed water and clear gesso on a glass plate to spread the tissue on. It came out with a kind of smooth texture, but still experimenting here. Just wonder if others have tried? Seems very durable and easy to shape after drying over night
DEC 29, 2015 - 11:34 AM

Never even heard of Gesso. I'll have to look and see if they have anything like that at the local DIY store.
DEC 29, 2015 - 07:20 PM
The brand I tried was Liquitex medium clear gesso acrylic. It is a paint base and thickener that is available at most art supply places such as Blicks or Hobby Lobby. Many use this for water effects like ripples or wave shapes. If it is thinned with water then it soaks into the tissue for a tarp. My issue was how to carefully get out the wrinkles without tearing when first wetting the tissue. A glass plate seems to help.
DEC 29, 2015 - 07:35 PM
Might have to give it a try.
I used wax paper as a work surface. Seems to work okay, but you're right; trying to do much with the tarp soon after painting it with your rubberizing medium of choice is tricky work.
DEC 29, 2015 - 07:39 PM
I've found a single tissue gives enough material for many projects.
I have also found that once it is completely dry I can form it into whatever rough shape I want and then paint it with isopropyl alcohol to soften it up enough to be able to precisely tune the shape. Worked like a charm for making a new canvas roof for a quad tractor and a spare tire cover for a scout car.
FEB 10, 2016 - 05:44 PM

Resurrecting this old thread because the final product looks so good. I tried it twice with facial and wrapping tissue but could not get it to work.
Questions for those in the US that got it to work:
1. What exact product did you use?
2. What surface did you use under the tissue when applying the liquid? (I used wax paper.) How do you lift the wet paper off the surface without tearing?
3. How do you dry it? Is it on the surface? How do you keep it from bonding to the surface when dry?
Thanks,
KL
DEC 22, 2018 - 07:38 AM

Kurt, here's what I do with Vinnie's EXCELLENT technique.
First you must use a good quality smooth tissue - I use the stuff that comes with men's shirts.
The latex I use here in Canada (I'm sure similar stuff is available in USA) is DAP brand Acrylic Latex Caulk Plus Silicone. I mix it 50/50 with water to make a very dilute "solution".
I do not apply it on a hard surface. Instead I have a 4" by 6" frame onto which I tape a piece of tissue. Then using a broad 3/4" to 1" wide SOFT brush I wet one side and gently dry it with a small hair dryer, which takes only a minute or two. Repeat on the other side. It is during these first two applications that you are most likely to tear the wet tissue . . . so be careful. I then do two more double sided coats. I'll do a fourth if I plan to cut the tissue into strips for belts, etc as it a little stronger.
The "cloth" takes acrylic paints very well. There are photos of this technique used to make a canvas roof of my Schwimmwagen on Missing-lynx 3 Sept 2018. Good luck . . . you only need it for the first coats.
DEC 22, 2018 - 09:49 AM
Thanks Tom!
I was thinking of attaching it to a frame. I have been using an acrylic caulk that is listed as "paintable". The small pieces that have survived the previous experiments did seem to be pretty durable, even with just a single coat. I will try this tomorrow.
Thanks,
KL
DEC 22, 2018 - 04:05 PM
Copyright ©2021 by Brian Balkwill. Images and/or videos also by copyright holder unless otherwise noted. The views and opinions expressed herein are solely the views and opinions of the authors and/or contributors to this Web site and do not necessarily represent the views and/or opinions of Armorama, KitMaker Network, or Silver Star Enterrpises. All rights reserved. Originally published on: 2006-06-12 00:00:00. Unique Reads: 46067

WEB HOSTING BY


Copyright ©2021 Armorama and Kitmaker Network, a subsidiary of Silver Star Enterprises
All Rights Reserved. Please read our Conditions of Use and Privacy Policy.
All Rights Reserved. Please read our Conditions of Use and Privacy Policy.