

1⁄35Building the DML M2A1 Halftrack
95
Comments
the chassis
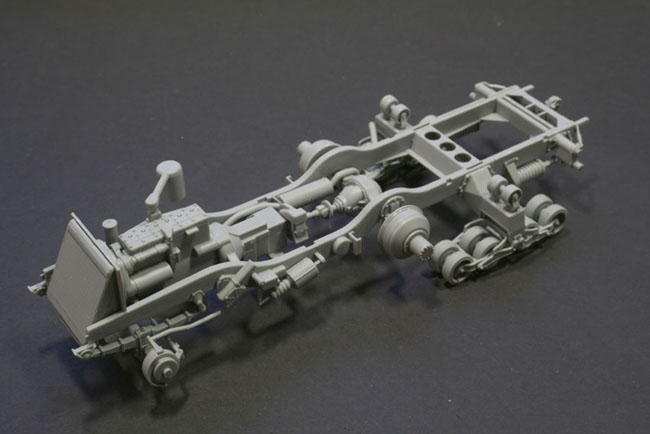
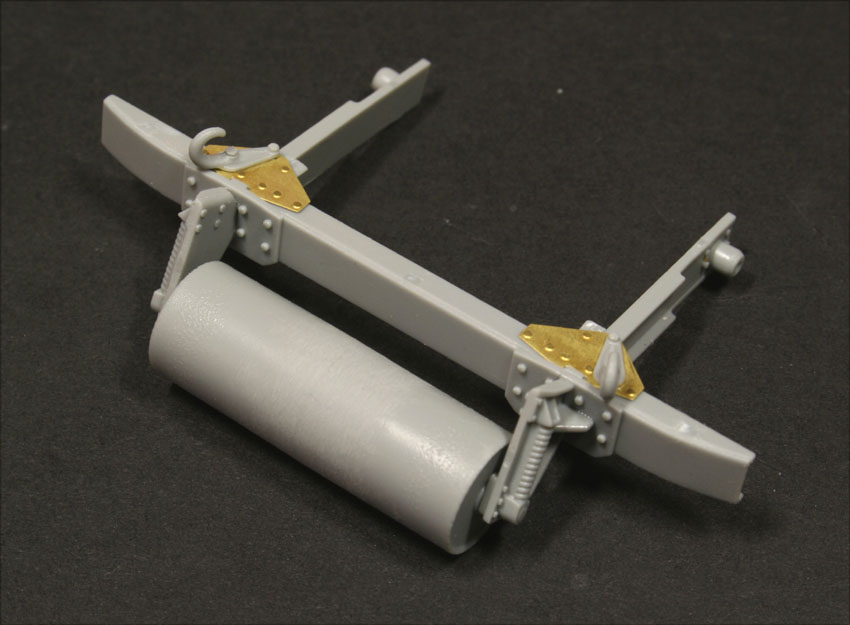
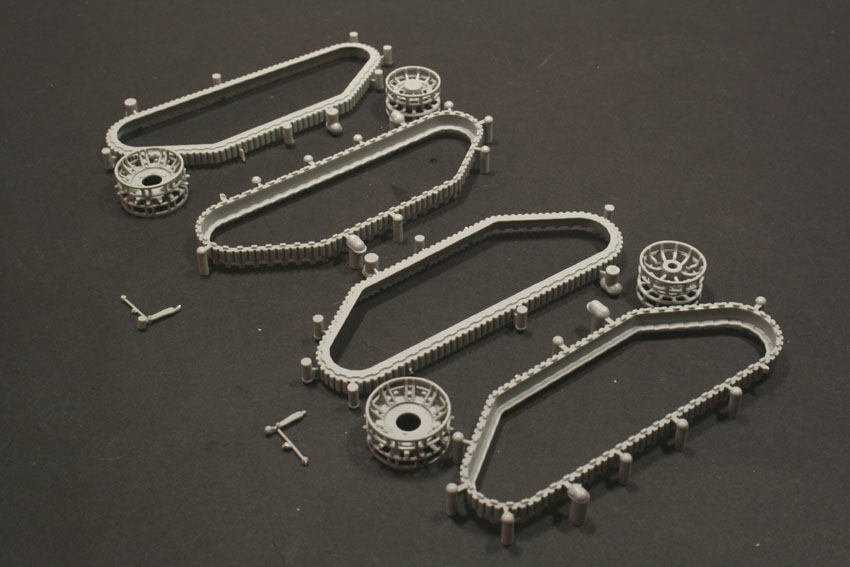
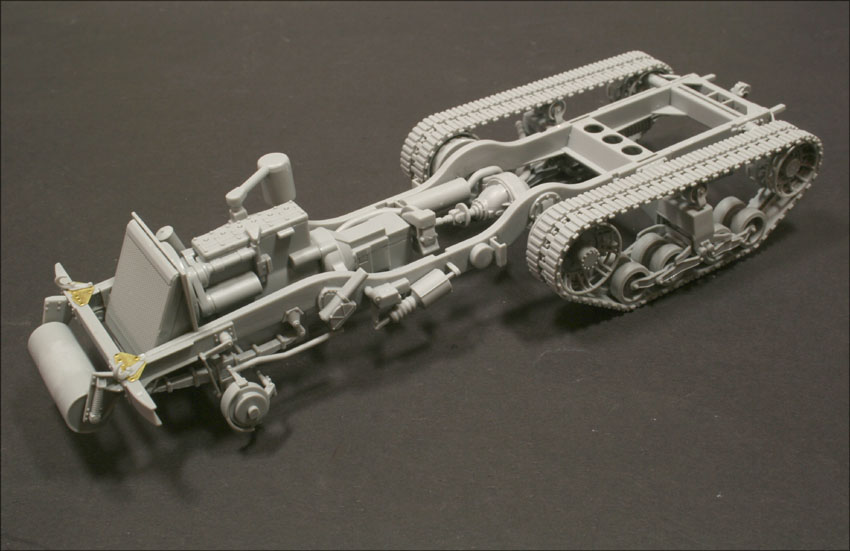
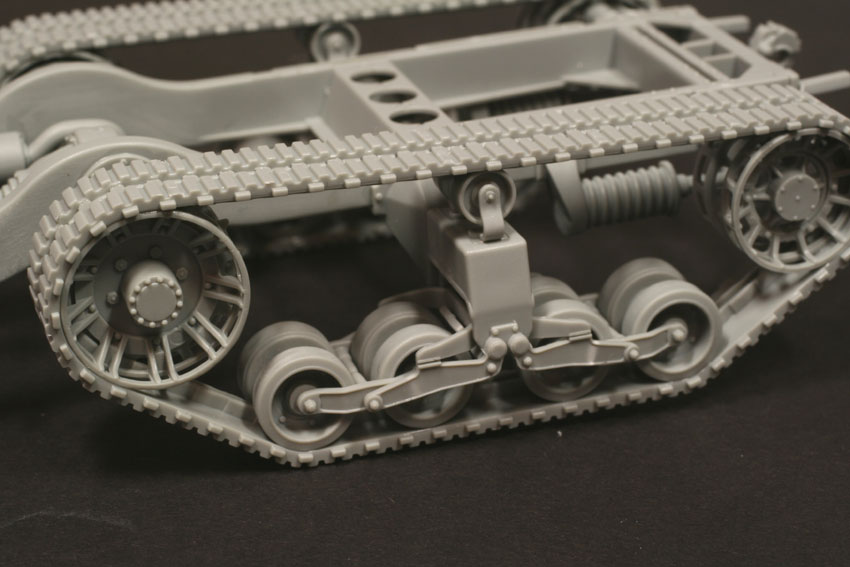
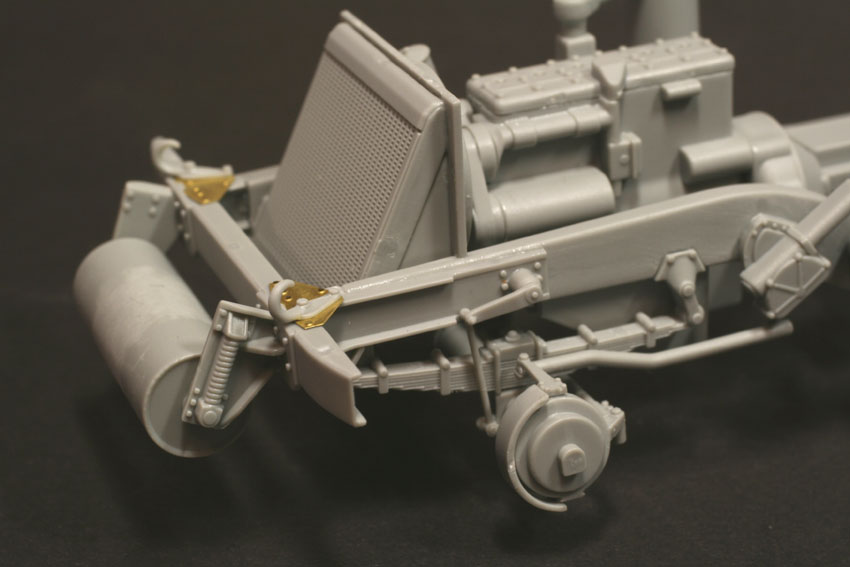
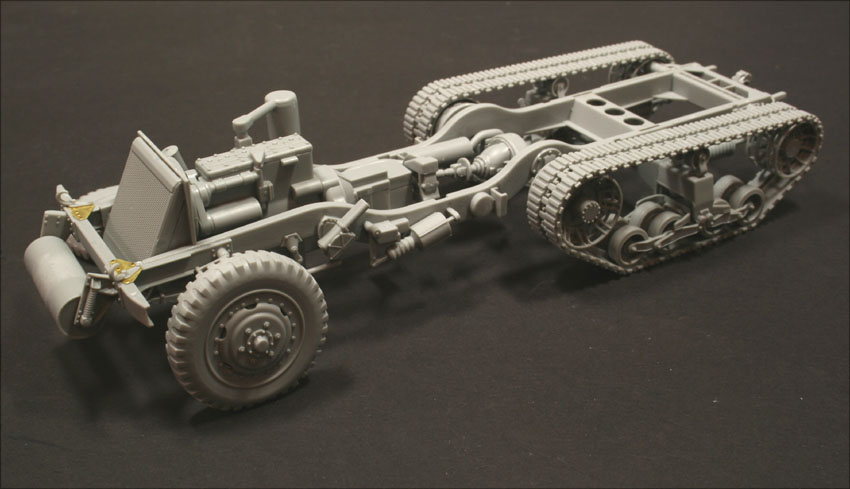
This stage deals with the assembly of the chassis, and its here that clean-up really pays dividends. Its also here that youll have to make the decision of which version youre going to want to build, the M2 or the M2A1, since there is a small part to be removed from the transmission cover where the power take-off for the winch goes in. One of the most onerous tasks Ive always found in modelling is cleaning up leaf springs. However, the ones in my kit required no more than a wipe with the scalpel blade, each half of the mould being lined up perfectly! Stage five shows the installation of all the sub assemblies so far being fitted to the chassis. Its also the start of where the instructions begin to get a little complicated. Part C13 is the poser take-off for the afore-mentioned winch, so if youve decided to make the basic M2, then dont fit this. There is an two-part insert, which clearly shows the front bracket assembly for both of the two versions, so its difficult to get mixed up, as Dragon have tried there best to clearly show us the way! The small nearly-triangular bolted strengthening plates at either end of the front bracket is supplied as photo etch, and there is no styrene alternative supplied so be careful with these! It will also pay you, should you be building the M2, to assemble parts C1 & C2 earlier and have them prepared, because therell be a central seam to remove which is unavoidable. In stage 6 we get to fit those lovely tracks! Each track is split longitudinally, and is moulded on one of the sprues. It sounds odd to manufacture the sprues this way, but all I can say is that it really works! Remember, these tracks on the real vehicle werent metal. They were rubber with an internal strengthening structure of wire, and they were live in that they were tensioned and not subject to track sag, so theres no real reason to have them made from individual links or vinyl. The only problem I can see from this approach is that some people will obviously need to animate the track to show the vehicle going over an obstacle in a diorama, but Im sure this is already in hand from the aftermarket sector, and it shouldnt be too long before we see a replacement set of tracks on the market. Once you have each track assembled, youll need to manipulate it over the road wheels, and the easiest way to do this is to have the drive sprocket and idlers inserted into the tracks, and then the whole assembly can be inserted into place. If youre going to spray-paint the vehicle, then this step can be completed now, however, if you use a brush for painting, its probably best to leave the whole running gear assembly separate for easier painting.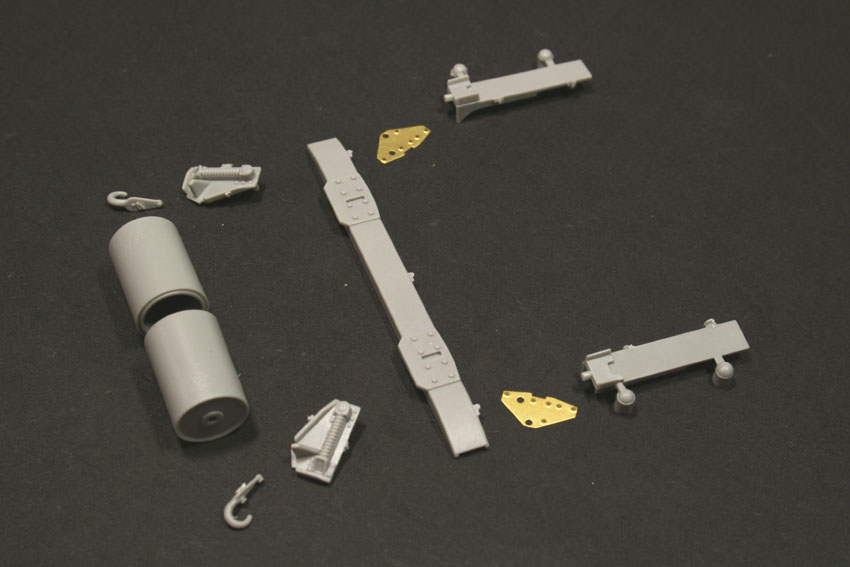
About the Author


Comments

If nothing else, this proves that DML at least listens to the discussions going on via forums around their kits. I take that as a positive indicator of awareness at least and willingness to acknowledge concerns one way or the other.
NOV 13, 2006 - 12:25 AM

And how long will it be until we see a pic posted in the gallery with the little bulge postioned at the top? :-) :-)
NOV 14, 2006 - 02:05 PM

This thread is pedantic to say the least. Who cares if there's a bulge in the tyres? It really is not that important in the greater scheme of things! If you don't like the look of it then don't buy it but stop whinging about it! As an Allied modeller I'm overjoyed that this kit has been released to replace the bog awful Tamiya half track. If that's the only inaccuacy anyone can find on the kit I'd say DML have done a fantastic job..just forgot to inflate the tyres to the correct PSI as you can always do that on a battlefield under fire. Get a grip
NOV 15, 2006 - 05:34 AM

There you are. It's not as if the Dragon tyre has a wrong thread pattern, or the wrong number of wheelnuts, or is the wrong size.... it's only underinflated.
How about using the Tamiya front wheels? They don't bulge...
Henk
NOV 15, 2006 - 08:32 AM

Excellent article, Vinnie! I just got my M2/M2A1 kit last night and am chomping at the bit to get started. This kit looks like one of those rare "box shakers" that require only some glue thrown into the box, which is then shaken and out comes a built model. :-) Seriously though, I could find no reference to "glitches", or problems with this kit, in your article (at least not major problems) and I am looking forward to getting on with this project. Once again, well done. Dave
NOV 18, 2006 - 02:19 AM

Well I just got my halftrack today, and gone through it several times, wiping up the drool as I go, and this is coming from a non-allied builder! :-)
I had a look at the little "issue" people have with a couple of certain parts, they look fine to me. Mine will be goin in a dio anyways, so they propably won't be noticed. But what a kit! and now it's promptly going into one of my boxes, as I'm packing to move!
NOV 18, 2006 - 08:05 AM
For any of you who might be interested, a tweaks list for this fine kit has been posted on ML. My buddy Jay did a lot of detective work and has very comprehensively listed many of the minor adjustments needed to make a great kit even greater. Give it a look! Happy Thanksgiving folks! Dave
NOV 22, 2006 - 06:52 AM

Well, enough of the tires. Vinnie, what you are missing is the cover for the gaping hole in the crew compartment. A lot of people are missing this, it is in the directions but it's very hard to miss. Even the one in AFV Modeler is missing it, I almost did too, had to add it after the model was built.
Jim
DEC 13, 2007 - 04:20 PM

James, there's little point in posting as a response to this feature. The author of the article is no longer a member of this site..
DEC 13, 2007 - 08:51 PM
Copyright ©2021 by Vinnie Branigan. Images and/or videos also by copyright holder unless otherwise noted. The views and opinions expressed herein are solely the views and opinions of the authors and/or contributors to this Web site and do not necessarily represent the views and/or opinions of Armorama, KitMaker Network, or Silver Star Enterrpises. All rights reserved. Originally published on: 2006-11-07 00:00:00. Unique Reads: 48591

WEB HOSTING BY


Copyright ©2021 Armorama and Kitmaker Network, a subsidiary of Silver Star Enterprises
All Rights Reserved. Please read our Conditions of Use and Privacy Policy.
All Rights Reserved. Please read our Conditions of Use and Privacy Policy.