1⁄35Building the Pzkpfw III Ausf E
11
Comments

Upper hull
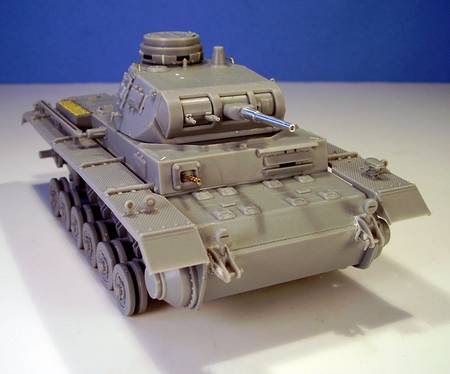
One of the more amusing side affects of the “mix-and-match” of parts sprues is that the upper hull portion is taken from the StuG III kits and is molded with the supporting casemate and gun structure for that vehicle. The process of re-constructing the upper hull requires plating over all of this with the hull panels. These panels also call for some minor molded on detail to be removed and holes drilled out for installation of the bullet splash guard. I discovered after the fact that this feature only appeared with the introduction of the Ausf F and is not appropriate for the E so the instructions are incorrect in calling for this but it was too late for me to correct and left as is. All the hull plates fit well together with only minor adjustments needed to achieve a squared up assembly. Test fits using the bottom of the turret showed good clearance all around, putting to rest my original worry due to the hidden StuG structures. One minor problem appeared involving the installation of the Armorscale MG replacement barrel. The hull ball mount must be drilled out to take the barrel and a quick test fit revealed the need to remove a good portion of the MG barrel to clear the hidden superstructure wall and still be the proper length on the exterior. This was accomplished with a pair of heavy duty side cutters and the barrel glued in place with some CA gel. Joining the upper and lower hull required some sanding and tension supplied by several good sized rubber bands due to the tight tolerance between the upper and lower hull join surfaces. After about an hour of being in traction, the hull was released and only some minor putty work required at the front hull over the drive sprockets.hull detail and fenders
Work began with removal of some molded on detail on the engine hatches and installing various fittings for the E rear deck layout. The kit provides parts for the smoke grenade holder on the rear deck but no grenades. I scrounged a set from the spares bin originally designed for a Pzkpw I-B and they fit well enough to be used. In an earlier step I’d mistakenly filled in the holes on the rear mufflers but discovered they were actually reinforcing holes to keep the muffler from suffering damage and the putty work was drilled back out to restore the holes to their proper condition. In addition to the rear deck, the hull sides received their engine intakes along with the replacement Aber screens and the fenders installed on both sides without issue. The original kit fire extinguisher was replaced with a more up to date item from a Pzkpw IV-E build in the spares bin. The rear mud flaps had their indentations filled for the correct solid flaps typical of the E and both the front and rear flaps were thinned down to a more in-scale appearance. The kit supplied antenna mast was replaced with brass rod and some careful work with the front tow hooks was required in terms of filling sink marks on their outward faces and correcting their poor fit against the front hull angle.turret
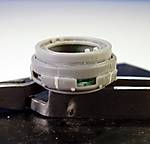
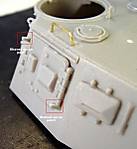
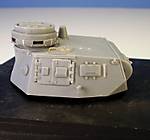
The turret assembly followed the usual pattern of a 3-sided shell with installation of a separate front plate and bottom ring. The right side hatch frames were incompletely molded and required two replacement hinge points to be scratch built from spare sprue to correct. I also carefully drilled out the solid molded lifting hooks on the turret front and rear with a pin vise and carefully opened the “hook” with the sharp point of a new #11 blade. One of the more impressive parts of this kit is the commander’s cupola. It is the early “drum” style base with 5 view ports and their corresponding armoured shutters but did not include any clear parts for the armoured glass. I modified some spare IV-E clear vision blocks by carefully sanding and trimming to fit the smaller dimensions on this cupola and these were tinted a slight greenish colour to simulate the 90mm glass with acrylic Tamiya Clear Green and then thinned with water to produce the desired effect. The lower portions of the visors required some putty and sanding over the join lines and the cupola was then secured using blue-tack for painting purposes. Final details included replacing the kit molded grab bars with some brass rod, installing the JR aluminium barrel, drilling out the dual coaxial MG barrels with a pin vise, and filling the pre-drilled holes in the turret roof that are not required for this variant to complete the turret.Comments
I actually have that kit in the on deck circle so it was really welcome.
Thanks Bill,
Shaun
DEC 10, 2006 - 06:59 PM
Nice Feature, very well put together!
Thanks for sharing, mate.
~Gunny
DEC 10, 2006 - 07:53 PM
Bill
I said it before when you were posting in the forums and I will say it again simply a superb article. Thanks for all your time and effort.
Regards
Sean
DEC 10, 2006 - 11:11 PM
Bill,
was the semi matte finish on your PzKW III E meant to convey a tank in the rain?
JUL 03, 2008 - 07:18 PM
Hi Jack,
Not sure what you mean by semi-matte? The finish on this one is dead-flat including the dust coat, it depicts a vehicle in the Balkans in early summer 1941.
JUL 03, 2008 - 07:29 PM
Great review and build...some great ideas and points to bear in mind when undertaking this kit. I usually avoid "older" kits but ,at the right price and with some judicious editing ,as you have shown, they can be made into fine looking kits.
MAY 15, 2015 - 09:17 PM
Thanks Bill,
You have shown, once again, the benefits of paying attention to detail in this build. It is a reminder that well honed skills can turn an older kit into a work of art.
Thanks again for the feature.
Cheers,
Rick
MAY 15, 2015 - 11:30 PM
Copyright ©2021 by Bill Plunk. Images and/or videos also by copyright holder unless otherwise noted. The views and opinions expressed herein are solely the views and opinions of the authors and/or contributors to this Web site and do not necessarily represent the views and/or opinions of Armorama, KitMaker Network, or Silver Star Enterrpises. All rights reserved. Originally published on: 2006-12-09 00:00:00. Unique Reads: 34354


