

1⁄35Prepping Plaster Diorama Kits
If you are reading a lengthy article on dioramas, you probably already have solid baseline knowledge of the tools required and a collection of suitable tools for the task at hand. There are however, three key tips I will recommend to any builder at any level, beyond the normal files, clamps, rotary tool, and paints. These three things will not only make you a better builder, but will save you time and frustration
a) flat floor tile for use as a working base, (found at any local hardware store for $2)
b) a lazy-susan for easily rotating the structure while working on the piece, and
c) the marvelous - no - essential FABRI*TAC clear glue
|
|
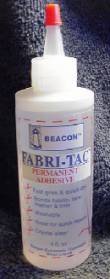
This stuff is wonderful! Tacky and sticky enough to hold pieces in place
immediately, yet slow curing enough to allow minor repositioning for up to 5
minutes after joining pieces together. Cyanocryllics are often recommended for
plaster kits, but I find they are too thin, too messy, too unforgiving, and tend
to soak into the plaster, wasting time and money. Cyano is great for resin
figures, but for plaster, FABRI*TAC is the answer! It has a thick peanut-butter
consistency that dries clear, holds fast, and becomes rock-hard after curing.
(Information about mentioned vendors provided at the end of this article).
The tile square is recommended because it is large enough to hold almost any
piece while working, is extremely flat, and the smooth finish tiles are almost
impervious to glue, stains, paint, or anything else. After the project is
finished, just wipe the tile surface with a little rubbing alcohol, then scrape
smooth again with a straightedge razor.
The Lazy Susan comes in handy when trying to turn a newly glued piece around to
insure perfect fit
rather than lift a non-cured piece, just give it a spin for
a view of fit and trim from any angle. You can find a simple ball-bearing 12"
metal ring at most any major hardware store. Screw it to a block of wood, and
glue the wood block to the bottom your square tile and you're in business for
years.
STEP 2 - The package
First and foremost, realize that most kits have few pieces - anywhere from 4 to
10 is common, although the tendency is moving towards more parts, and the
addition of resin detail kits is also becoming more popular. It is essential to
keep the manufacturer's package photo for ready reference, as instructions for
the kits are rarely included. A small piece will eventually find it's way to
your work table, and you'll be scratching your head and wondering "what is this
do-hickey - and where does it go!?"
Usually you can find out by looking at the
kit photo.
About the Author


FROM: TEXAS, UNITED STATES
After a hiatus of several years following the sale of my hobby shop (Hobby Annex in Dallas, TX), I am ready to build again... I love dioramas, with a focus on WW2 and tend to spend a lot of time documenting my work... any questions, just let me know! - Keith


All Rights Reserved. Please read our Conditions of Use and Privacy Policy.