

1⁄35Prepping Plaster Diorama Kits
I like to take all pieces out of the package next, and lay them flat on my work surface. This accomplishes three major things:
1) Identify all the pieces,
2) Inspect for damage
3) Check for perfectly flat / square pieces.
|
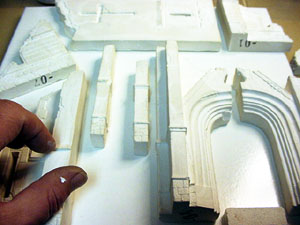
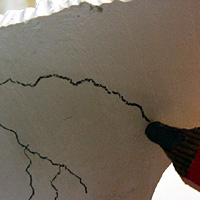
While identifying the pieces, I often take a small pencil and mark areas that
need touch-up or I may draw in modifications I need to make, such as adding
brick texture to inside walls or indicating where my electrical wiring may go in
a finished piece. Most manufacturers do not provide any detail on the inside or
"non-showing" faces of their plaster - but if you want a 360-degree experience
for the viewer, these will need to be added. (See: STEP 4 "Fiddlin' and Filing")
Because the kits are made of plaster and are often shipped far distances, it is
also a mandate to determine if any pieces have been damaged beyond repair. Don't
be alarmed if the front of your building is split in two or three pieces
after
all - you are typically working on a ruin, right? Simply diagnose what pieces go
where, break out the FABRI*TAC and a little white Spackle, and put them back
together. Only when I open the box and find a key pieces has been pulverized
into powder do I contact the kit maker or my hobby shop for a replacement part.
Often they send it for free, but at worst case, they may charge a dollar or two
more.
 |
 |
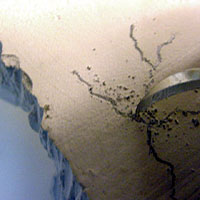 |
| Use a Right Angle Block to Check for straight edges. | Draw in additional detail to be scribed on the back pieces. | Lightly scribe in detail using two or three passes for depth. |
Finally, I like to make sure that no pieces are badly warped or "out of square".
To do this, I lay the pieces flat on their unfinished side, and look to see if
there is any bend in the piece. If so, simply sand down any high spots with a
hand sanding pad (avoid overdoing it with a rotary tool!) and check repeatedly
until the problem disappears. I also like to get out my metal right angle and
look for any skewed edges that may need to be trimmed or "built up" with Spackle
or balsa wood.
About the Author


FROM: TEXAS, UNITED STATES
After a hiatus of several years following the sale of my hobby shop (Hobby Annex in Dallas, TX), I am ready to build again... I love dioramas, with a focus on WW2 and tend to spend a lot of time documenting my work... any questions, just let me know! - Keith


All Rights Reserved. Please read our Conditions of Use and Privacy Policy.