

1⁄35Filling the Gap
9
Comments
introduction
Sometimes when I am between major projects, I like to build what I call a "filler" build. These usually consist of a low quality kit but always of a subject that interests me and needed for my personal collection. They are also very good for practicing the basics of building, filling, and painting and weathering. For this project, I chose the 1/35 Maquette offering of the Russian amphibious T-37A light tank. As most of us know, Maquette kits are not the best or easiest to build by any means. They tend to get passed over without even a second glance anymore with all the newer releases from Dragon, Tristar and Tamiya, just to name a few. While those kits are usually better engineered and better detailed, sometimes we have to revert to companies like Maquette when they are the only option for certain vehicles in plastic. Usually, with a bit of patience, they can still be built into nice looking models.background
Production of the T-37 began in the early to mid 1930's and it was the first amphibious tank of its kind to be deployed. It was mainly used as an infantry support and recon vehicle and was hopelessly obsolete by WW2. Despite this fact, it was used in combat by the Russians and was still being used up to as late as 1943 by the Germans who had pressed captured vehicles into service as beutepanzers. The Finns also used captured T-37's against their former owners on occasion.the build
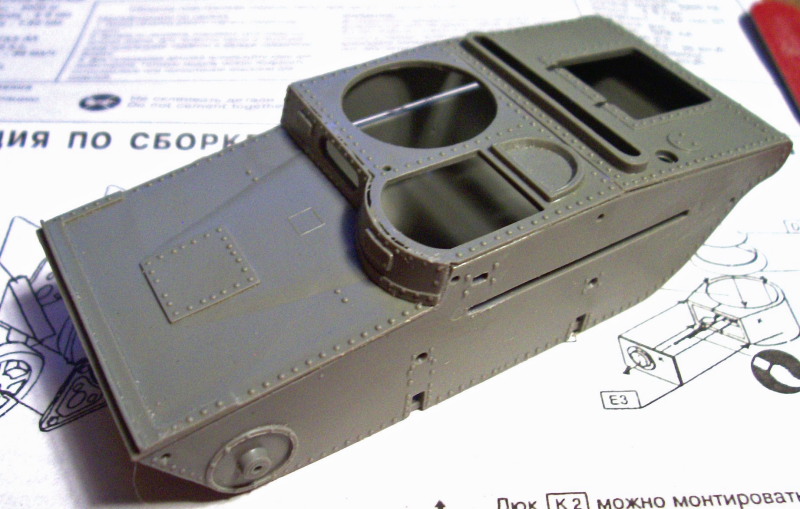
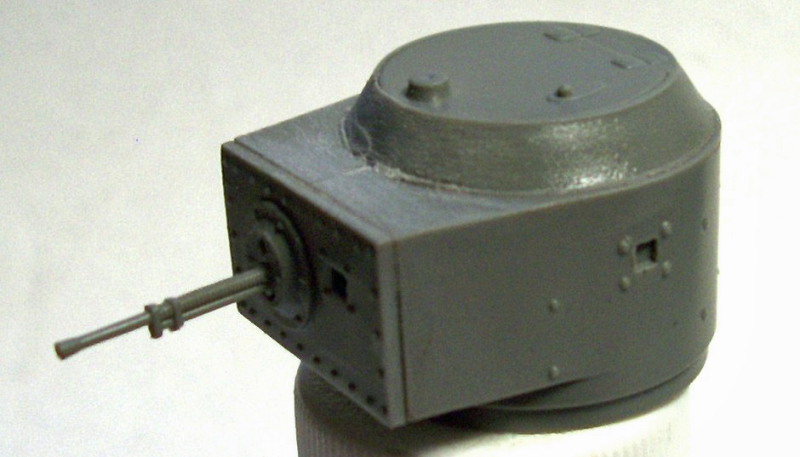
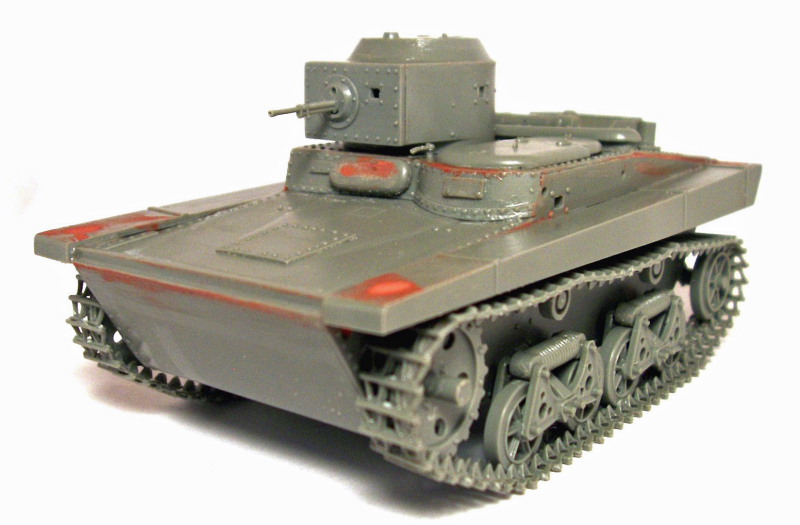
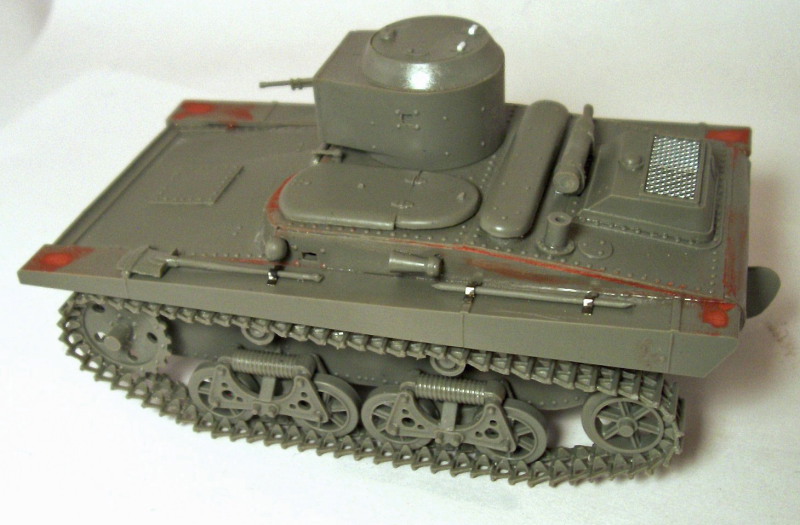
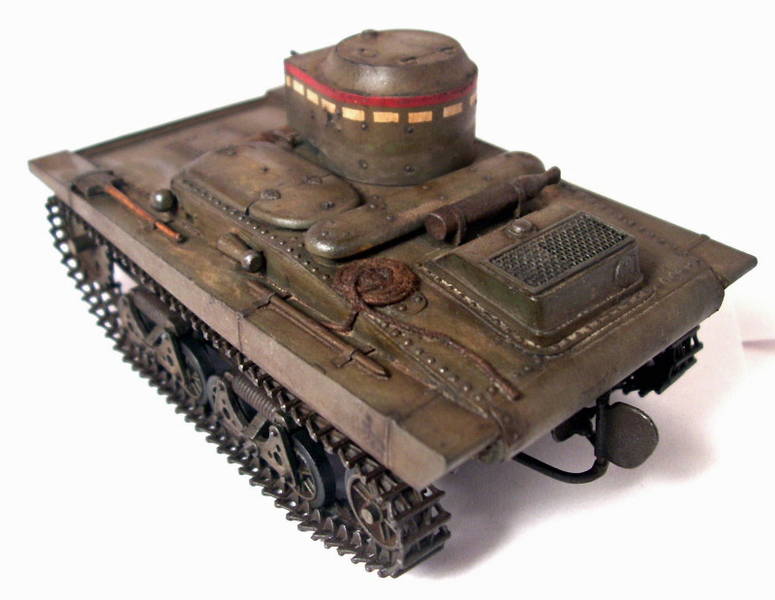
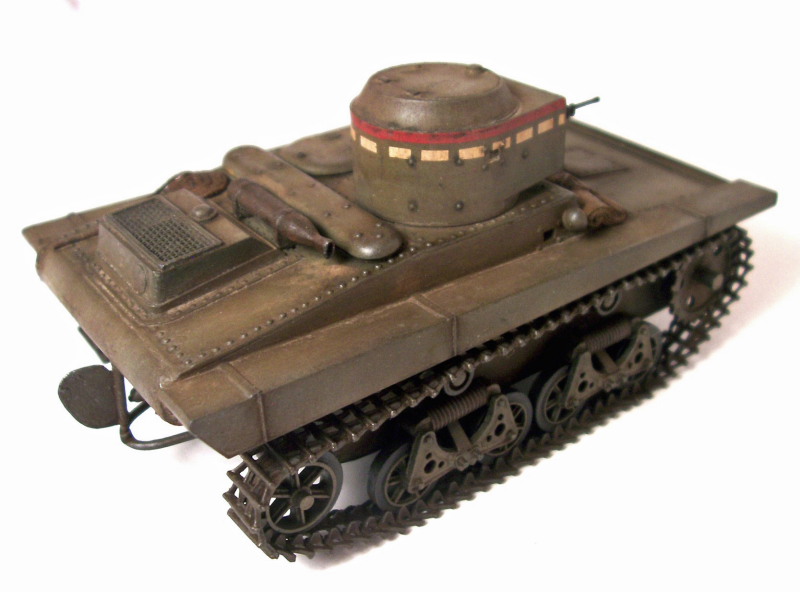
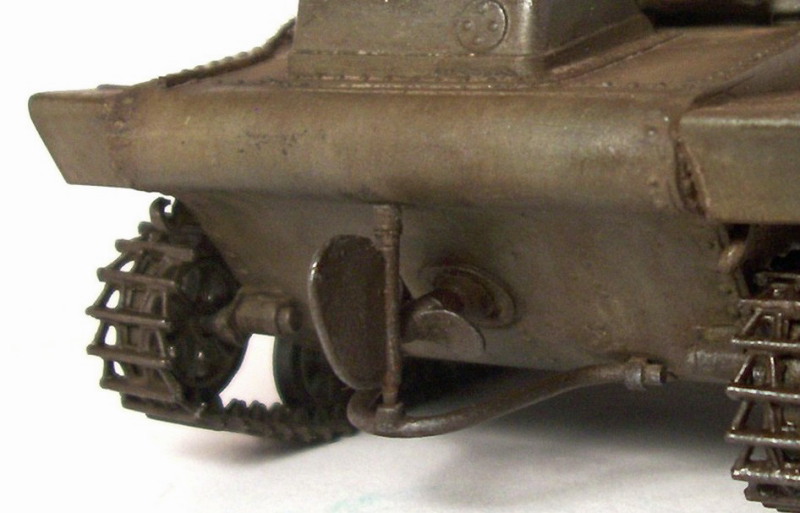
The boxart is fairly nice for this type of kit and gets the point of what this vehicle is about across nicely. Upon opening the box, you quickly realise that there is not much inside but when all was said and done there was everything there that was needed to build the model, so I can't really complain on that score. The parts themselves were actually fairly well molded with little or no flash which is suprising given Maquette's reputation. In addition, the tracks and running gear were also quite well done and I felt a slight feeling of optimism at this point! I began constructing the main tub and upper hull and my optimism soon faded when it quickly bacame apparent that there was no way these parts were ever meant to go together properly as provided. I fit them the best I could knowing I was going to have to rely on putty to fix this one up. The rest of the build went quite well in comparison with a few sink holes to contend with and of course the gaps in the upper hull. I was actually enjoying myself at this point so it didnt matter that much. The wheels and tracks went together quite well and in my opinion looked very good when done. I had to scratch-build a couple of small items to replace some bad moldings and also added a mesh screen for the rear vent. Otherwise, nothing major was added or changed in trying to keep this to being a "filler" project. I did go ahead and drill out the lights and used clear epoxy for lenses when the painting and weathering was complete.Finishing
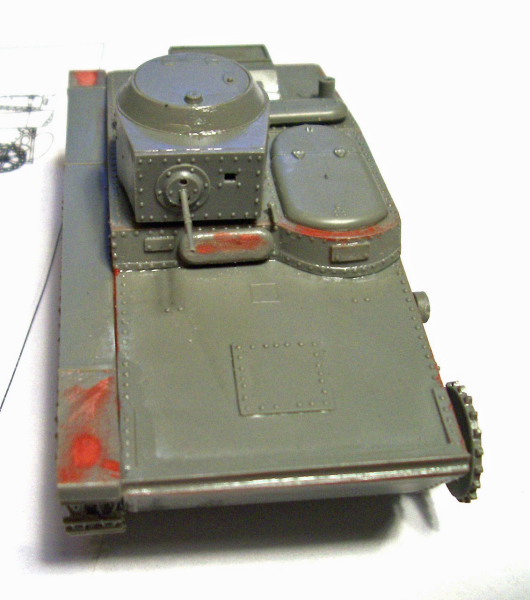
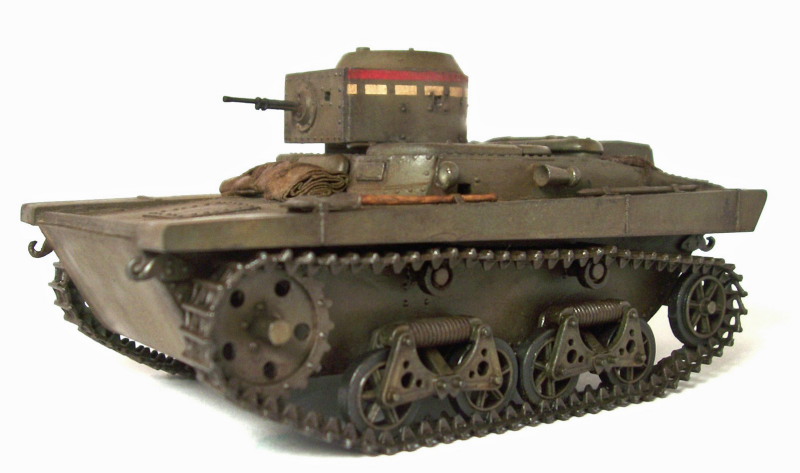
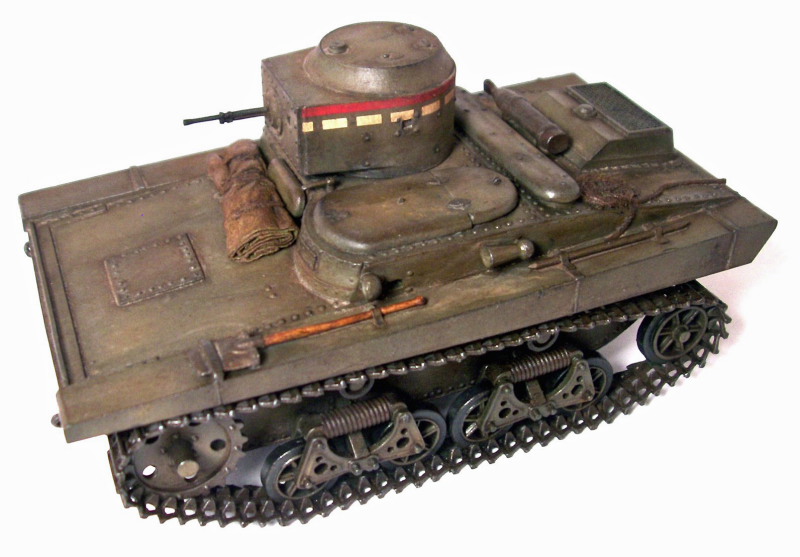
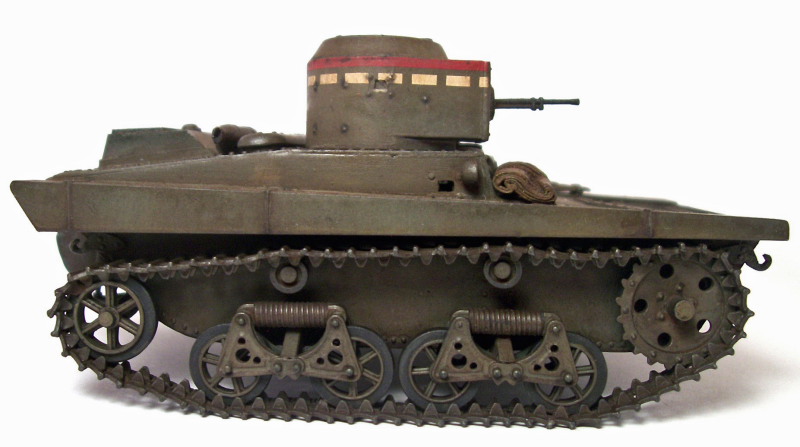
With the build finished, which happened quite quickly since after all there really wasnt that much of it (nor was they very much of the actual real life vehicle!), it was time to get on with the painting. The kit did not supply any markings at all so I went looking in the spares box. I had already decided what vehicle I was going for and luckily enough I had just the thing. The vehicle I decided on presumably belonged to the 172nd Separate Recon Battalion/142nd Rifle Division. The turret features pre-war tactical designations in the form of an interrupted white stripe and a continuous red stripe, which denotes that the vehicle belongs to the 2nd company/1st battalion in a regiment stationed at the Northern Front in July, 1941. I painted the model with MM acrylic "dark green" and then proceded to weather it with oils. A filter of yellow ochre was applied followed by several washes of Van Dyke brown and a lightened version of Van Dyke brown. I decided to keep this one fairly clean looking by my standards for two reasons. The first being it was an amphibious vehicle, so I wanted it to appear like it had been in water recently. The second reason was the size of the model. It is roughly the size of a regular tank in 1/72 scale measuring roughly four inches in length and two and a quarter inches wide, so I was afraid too much weathering might look out of scale or kill the few slight details present. In the end, I was happy with this decision and the look of the finished model. For some people, this kit will be way too simplified and will need some major upgrading, but I just build for my own personal collection and fun. This kit gives a fairly decent represention of this particular vehicle and fills its rightful spot on the shelf in the end.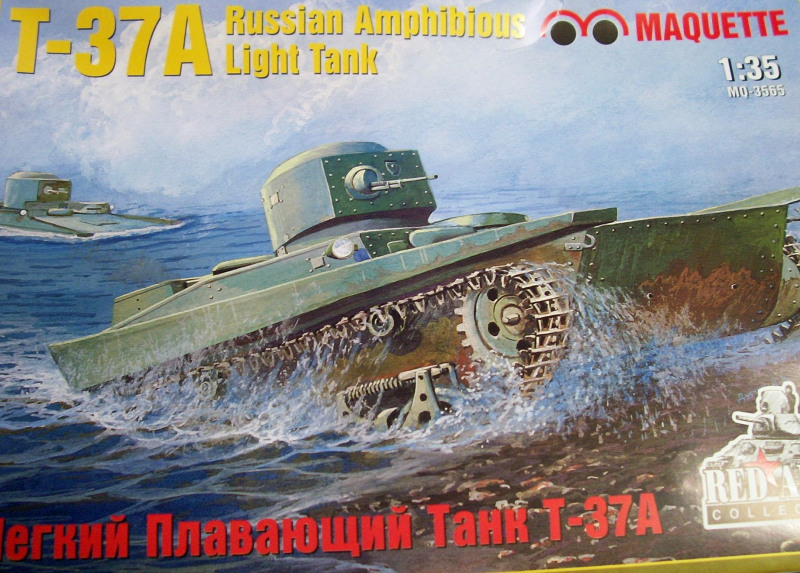


About the Author


FROM: TENNESSEE, UNITED STATES
My name is Ron and i began modeling in january of 2005 while off work with knee surgery i have always been interested in the military and 1/35 scale vehicles and armour are my main subjects, i will build just about any brand of kit there is as long as it interests me and i build for my own collectio...
Comments


Couldn't agree more, a great little article.
I'm exactly the same with builds, after putting a lot of time and effort into something I love nothing more than just building something quick and easy without too much hastle, a 'filler' build is a good name for it and it's a great excuse to do something out of the ordinary.
This is an excellent example of just that and it's great to see others think along the same lines as I do!
Cheers,
James
JUN 28, 2007 - 04:06 AM

I got one of these a little while ago (I have a Winter War calendar hanging up at work and this was the featured afv for January) and I was very pleased to see just how good one of these kits can be done up. Of course, when I do get around to building mine, I will have it mostly buried in the snow...
JUN 28, 2007 - 06:11 AM
Ron -
I really enjoy your Russian builds, and this is a perfect example!
It's beautiful. Kinda funny for me to see it called a "filler build", though.
If I could put a finish like that on a vehicle it would be 'Front & Center' on my shelf.
Thanks for your continuing inspiration!
Lee
JUL 27, 2007 - 03:09 AM

Well, since others already said it I won't say nice little tank. I am planning to build the Maquette OT-26 so i was happy to hear this kit was decent. It was also good to see where some of the "fixes" were needed.
Thank you for sharing!!
JUL 27, 2007 - 03:55 AM

After a long, tough armor build, I find that old airplane kits (from the 50's & 60's) work real well as filler kits for me. Simple, not many parts(less than 20 usually) but enough challenges to keep the modelling skills at a good level.
capnjock
JUL 28, 2007 - 02:08 AM

Hi all, i appreciate the interest in the article and taking the time to comment, one of the reasons i wrote this was out of curiosity to see if others did the same thing and i guess the answer is yes, i believe many people build these "fillers" but dont bother posting about them fearing lack of interest, thanks again.
Hi Lee, i really take more pride in making these kind of builds look good it definatly takes more effort, thank you for the great compliments.
Ron.
JUL 29, 2007 - 01:27 PM

I do these builds, too. I call them "cleanse the pallette" builds. Usually a 1/48 Monogram plane, OOB, and hung from my son's bedroom ceiling when done. Very theraputic.
AUG 05, 2007 - 10:22 AM
Copyright ©2021 by Ron Goins. Images and/or videos also by copyright holder unless otherwise noted. The views and opinions expressed herein are solely the views and opinions of the authors and/or contributors to this Web site and do not necessarily represent the views and/or opinions of Armorama, KitMaker Network, or Silver Star Enterrpises. All rights reserved. Originally published on: 2007-06-28 00:00:00. Unique Reads: 15443

WEB HOSTING BY


Copyright ©2021 Armorama and Kitmaker Network, a subsidiary of Silver Star Enterprises
All Rights Reserved. Please read our Conditions of Use and Privacy Policy.
All Rights Reserved. Please read our Conditions of Use and Privacy Policy.