

1⁄72Lusitania - Battle of Arras, France 1917
9
Comments

Introduction
I have developed a growing interest in the Airfix kits box-arts since I bought their 1999 catalogue during one of my first modelling incursions. The British Mk I box-art has been a long time favourite off mine, and when I came across the Landships site, I just had to get myself one and actually build the model.History
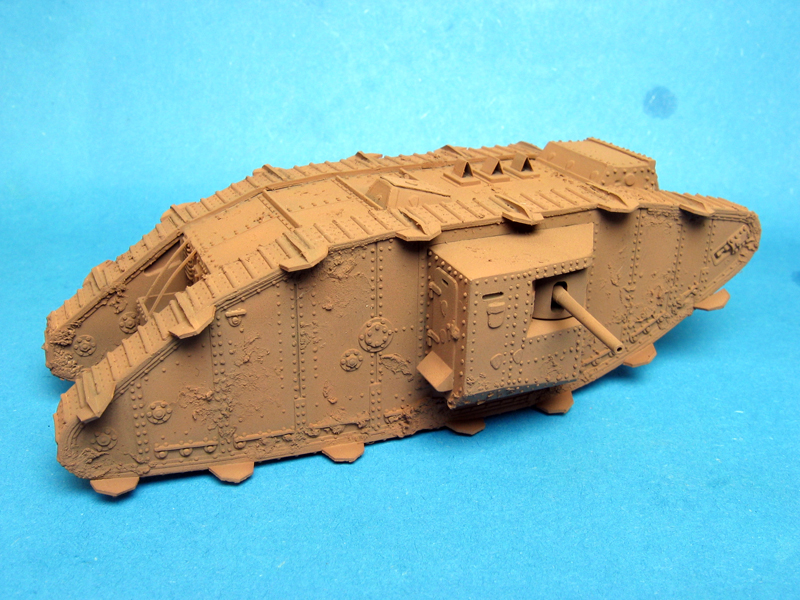
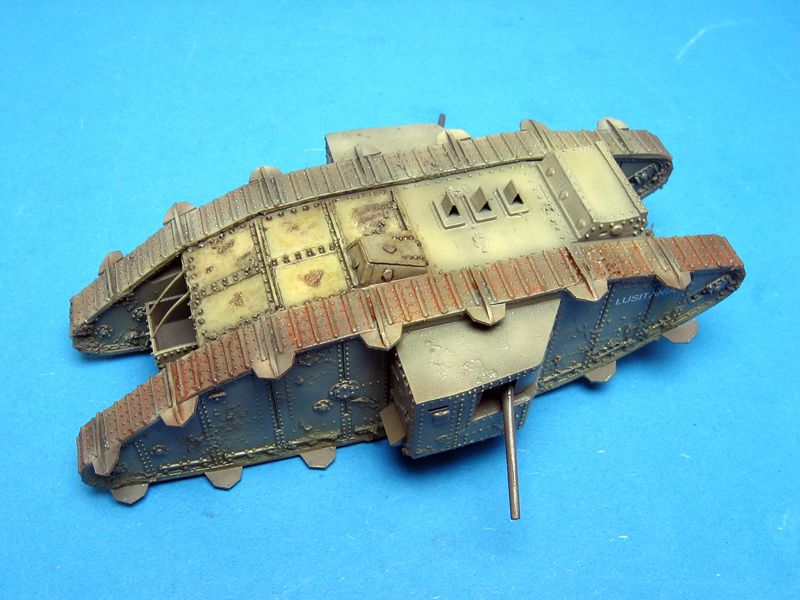
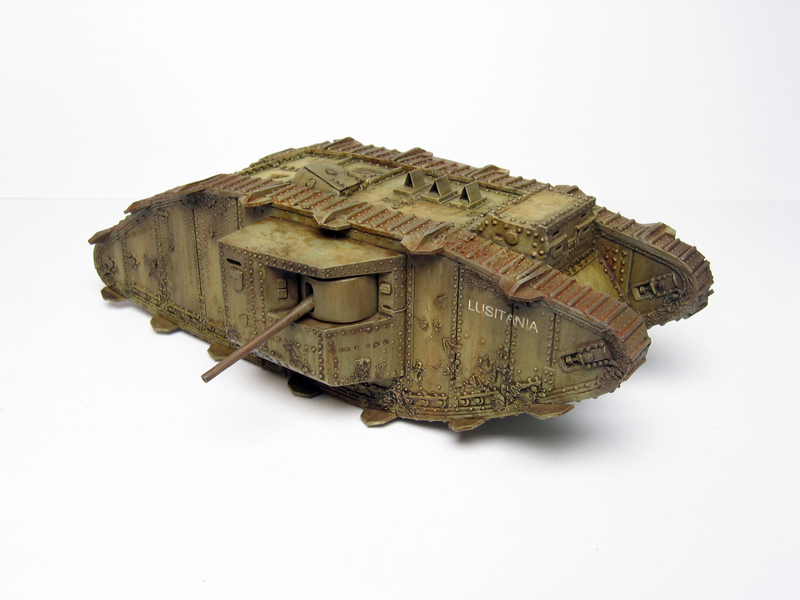
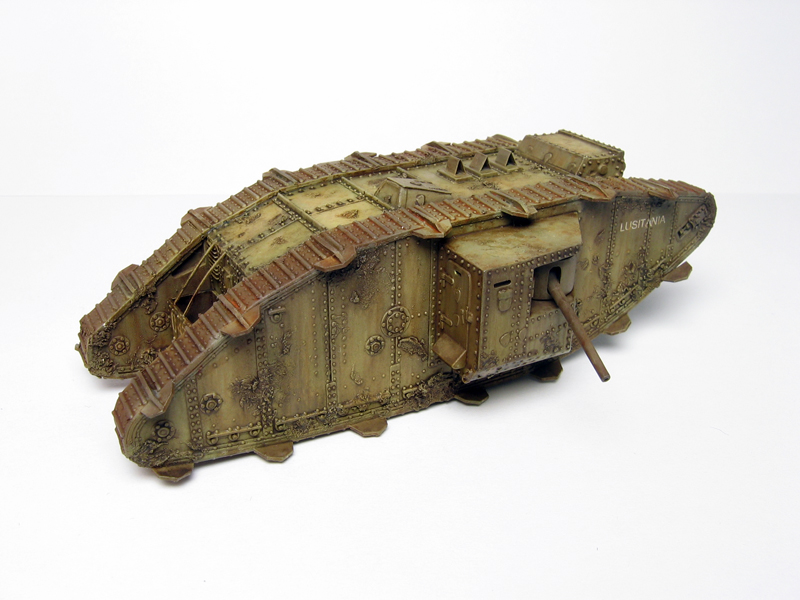
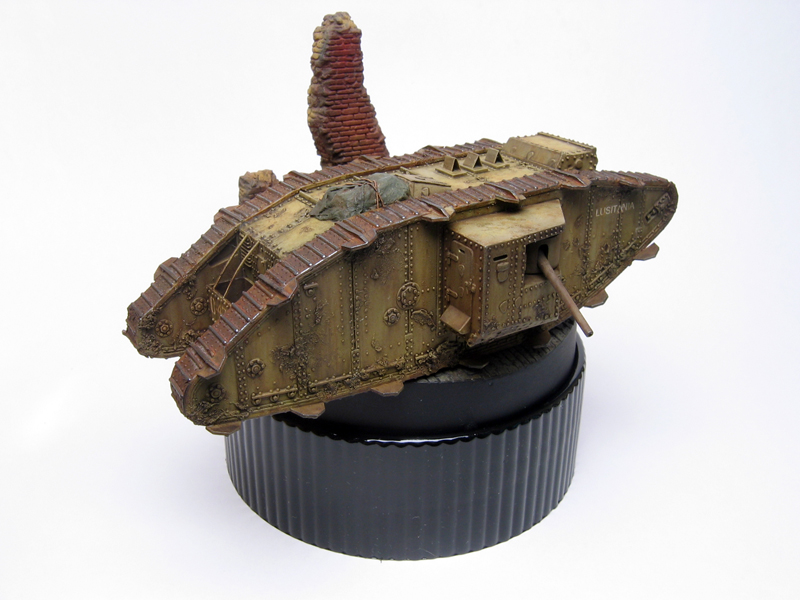
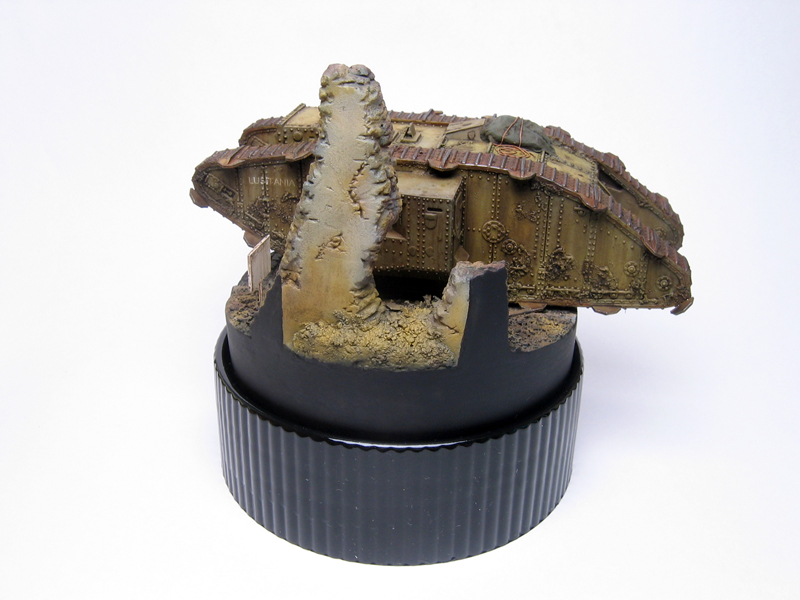
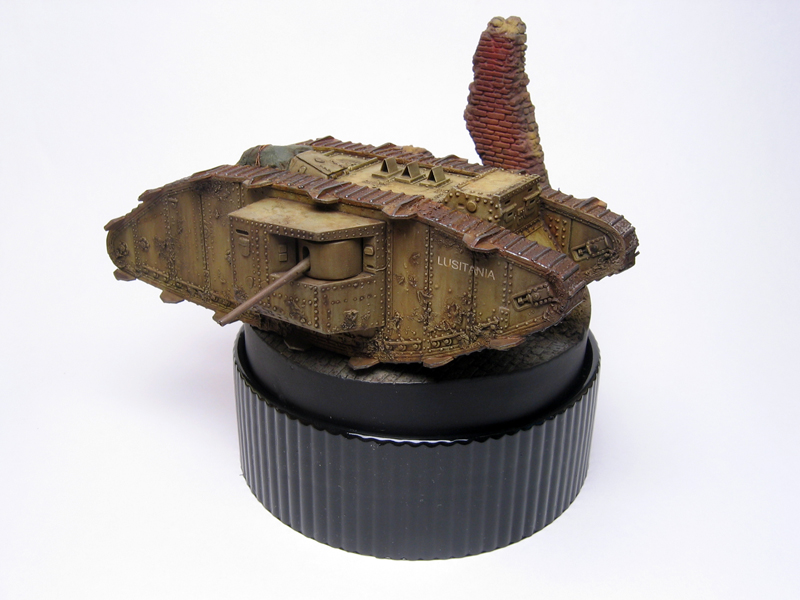
The Airfix kit isnt really a Mk I, its mostly a Mark II fitted with the tail wheels of the Mark I tank, so, some conversion work was in order. I ended up deciding to try to depict the British Mk II (male) nº 788, nicknamed Lusitania, from C Battalion, that saw action during the Battle of Arras, France, in 1917. As you probably know, Lusitania was an ancient Roman province that partly consisted of what was to become Portugal, my country, and gladly the Landships decal sheet provided the needed markings for this project.constructing the kit
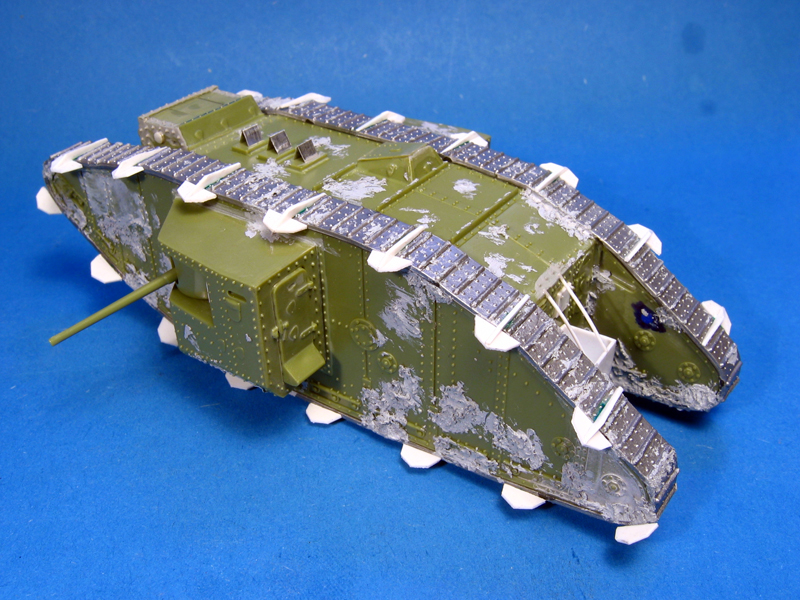
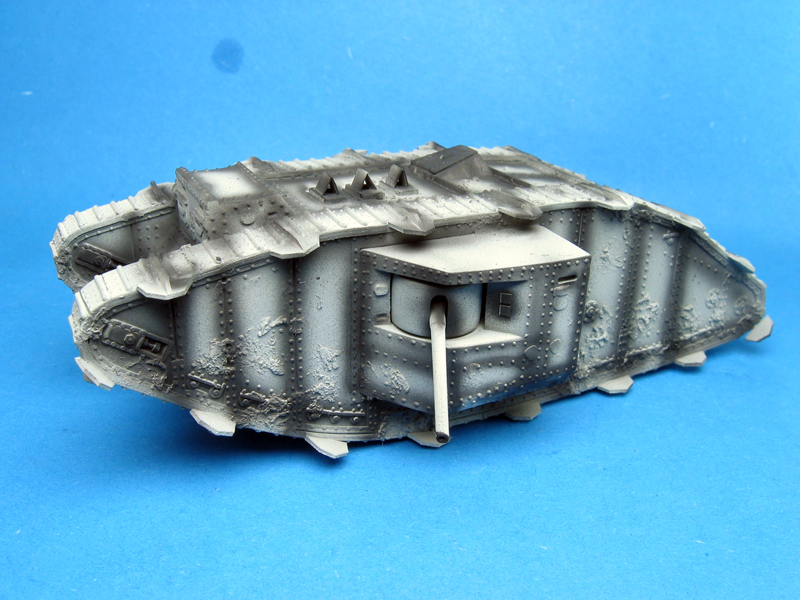
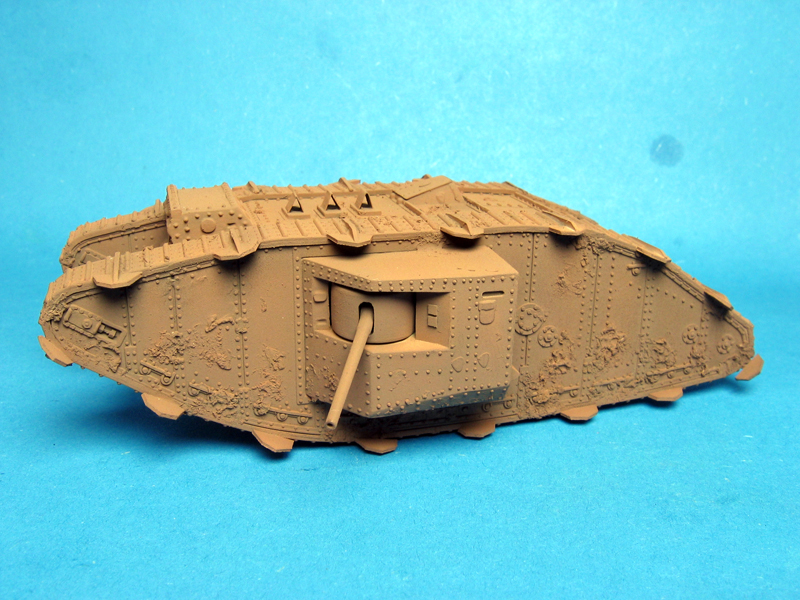
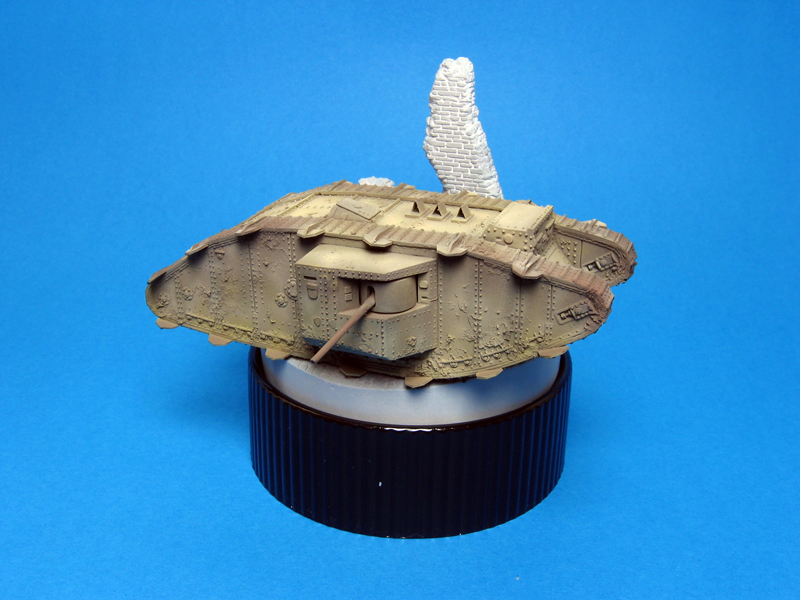
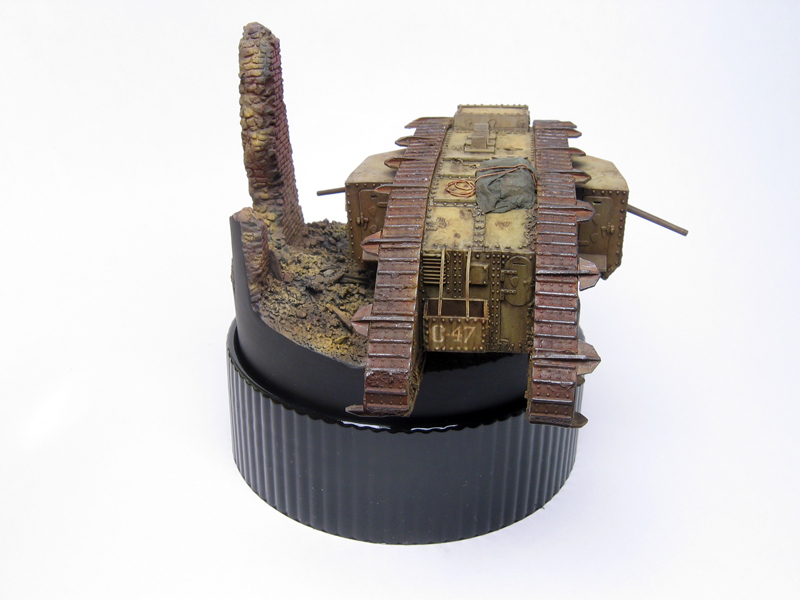
The assembly of the model wasnt difficult and, even with its limitations, it was very pleasing to build. The tracks are a bit short, so I hid the gap with mud, and used superglue to fix them to the kit, there was no adverse reaction with the Airfix plastic tracks unlike other soft plastic tracks from other manufactures. There are some sink holes here and there but these are easily fixed with some putty. For more detailed information about converting the Airfix kit to an Mk II or Mk III, I suggest you browse Landships articles. I decided to apply Tamiya Putty during the initial phase of the construction to simulate mud. This is not very usual nowadays but my goal was to create more of an old school / artistic finish rather than a realistic finish, as you usually get by using pigments to weather your models.Painting the model
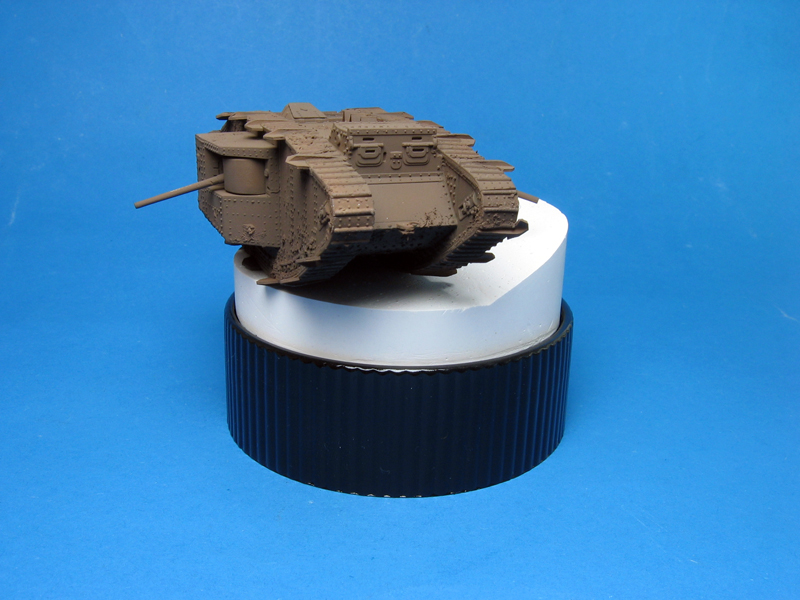
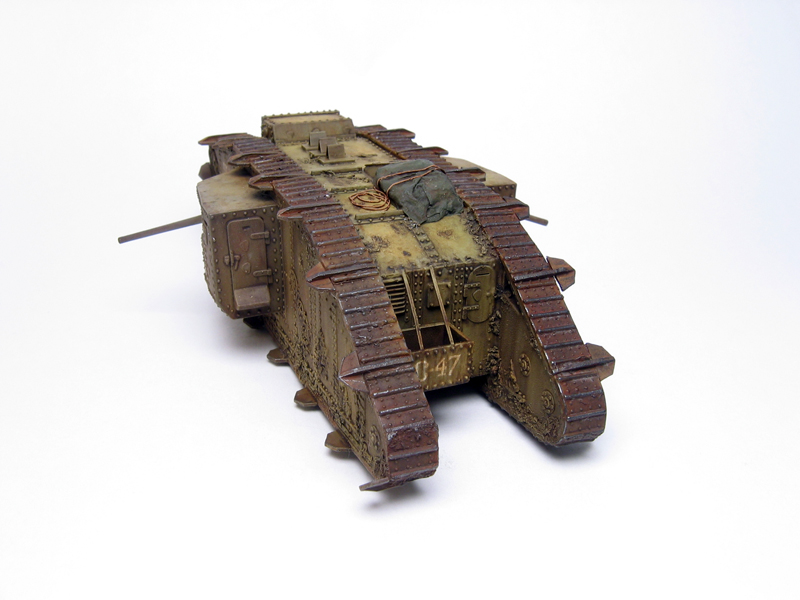
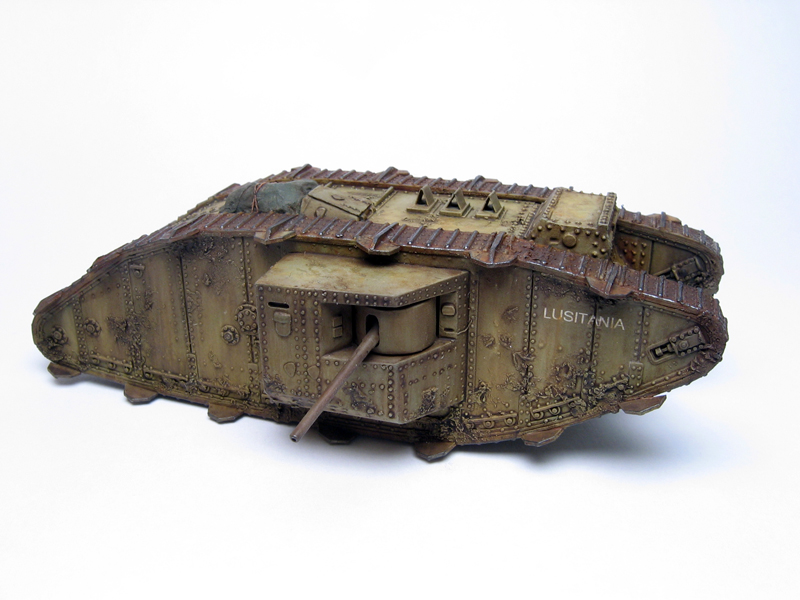
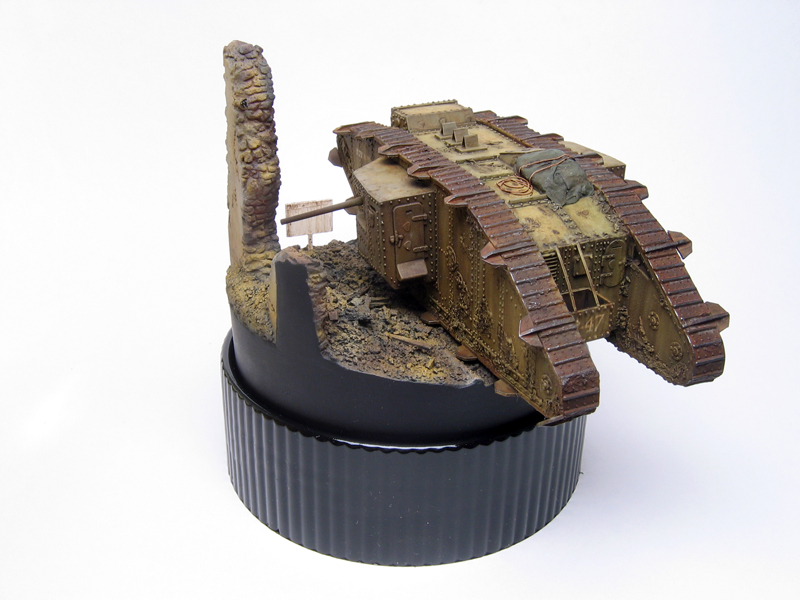
Humbrol primer was used as a base coat and some pre-shading done with Tamiya Black too. The brownish base colour was achieved by mixing some Tamiya Earth, Flat Brown, Desert Sand and Buff, and the flat surfaces were highlighted with Desert Brown and Buff. This was then protected with a coat of acrylic floor wax (Jontec, our Future equivalent), and left to dry until it was ready to get some oil washes on. Raw Umber, Burnt Umber, Burnt Sienna, Yellow and Green were used to give the model a worn look, and after letting it dry for a few days, everything was sealed with Model master Flat Lacquer. The tracks received another wash with Burnt Sienna that was left to dry overnight, and some dry brushings with dark earth pigment and graphite to simulate the polished metal. The stowage on the roof was created by rolling a bit of tissue paper around a rectangle of Styrofoam, and brushing it with a mix of water and white glue to seal it in place. The rope was made from copper wire and everything was painted with acrylics, sealed with floor wax, washed with some oils and finished with a matt coat.The Base
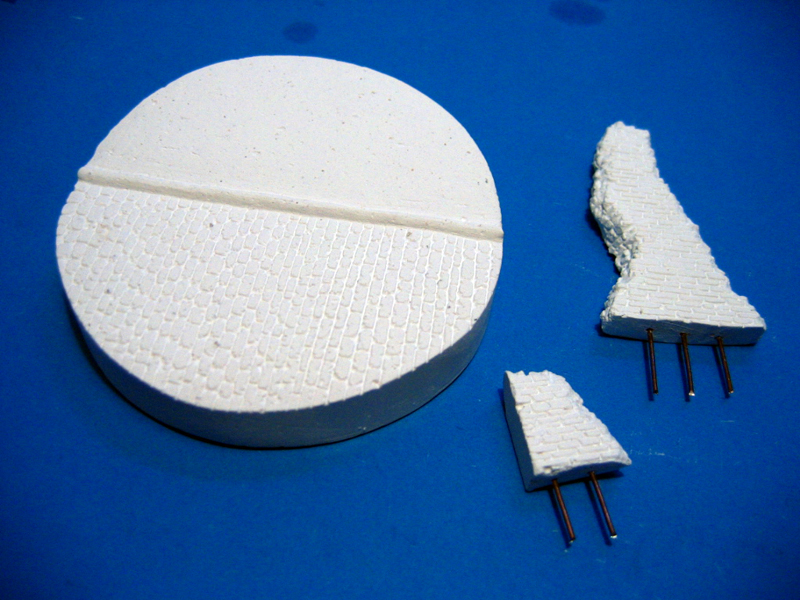
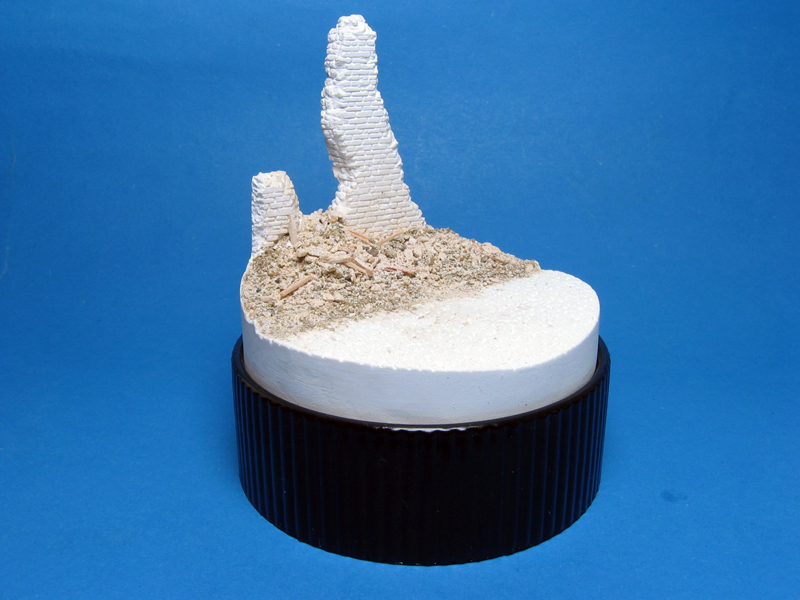
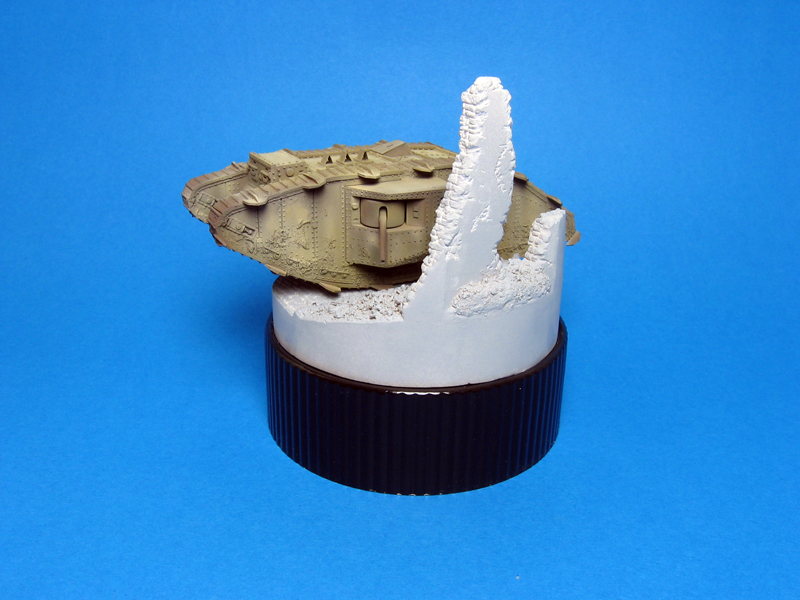
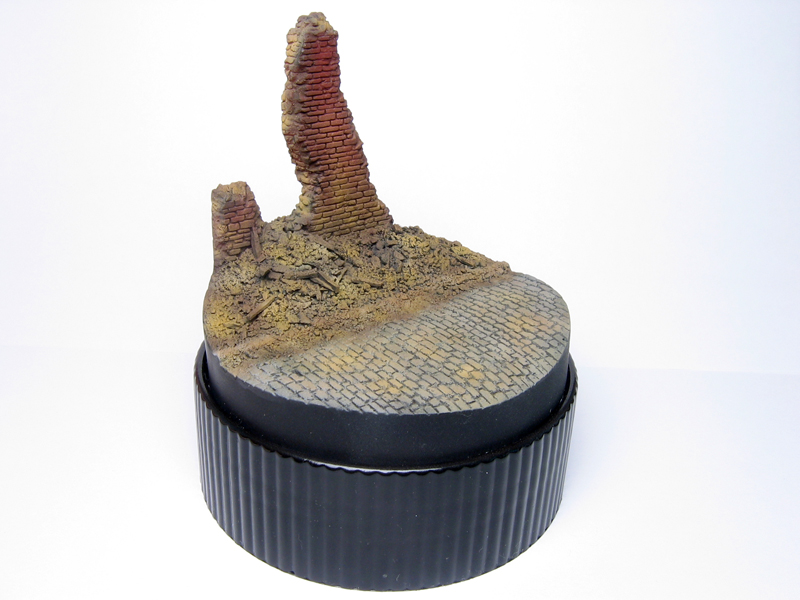
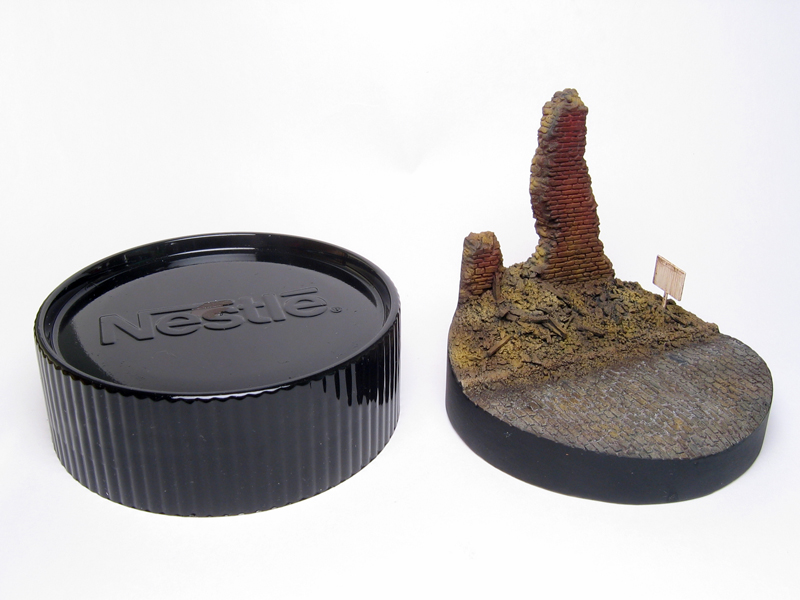
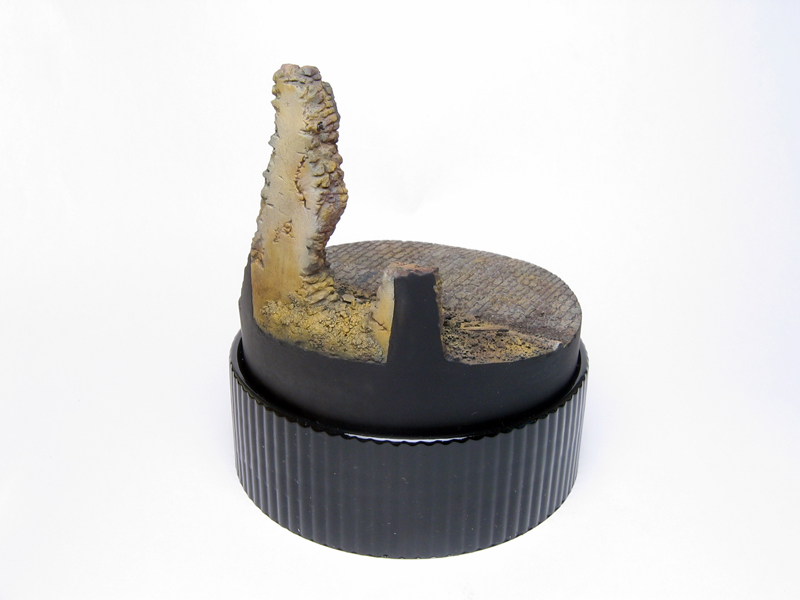
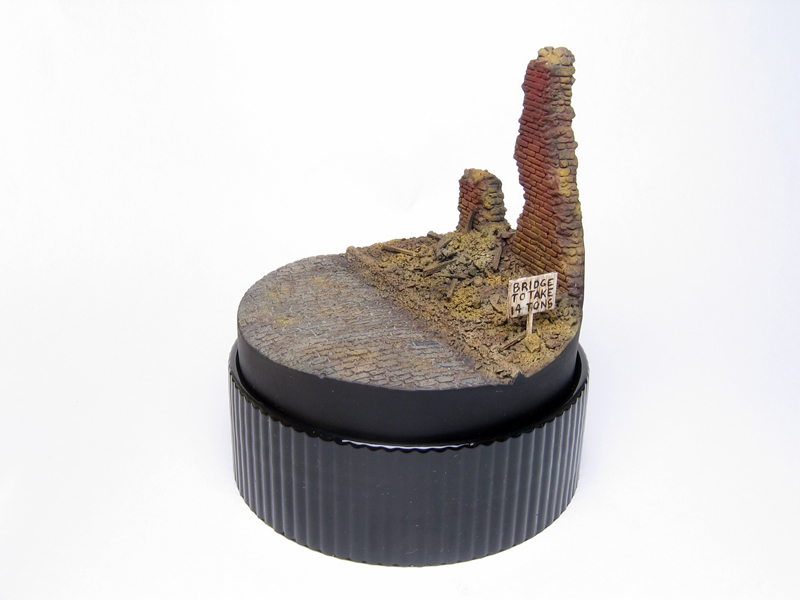
The base was created by casting a block of plaster using a cylindrical mould, made out of a rolled rectangle of cardboard from a cereal box, and was then sculpted with a needle mounted in a modelling knife handle.It was primed with automotive primer and then a coat of Tamiya Black, followed by Sky Gray for the pavement, a bright red-brown for the wall and Earth, Desert Sand and Buff was used for the rubble, which was made with bits of plaster, fine sand and some little chips of balsa wood.Everything was again sealed with floor wax and some oil washes were given to help enhance the details. After a matt coat, some dark brown pigments were brushed on the road and fixed in place with white spirit. Some minor dry brushing with oils here and there was done to bring out all the detail. The sign was made out of plastic card that was painted white and protected with floor wax, so I could clean it up every time I made a mistake while trying to brush paint the letters on.conclusion
All in all, it was a very pleasant project and Im sure Ill build some more variants of this famous tank, using the Airfix kit.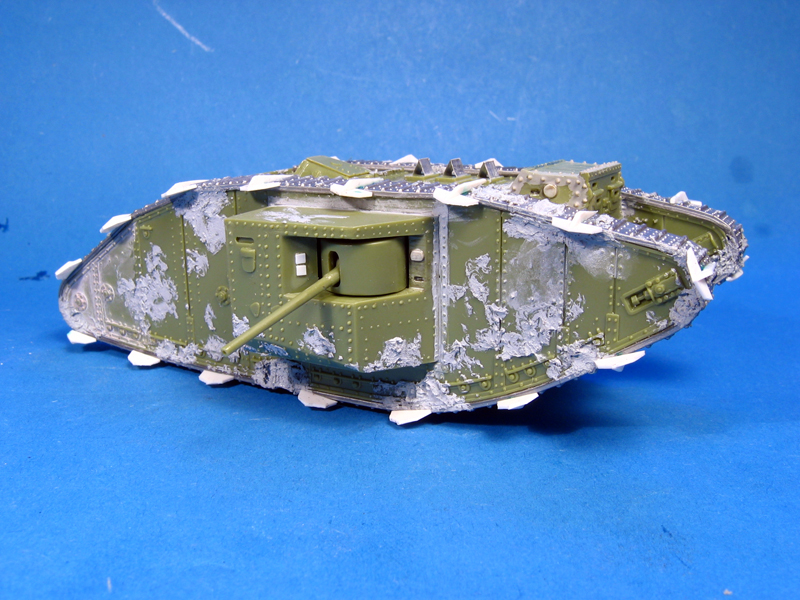


About the Author


FROM: LISBOA, PORTUGAL
My name is Francisco, born in 1983 in Lisbon, Portugal. My first models were an USS Saratoga, F-15 and F-117 that I built when I was around 12 years old - only with some drops of glue and no paint. After some years without thinking about models, I started browsing the internet and decided to give it...
Comments
Francisco, this is wonderful.
The original is superbly copied and build.
I must admit that i would have preferred to see it on a bigger base.
But all this on 1/72 - Respect !
Claude
AUG 25, 2007 - 10:35 AM


Hi Francisco,
Excellent work mate.Superbly detailing a tank and groundwork in 1/72 scale is by no means an easy feat..hats off to you!
I do agree with Claude though, i would of liked to of seen it on a bigger base.
Secondly, this is my own personal opinion but i think the black plastic base does not compliment the dio very well.A wooden base would of been much more appropriate and had given a somewhat extra "vintage" look.
It's great to see someone else depicting a W.W.1 diorama, modelers seem to forget there was a First World War before the second one ever came about !
Cheers,
Shay
AUG 25, 2007 - 07:03 PM


Brilliant.
I love the coffee tin lid base. Great job. Love the scale detail
AUG 26, 2007 - 12:03 AM
Simply fantastic - especially considering the scale!
Thanks for sharing
AUG 26, 2007 - 09:53 PM

I have to admit that when I fist saw the title of this thread, I was wondering what a diorama of the RMS Lusitania in 1917 was doing here considering it had been on the bottom of the Irish Sea since 1915.
I like the subject, & the tank looks great. Nicely done. In a way, the hanging off the base is quite artistic & gives it some "motion".
Jim
AUG 27, 2007 - 12:44 AM

Thank you very much for your kind comments, I really appreciate them! Thanks to the Armorama staff for the opportunity to show my work, I hope it helps to show that small scale still has a lot of potential and that anyone can start modeling without spending a lot of money.
Regards,
Francisco
SEP 03, 2007 - 10:10 AM
Do you do anything to the base to make them shine as much as this one does?
SEP 09, 2007 - 06:03 AM
Copyright ©2021 by Francisco. Images and/or videos also by copyright holder unless otherwise noted. The views and opinions expressed herein are solely the views and opinions of the authors and/or contributors to this Web site and do not necessarily represent the views and/or opinions of Armorama, KitMaker Network, or Silver Star Enterrpises. All rights reserved. Originally published on: 2007-08-24 00:00:00. Unique Reads: 17492

WEB HOSTING BY


Copyright ©2021 Armorama and Kitmaker Network, a subsidiary of Silver Star Enterprises
All Rights Reserved. Please read our Conditions of Use and Privacy Policy.
All Rights Reserved. Please read our Conditions of Use and Privacy Policy.