

1⁄35Indy Link Tracks
20
Comments
track forming
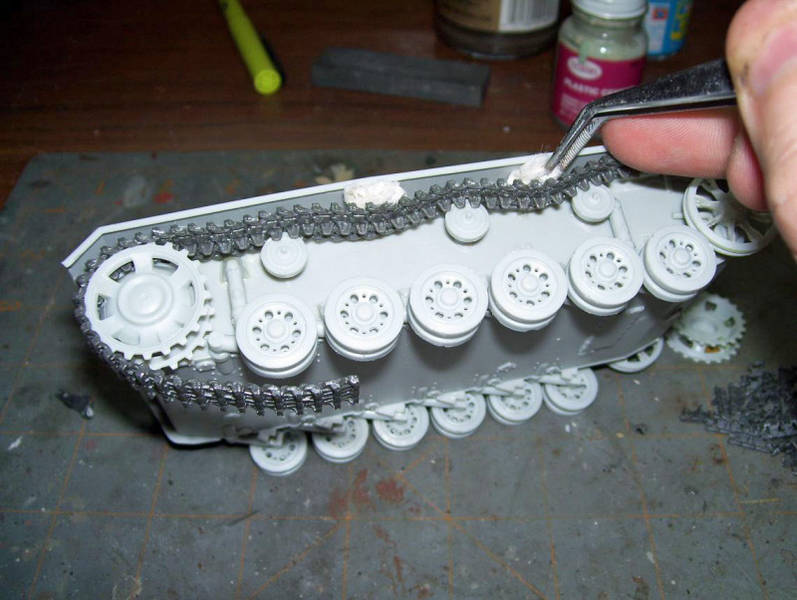
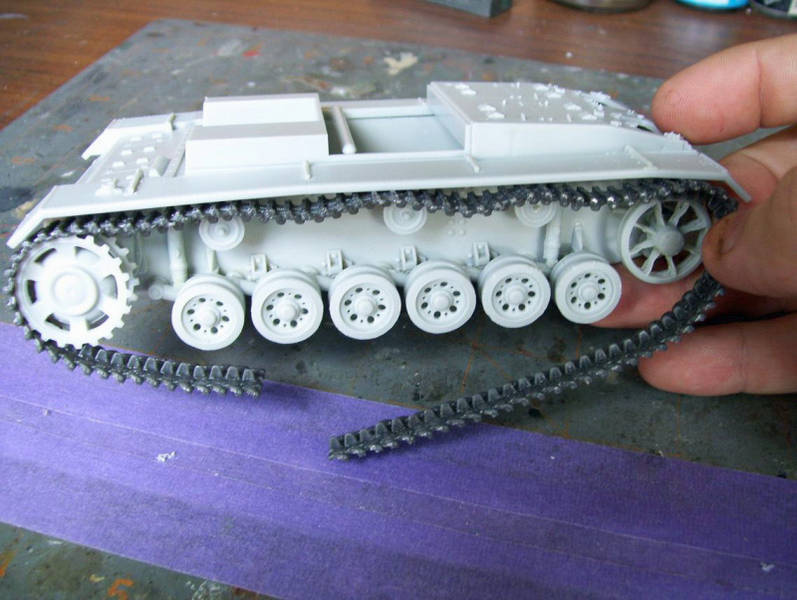
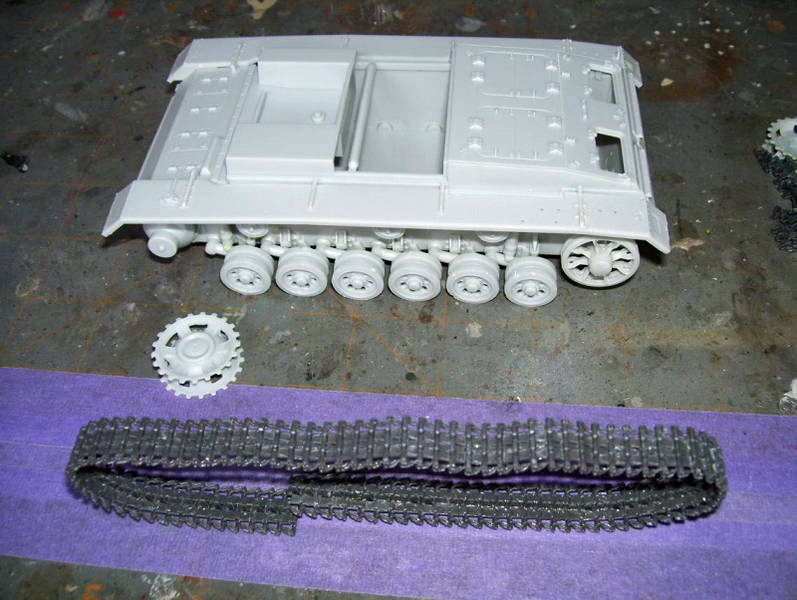
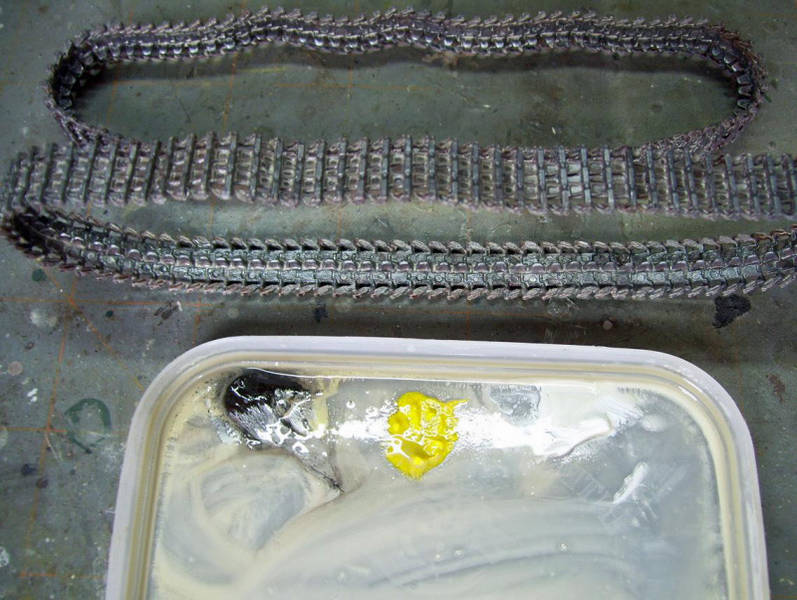
In the next photo, I have picked up the track, which you can see is still pliable, and placed it over the sprocket, extending it over to the idler. I make some small balls of facial tissue and place them between the fender and the track, setting the sag before curving the track around the idler and gluing it to the length coming around the sprocket. Note how the upper track lays on the outside of the return rollers. This will allow you to slip the tracks off after they have set. RememberONLY the inside return rollers are glued on at this point! Featured in the photos is the completed right side track, placed on the lower hull to set firmly overnight. The two ends have been joinedbut not yet glued--on the bottom of the run; the weight of the hull keeps them joined for now. Small balls of tissue have been placed under the front and rear to prevent droop. In the morning, I remove the tissue balls, and remove the tracks by simply loosening the track from the idler and pulling gently on the sprocket, which comes off easily with the track which by now has set hard. The sprocket comes off easily, nestled in the track and can be removed for ease of painting.Paint and finish
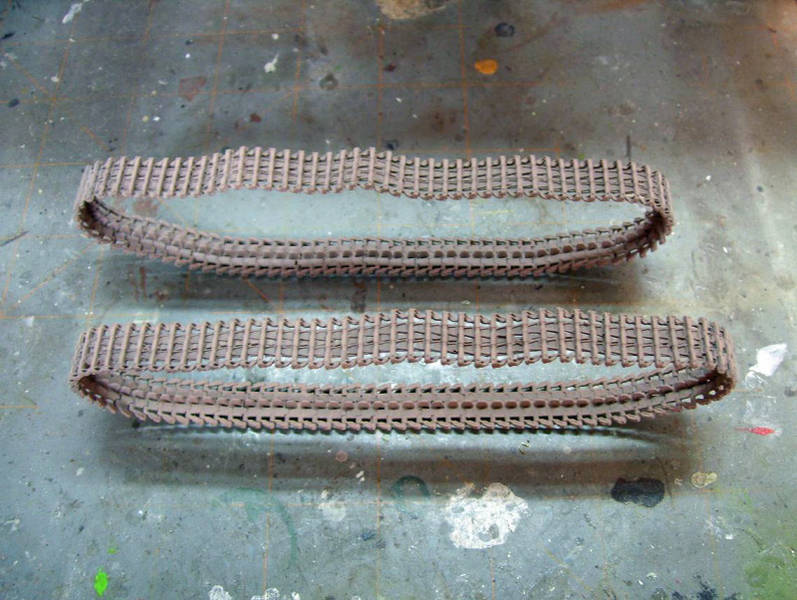
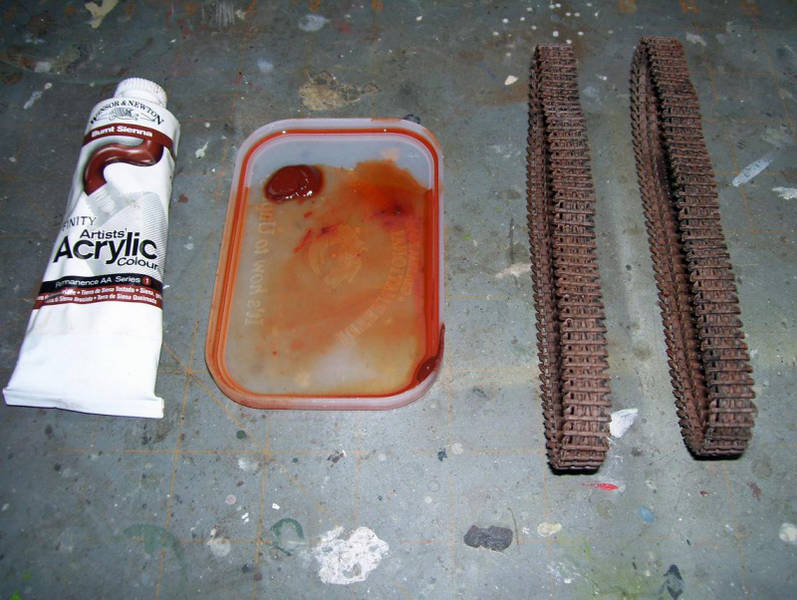
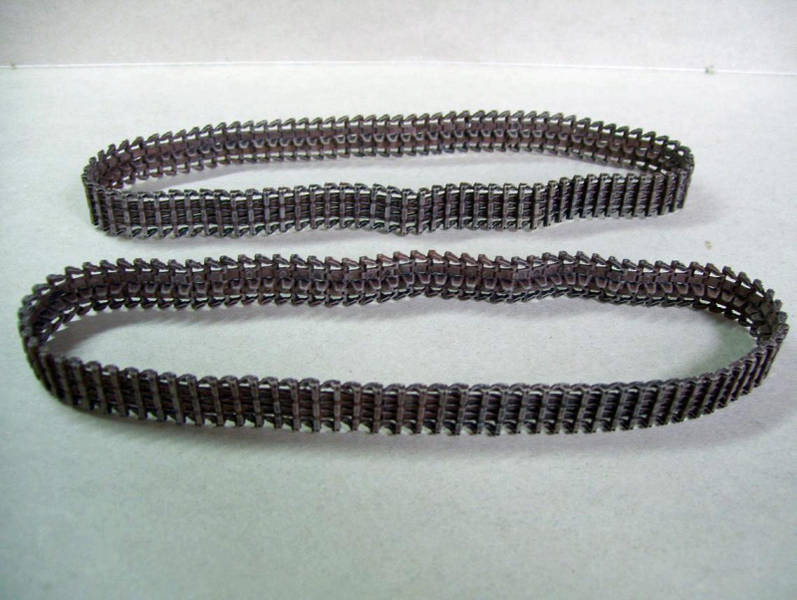
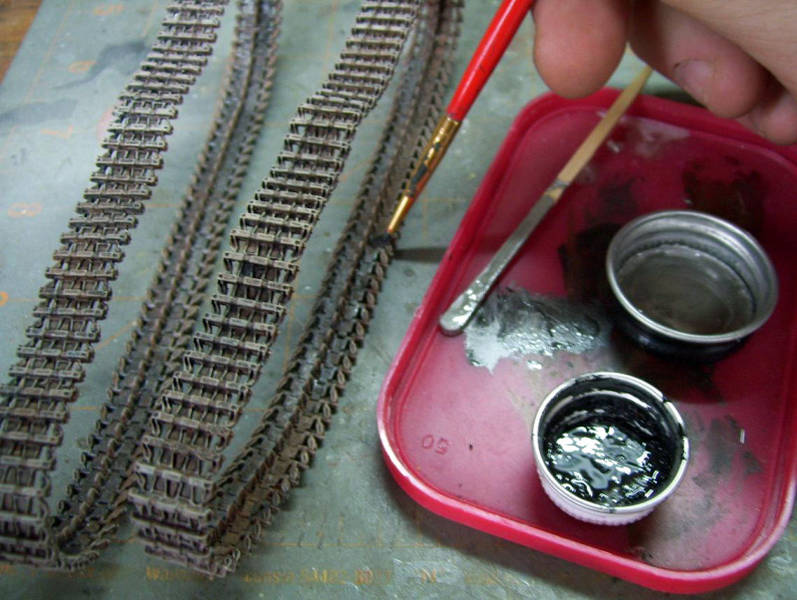
To begin the painting process, I first base coat the tracks with Tamiya XF-52 Flat Earth. Next, an oil wash of Windsor & Newtons raw umber and then an acrylic wash of Windsor & Newtons acrylic burnt sienna were applied. I added a drop of dish-washing liquid to the wash to break the surface tension and help it flow into the recesses of the track faces. Next, the tracks are dry brushed with a light dirt color from the craft store acrylics line, in this case, Folk Art 940 Coffee Bean lightened with Aleenes Beige. Now the track insides are weathered with Testors Steel darkened with a little bit of black. Ill hit the guide horns too while Im in there, this is the main reason why I never paint and weather my tracks on the model; you cant really adequately perform this step in my opinion with the tracks installed. Lastly, the track faces receive a brushing of Steel to simulate wear. After allowing to dry for a day, I then apply an oil wash of a light, dusty tan mixture, consisting of raw umber+white+yellow. Be careful with the yellow oil; the pigments are extremely dense and only a pinprick is necessary to tint the dust! Ill also wash the entire model with this mixture/wash. When the wash dries, I dry brush some Silver on the very tips of the guide horns.final installation
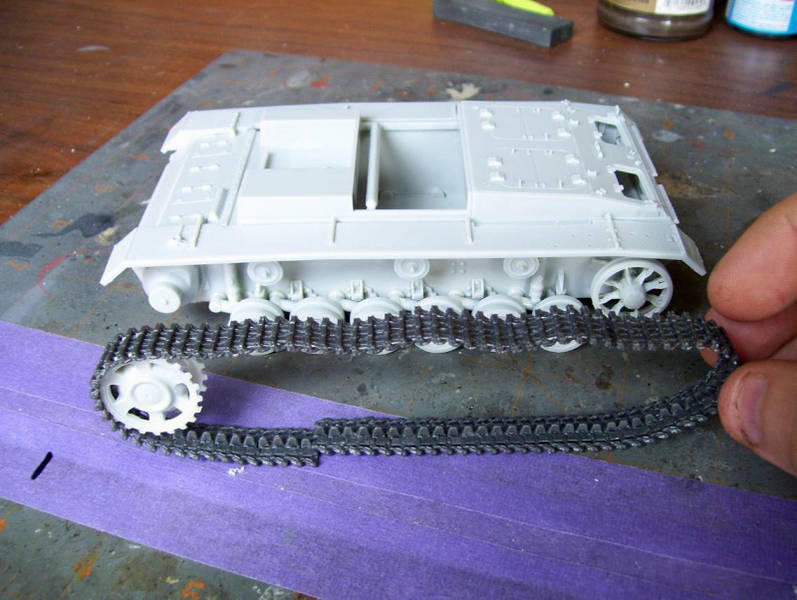
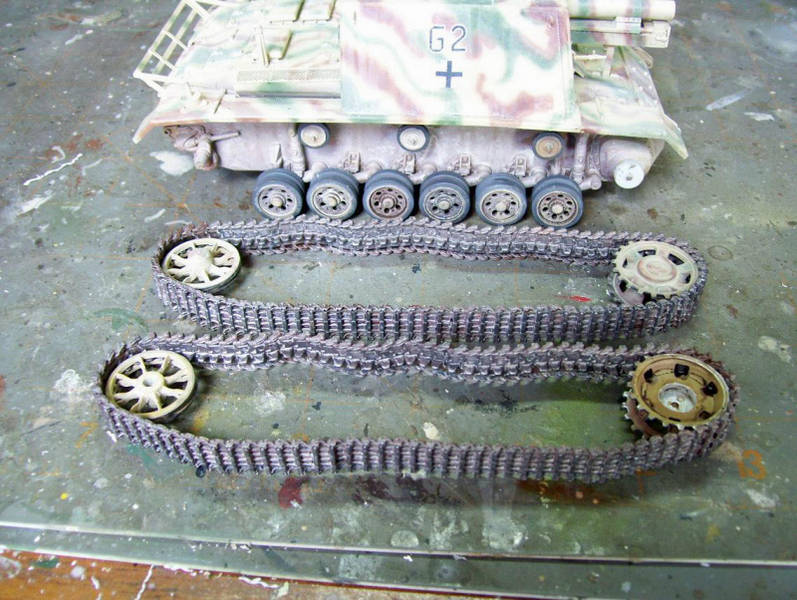
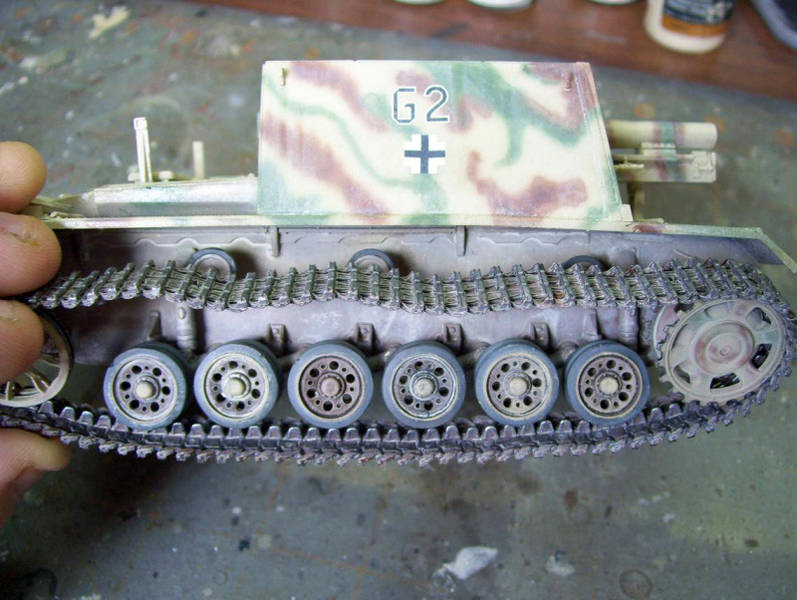
Once all the pieces have dried and are ready to be assembled, it's time to install them. First coax the guide horns into the wheels and then the sprocket and idler will be slipped on their posts which have been wet with liquid glue just prior to installation. Note the return rollers still only have the inside rollers and how the tracks will butt right up against them. Once the finished tracks are in place on both sides, the outer return rollers are now added to enclose the tracks on their upper travel. At this point the model still has to receive some details and final weathering; some additional pin washes, rust streaks, and possibly some MIG powders on the lower tracks and hull Alas that is beyond the scope of this tutorial! I hope that you have enjoyed this tutorial and may be no longer intimidated by the words Individual Track Links!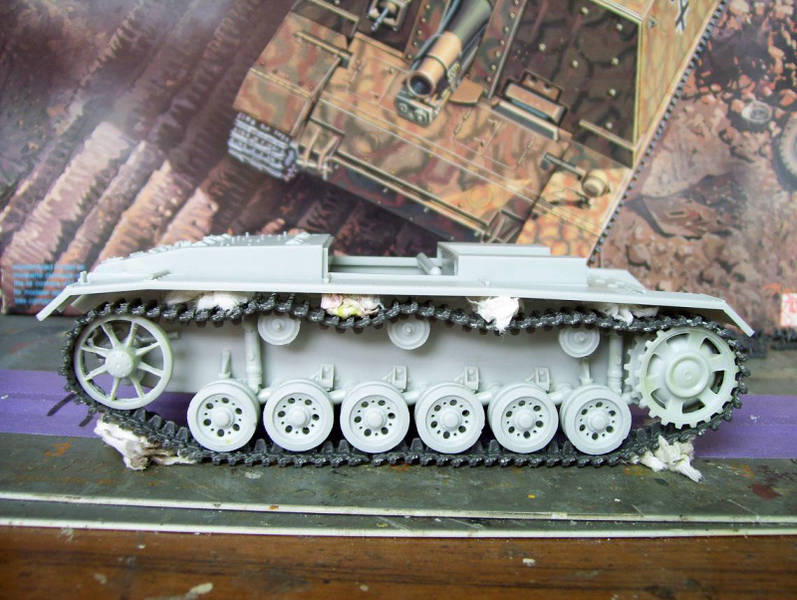


About the Author


FROM: NEW YORK, UNITED STATES
I am a professional musician, and have been a featured author in Finescale Modeler magazine, in Jan 08, Nov 08, Dec 08, and Jan 09. I am also featured in a special issue called "Essential Techniques for the Model Builder". I have won several IPMS "Best of Show" awards, and "Best of the Master Mod...
Comments
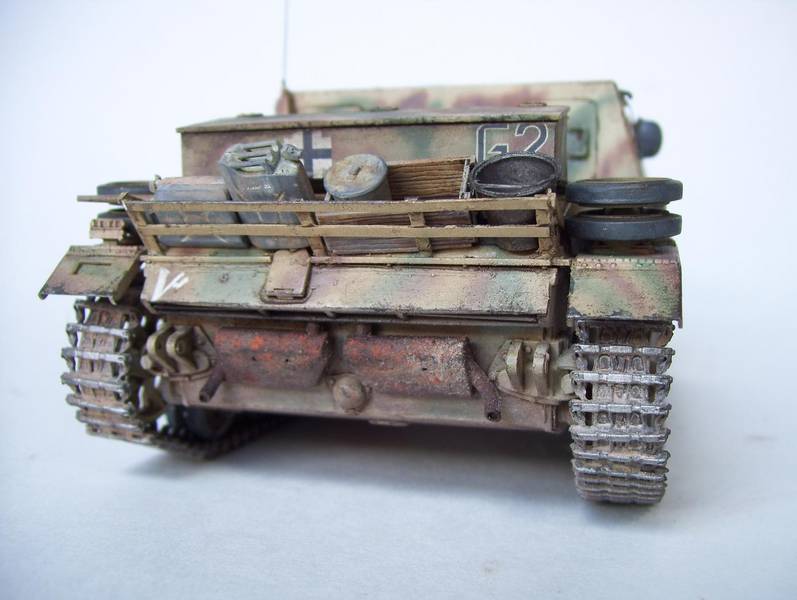
Thanks Matt! It's not quite done here in the photos, but I'll post a photo in the forums when I get it all together--you can see that I still haven't added the big box on the back or a spare track rack on the front...just forgot that ???
Rain streaks aren't hard with oil paints; just dip the brush in a thinly diluted puddle of raw umber, and then touch it to a paper towel to lose most of the thinner, and then drag what's left on the brush down the side of the model. No need to fear overdoing it; just re-wet the brush and pull a little more down--you can even swab it all off if you don't like the way it looks. That's the nice thing about oils; they take so long to dry that you can manipulate them many different ways til you get what you like!
Try it! Good luck!
SEP 15, 2007 - 07:26 AM

Thanks for the article. I'm trying to get back into military modeling after a 12 layoff from the hobby . This is a great help.
SEP 16, 2007 - 06:48 AM
Thanks again, Robert!
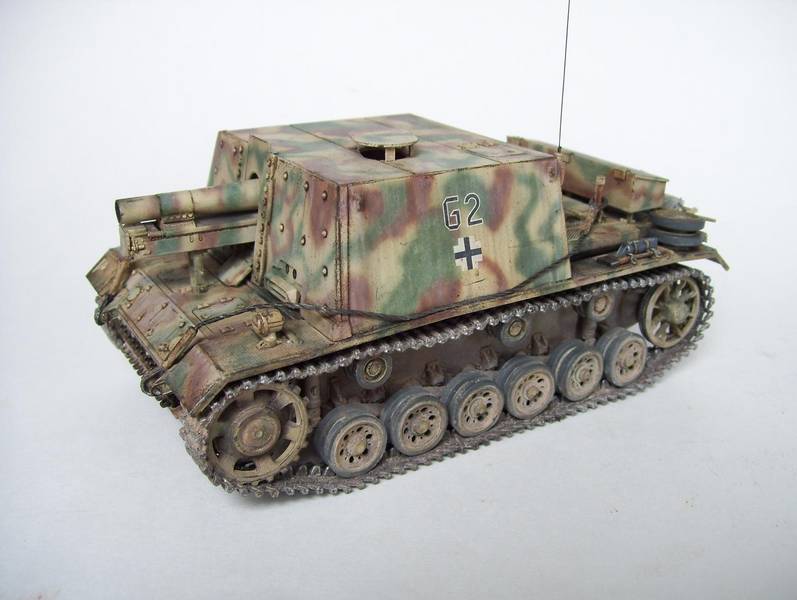
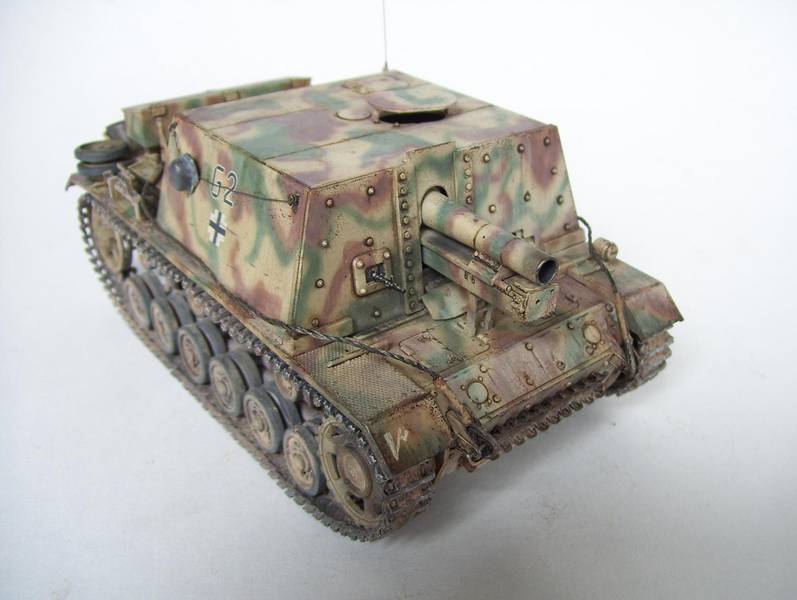
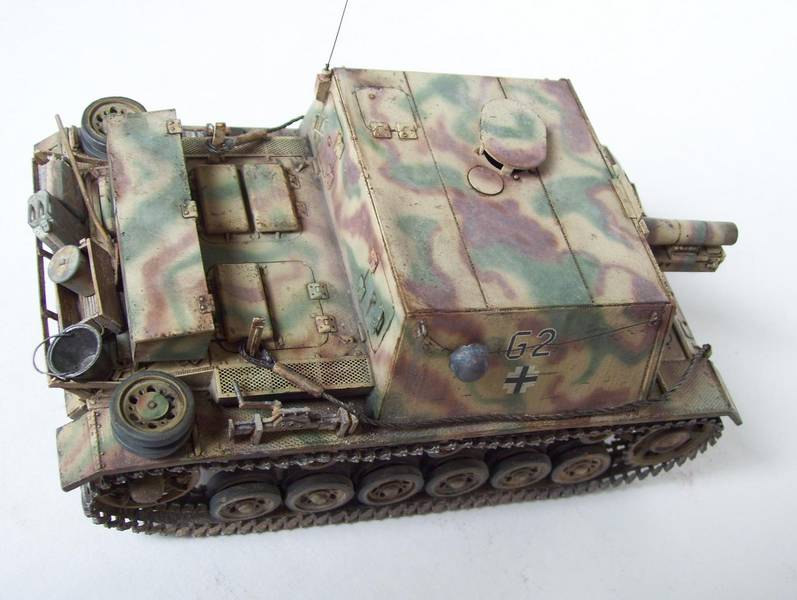
I just finished the Sig, and thought I'd post a photo or two of it, so here it is!

SEP 16, 2007 - 08:21 AM

Great instruction, I have always had a rough go in working individual track.
SEP 17, 2007 - 09:05 AM

Excellent article and model, Karl. Look forward to seeing more from you.
SEP 21, 2007 - 04:05 AM
Thank you Jim and Andrew! Glad you enjoyed the article, and always glad to be of help!
SEP 21, 2007 - 04:14 AM
Thank you for the article it was a refresher on how to build tracks forme...I just so happen to do my tracks while reading your article and it was a snap!
Thanks again.
By the way your build looks great!
NOV 01, 2007 - 10:51 AM

Would the Testors cement that comes in a blue tube work for this.
Thanks.
JAN 23, 2008 - 01:43 AM
Hi Sam
If you're using tube glue, I wouldn't recommend it. Tube glue is notoriously unreliable in the way that the amount you use can drastically affect the strength of the bond between parts. Plus, models built with tube cement have a tendency to break bonds a lot easier after a few years, sometimes without handling. I know guys who have seen their sprockets come right off from the pull of the rubber band tracks.
Of course you don't really have that concern here, but with several hundred individual little bonds between links, you would only be asking for heartbreak, IMO.
But the real problem you would have would be the time it takes to apply the glue and set the bonds--you need to use liquid glue, because you need to have the link bonds set up within relatively short times of each other in order to have the ENTIRE track bonded enough to be both pliable enough to wrap around the sprockets, and yet not SO set as to not allow you to set sag. Tube glue just does not bond as quickly and with the same strength as liquid glue to allow you to handle the tracks and form them around the sprockets You might also have problems with the tube glue oozing out from between links and then bonding the tracks to the wheels prematurely--you wouldn't be able to remove them then from the tank as I have.
All in all I wouldn't recommend even trying this with tube glue. Use liquid glue and ONLY use Testor's. Fast-setting glues like Tenax R7 and ProWeld actually set up TOO fast, and make the tracks hard to work with.
Good luck!
JAN 23, 2008 - 05:23 AM

Copyright ©2021 by Karl Logan. Images and/or videos also by copyright holder unless otherwise noted. The views and opinions expressed herein are solely the views and opinions of the authors and/or contributors to this Web site and do not necessarily represent the views and/or opinions of Armorama, KitMaker Network, or Silver Star Enterrpises. All rights reserved. Originally published on: 2007-09-14 00:00:00. Unique Reads: 44441

WEB HOSTING BY


Copyright ©2021 Armorama and Kitmaker Network, a subsidiary of Silver Star Enterprises
All Rights Reserved. Please read our Conditions of Use and Privacy Policy.
All Rights Reserved. Please read our Conditions of Use and Privacy Policy.