

1⁄35Tiger I Late Production
3
Comments

Introduction
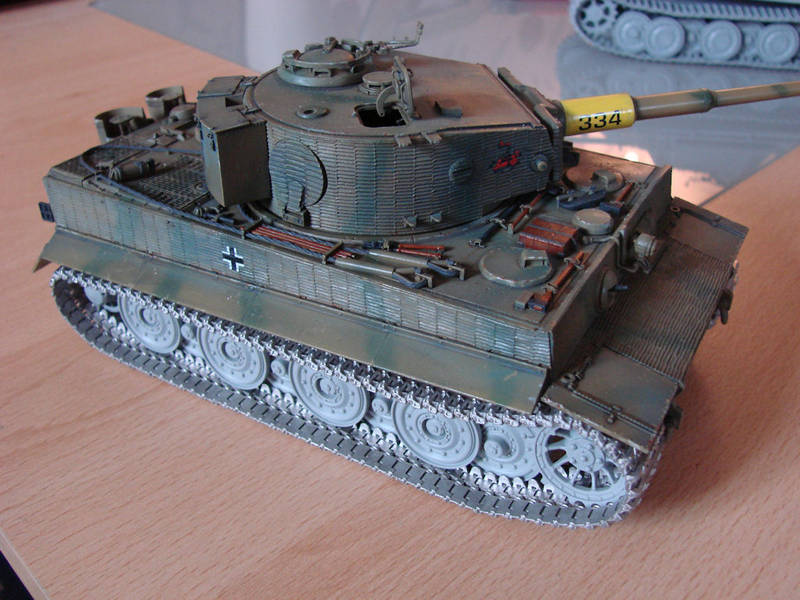
This model marks a landmark in my modelling life. I ceased modelling in plastics when I was around 18, with a small number of forays in my very early 20s, and to say I was shocked by how things had changed when I returned to the hobby is an understatement. I first saw one of these Dragon Tiger kits partially completed when I attended an IPMS Bolton meeting, and I was impressed, so I decided that even though I had collected a small number of kits, that I would make this the one to cut my teeth with again. Please remember that at this stage that I had never used an airbrush either, or pigments etc etc. I used to build airplane models exclusively, so this was going to be an unusual ride in more ways than one! The Tiger I, to me, is the archetypal German tank of WW2, and one that there was already plenty of reference material around for, so this should be a breeze, right? Also, I am not fully conversant with tank terminology, so you may find some of my terms amusing! The Tiger I was designed by Henschel and introduced in August of 1942. The Tigers power and accuracy was unrivalled at the time, and struck fear into opposing tank crews, many of whom chose not to attack whilst in open fighting.Products used
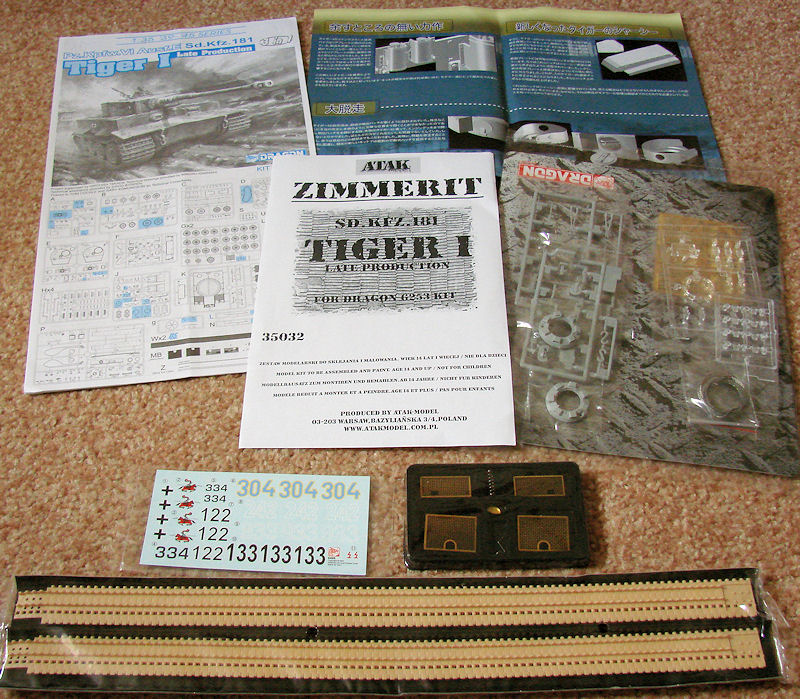
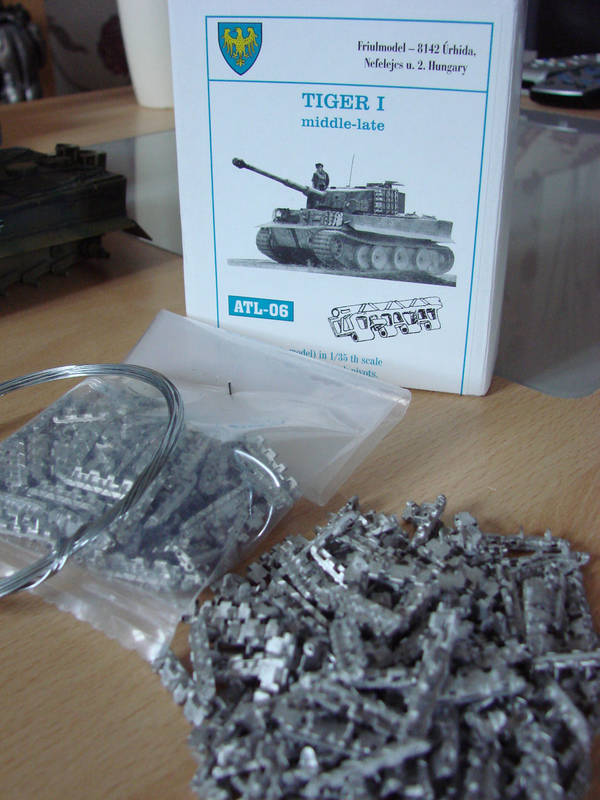
- 1/35 Dragon 3 in 1 Tiger I Late Production (DML6406)
- ATAK resin zimmerit
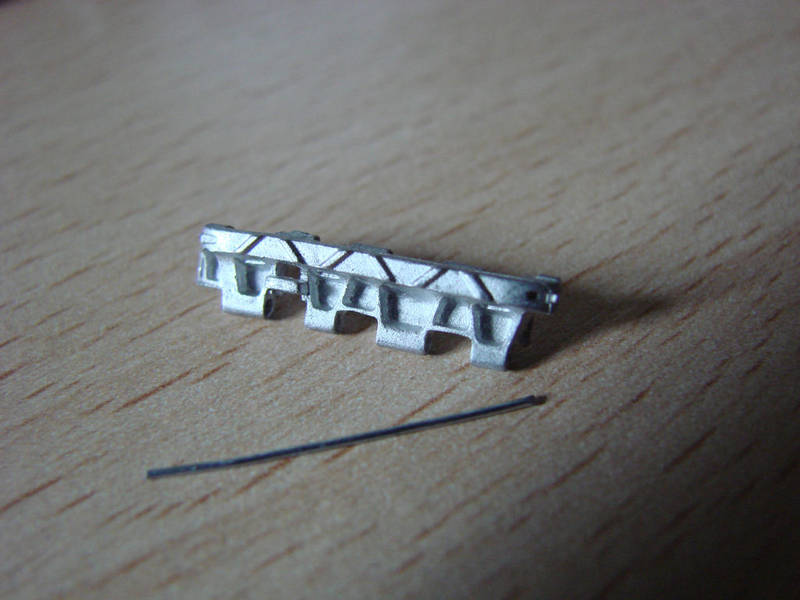
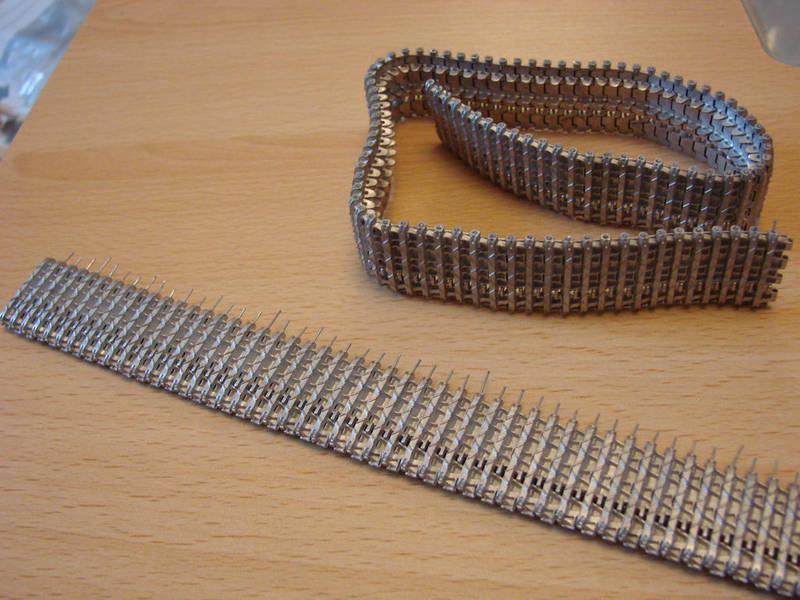
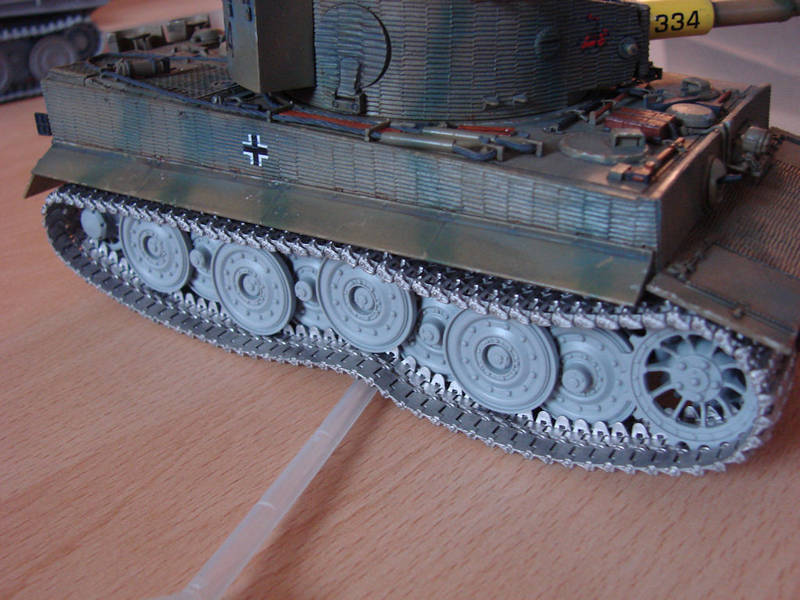
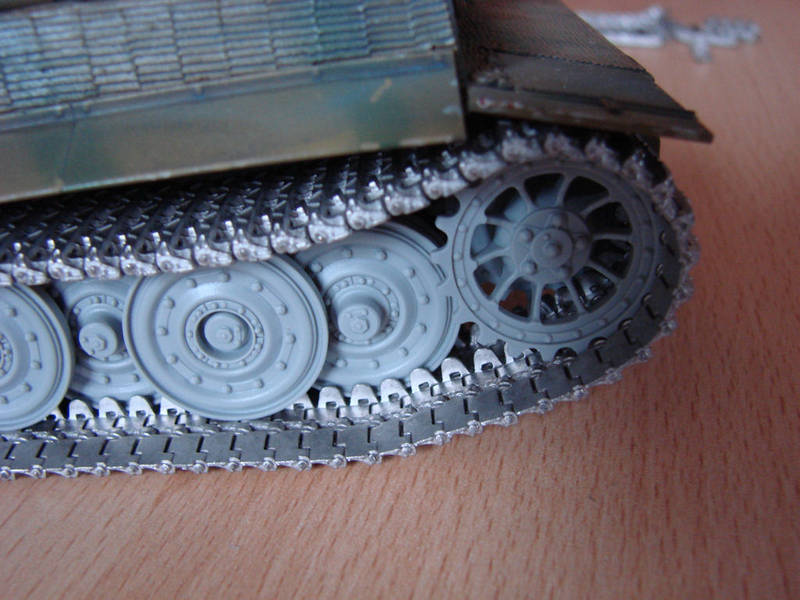
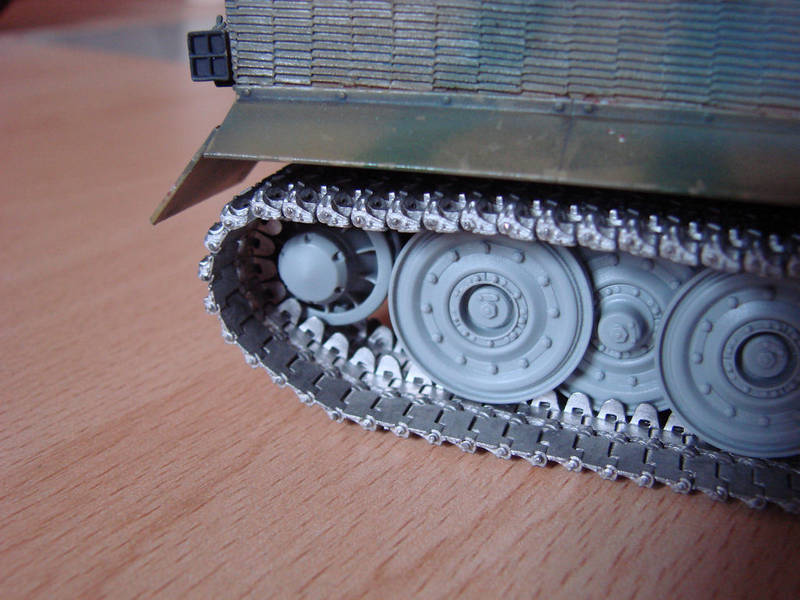
- Friulmodel metal tracks ATL06
- WEM Enamel & Varnish
- MIG Pigments & Filters
- Winsor & Newton Oils
CONSTRUCTION
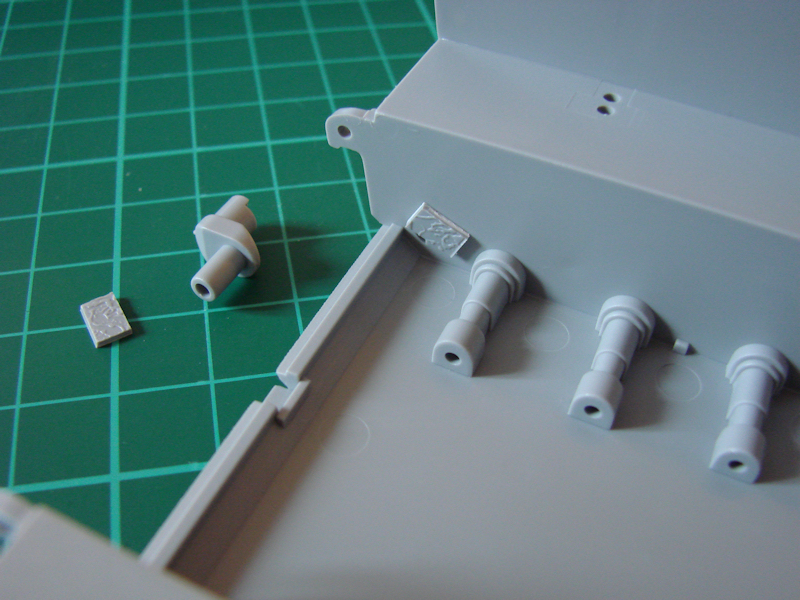
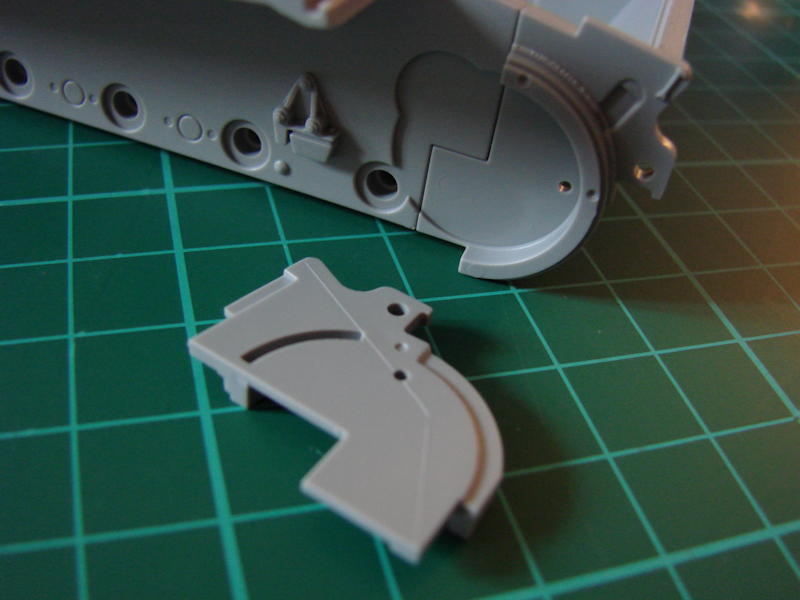
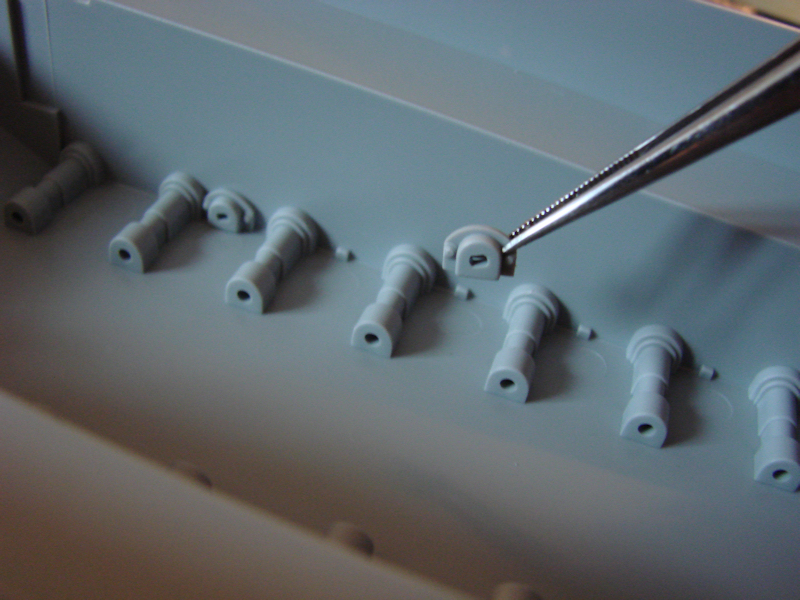
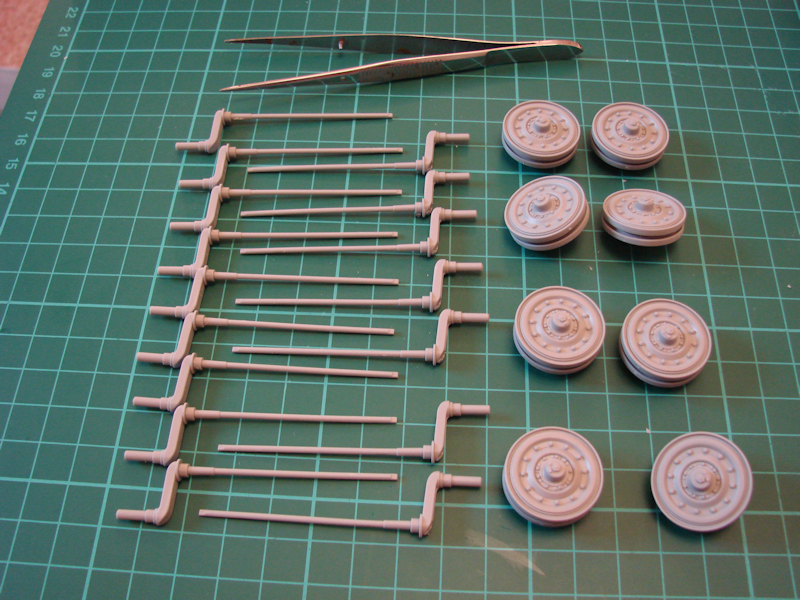
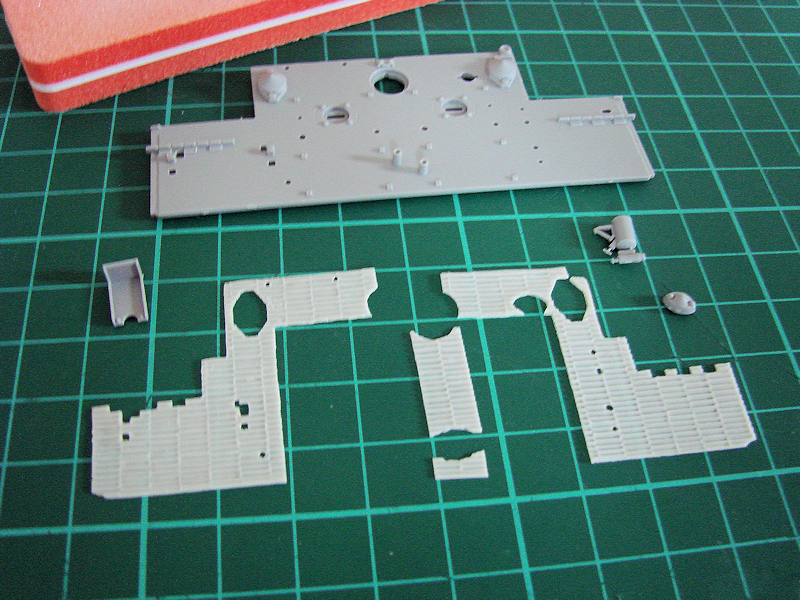
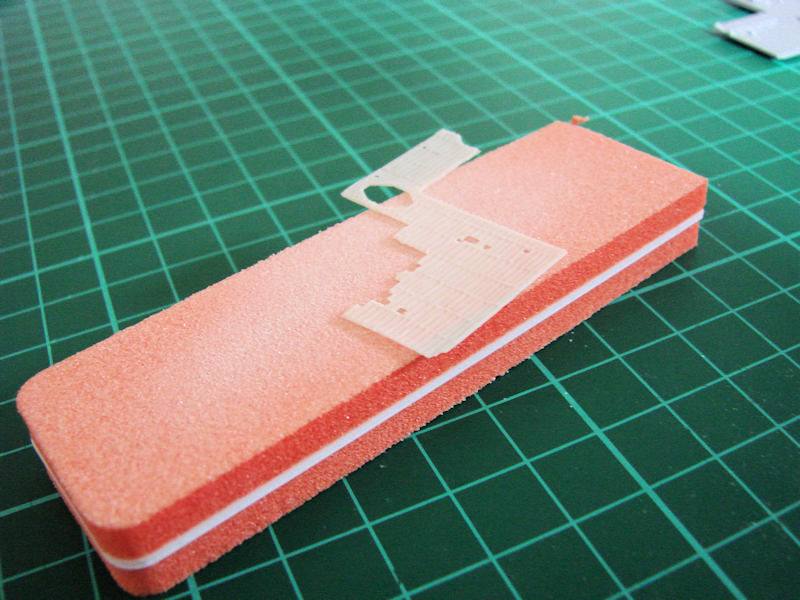
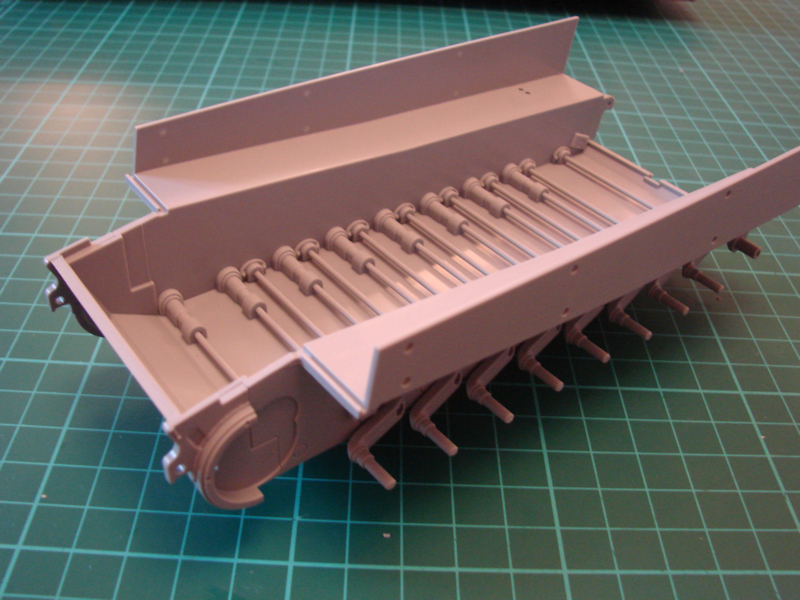
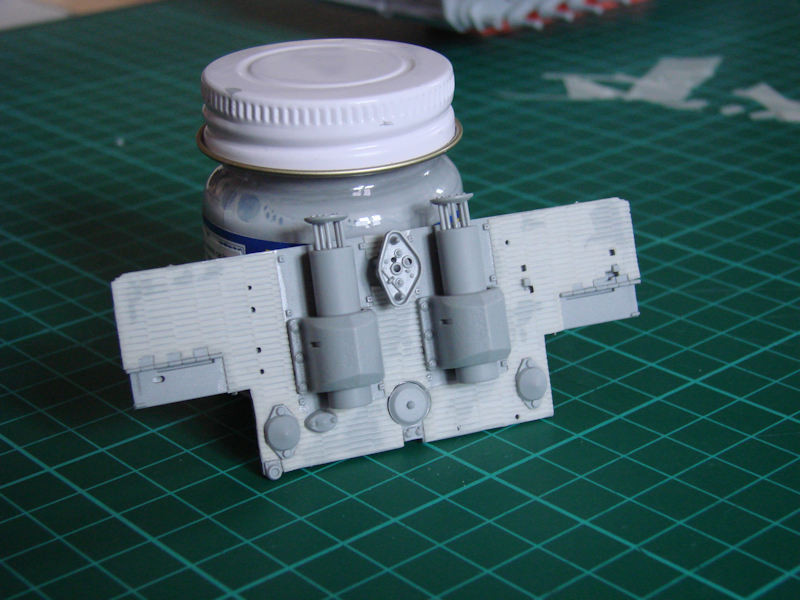
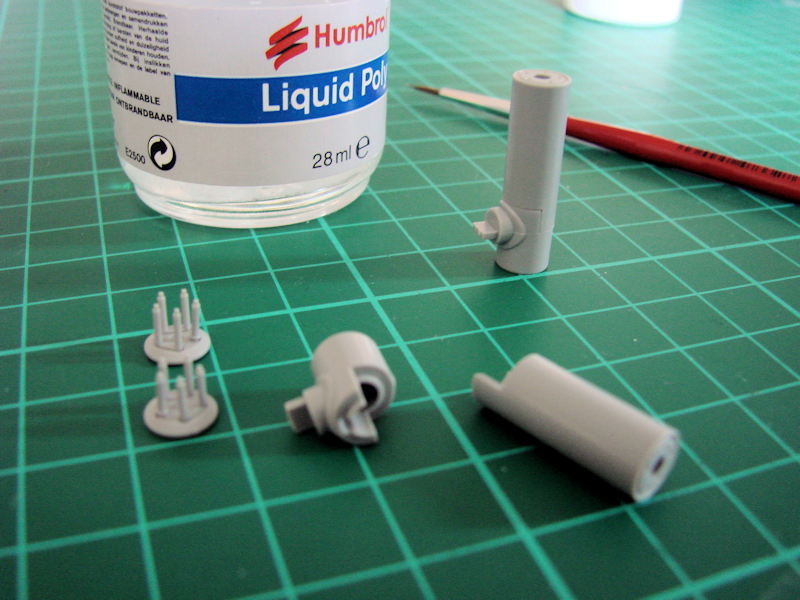
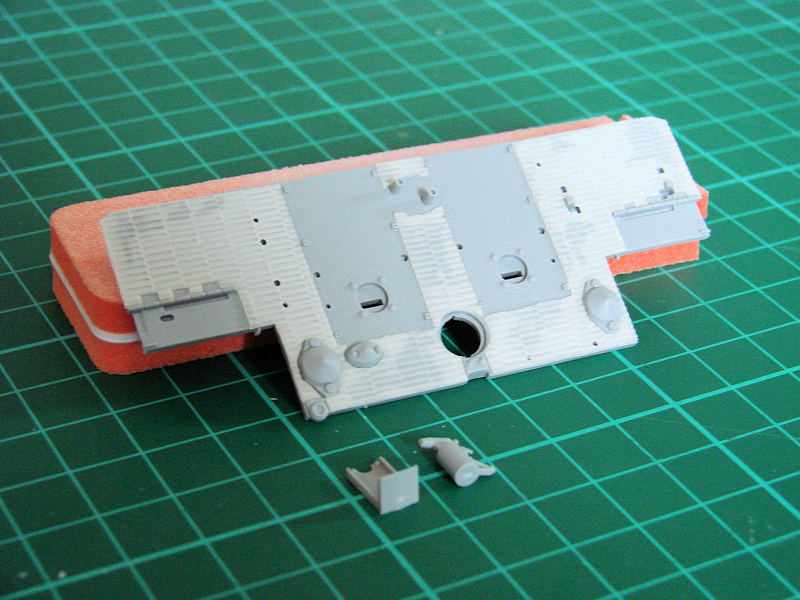
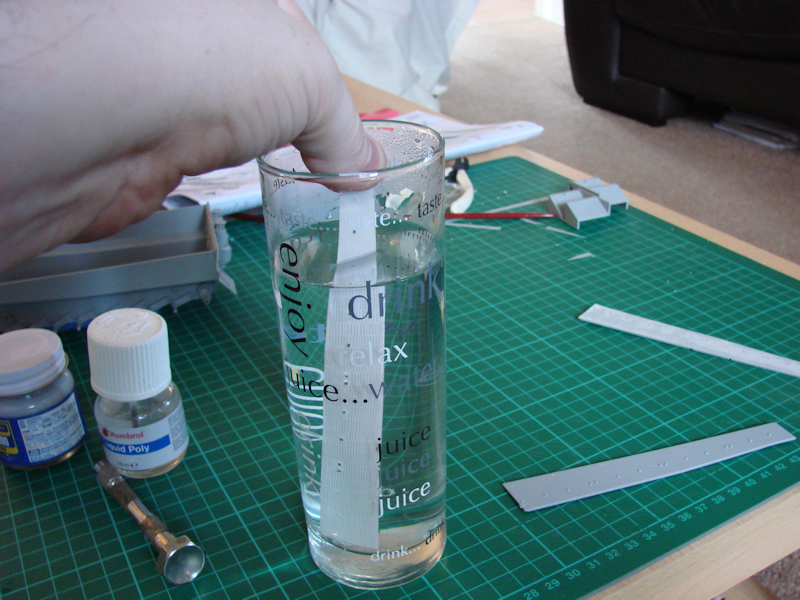
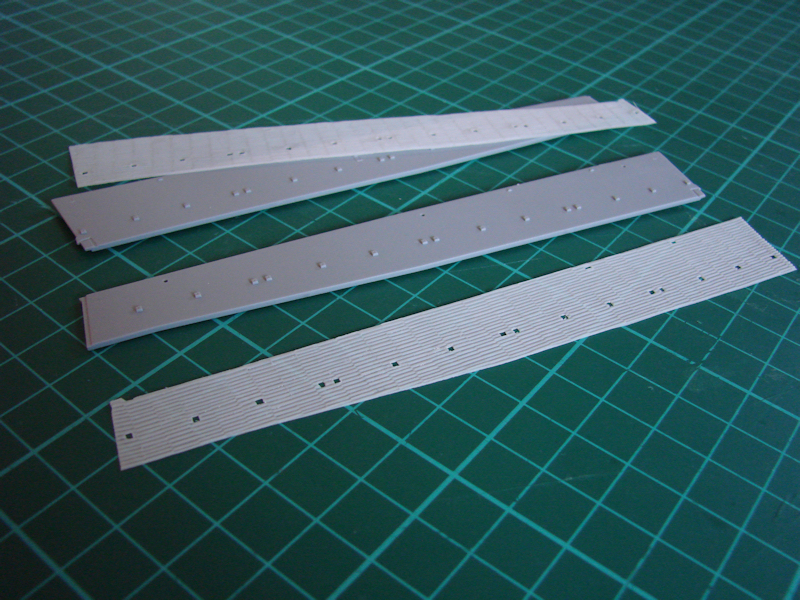
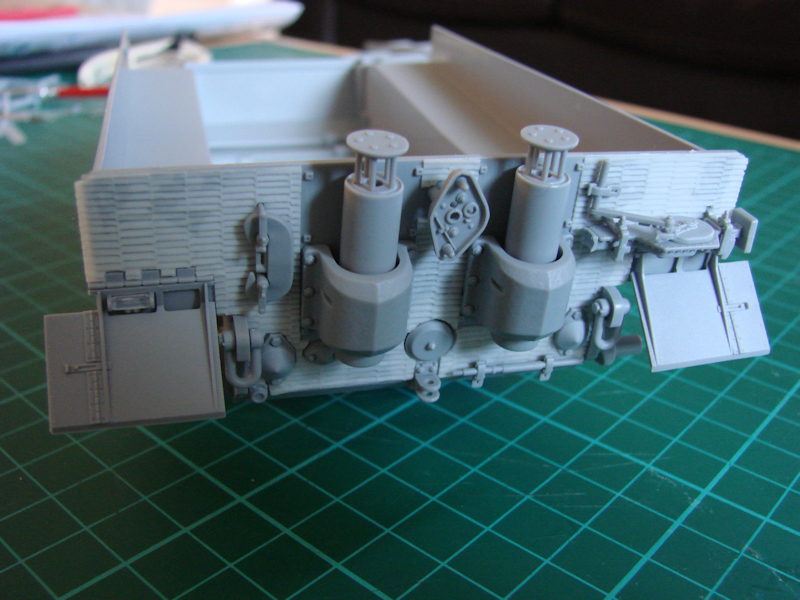
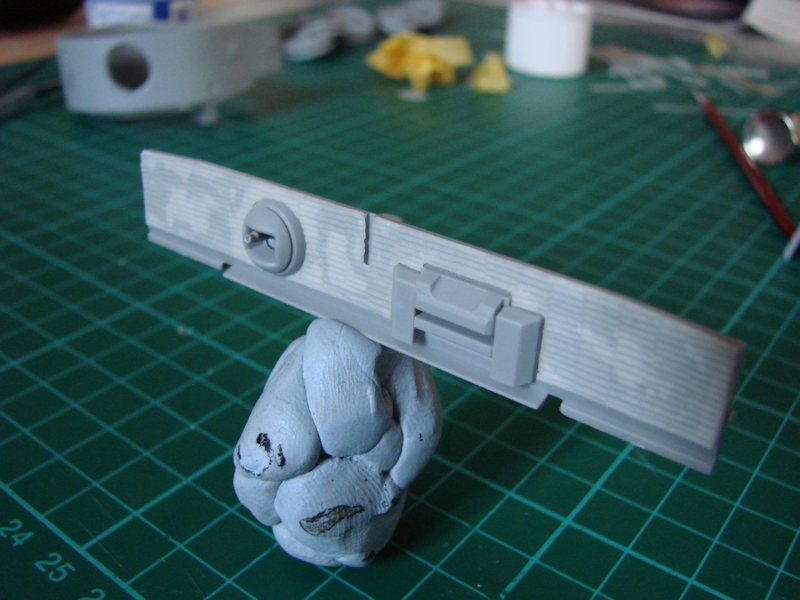
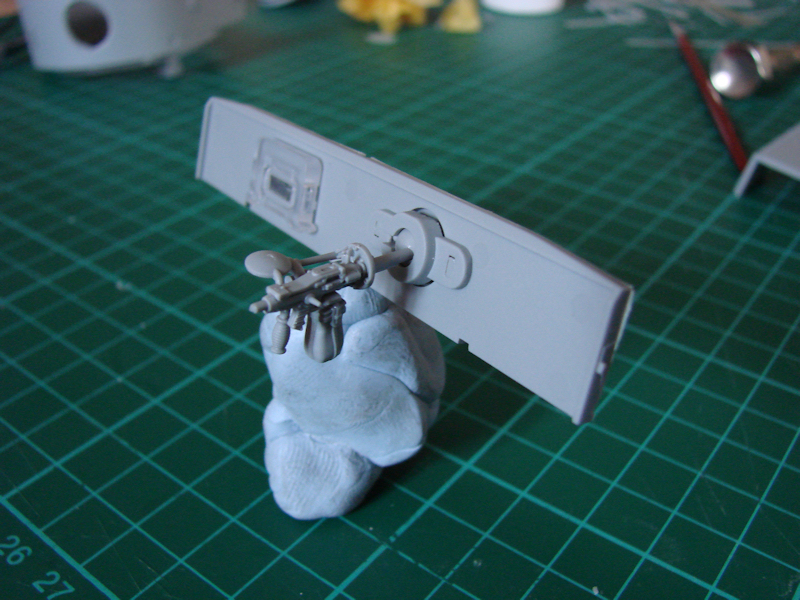
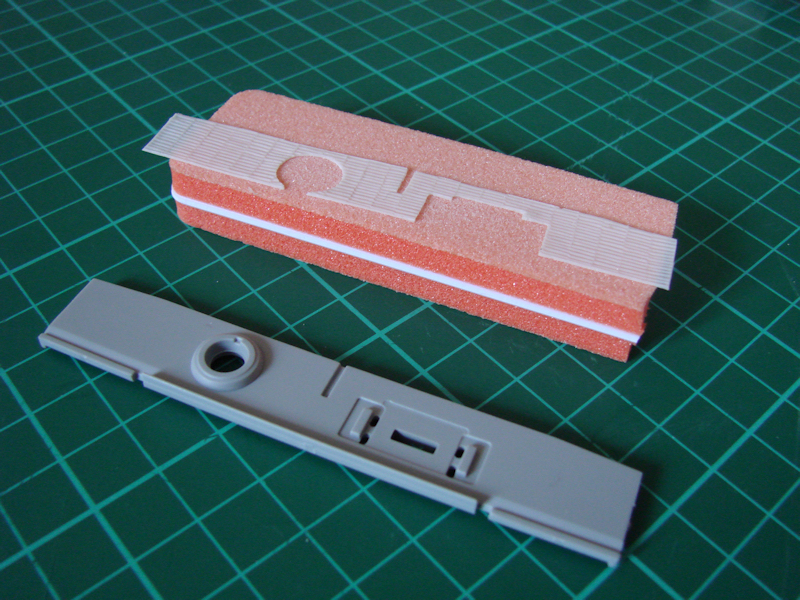
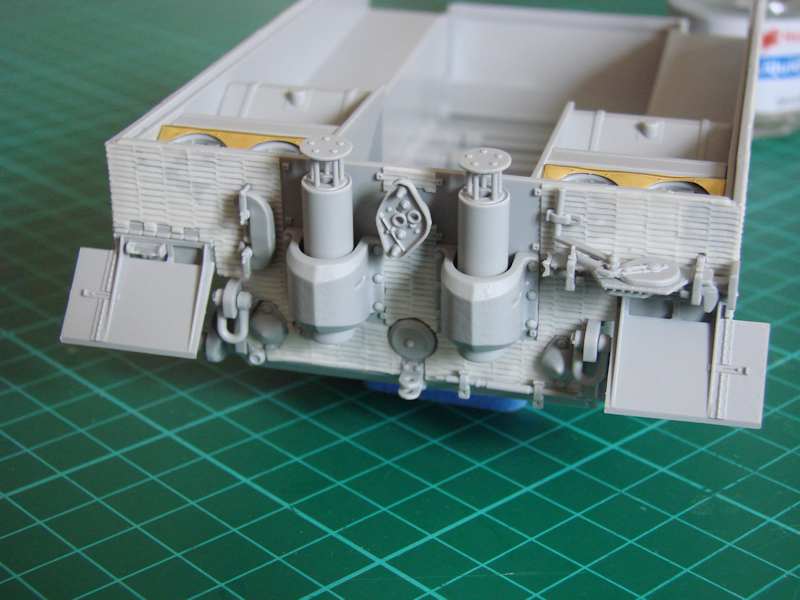
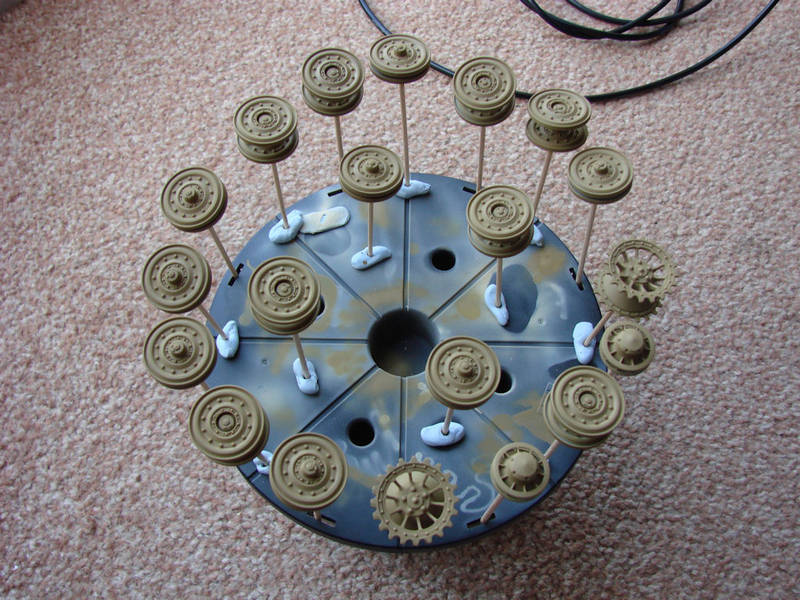
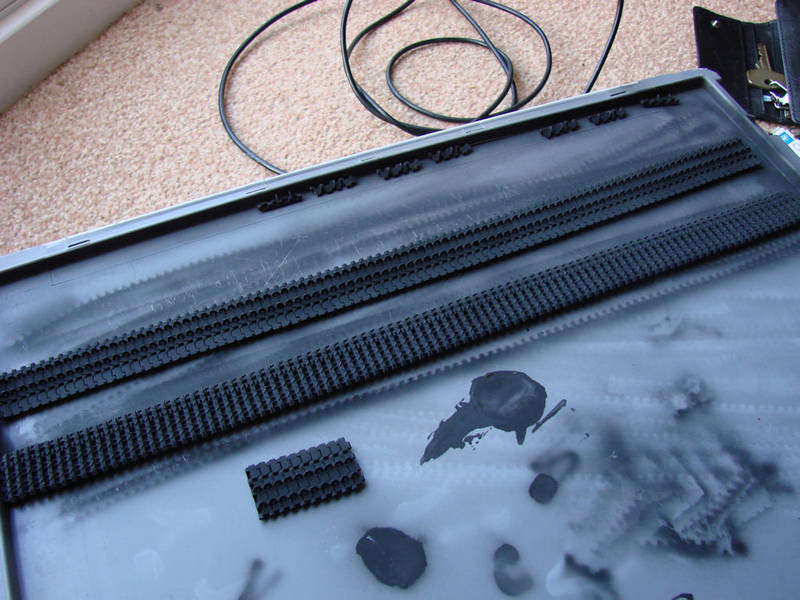
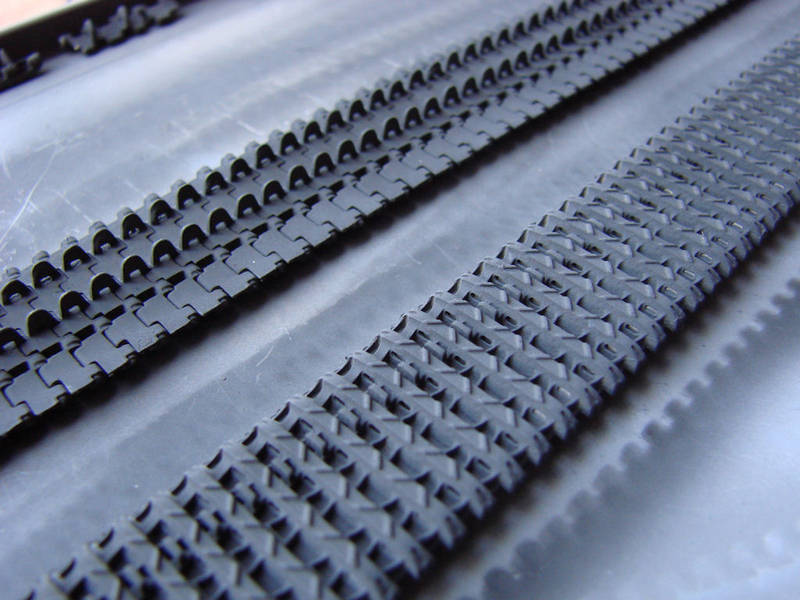
Hull The build begins with the hull as is typical, and the first job I did was to remove the wheel sprockets/torsion bars. These were cleaned up ready for assembly to the hull. At this juncture, I will also get the other repetitive work out of the way by choosing which version of this tank I will make, and then assemble the set of wheels to match it accordingly. The feint seam around all the wheels was sanded away with sanding sponges. At this point, I had not added the rear idlers, and to plagiarise another build of this kit I saw blogged somewhere, I made them moveable by adding a small slab of plastic to the idler, from the inside of the hull. With this, I could then tension the tracks properly at a later stage. All the wheel sprockets are now added and I made sure that all the sprockets sagged by the same amount. The fit of the torsion bars into their sockets was a little sloppy, so I found this a useful idea. The whole assembly was left overnight for the cement to cure fully. This kit is produced without zimmerit, even though the box art shows it added, and guess what? I had never done zimmerit before. Just as well I bought the ATAK zimmerit set then. The zimmerit is supplied in a paper thin resin sheet and is superbly cast. It appears fragile, but is actually quite strong. The zimmerit is supplied in 2 patterns for the turret, and there are 2 turret hatches correspondingly. 2 resin mantlets are included to replace kit parts totally. There is a monocular and a binocular mantlet. Vision ports in zimmerit finished resin are also included. With the lower hull set to one side to cure, I started work on the rear glacis, and encountered my first zimmerit parts to complete. The resin sheet parts were removed from their carrier with a scalpel knife and the rear of them gently sanded to provide flat areas, plus a key for the cement. These were then applied after an initial test fit. The exhausts were then assembled and fitted. The rear glacis was then added to the lower hull assembly, the fit was perfect, just as well. I didnt want anything too awkward for this build. Resin zimmerit was also now applied to the slab armour sides which are to be glued to the lower hull sides. The resin parts were slightly too short to cover the full length of the slabs, so dipping them in just-boiled water for less than half a minute made them more pliable. Lining them up against a ruler, I stretched them gradually by a fraction. The zimmerit was then immediately applied to the slabs. Other lower hull areas were now given attention, such as the fan and shutter assemblies in the rear hull, which benefitted from a nice piece of PE to frame the fans. I wasnt overly concerned about this area though, as it was pretty much going to be covered up. In fact, some of the piping wasnt assembled at this point either. I simply left it off. The resin treatment was now given to the near vertical plate which holds the forward vision port and gun mount. The fit was perfect. The forward glacis and the new assembly were now fitted to the hull Upper Hull It seems to make more sense to me to add the upper hull to the lower hull before things such as tools are added, just for the sake of fragility. Still, I stuck to the sequence for this area. I had already decided to ditch the tools with moulded clamps and add the PE ones. After all, I had just bought a Hold n Fold, so I figure I had better use it. Dragon supply a sprue with a set of moulded profiles for bending the clamps over, and they are great but real fiddly. All tools were added to the upper hull, but a mistake by Dragon in supplying one tool without clamps, which was too short in length, meant I had to shave the clamps off the other tool and use that in its place. Other areas such as rear engine cover, tow cables and other ancillary parts are now attached to the upper hull. The upper hull is now glued into place on the lower and Tamiya tape used to hold everything in place while it sets. Overall, the hull fit has been pretty good, with little to no persuasion in terms of fitting required. At this point I have to add that all hatches on the hull have been modelled in a closed position. I dont intend any extra detail to be added or seen. Turret As my model was having zimmerit applied, the first thing I did with this turret was to remove the weld seams and vision ports from the actual turret. This was done with some careful carving with a scalpel. The turret was then sanded with medium sanding sponges to provide a key to the resin zimmerit. This was supplied in 2 halves. When I checked these against the turret, again, they were a little short overall, so I dipped them in just-boiled water and stretched them. These were glued to the turret and the vision ports attached. Next up on the slab was the gun. I cant understand why a spring is supplied to give the gun recoil. I dont think it will be doing that on my display shelf! Nevertheless, it was added and probably prevented the gun from being sloppy in the expansion chamber during assembly. The resin mantlet replaced the kit part and was added to the gun assembly. With the gun complete and temporarily added to the turret, the inside of the turret, including the gun and underside of the turret lid, was given a coat of Tamiya X1 Black. The cupola and was then assembled and the turret lid added and detailed. With the gun now in place, the turret bin was assembled and fitted. The padlocks were simplified though as in this case, the carpet monster ate about 3 or 4 of the parts. At this point, I had decided to replace the kit spare tracks for the turret, and use some from the Friul kit I bought. For some reason, I had another 30 to 40 extra metal tracks in the box, so this was the way to go. This also applied to the extra front glacis plate links too. Hull completion With the model more or less completed, I now added the fenders and other detail. I replaced the poor preformed wire link for the headlight with a length of thin solder which conformed better to the hull. I decided not to go overboard with too many extras on this model as I knew it was going to be the testbed for everything from airbrushing, through to resin and pigments etc. I incorporated next to no extra damage to the model such as bends and dents etc. The only thing I actually did was to dent the engine grilles. Tracks With the wheels temporarily in place on the hull at a much earlier stage of this build, the vinyl tracks were added, but they simply didnt do it for me. There was nothing natural looking about them, and although I could have made them conform to the top of the wheels instead of floating above them, it just looked awful. So I ditched them, hence the purchase of Friul tracks courtesy of Lou Stener Armour. These are painted and weathered in the following paragraphs.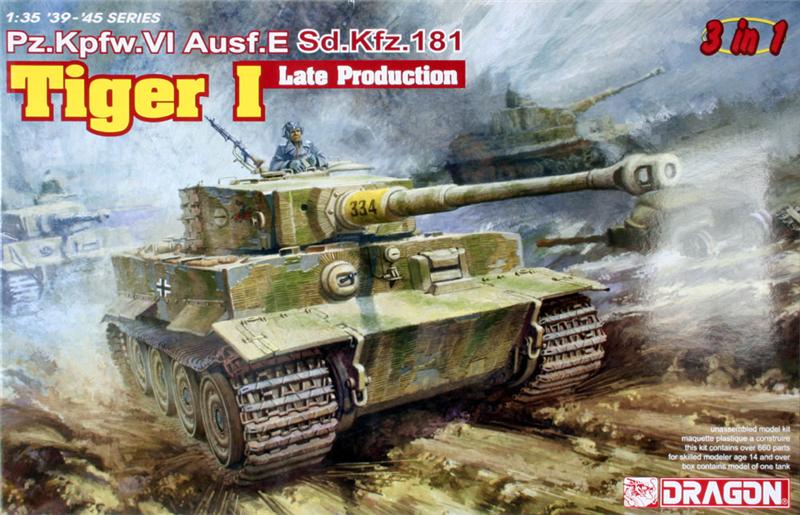


About the Author


FROM: ENGLAND - NORTH WEST, UNITED KINGDOM
I'm 47 yrs old and started modelling from about 6yrs old, mostly in plastic, but then also designing and flying scale model aircraft for Free Flight. Left the scene in the early 90's and ventured back in 2001 to build wooden period ships. Decided I missed plastic too much. Recently re-aligned my ...
Comments

Jim, you know I have the same Tiger on my workbench and I am currently applying the ATAK Zim. Although not very easy to do, I just like the quality of this Zimmerit. It was nice reading about the progression of your built. I will apply some the things that you mentioned and I hope I can get a good result close to what you have achieved.
JUN 03, 2010 - 04:16 PM
Copyright ©2021 by Jim Hatch . Images and/or videos also by copyright holder unless otherwise noted. The views and opinions expressed herein are solely the views and opinions of the authors and/or contributors to this Web site and do not necessarily represent the views and/or opinions of Armorama, KitMaker Network, or Silver Star Enterrpises. All rights reserved. Originally published on: 2008-11-30 00:00:00. Unique Reads: 33786

WEB HOSTING BY


Copyright ©2021 Armorama and Kitmaker Network, a subsidiary of Silver Star Enterprises
All Rights Reserved. Please read our Conditions of Use and Privacy Policy.
All Rights Reserved. Please read our Conditions of Use and Privacy Policy.