

1⁄35Chevrolet C8A HUW
10
Comments
Decals/Stowage
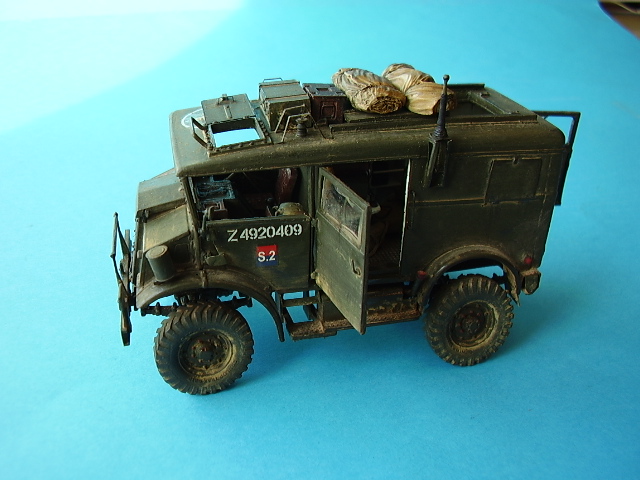
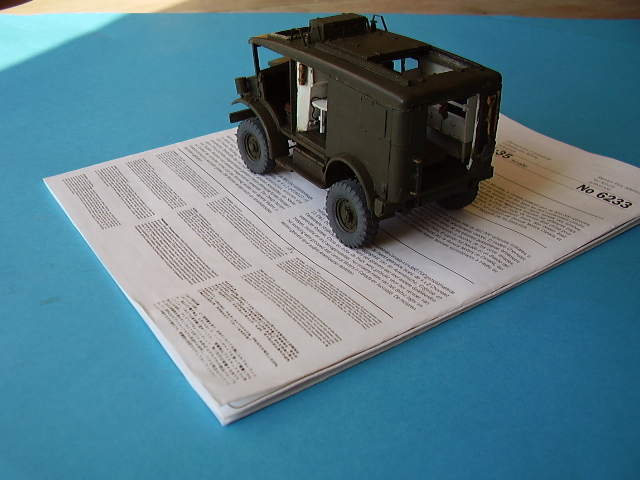
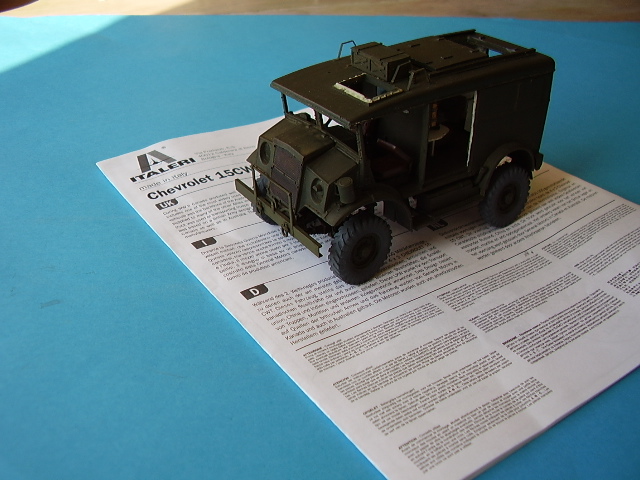
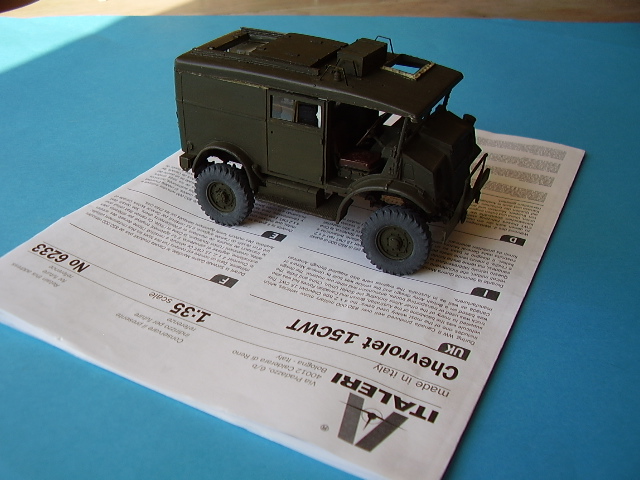
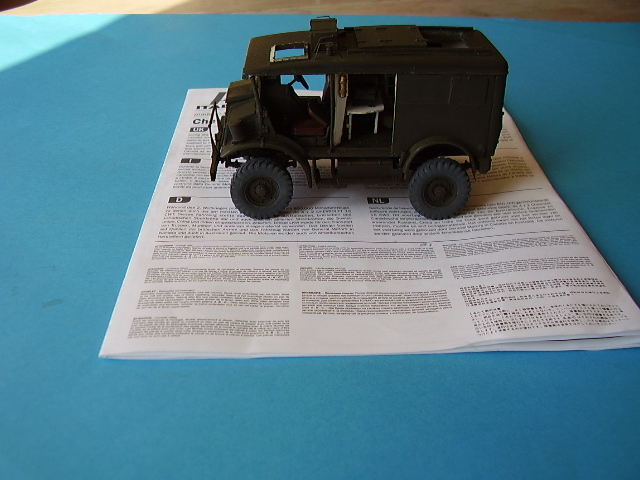
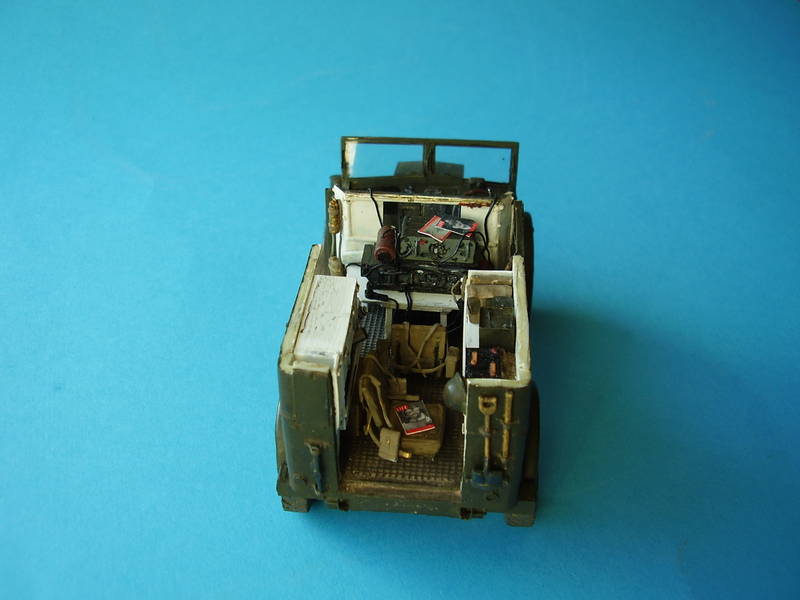
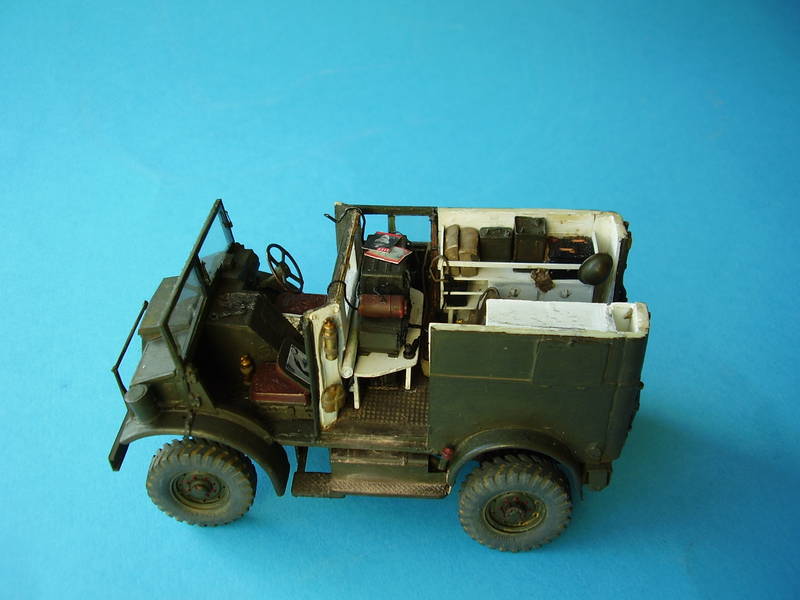
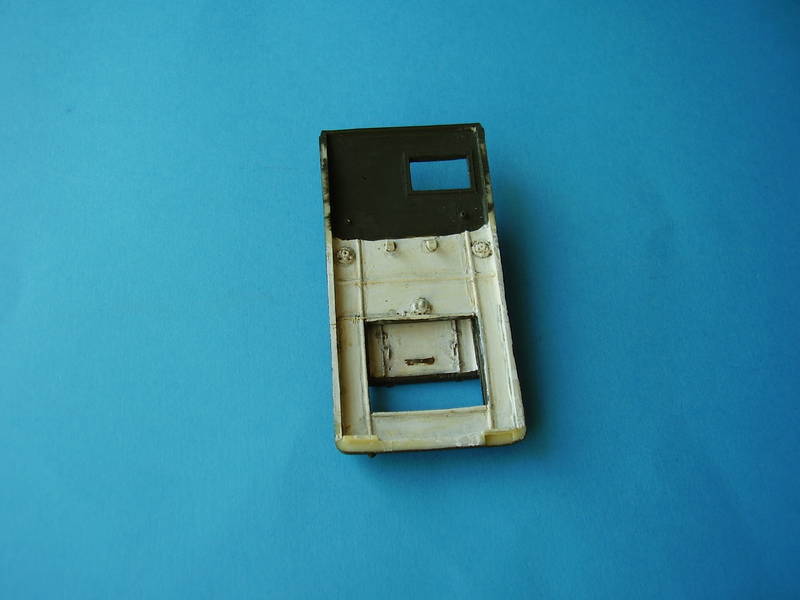
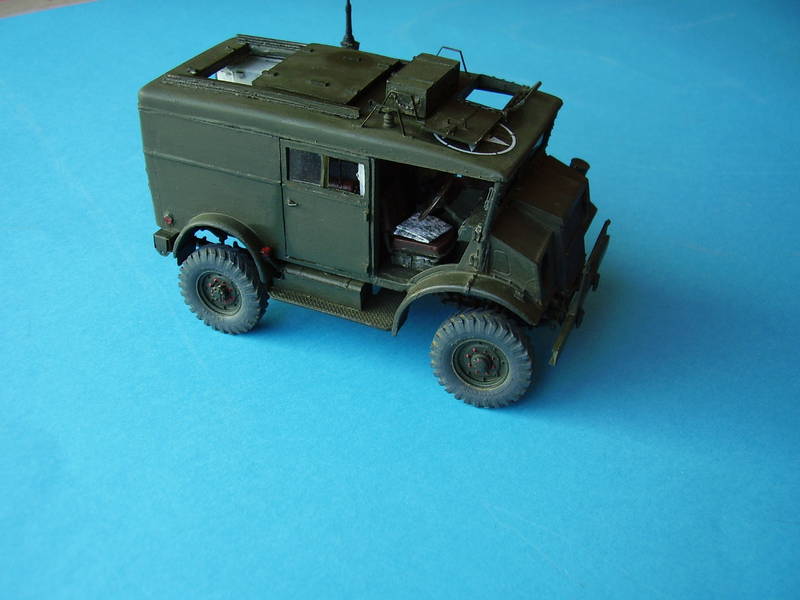
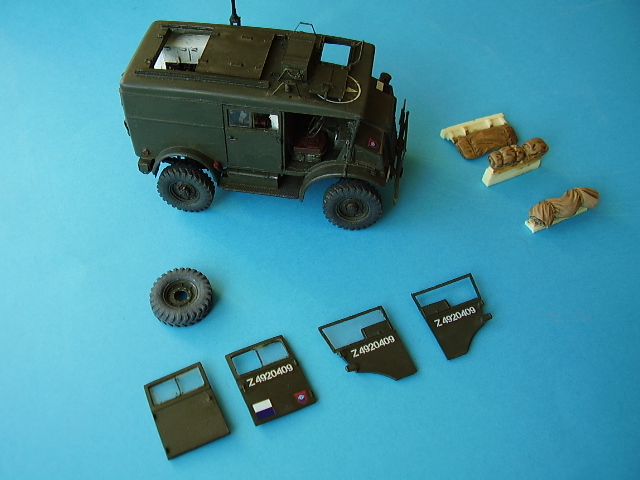
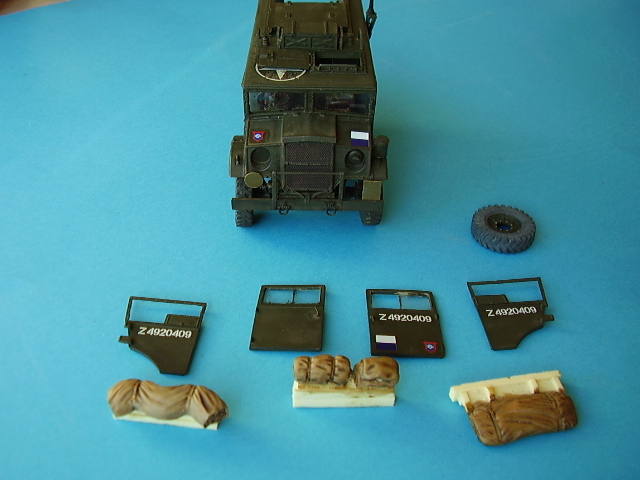
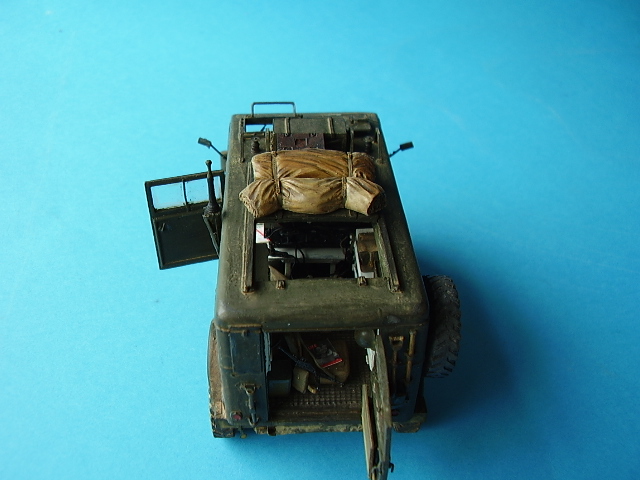
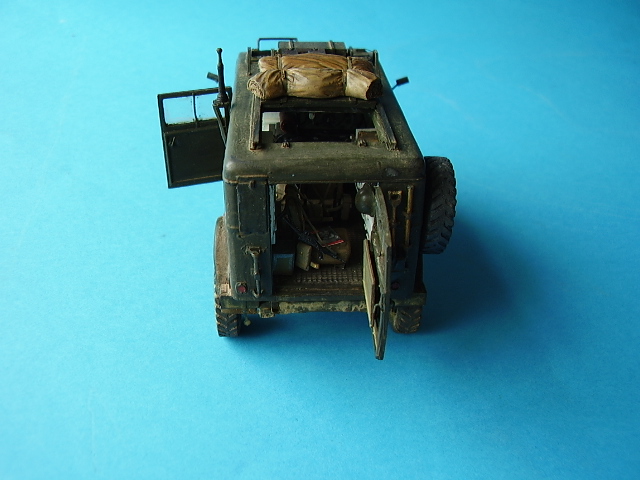
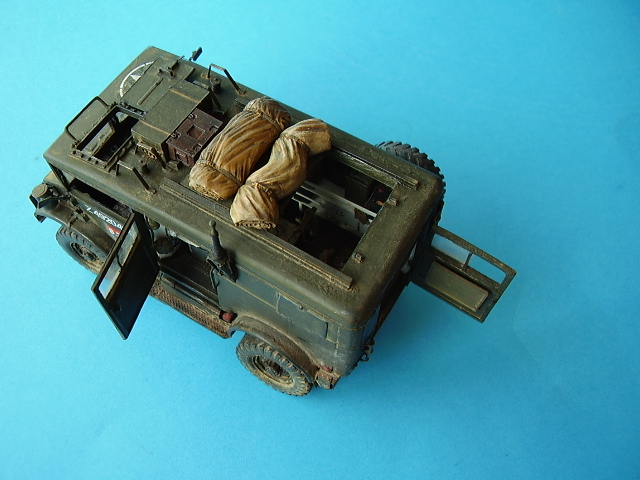
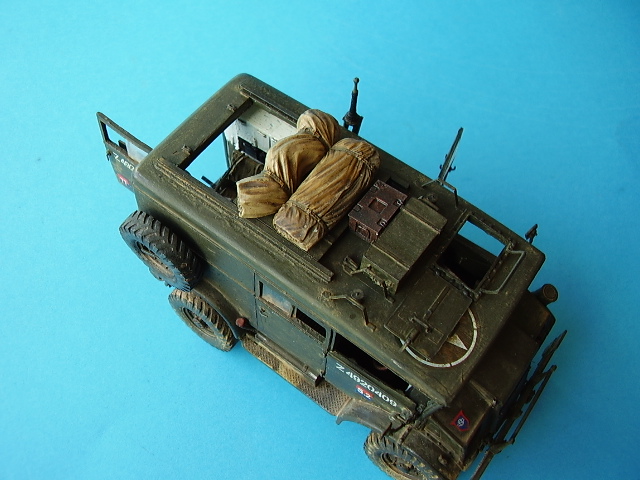
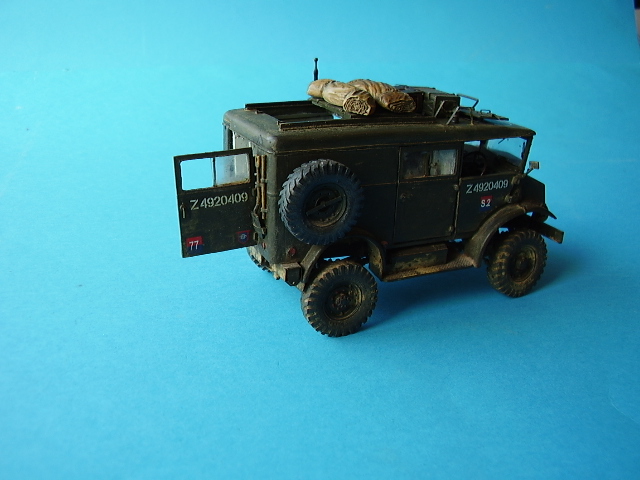
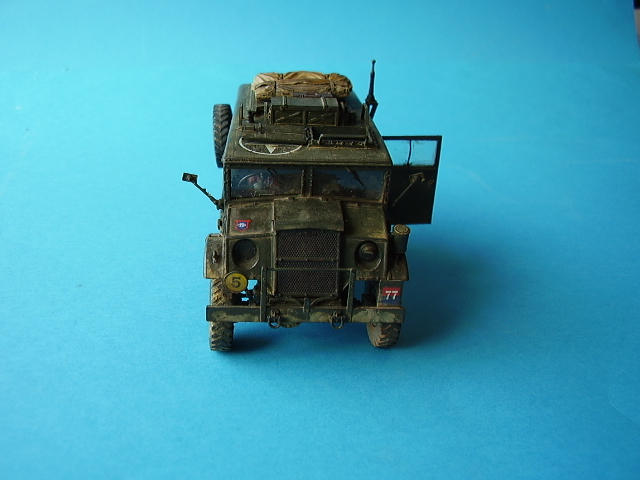
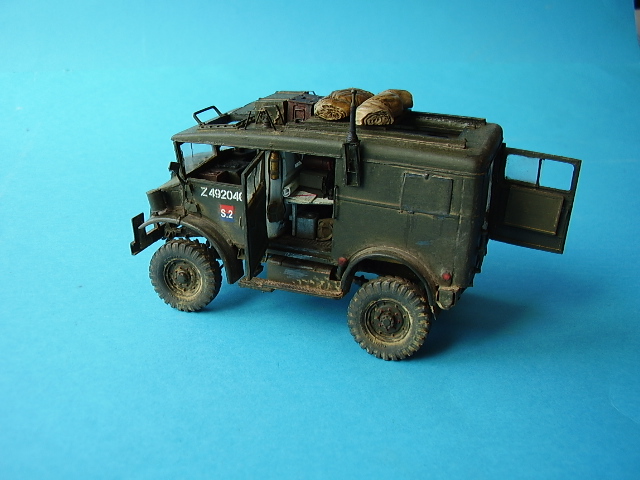
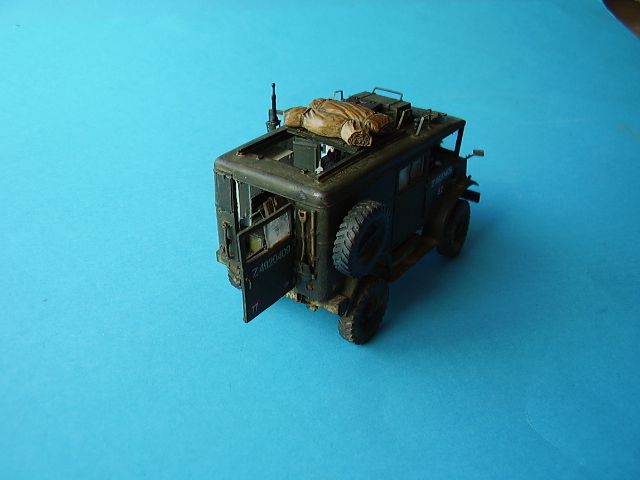
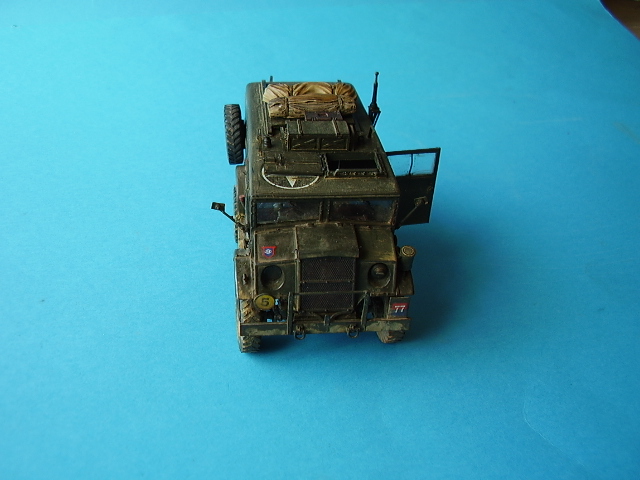
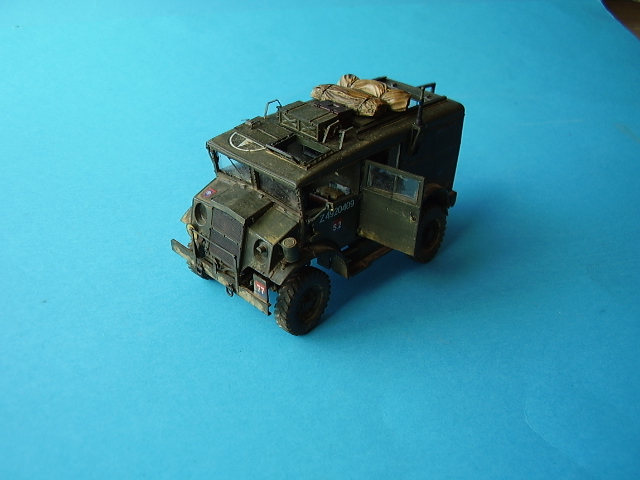
The HUW was used mainly by anti tank and anti aircraft units of the RA as a communications vehicle. I used a mix of the kit decals and the excellent set from Fingerprint Design to mark the vehicle, as one from No 2 Det RSC, 21st Anti Tank Regiment Royal Artillery, Guards Armoured Division. The regiment were equipped with towed 17pdr anti tank guns. One thing that was impossible to find were pictures of this truck in the field, which was a great pity. Whilst the later variant of this truck had a recess for the spare wheel where the unused RHS door wood have been I decided to add a field modification and spare wheel to the rear RHS. I fashioned a mounting bracket and retaining bar from old kit parts and plastic. The I added the spare wheel that comes with the Hussar set. For roof stowage I used a couple of pieces of Plus Model stowage I had left over from a previous build and an ammo box from either Accurate Armour or Resicast. The last thing I added as a small PE fitting to the underside of the rear LHS back end.Painting and Weathering
I paint as I go and this build was not different. I completed each sub section as I had finished it, and when the whole vehicle was put together blended the paint together using a selection of Mig filters. Some mud mixed with a variety of pigments was added to the underside and wheel arches and wear marks with pencil and pin washes of Burn Umber. The paints used were:- Tamiya, XF61 Dark green and FX 62 Olive Drab
- Tamiya XF 64 Dark Brown
- Taniya X 10 Gun Metal
- Tamiya XF Metallic Grey
- Tamiya XF1 Matt Black
- Tamiya XF 66 Light Grey
- Tamiya XF 18 Medium Blue
- Tamiya XF 75 Buff
- Tamiya XF 49 Khaki
- Humbrol Matt 70
- Humbrol Metalic 54
- Vallejo Yellow Ochre - 913
- Vallejo Off White - 70820
- Mig pigments Dark Mud P033
- European Dust P028
- Light Dust P027
- and Filter Dark Brown for Green P245
- P402 Brown for Desert Yellow
- P400 Grey for Dark Yellow
- Standard Lead Pencil
- Milliput
- Mr Surface
- Plus Models Lead Wire
- Plastic rod and strip in various sizes
- Maps and documents by Paul Rains
Conclusion
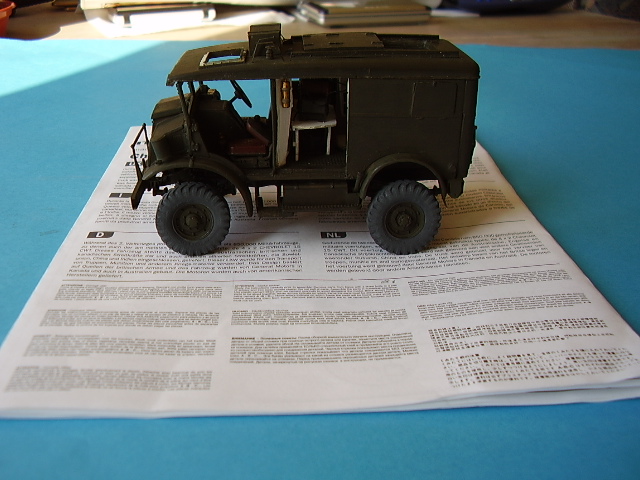
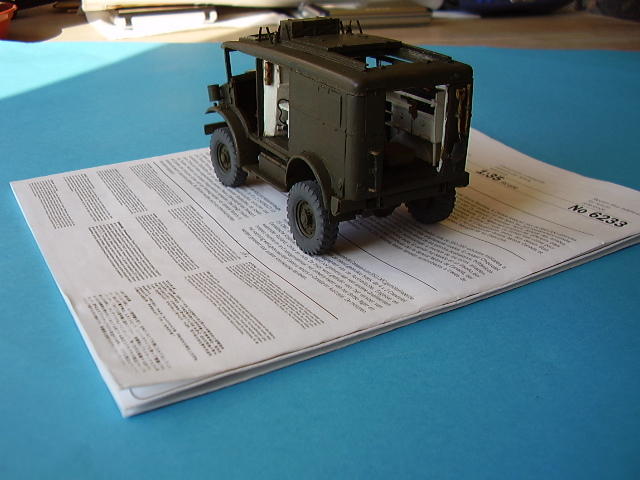
This was a challenging and fun build to do. I Learnt some new skills, revisited some old ones and forgot a few others!! I think I have made an interesting an unusual vehicle, one Ive not seen modelled in this open form before. Its not perfect but its the best I could do. I cant despite having enjoyed the build immensely recommend the Plus Models kit to anyone. It is expensive, poor on fit and soft on detail. It would require a lot of work just to build it as a basic box vehicle but it does have one saving grace it allows you to build the HUW, and if like me you build British and Commonwealth vehicles, well its the only game in town at the moment, unless you can get a set of plans and scratch your own. If I have a disappointment with the vehicle it is in dusting the front windows. I have made several attempts at achieving this with little or no success so I left them for now. I think that particular technique is best achieved with a spray gun and that I dont have. More practice required!! Just to reinforce the point about pinning the wheels as it started to take the last pictures the rear LHS wheel was close to dropping off. I took it off, drilled a hole in the axel and wheel and pinned it with wire!! Antenna and figures will come along when I decide on a home. My thanks to all those who contributed to the blog and made the build possible with their contributions of knowledge, documentation, reference pictures, ideas and support.Links to reviewed items
C8A HUW Conversion Set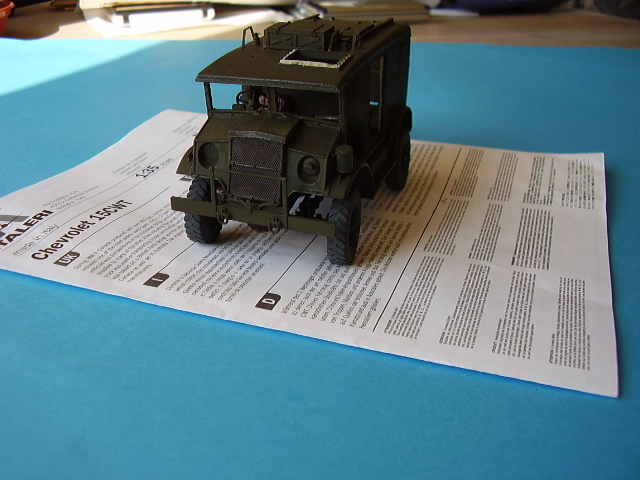


About the Author


FROM: ENGLAND - EAST ANGLIA, UNITED KINGDOM
Greying slightly, but young at heart. I've been teaching adults off and on for most of my life. Left the services in 85 and first started modelling in about 87 for a few years. Then I had a long spell when I didn't build anything (too busy) and really just got started again during the summer of ...
Comments

Another fantastic build from Alan, and it's a CMP!
This is another that I tried to scratchbuild some years ago, and like the C15TA it never got finished. That conversion set looks a bit of a dog, so well done for making it work so well!
JAN 08, 2009 - 05:12 AM
Really great job Alan! Looks really nice and a first rate job as usual. I always like to see your work and really appreciate you sharing it with us. Love to see those CMP trucks!!
Bob
JAN 08, 2009 - 05:47 AM

Hi Dave and Bob,
Thanks for the comments guys, appreciated. I have to admit that when I decided to open it up I had no idea if it was do-able.
Cheers
Al
JAN 08, 2009 - 06:33 AM

Really nice Build, Alan, and an interesting project.
Great work.
Paul
JAN 08, 2009 - 08:44 AM
Alan,
I keep seeing a lot of your work coming up and the details just keep getting better with each build. Very impressive build and congratulations on a great feature. I didnt notice but is the top still detachable? Hope so, it's such a shame not to be able to see all the great details you added.
Bob
JAN 08, 2009 - 09:39 AM
Hi Guys,
Paul, thanks for the comments and glad you found the project an interesting one. It was quite a challenge
Bob, many thanks for the kind words. Unfortunately the only way to get the roof to sit correctly was glue it down, but a a fair amount of the details is still visible through the open doors.so it does look nice and busy inside.
Cheers folks.
Al
JAN 08, 2009 - 06:17 PM
Hey there Alan,
Great build....I just picked up one of these conversion sets and want to do a CDN version of the truck.
I picked up the conversion in a trade with another modeler, as opposed to purchasing it out right, otherwise I might have been as disappointed in it as you were in the conversion kit.
I will however be bookmarking your build and use it as a reference for my own build at some point!
Again, fantastic result!!!!
JAN 10, 2009 - 08:37 AM
Hi Scott,
Many thanks for the comments and glad you enjoyed the article. The original build blog is still in place. I don't know if you followed the build but there are a lot of useful references in the blog:
Here's the link
https://armorama.kitmaker.net/forums/124414#1026710
so fill you boots as they say
Plus Models make a lot of neat items but they are very expensive, over priced IMHO. Still this was the only kid on the block and a lot of fun to do. Hopefully you got a good trade and can go from there.
Cheers
Al
JAN 10, 2009 - 09:25 AM

Perhaps I missed the reason why the left front seat has a fold down back since there is a wall behind it.
Your mud and dirt give it that lived in look. If you want a dustier appearance, you might try a slurry of wood ashes in water.
Paint it on with a wide brush, let dry, rinse and brush off. It will mildly etch and flatten the paint also and leaves a light tan/grey look, as if it had spent a lot of time on unpaved Normandy roads.
JAN 11, 2009 - 02:30 PM
Hi Trenor,
Yes, you did, the Pin Up behind it
Thanks for the thoughts on the wood ash, interesting technicque. No facilities for an open fire here but perhaps cigarette ash or paper ash might work too. I'll try a few experiments.
Many thanks
Al
JAN 11, 2009 - 05:43 PM
Copyright ©2021 by Alan McNeilly. Images and/or videos also by copyright holder unless otherwise noted. The views and opinions expressed herein are solely the views and opinions of the authors and/or contributors to this Web site and do not necessarily represent the views and/or opinions of Armorama, KitMaker Network, or Silver Star Enterrpises. All rights reserved. Originally published on: 2009-01-08 00:00:00. Unique Reads: 23130

WEB HOSTING BY


Copyright ©2021 Armorama and Kitmaker Network, a subsidiary of Silver Star Enterprises
All Rights Reserved. Please read our Conditions of Use and Privacy Policy.
All Rights Reserved. Please read our Conditions of Use and Privacy Policy.