

1⁄35Pz.Kpfw.IV Ausf H
20
Comments
Paint & Weathering
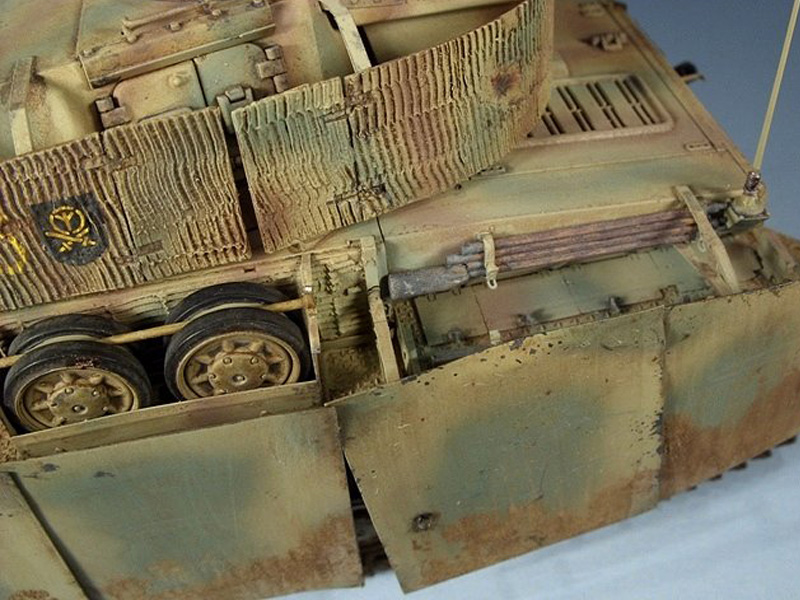
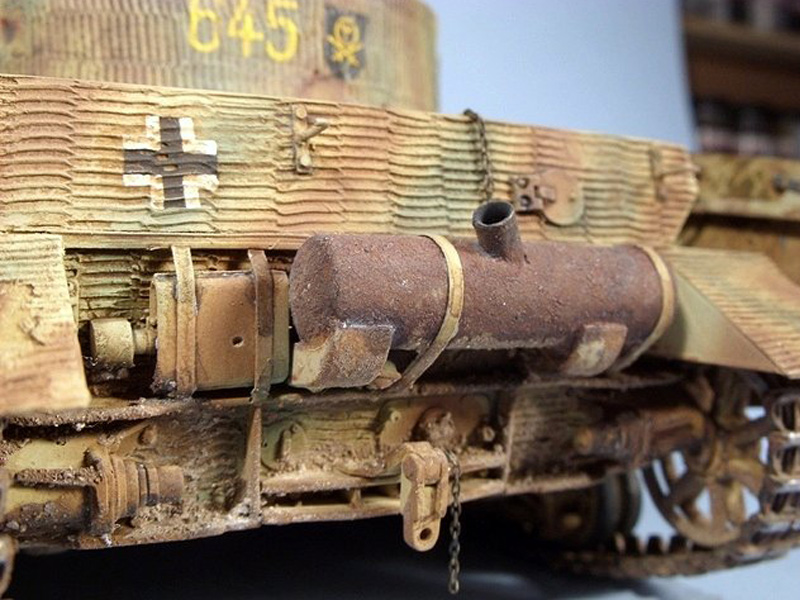
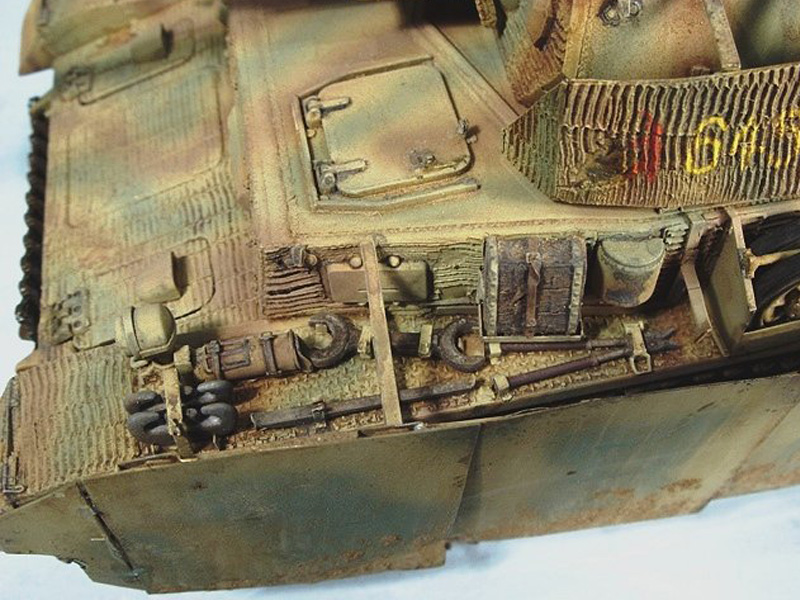
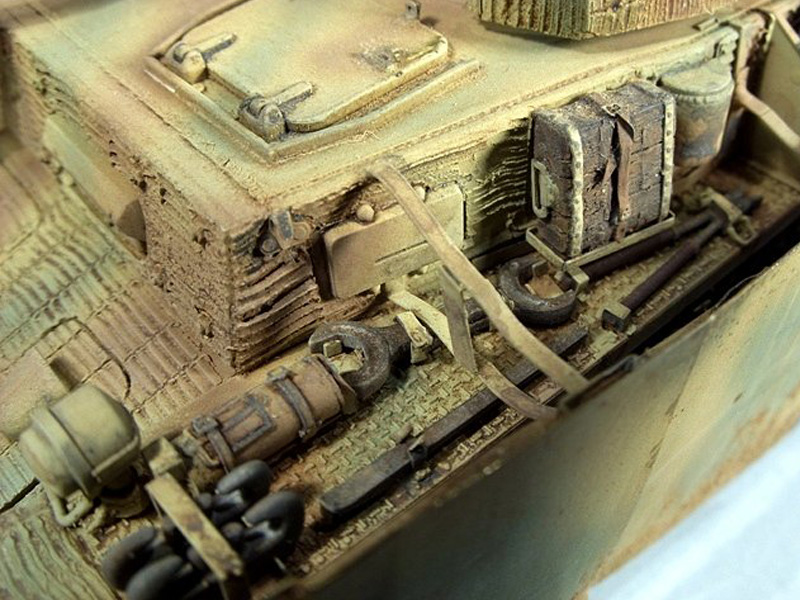
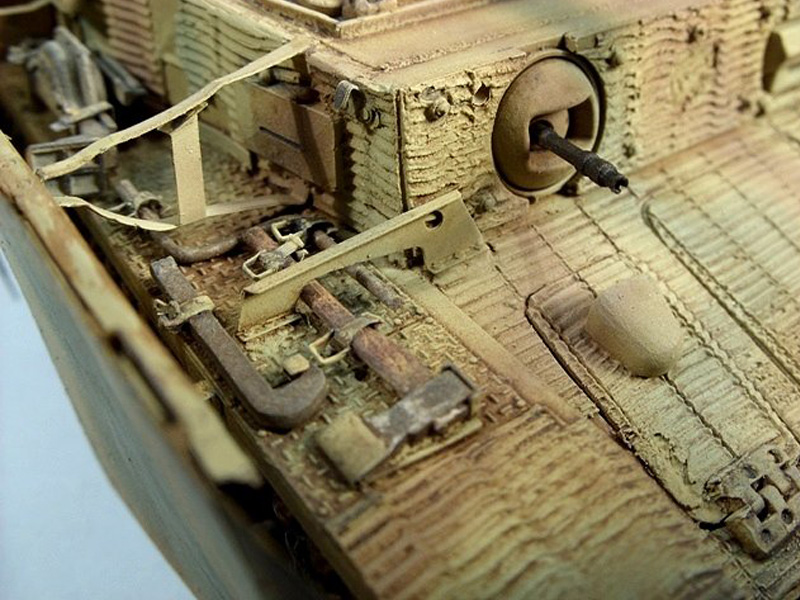
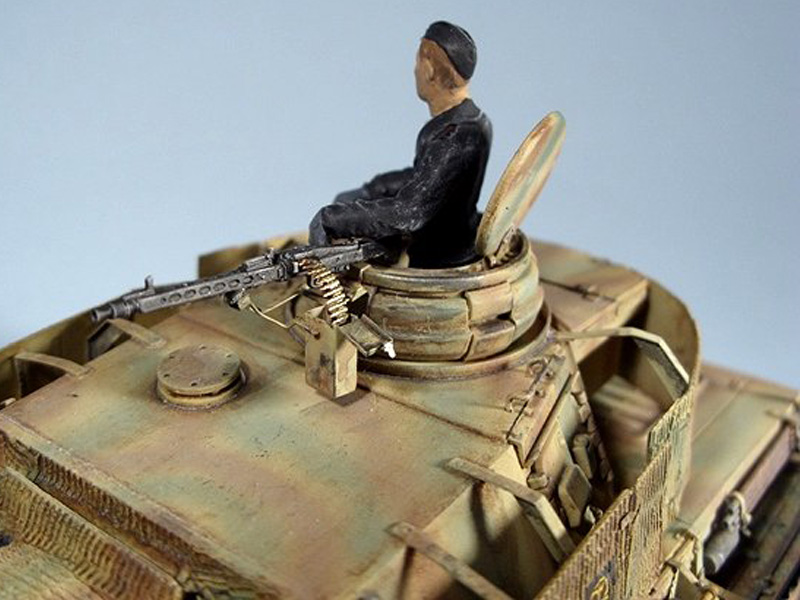
The model is painted with Model Master Enamels. The dark yellow is mixed with about 30% white and a little bit of Italian Sand. The panzer green was lightening a little with white and red brown is a mix of Leather and Military Brown, also lightened. After the camouflage I applied a filter of the base color about 90/10 thinner to pint to pull it all together. I made a dirty brown sludge wash with artist acrylics that was thinned with alcohol. This dries really fast after which I took a stiff brush damped with alcohol to wipe away or blend the color. An alcohol swab was used if I needed to remove more then the brush would pick up. In the photo of the top of the turret, the front has been brushed/wiped and the storage bin lid has not. This was followed by a couple more coats of the base color filter. A burnt sienna pin wash was used to pick out the small details. Tool handles are painted with enamel Wood and after that dries, a thin coat of Tamiya hull red. While that was still tacky I wiped it with a Scotch Brite scouring pad to streak the red to look like wood grain. The jack block was texture to look more like a piece of wood that regularly has 25 tons on it. The mud is real dirt glued on with brown paint. I let it sit for a minute or two to adhere then the dirt is tapped with the bristles of a stiff 1 flat brush. This pushes it into the paint to stick better while at the same time removes the loose dirt to let detail show threw. This is done in layers then a fan brush damp with thinner is used to pulled the dirt down and streak it as if wet mud slid down. I got a little carried away on the outside of the shurtzen so some was removed in the photos with the figure. A little dry brushing, some chipping applied with sponge dipped into a mix of black, steel and rust then finished off with a couple of coats of Testors Dullcoat.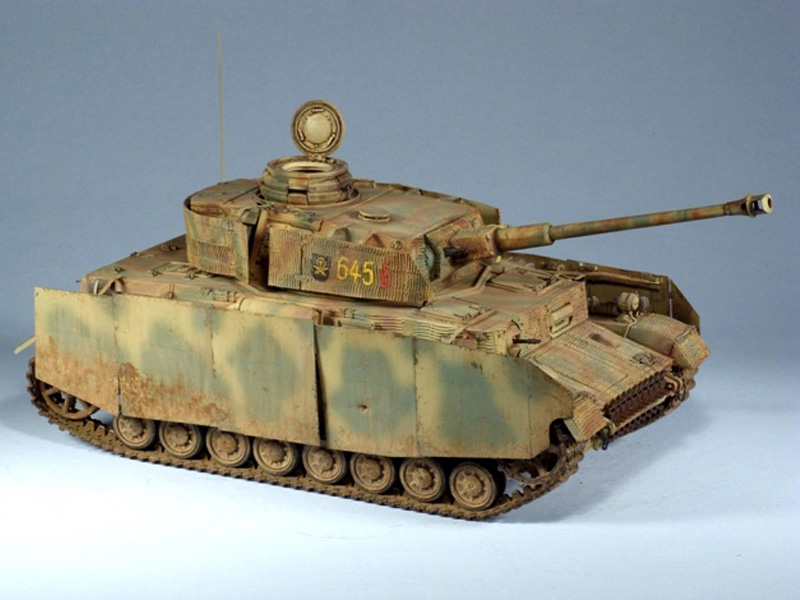

About the Author


FROM: NEW JERSEY, UNITED STATES
Like so many others my modeling has been an on again/off again affair. I started in high school with the first break form the hobby coming with college, work, marriage, kids. You know the drill. As you can probably tell by my screen name I was all aircraft all the time. I had a short "TOPGUN" ph...
Comments

Thanks for all the support and comments everyone. Yup Bill... all form Avenel.
JUN 01, 2009 - 05:12 AM

Marc, I like your build, really want to see the pix of it finished - I did a PIV-H last year and it's interesting to see someone else's take on something that you get to know so well over the months of work.
I totally agree with you about how tough it is getting those turret schurzen lined up. It's like the plates have to align perfectly with the turret, but through the medium of some wobbly thin bits of metal.
I also like the way you improvised some of the details rather than relying on purchased items for everything.
JUN 03, 2009 - 08:56 AM
Matthew, thank you for the feedback and nice comments.
After it was done someone, I think it was Bill Plunk, posted a great photo of the H from directly above. It would have made aligning it all so much easier. I should have saved the photo. I can't remember if the turret schurzen mounts are just welded on or is there a rivet at the end as well. I want to do another H and i was thinking that using those micro brass bolts glued into a drilled hole would make the whole affair a little sturdier.
JUN 03, 2009 - 12:36 PM

Nice work Marc, looks pretty darn good from here. Thanks for sharing your work!
Cheers -
Tim
JUN 03, 2009 - 12:55 PM
Marc, I think I know the photo you mean, it is in the PzKpfw IV G,H,J book by Hilary Doyle (New Vanguard 39), it is what I used. You are correct that the brackets are riveted to the turret with single flat headed rivet. I used Grandt Line rivets. They are a bit small in 1/48, but you can just about see them in the photo:
My Pz IV H
Really recommend the Squadron Pz IV In Action book as well by the way, if you don't have it already.
JUN 04, 2009 - 10:08 AM

Another excellent model Marc, glad to see it in the features. You know I'm a big fan of the PZIV and this is a beauty. The camo is very convincing and weathering spot on, keep up the awesome work and I'm glad you switched to armor. Hope to see this one in Sept at AMPS.
Rob
JUN 10, 2009 - 11:09 PM

Simply amazing the amount of detail put into this model. Looking to be building one myself in a couple of weeks. Will definitaly have to keep this around as a reference. I do have one question. Where you trying to increase the appearance of being heavily armored when you added the side armor? After all the attention you put into the tracks, I would be showing them off. Excellent build all the same.
Matt N.
AUG 29, 2009 - 01:49 AM
Copyright ©2021 by Marc Rocca. Images and/or videos also by copyright holder unless otherwise noted. The views and opinions expressed herein are solely the views and opinions of the authors and/or contributors to this Web site and do not necessarily represent the views and/or opinions of Armorama, KitMaker Network, or Silver Star Enterrpises. All rights reserved. Originally published on: 2009-05-31 00:00:00. Unique Reads: 23441

WEB HOSTING BY


Copyright ©2021 Armorama and Kitmaker Network, a subsidiary of Silver Star Enterprises
All Rights Reserved. Please read our Conditions of Use and Privacy Policy.
All Rights Reserved. Please read our Conditions of Use and Privacy Policy.