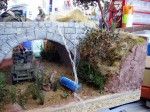
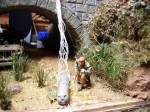
1⁄35Making a Parachute
5
Comments
Building the Parachute
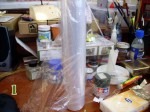
First problem was to decide what material to use; it had to be something thin. After attempts with handkerchief paper, plastic bags and even a window curtain I saw something in my wifeís kitchen (picture 1).Iím not sure what its Ďofficialí name is, but itís something like kitchen foil. It's thin but not too flexible.
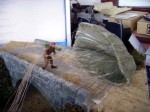
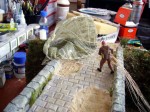
Planning how to add the parachute lines was done by using a technical drawing of the lines and transferring it to a long strip of paper (pictures 2 and 3.)
Shaping the thin material was problem no. 2. I used my sonís balloon and fixed it on some round box. Then I cover it with the kitchen foil. Wrap the line strip (picture 3) around the balloon and secure the foil with a rubber band (picture 4.) The upper half on the balloon will be the parachute canvas.
Painting
Now the funny part starts. White glue has to be spread all over the upper canvas part, but very thinly. The first layer of white glue was mixed with water but just a little. Add some paint to the white glue mix (picture 5.) This will make sure any glossy white from the glue wonít show through anywhere.The first layer is very thin (picture 6.) The second layer was pure white glue and paint (picture 7.)
Strings
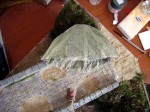
Then strings have to be attached over the canvas. The strings are plain thread for sewing which was run through candle wax to keep thin wisps of thread from separating. Use the guide strip attached earlier to help positioning the strings. Wrap the string from one site over the top to the other side.Once again white glue was brushed on, but only over the strings on canvas (picture 8.) After that, let it dry and than paint.
Positioning
Some thin wire is inserted under canvas to help shape the final positioning. This helps to make it look like it's inflated with wind. I guess thatís all folks. Hope you like it and even use this technique for your future projects.Comments
Hello Robert
That's a clever way of making a parachute.
You've done a great job.
The clear Kitchen foil is called "Cling Film " . would never of thought to have used it.
MAY 28, 2009 - 02:13 AM
Simply, an awesome post, all the way around!! Your dio looks fantastic, and the steps you have illustrated in making a parachute are superb. Thanks for such a great post.
BTW, your wife's "plastic foil" is, here in America, variously called cling wrap, Saran Wrap (a trademarked name), and Handi-Wrap (also a trademarked name, but I'm not sure if it's even produced any more).
Cheers
Tim
MAY 29, 2009 - 04:58 AM
yup, its still made..I use it for wrapping built models for shipping..great stuff.. and a very great idea for its use! always wanted to make a chute deployed for an F-4 landing.now I know how. nice idea for rcycling batteries there too.
MAY 29, 2009 - 05:45 AM
Robert-- pretty darn clever! I will have to try this one. I would also have to research the cargo parachute system to see if they have a vent cap as do the personnel parachutes. The vent cap is located at the very top of the canopy and allows air to escape during the decent thus controlling the oscillation or swinging motion. It also aids (to a very limted degree) steering the parachute. What is the source document you used for the construction?
thanks
Well done
DJ
MAY 29, 2009 - 07:26 AM
Thank you very much for this. I have been wondering about a solution for quite a while now. And your SBS gave me the push I needed. I shall however first try your ballon jig with Magic Sculpt rolled out flat.
Cheers
MAY 29, 2009 - 08:08 AM
Copyright ©2021 by Robert Plese. Images and/or videos also by copyright holder unless otherwise noted. The views and opinions expressed herein are solely the views and opinions of the authors and/or contributors to this Web site and do not necessarily represent the views and/or opinions of Armorama, KitMaker Network, or Silver Star Enterrpises. All rights reserved. Originally published on: 2009-05-28 00:00:00. Unique Reads: 13887


