

1⁄1Accident SdKfz 232
7
Comments
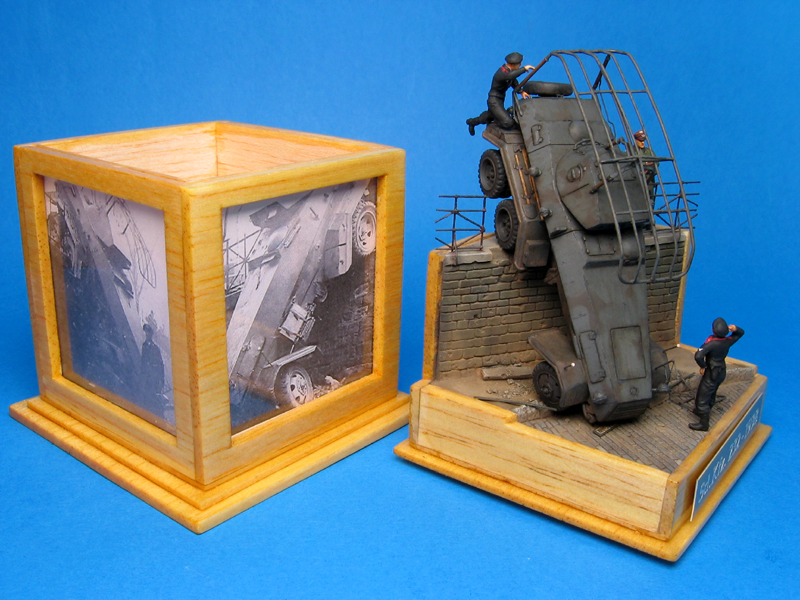
The Figures:
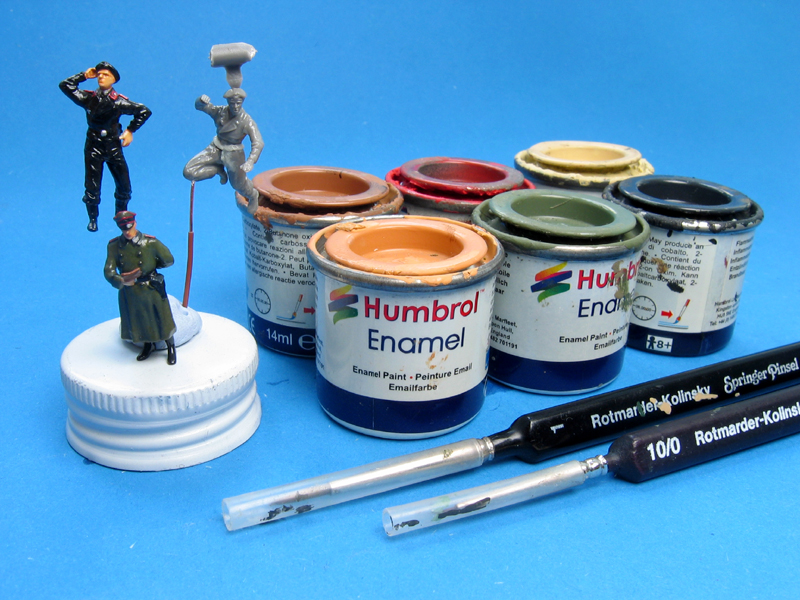
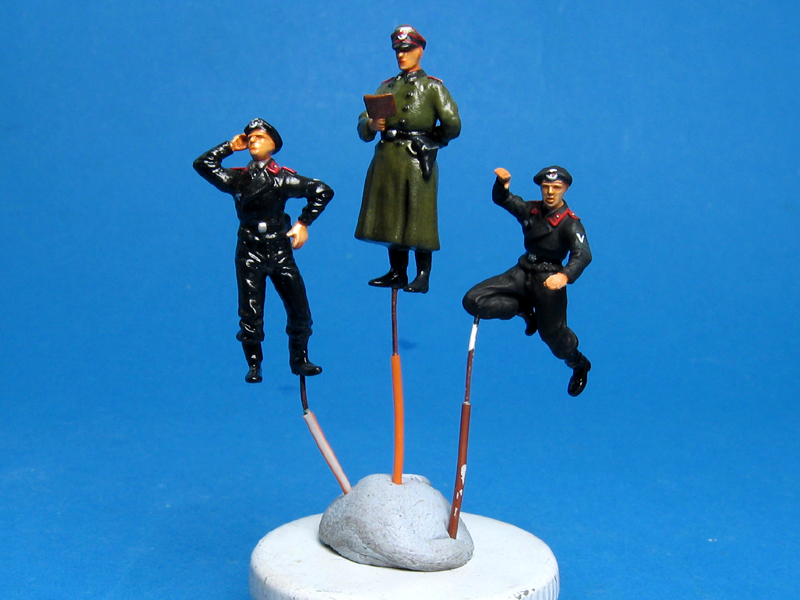
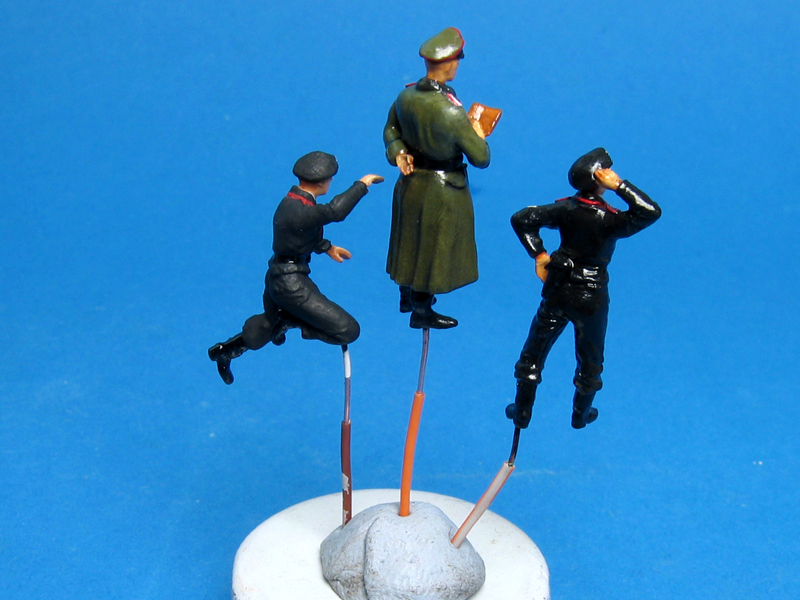
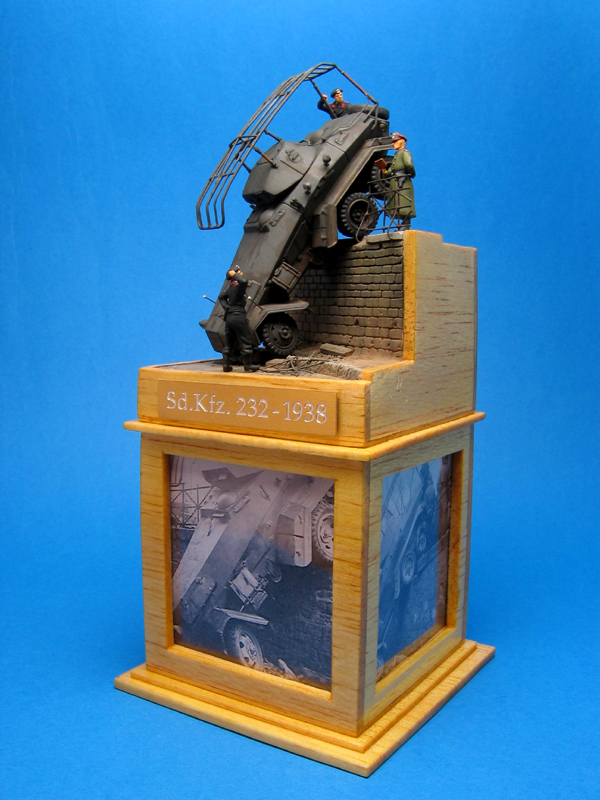
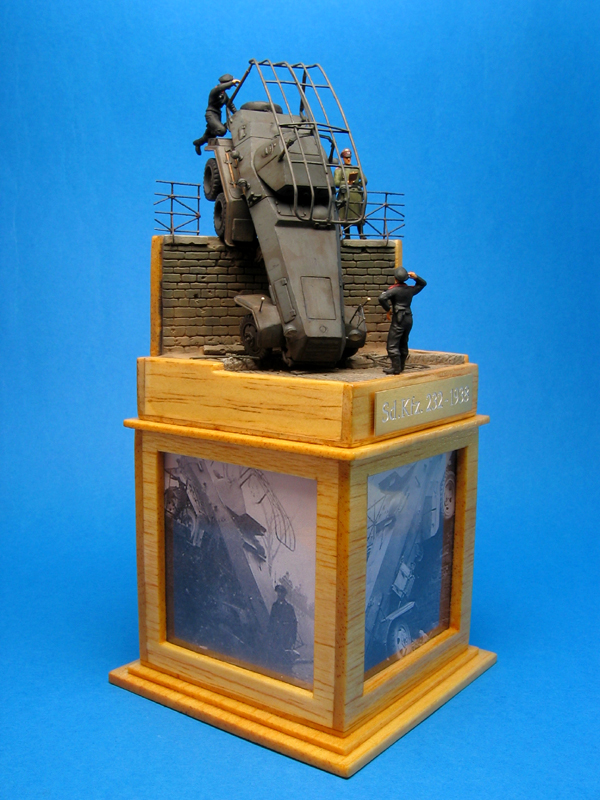
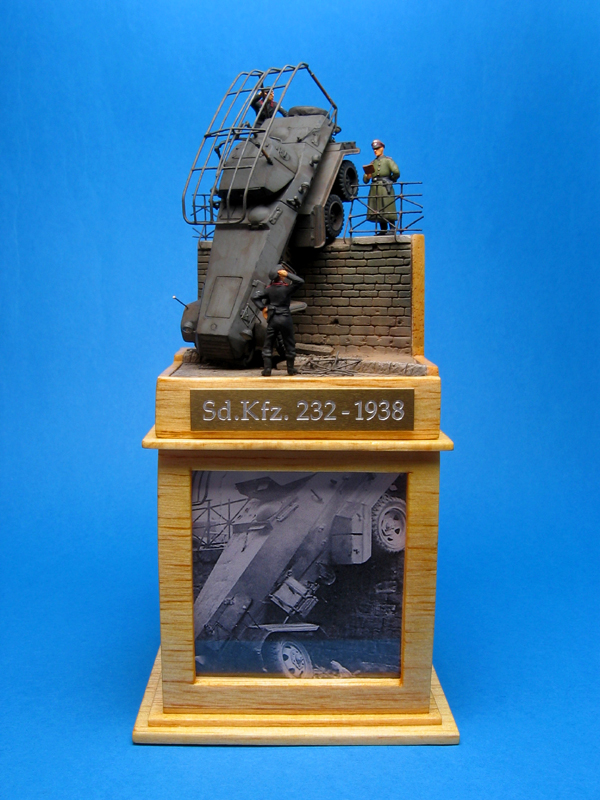
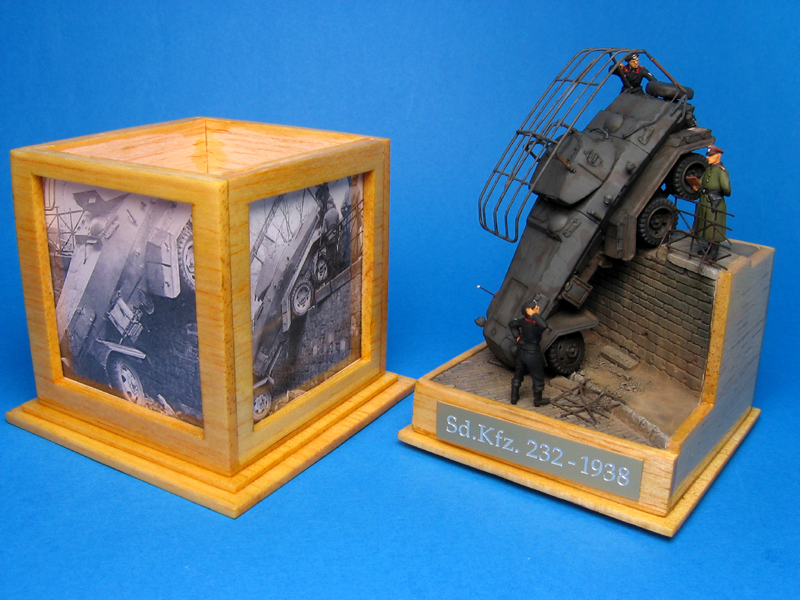
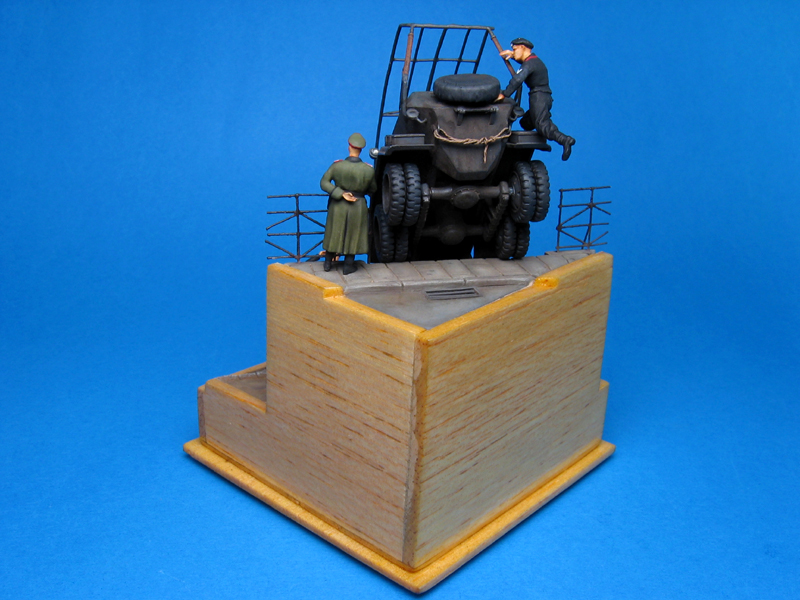
A couple of soldiers can be seen in the original photo: the officer wearing a greatcoat and the crewman standing by the vehicle for a quick shot. However, I chose to model three figures instead to achieve a more balanced composition. This way, I decided to depict the soldier climbing on the back of the vehicle as well. Preiser figures were used in this project - my favorite, since theyre hard plastic with interchangeable parts which allows me to work them to almost any pose.The officer came from the 'German Soldiers on Leave' box. With the low resolution photos I had, I couldnt tell what kind of greatcoat he was wearing so I ended up deciding to convert the rubberized overcoat of the feldgendarme figure to the more common M35 in order to depict a Lieutenant of the Panzertroops. The head was also swapped for another one with a peaked cap and the arm was repositioned. Humbrol paints were used for the paint job with the flesh tones being done with a mixture of 148 Radome Tan and 61 Matt Flesh, washed with 62 Leather and highlighted with 148 again, while 86 Light Olive was used as Feldgrau. I usually brush a thin coat of acrylic floor wax before the final matt lacquer varnish to hide brush marks and to give the surface a smoother look, but its also good to protect the figures while you handle them before the diorama is actually finished and ready to be photographed.
The crewmen came from box nº 72515 'German Tank Crew' and were assembled with parts coming from different figures, with minor sculpting and gap filling being done with Magic Sculpt. They wear the typical 1936 AFV uniform with pink piping collars and a black panzer beret (Shutzmütz), which were painted with a very dark grey, while the flesh tones were achieved with the same paints as for the officer. Both oak-leaf insignia on the caps and Gefreiter sleeve insignia were painted with white oil paint, which I find easier to apply and retouch with a fine brush dampened with white-spirit. Acrylic floor wax was also airbrushed to seal the paintjob before the final coat of Modelmaster Flat Lacquer.
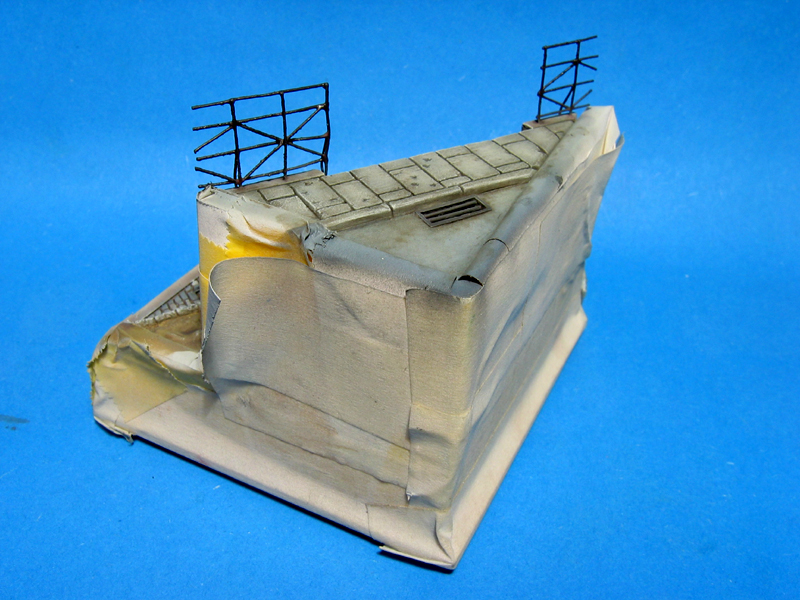
The Base:
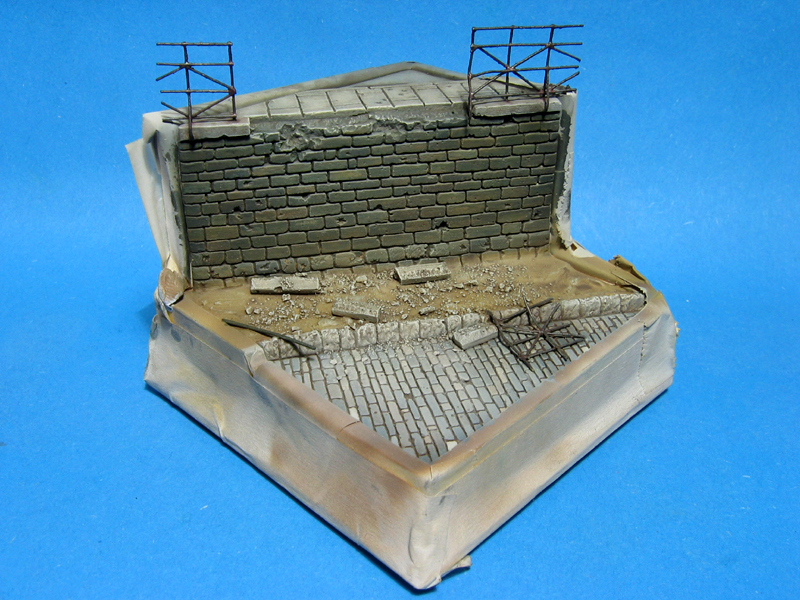
The first thing to do was research more photos of the event showing different views of the vehicle and surroundings. Those photos cleared out the pattern of the railing, of the cobblestones and of the bricks in the wall. The railing was made with copper wire, with the joints being glued with gel superglue. After this, I gave it a coat of Tamiya putty diluted in acetone, just to give the paint something to hold on to, like a primer. Later in the process when the base had already been painted, it was given a coat of very dark green which I found to be a good colour to receive a wash of burnt-sienna, in order to show a worn and rusty appearance. The street and wall assembly consisted of two parts, both cast in plaster. For the moulds, cereal box cardboard was used, with the glossy printed part facing inwards to get a smooth surfaced plaster piece. Both were sculpted and engraved reverting to very basic tools like a needle mounted on a scalpel handle or a straight edge fashioned from a coke bottle. This way I could make it thin enough to scribe all the fine horizontal lines that were to become individual bricks/cobblestones after I connected them with small vertical lines. A coat of automotive primer was sprayed and a layer of Tamiya Xf-1 Matt Black followed, to serve as pre-shading for the subsequent colours. The cobblestones, upper sidewalk and street were given an uneven coat of Tamiya XF-19 Sky Grey to let the black show through in some areas, with individual cobblestones being picked with different mixtures of Humbrol browns, greens and yellows. After these painting procedures, it was time to weather the base a little. A couple of filters were sprayed using much diluted Tamiya Tan and Desert Yellow in order to even out all the colours and give them a more natural look. After being left to dry, everything was sealed with a spray of acrylic floor wax. This prepared the surfaces to receive some washes of very diluted artist oil paints, using colours like raw-umber, burnt-umber and burnt sienna, dark green and yellow ochre. The base was left to dry for a few days until it was time to give it a final coat of Modelmaster Flat Lacquer. All that was left to do was to apply some Mig pigments with an old brush.The wood-work was done with balsa, as its very easy to cut and shape. The idea was to build a frame to hold the photos of the real event in order to let the viewer better understand the subject of the diorama. After all the parts were glued, wood varnish was applied, with some gentle sanding between layers to achieve a smooth, glossy surface. As a final touch, some days later, two or three layers of acrylic floor wax were brushed to give the wood an even glossier appearance.
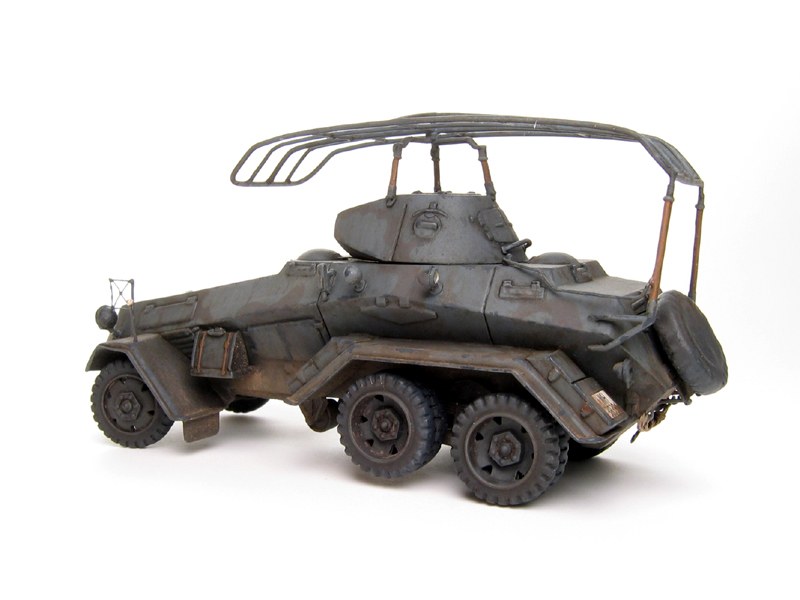
After the base was finished, the figures were stuck in place with the help of small wire pins and epoxy glue was used to hold the vehicle by its front tires. A brass nameplate was the final touch before the last photo

About the Author


FROM: LISBOA, PORTUGAL
My name is Francisco, born in 1983 in Lisbon, Portugal. My first models were an USS Saratoga, F-15 and F-117 that I built when I was around 12 years old - only with some drops of glue and no paint. After some years without thinking about models, I started browsing the internet and decided to give it...
Comments

Great piece of work. As usual it took me a while to relaise it was in Braille scale.
NOV 05, 2009 - 11:31 PM

Hi fransisco,
Thanks for the feature. Superbe work in tiny scale. When i see your setup for the painting, LOL, well done!
Cheers
Claude
NOV 10, 2009 - 03:00 AM
Francisco,
Absolutely 1/35 quality!)) Nice perspective, good compression of space. Well done.
NOV 10, 2009 - 08:17 AM
Copyright ©2021 by Francisco. Images and/or videos also by copyright holder unless otherwise noted. The views and opinions expressed herein are solely the views and opinions of the authors and/or contributors to this Web site and do not necessarily represent the views and/or opinions of Armorama, KitMaker Network, or Silver Star Enterrpises. All rights reserved. Originally published on: 2009-11-03 00:00:00. Unique Reads: 33796

WEB HOSTING BY


Copyright ©2021 Armorama and Kitmaker Network, a subsidiary of Silver Star Enterprises
All Rights Reserved. Please read our Conditions of Use and Privacy Policy.
All Rights Reserved. Please read our Conditions of Use and Privacy Policy.