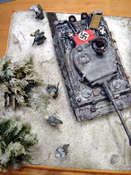
1⁄35The Diary of a Winter Diorama
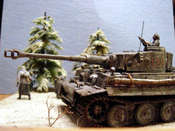
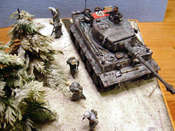
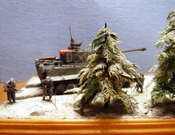
02/20/04: I gathered my groundwork materials together and taped off the sides of the base with masking tape. I inserted toothpicks into the tree's holes to prevent losing their location during the application of the groundwork. I prepared a 50/50 mix of Durham's Water Putty and Celluclay and added a generous amount of Elmer's white glue and craft raw umber and black acrylic paint (in an effort to get to the grayish/black/brown mud color created by the MMP pigments). I then applied the groundwork mix the base and smoothed it out with my putty knife. The two evergreen trees were inserted into the base after applying a small amount of Elmer's to the toothpicks and I then worked the groundwork up around the tree trunks. Placed some previously made Durham's rocks in random locations around the base and worked the groundwork up around them. Sprinkled cat litter around the base for smaller rocks. Added some small twigs as fallen branches. Inserted some dried plants from local craft/hobby stores into the groundwork as bare bushes. Added a mix of static grass in the area where the tank treads would be inserted. I allowed this to dry for a while and then pressed the tank tracks into the groundwork to get the track impressions. Inserted Woodland Scenics Fall Tall Grass in various locations around the base. I then added more static grass around the base. Set the base aside to let it dry overnight.
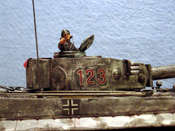
02/21/04: The base had not completely dried so there was not much to do today. I applied a charcoal gray craft acrylic wash to the rocks. Painted some elastic white thread with a brown and gray wash and then painted it with undiluted brown. After allowing it to dry for a few minutes, I attached to the turret storage bin to hold the air recognition flag in place.
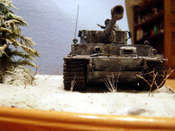
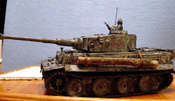
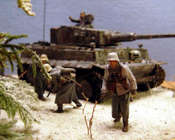
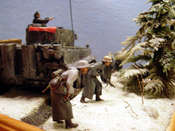
02/22/04:The base had finally dried and was ready for the application of the light snow. I was looking for a light, late season snow, where the grass, etc. would still be showing through. I did not want to get the snow in the area of the track impressions, so I doubled up some masking tape and cut it to the right width and length to cover the track impressions while I was adding the snow. I had decided that the track impressions needed something to look more like wet mud. I applied MMP mud pigments, this time mixed with 91% rubbing alcohol. I applied this in the areas of the impressions where they will be visible with the tank on the base. I allowed this to dry for a few minutes and then put down my masking tape and sprayed the base and trees with pump liquid hairspray. Applied a layer of the snow using Ken Fortier's make-up brush method. Sprayed a second coat of the liquid hairspray and added more snow. I felt like it needed a bit more snow, but I exerted some self-control (following the adage I have read many times in modeling articles) and did not apply any more snow to the base. Applied a final coat of hairspray to seal the snow. Finally, using a water/white glue mix, added a small amount of snow to the log hanging on the side of the tank as well as on the front portions of the tank. The tank was then attached to the base using superglue.
02/23/04: I mixed up a small batch of MMP mud pigments and 91% rubbing alcohol and brushed it into the track impressions and along the inner surfaces of the tank treads and a little ways out from the treads on the snow. I then rubbed some black pastel shavings on the faces of the infantry figures to create an appearance of 5 o'clock shadow. I then cut off the toothpicks, worked out the location for each figure, drilled a small hole; test fit each figure and then attached each to the base with super-glue. After attaching the figures, I attempted, without much success, to make some additional footprints in the snow. Finally, I decided that I would use MM Gloss clear coat to give the tank track impressions a wet appearance. Brushed on a generous coat and immediately almost had a heart attack as it turned blue! I calmed myself down and, before reacting, decided to wait and see what it looked like after it dried. After about ten minutes I determined the blue areas were slowly receding and the gloss coat was drying clear and was giving the surface a wet appearance. I had also noticed that the end of my track impressions, which were just short of the base edge, were very noticeable. I applied more of the MMP mud pigments mixed with rubbing alcohol to that area to take the impressions up to the edge.
With that, the diorama was complete, with two days to spare before the club meeting.


