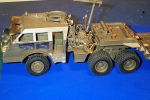
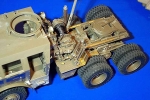
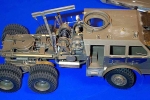
1⁄35Tamiya M26 Dragon Wagon and M4 Sherman
14
Comments
Cab
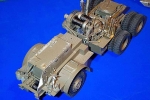
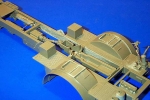
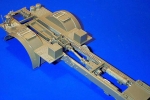
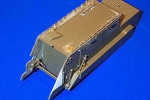
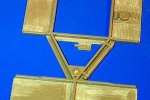
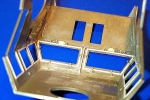
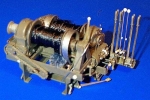
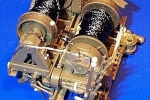
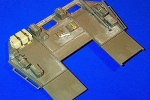
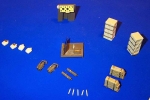
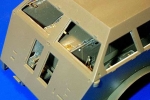
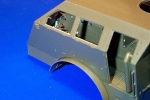
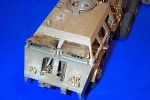
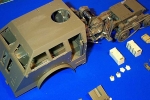
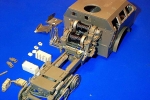
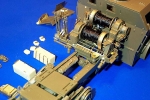
The production of the M26 started back in early December 2002.The kit was built was built in sub sections and all I can say it was a pleasure to build. Once building the kit components in sub section process was complete I moved onto adding the photo etch. The detailing began with the chassis with the airline wiring. I know this was not seen but I wanted the build to start from the ground up. The cab section had evergreen strip glued to the windows with the wiring, window clips and washer fittings glued into position. The royal model etch in step 2 of the instructions covers extra detailing of torches, fire extinguishers, resin 50cal box holder s to mention a few .The 50 cal box holders are duplicated in the Eduard set but I opted for the Royal model holders because it was better detailed. It was at this time where I added the wiring for the roof light. I found the jerry can holders on the chassis wheel arch needed a little sanding. Some converting between the royal model and Eduard sets was done to make the 2 Jerry can holders. The plastic drivers panel had the plastic dials removed with an Xacto blade No11 and re-glued back onto the photo etch panel by Royal. They also give you etch buttons but I preferred to use the plastic ones because they sat higher and gave better presentation of the dials. It was at this point I glued the photo etch keys into position. The commanderís plastic table got replaced with a photo etch one. Fine wire was added for the airline gear assembly which ran off the steering column, once again it may not have been seen clearly but I wanted to replicate it as close as I could get it. The complete engine cover had been replaced with metal rod and photo etch between both the royal model and Eduard etch and wiring for the air horns. Nothing was spared and everything was used. Evergreen strip and rod had been used on the rear interior wall. The resin Royal model resin jerry cans had been slightly bigger to fit on the rear wall so I replaced that with an Academy jerrycan from the spares box. Moving to the outside of the cab I looked at detailing the front and top sections of the can. Evergreen rod was inserted and glued into position for the headlight guards. The photo etch was bent around the plastic headlight guard to get the profile and then the rods had been glued into place. The interior of the lights had been painted with silver and MV lenses had been used for all three lights on the front of the cab. I removed the locking levers from the plastic armoured window shutters and reused onto the photo etch windows along with some fine rod to show the window locked into position. The searchlights on the back had been modified with wing nuts etch and MV lenses. I painted the inside of the searchlight with Humbrol No11 silver and then used blue tac to cover and protect during the painting process. The gun ring mount was scratchbuilt with Royal etch and evergreen rod. I used a Verlinden 50 cal with Eduard etch, Aber ammo tray and box with Mission Models 50 cal links. The next stage was to tackle the winch assembly .The first thing was the winch ropes needed to be replaced with a wire colour .The thread was wound onto the winch drums and with about 35-40mm left for the end connectors to be glue on. Black ink was then dropped onto the reels and left to seep all the way through the thread. This was then left to allow me to high light with a metal colour and leave a depth like appearance to the tow ropes. The winch assembly needs a lot of detailing .The linkages for the gears had been a huge challenge. Nuts and bolts punched out of evergreen card helped detail the winch assembly along with the full complement of etch Royal model etch and resin gear lever knobs in section 14 of the instructions. The pioneer mounts got made up out of photo etch and the kitís pioneer tools had been converted to fit the mounts. The pioneer mounts had been left off and painted separately. All the fittings molded on top of the cab had been removed and replaced with etch from both the Royal and Eduard sets with adding air lines to the rear axles and the winch grease pipes and photo etch chain covers.Comments
Beautiful work!
These were rated at 40 tons, but I've read that in practice they could haul a heavier load. Did these ever carry Pershings?
JAN 11, 2011 - 08:10 AM
Thanks Everyone for your kind words.They are appreciated .
Can I also add a special thanks to Darren and Kieth for their work to provide this article at Armorama.
My apologies I have no weathering progress photos as I have tried a variety of methods used on this vehicle which used various techniques from pastel chalks to Pigments and a small variation of mixing gyprock wall filler, acrylic paints and bird sand for the mud in the tire tracks.
I would like to share more articles in the weathering process in future articles throughout the year.
I'm glad you like the images.
Michael
JAN 11, 2011 - 07:37 PM
A stunning work Michael congrats, i'm very impressed
I'm sorry, probably you've already written it in the article, but how long did it take you to finish it?
I Always complain About my modelling slowness...If I were you I'd finish a similar work in about a century (and of, course with not the same results)
Cheers and congrats again
JAN 11, 2011 - 08:22 PM
Hi Mauro,
Thanks for your kind words.
The time it took to do this was a period of a good 9 months.
That was for both tank and Dragon Wagon.
The intention was to complete this and a diorama for Euro 2003
The diorama was partly started halfway through 2003 withe the dragon wagon.
I realised doing the groundwork on the dio that it was not going to be finished in time
The Dragon Wagon made Euro 2003 but was not completely finished .
It was another 12 months for weathering from using pigments and different weathering techniques during 2004
The final one was using faber castel pencil scratches and marks for the m26 and M4 .
And now ,you see the end result .
Michael
JAN 11, 2011 - 11:46 PM
Great looking combo Mike and a very insightful article. Thanks!
Cheers!
Stefan
JAN 12, 2011 - 04:33 AM
Yes i can see really stunning
On average, how many hours a week do you model ?
Did you give a primer coat on your models? (as i said, if you've already written in the text, i'm sorry in advance)
If yes, what primer did you use?
The m4 wreck seems to me incredible convincing and realistic
I think that modelling is not just a a matter of correct execution of techniques
I believe that just talent can make the difference between a "good model" and a "special one".Well, i'm happy 'cause here in Armorama i have the chance to see the works of many "talented" modellers. In my opinion you're one of them.
Cheers and thanks for share your work
JAN 12, 2011 - 11:07 AM
Thanks again Mauro and Stefan for your kind words.
modelling time per week could be anything up to 4 hours.
I am in the midst of completing a M2 Half track although this has taken far longer than anticipated.
I have been side tracked playing Bad Company on XBOX live and this does not help when you have cupboards full of models to build
The primer used on the 2 models would have been Humbrol No1 Matt primer.
I like Model Masters primer but have found when you do not use it for awhile it solidifies .
I only prime the parts or areas that need priming .I do not spray the primer all over the model.
Once primed I then airbrush the model with the base colour .
Michael
JAN 12, 2011 - 03:23 PM
As I thought. Using less primer is better
Thanks a lot for your explanations
I hope to see soon another of your work
cheers
JAN 12, 2011 - 07:35 PM
Copyright ©2021 by Michael Walsh. Images and/or videos also by copyright holder unless otherwise noted. The views and opinions expressed herein are solely the views and opinions of the authors and/or contributors to this Web site and do not necessarily represent the views and/or opinions of Armorama, KitMaker Network, or Silver Star Enterrpises. All rights reserved. Originally published on: 2011-01-10 00:00:00. Unique Reads: 38662


