

1⁄35Tamiya M26 Dragon Wagon and M4 Sherman
14
Comments
All the large resin components for the interior detail sets had been removed from the carriers and test fitted .
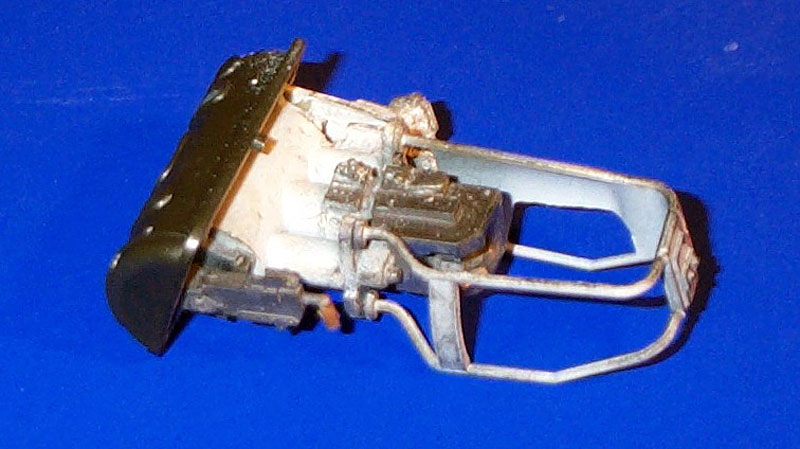
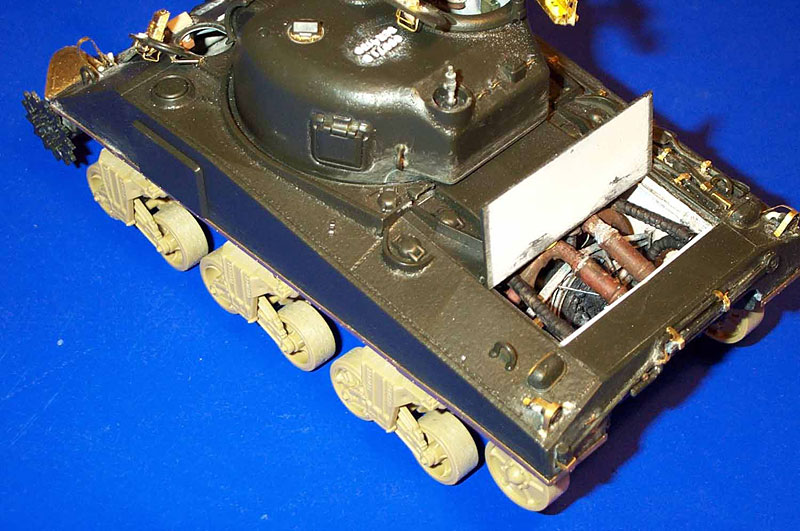
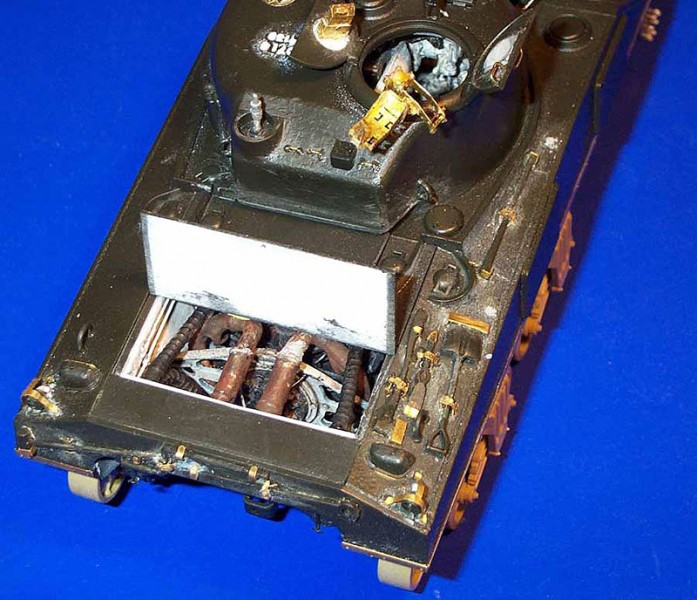
The first area was the radial engine. After gluing the engine together I then added the wiring for the spark plugs.
I know that you would not see this but I wanted to try and replicate this the best I could.
The radial was put together and left outside the compartment.
This was so it could be painted separately. Hydraulic piping was included around the engine bay. Although due to the lack of proper reference material I could only allow for what I had in the reference shots.
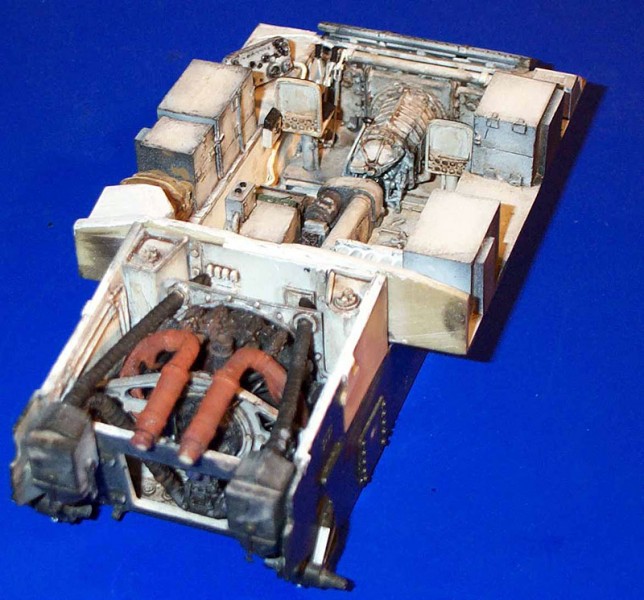
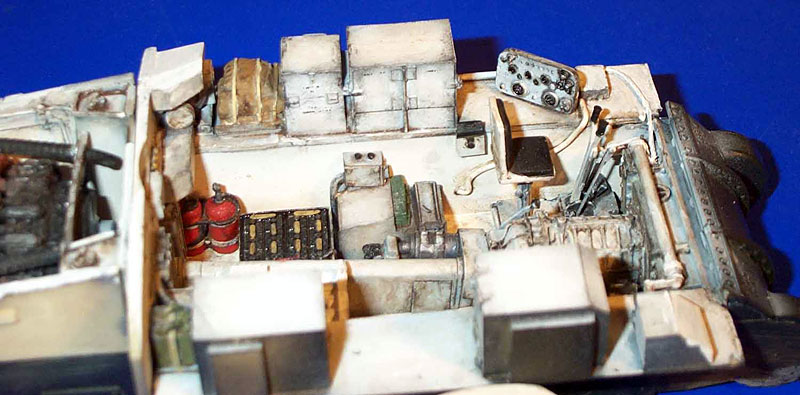
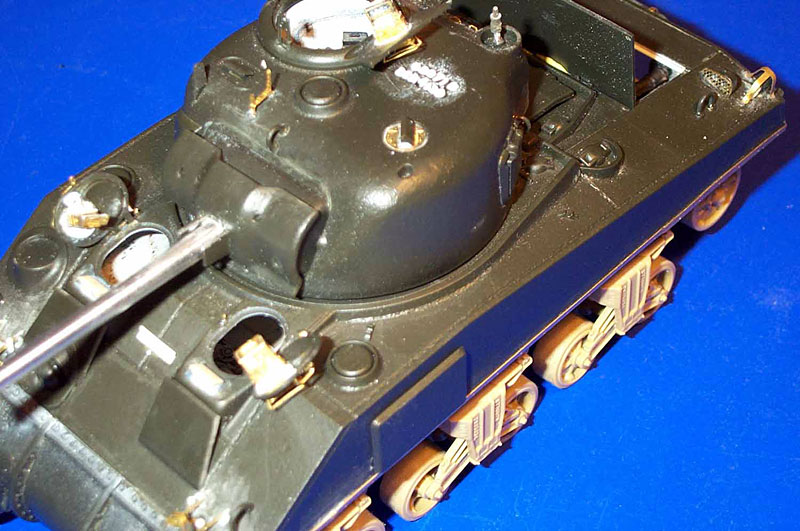
Moving onto the fighting compartment interior there was a lot of test fitting on the lower hull to ensure it all fitted correctly.
There had been some items I left out because I wanted to paint them separately before glueing into position.
After I was happy with the layout of the lower hull I continued onto the turret basket.
This is a challenge .The one main area of concern for this section is to constantly dry fit the turret basket and turret to the lower part of the hull. There was some constant sanding of the resin base to get this to sit correctly.
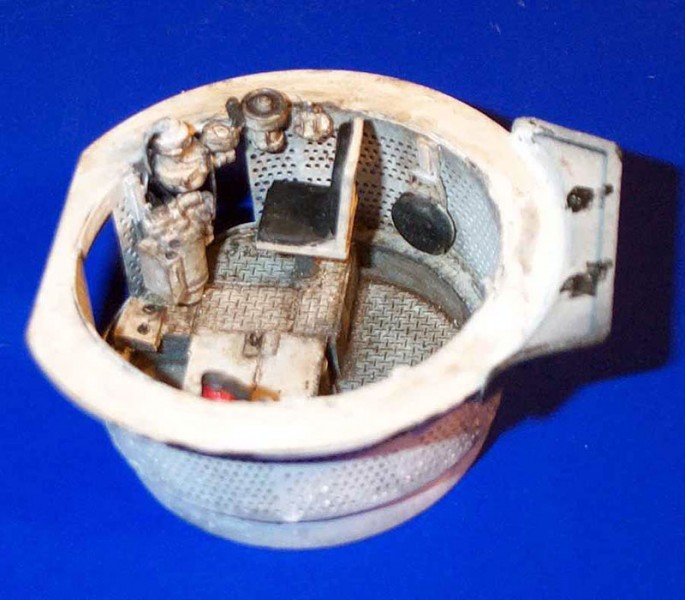
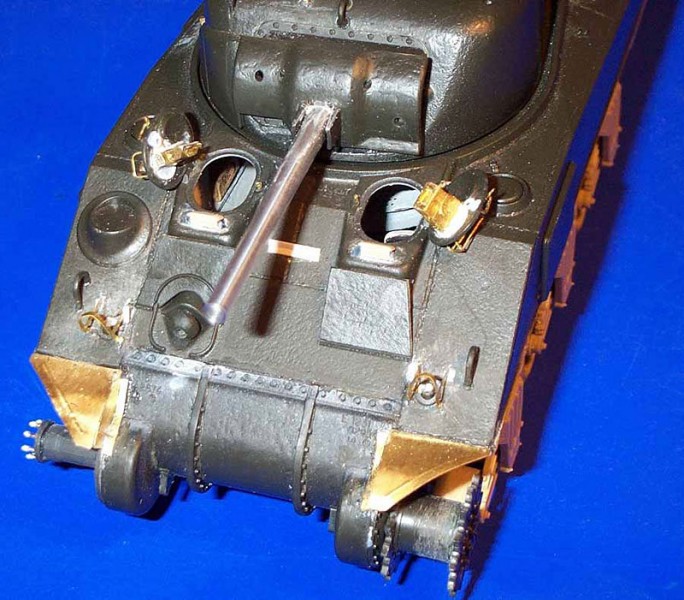
With the limited knowledge I had on the interior of the turret I commenced with super glueing fine wire to the Verlinden resin intercom boxes. The co ax 30 cal was glued in place with the ammo box glued to the lower part of the turret with evergreen card used for the ammo box holder.
This is a tricky area because when the upper and lower turret parts are together I made sure that they would not foul on anything.
With most of the components glued together in the upper and lower hulls I then began airbrushing Humbrol panzer gray No 67 as the base colour for all the interior components.
I decided against black because if I was highlighting with white it would be too much of a contrast variation.
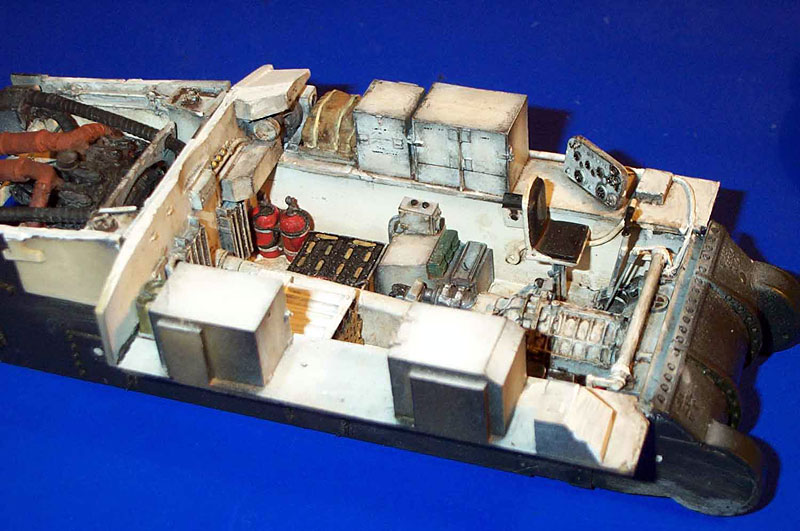
The next highlighting colour was Humbrol white enamel followed by a coat of Testors Dullcote.
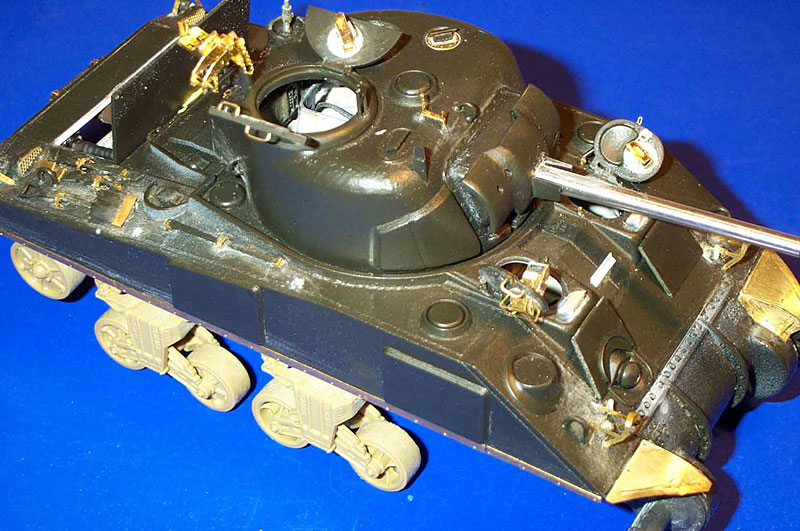
This is where all the smaller items that had been painted in sub sections were glued into position .
I then gave another coat of Testors Dullcote to remove any glue shiny spots. Allow a couple of hours for the Dullcote to dry before commencing with a wash to give the interior a dirty look.
The wash was a mixture of white spirit, burnt umber and black oil paint and applied with a fine o paint brush
I then proceeded around the hull with a highlight colour of Humbrol metalcote to simulate worn sections inside the hull.
The next stage was a HB pencil and cut sections of Verlinden dry transfers on the bins inside the lower hull. The Americans marked all the interior components on where everything should be inside their armoured vehicles.
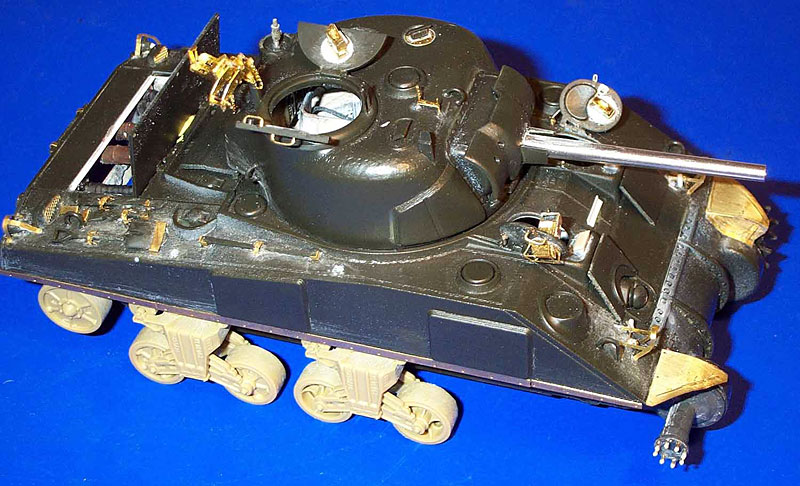
It was at this stage I glued the upper and lower hulls together and moved to the outside of the Sherman.
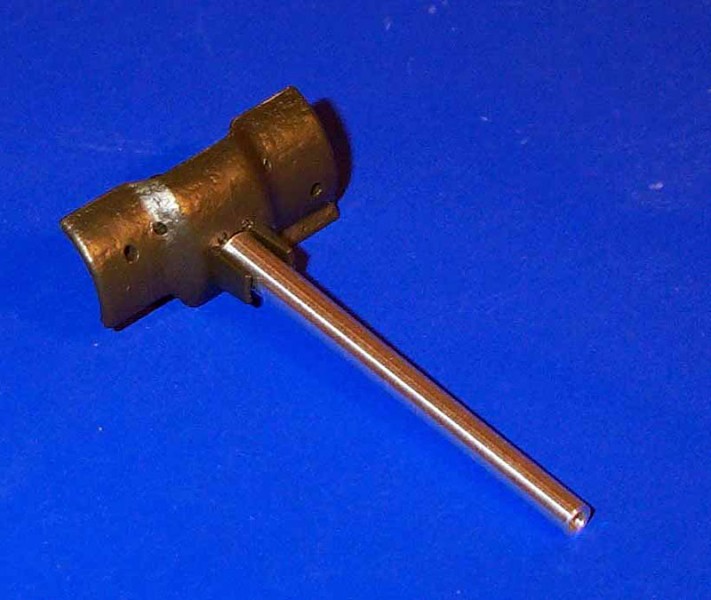
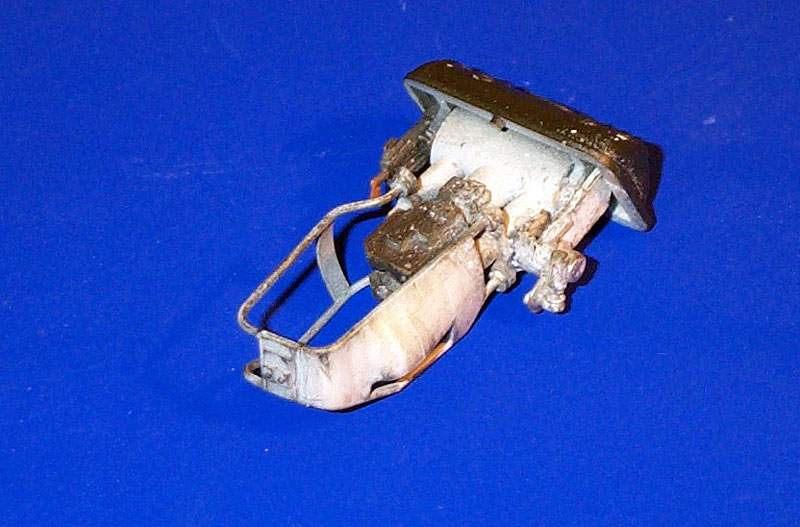
A Jordi Rubio barrel and Aber etch tool clamps, front fenders, headlight guards ,50 cal mount had been added along with scratchbuilt bullet deflector and headlight holders. Due to the limited access to brass casting letters a friend gave me some railway plastic letters and numbers for the turret castings for the top of the turret.
I used a Verlinden arial mount, cut the lower half of the arial and drilled out the upper and lower halves of the arial. Verlinden spring was cut to the desired length and superglued into position.
I wanted this so I could bend the arial like the real thing .The things we do to accurately present something.

About the Author

FROM: QUEENSLAND, AUSTRALIA
My interest in plastic modeling started when I was 10 with building the odd 1/72nd scale plane or tank ,with moving around a lot there was a break from the model building until 1987 when I come across the Verlinden Publications which sparked my interest to building military vehicles and dioramas. I...
Comments


Beautiful work!
These were rated at 40 tons, but I've read that in practice they could haul a heavier load. Did these ever carry Pershings?
JAN 11, 2011 - 08:10 AM

Thanks Everyone for your kind words.They are appreciated .
Can I also add a special thanks to Darren and Kieth for their work to provide this article at Armorama.
My apologies I have no weathering progress photos as I have tried a variety of methods used on this vehicle which used various techniques from pastel chalks to Pigments and a small variation of mixing gyprock wall filler, acrylic paints and bird sand for the mud in the tire tracks.
I would like to share more articles in the weathering process in future articles throughout the year.
I'm glad you like the images.
Michael
JAN 11, 2011 - 07:37 PM

A stunning work Michael congrats, i'm very impressed
I'm sorry, probably you've already written it in the article, but how long did it take you to finish it?
I Always complain About my modelling slowness...If I were you I'd finish a similar work in about a century (and of, course with not the same results)
Cheers and congrats again
JAN 11, 2011 - 08:22 PM
Hi Mauro,
Thanks for your kind words.
The time it took to do this was a period of a good 9 months.
That was for both tank and Dragon Wagon.
The intention was to complete this and a diorama for Euro 2003
The diorama was partly started halfway through 2003 withe the dragon wagon.
I realised doing the groundwork on the dio that it was not going to be finished in time
The Dragon Wagon made Euro 2003 but was not completely finished .
It was another 12 months for weathering from using pigments and different weathering techniques during 2004
The final one was using faber castel pencil scratches and marks for the m26 and M4 .
And now ,you see the end result .
Michael
JAN 11, 2011 - 11:46 PM
Great looking combo Mike and a very insightful article. Thanks!
Cheers!
Stefan
JAN 12, 2011 - 04:33 AM
Yes i can see really stunning
On average, how many hours a week do you model ?
Did you give a primer coat on your models? (as i said, if you've already written in the text, i'm sorry in advance)
If yes, what primer did you use?
The m4 wreck seems to me incredible convincing and realistic
I think that modelling is not just a a matter of correct execution of techniques
I believe that just talent can make the difference between a "good model" and a "special one".Well, i'm happy 'cause here in Armorama i have the chance to see the works of many "talented" modellers. In my opinion you're one of them.
Cheers and thanks for share your work
JAN 12, 2011 - 11:07 AM
Thanks again Mauro and Stefan for your kind words.
modelling time per week could be anything up to 4 hours.
I am in the midst of completing a M2 Half track although this has taken far longer than anticipated.
I have been side tracked playing Bad Company on XBOX live and this does not help when you have cupboards full of models to build
The primer used on the 2 models would have been Humbrol No1 Matt primer.
I like Model Masters primer but have found when you do not use it for awhile it solidifies .
I only prime the parts or areas that need priming .I do not spray the primer all over the model.
Once primed I then airbrush the model with the base colour .
Michael
JAN 12, 2011 - 03:23 PM
As I thought. Using less primer is better
Thanks a lot for your explanations
I hope to see soon another of your work
cheers
JAN 12, 2011 - 07:35 PM
Copyright ©2021 by Michael Walsh. Images and/or videos also by copyright holder unless otherwise noted. The views and opinions expressed herein are solely the views and opinions of the authors and/or contributors to this Web site and do not necessarily represent the views and/or opinions of Armorama, KitMaker Network, or Silver Star Enterrpises. All rights reserved. Originally published on: 2011-01-10 00:00:00. Unique Reads: 38662

WEB HOSTING BY


Copyright ©2021 Armorama and Kitmaker Network, a subsidiary of Silver Star Enterprises
All Rights Reserved. Please read our Conditions of Use and Privacy Policy.
All Rights Reserved. Please read our Conditions of Use and Privacy Policy.