

1⁄35A Walk in the Woods
6
Comments
PHOTO NO: 9
The next step is to add the grasses to the base. For this I use TREEMENDUS Raw Grass. It is best to work on small areas at a time when undertaking this process. Start by adding some Scenefix glue to the area where you want the grass to be growing. I would recommend starting at the back and working forward for this process.
PHOTO NO: 10
Colour the fabric using either diluted water based paints or thinned oil based paints. The best way to do this is to simply brush the fabric so the fibres are standing upright and rub the paint into it by hand until the desired colour is achieved. The fabric can also be lightly sprayed with an aerosol or airbrush to give added colour and effects. When the paint dries comb the fibres so they stand upright, trim small pinches off the sheet to the required length with scissors. Dip these into the Scenefix glue (or put the glue directly onto the base as in this case and sit them in position). Once the glue has dried they will be fixed in place and then can then be tweaked to give a more pleasing effect.
PHOTO NO: 11
Here TREEMENDUS Raw Grass has been used to create convincing moss. For this I take a pinch of pre coloured fibres and trim them into 1-2 mm lengths. Paint some Scenefix glue onto the beam and sprinkle the fibres onto it, a light spray of hairspray will ensure the fibres stick to the wood. This also works very well on road surfaces, paths, rock faces etc where a mossy look would add to the surrounding area.
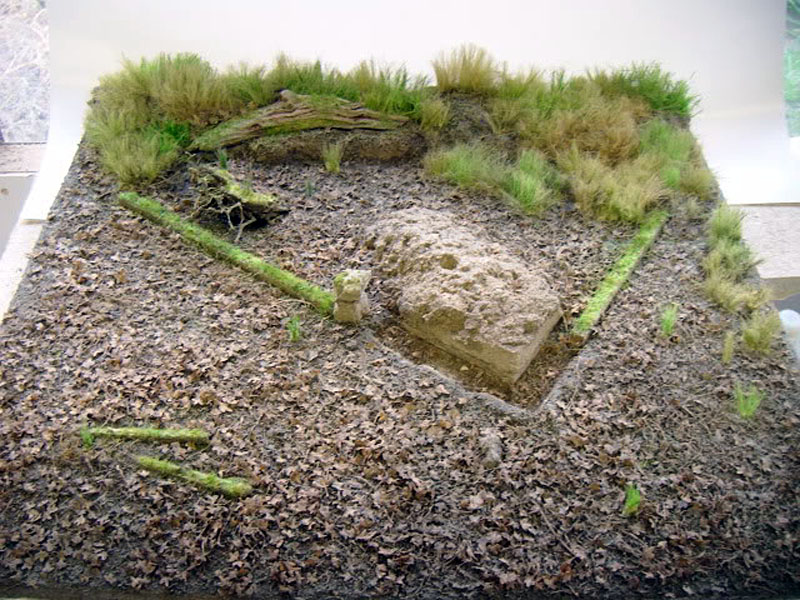
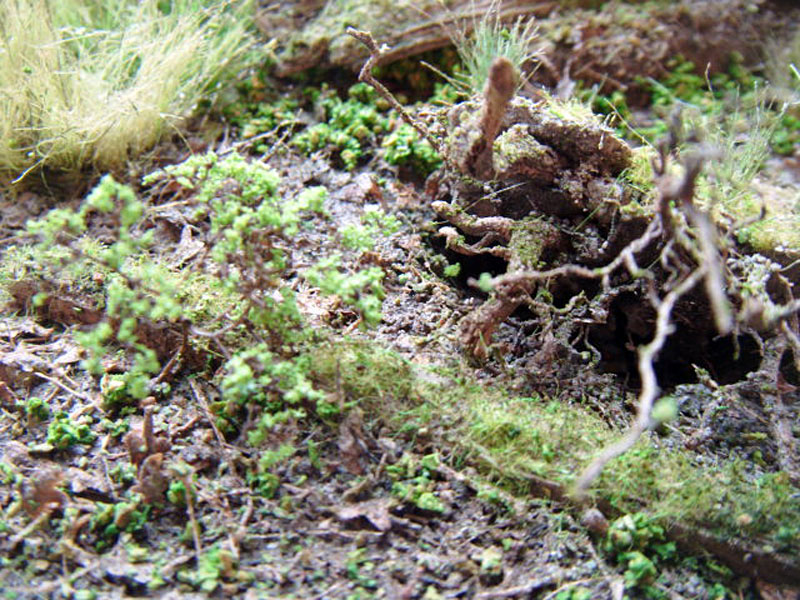
PHOTO NO: 12
An overall view of the base, with the initial groundwork in place and further grass and tufts added. The next step is to add some greenery to the base to really bring it alive.
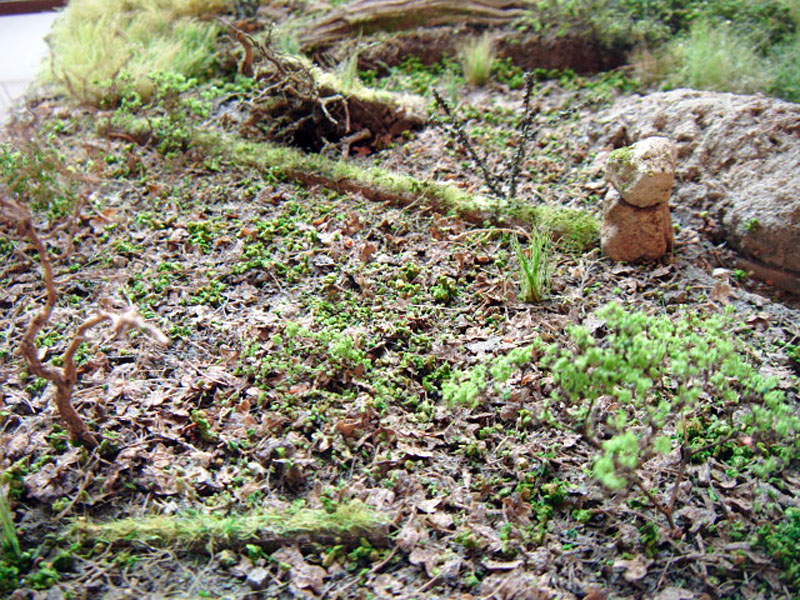
PHOTO NO: 13
The low growing weeds we see here are easy to create. Take some TREEMENDUS Summer Scatter and mix it with Scenefix glue in a small container. Apply the scatter/glue mix to the base with a small paintbrush. Once in place spray with hairspray.
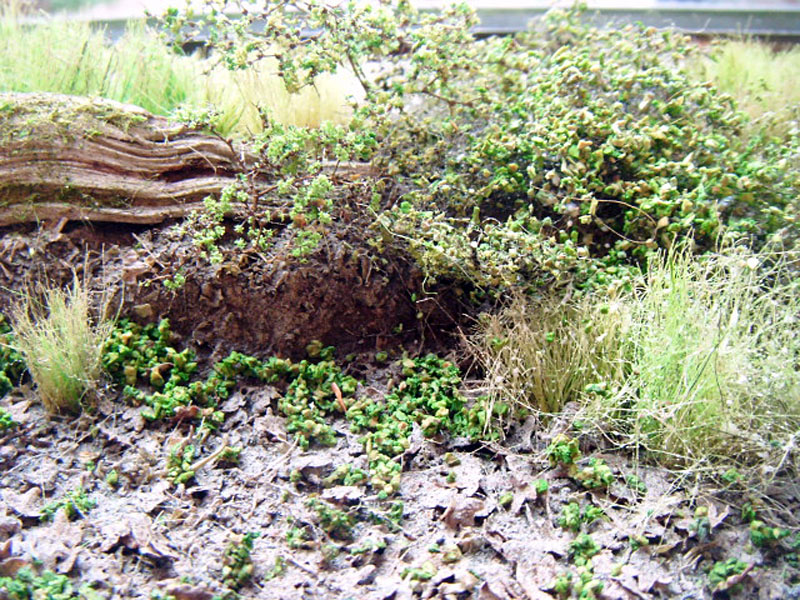
PHOTO NO: 14
A close up of the rear of the diorama shows the addition of bushes made using Canopy and Spring Scatter. It also shows how the different elements blend together to give a very realistic impression of the original photo.
PHOTO NO: 15
Small saplings (included with the Forest Floor material) have been glued in place using PVA glue. A small hole was made in the base first and the saplings were simply placed into the holes. I will stick individual leaves onto the saplings at a later date.
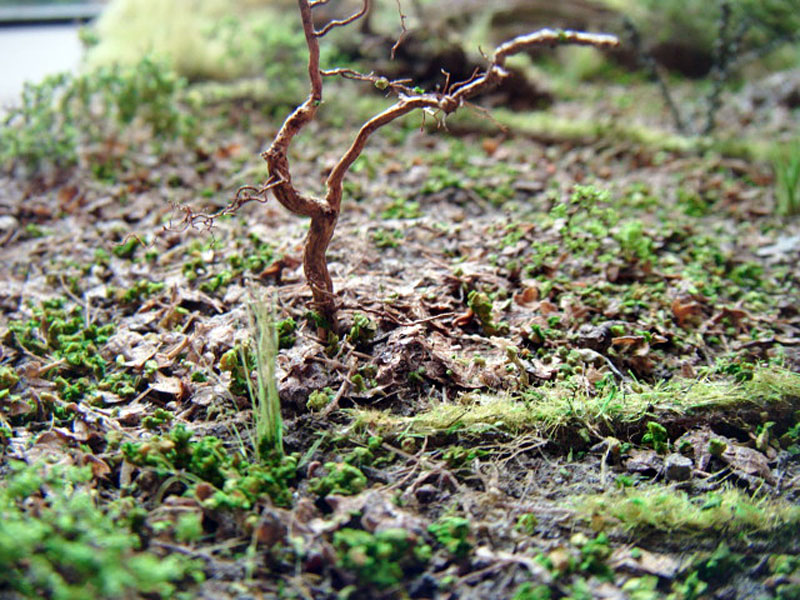
PHOTO NO: 16
Another close up of the ground work shows the root ball to great effect. The fallen tree will be added when all the other trees are added. The tree trunk will be covered with moss to mirror the growth on the beams. I hope to show an update on this in a forthcoming issue.
INFORMATION
All the scenic materials used in this diorama are available to purchase from the TREEMENDUS website. They are TREEMENDUS Scenic Kit, Forest Floor and Natural leaves. TREEMENDUS website Live links Or you can E-mail TREEMENDUS at the following address [email protected] Telephone: 0161 973 2079 All prices shown on the website include free post in the UK. If you have any questions please contact me using one of the contact methods above.


About the Author


Comments


Definitely a two month project. I'd be burning the midnight and insanely, early, morning oil for sure.
AUG 25, 2011 - 11:39 AM
I definitely need to hang out more in the Diorama section. VERY helpful and interesting stuff.
AUG 29, 2011 - 04:05 AM
Copyright ©2021 by Anthony Reeves. Images and/or videos also by copyright holder unless otherwise noted. The views and opinions expressed herein are solely the views and opinions of the authors and/or contributors to this Web site and do not necessarily represent the views and/or opinions of Armorama, KitMaker Network, or Silver Star Enterrpises. All rights reserved. Originally published on: 2011-08-25 00:00:00. Unique Reads: 23143

WEB HOSTING BY


Copyright ©2021 Armorama and Kitmaker Network, a subsidiary of Silver Star Enterprises
All Rights Reserved. Please read our Conditions of Use and Privacy Policy.
All Rights Reserved. Please read our Conditions of Use and Privacy Policy.