

1⁄35Snow Panzer
2
Comments
Painting
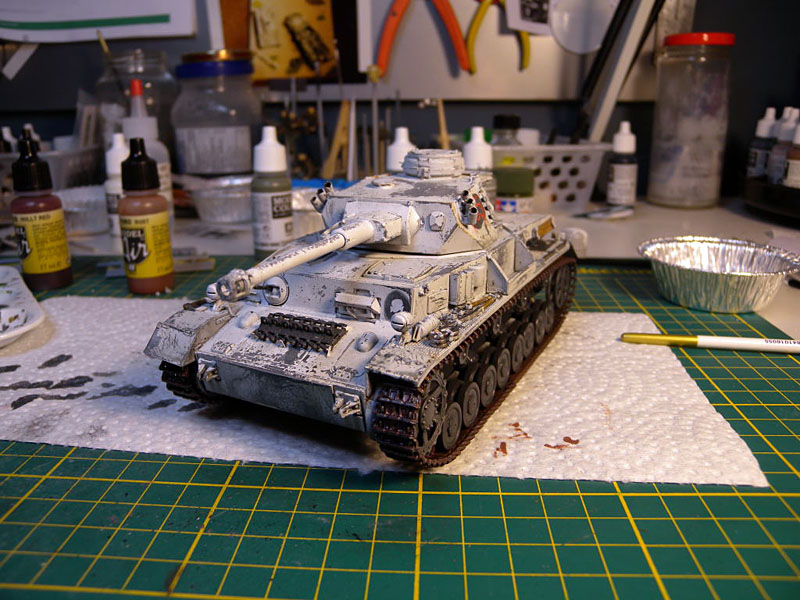
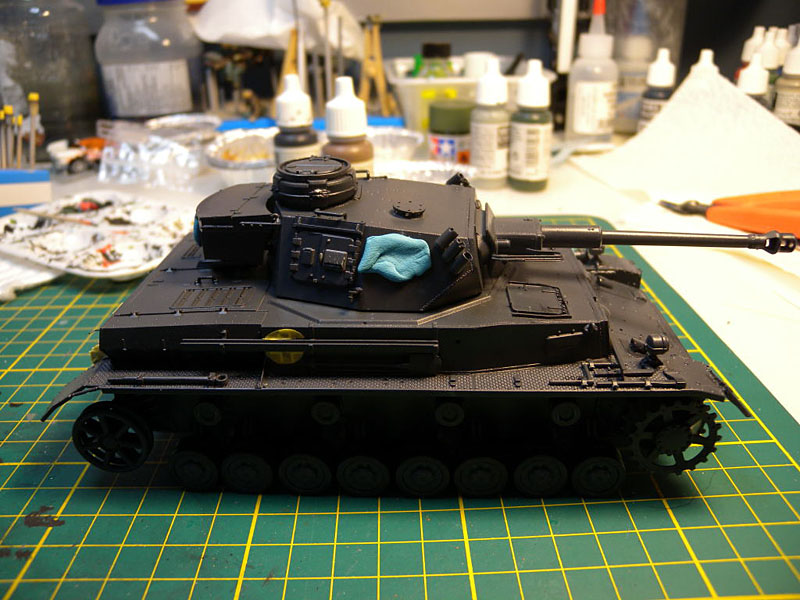
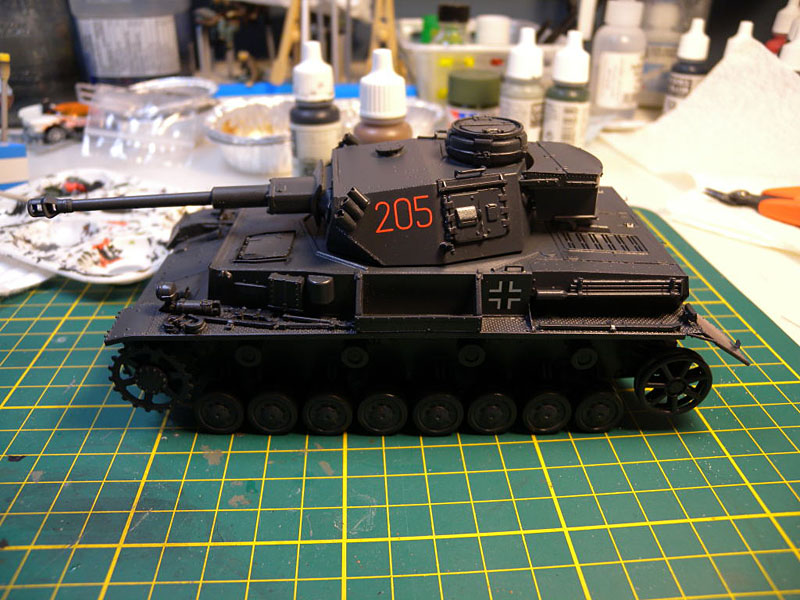
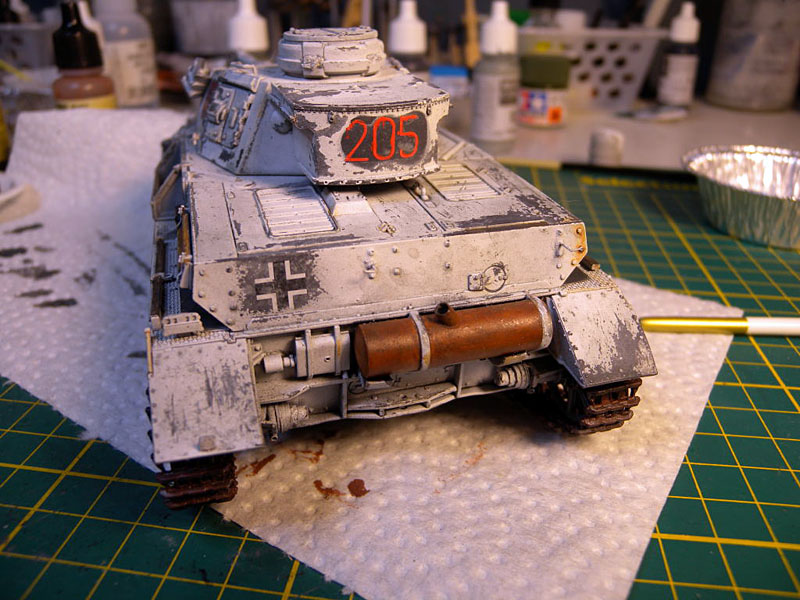
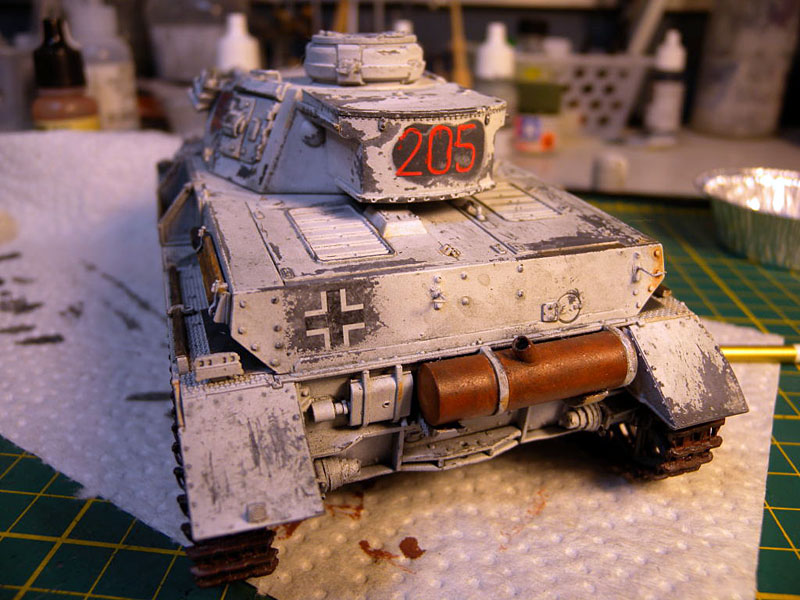
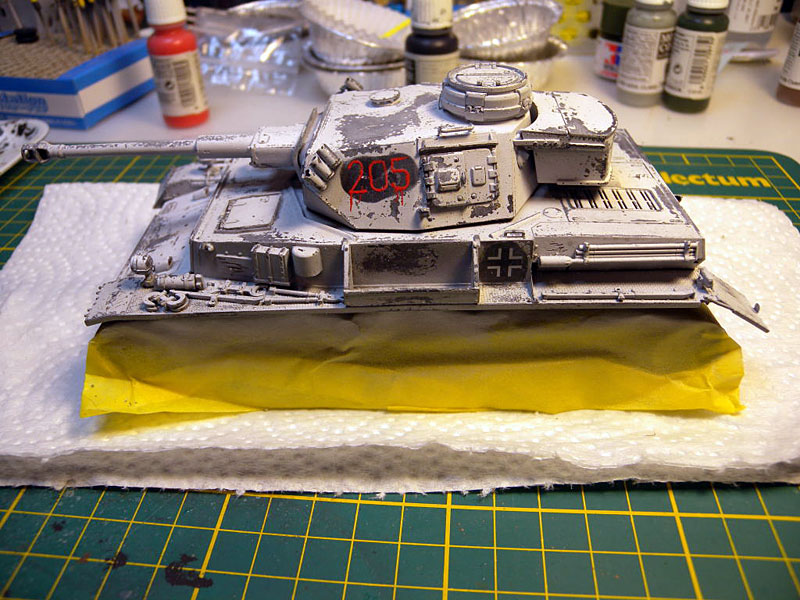
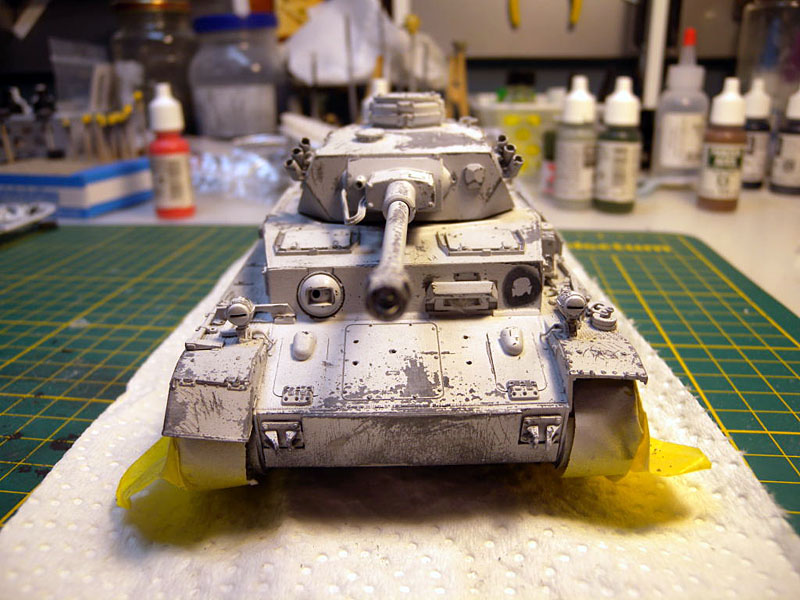
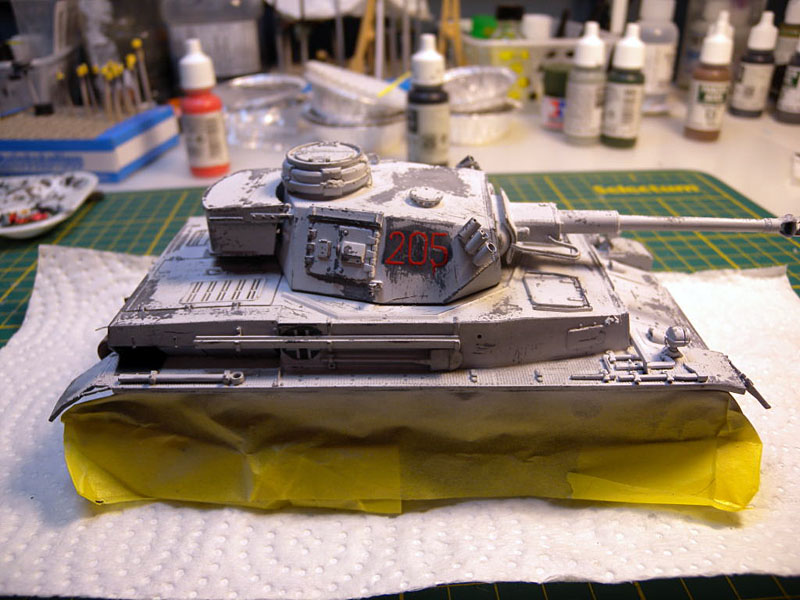
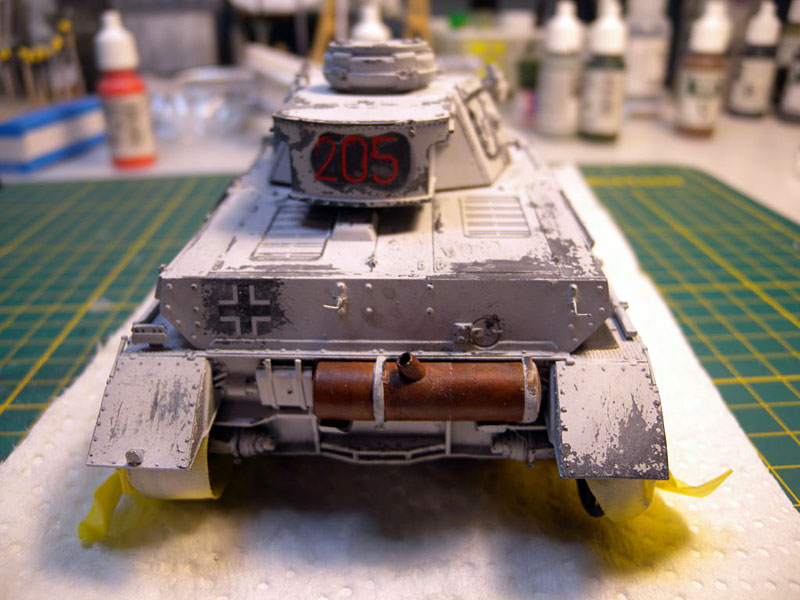
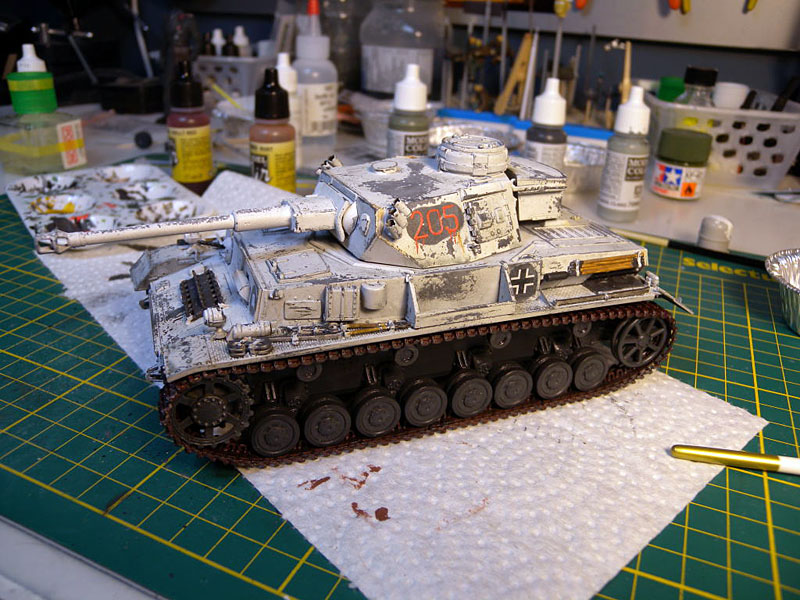
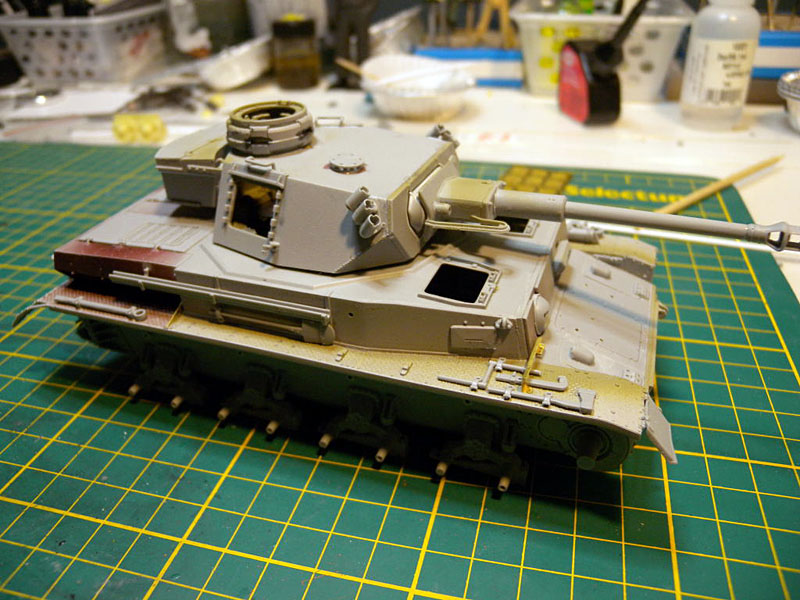
With the construction finished it was time to paint. First the entire model was given a coat of Tamiya Fine Primer, including wheels and track. Once dry, I then airbrushed the model and wheels with a couple of thin coats of Tamiya German Grey. The track was given a thin coat of Tamiya Gun Metal spray from a can. Once the model was done, it was given a coat of Future to provide a good surface for the decal to adhere. Decals were put in place and give a coat of Walther's Solva Set. Once dry, the model was then given another coat of Future to seal the decals. Now to start the dreaded winter paint scheme. I had never done this before, and I was afraid of how it might turn out. After taping off the wheel section, the model was given two coats of hair spray. After about half an hour, I figured it was time to paint. The first coat was a 50/50 mix of Tamiya Flat Royal Grey and Tamiya Flat White. I immediately then applied a coat with more white added to the mix, this was then follow by straight Tamiya Flat White to highlight the flat surfaces and edges. All coat where applied by airbrush at about 20 psi. I gave the paint about an hour to dry, and then started on the "peel" effect. This was achieved with a wet stiff toothbrush, hard coral sponge, and a sanding stick. To begin with I was very gentle applying only light pressure, until I realized it was harder to get the paint off then I expected. So I got a little rough, and continued until I got the desired effect. As soon as I had achieved the effect, I gave the model another coat of Future to seal it all and stop anymore paint from coming off. While the Future on the tank dried, I went back to work on the tracks. After the spraying a coat of Gun Metal, I gave the tracks a wash of Mig Dark Wash, follow by a wash of Mig Rust Effects. When dried I used Mig Pigments Black along the inside where the wheels would make contact with the track. They were then attached to the tank.
About the Author

FROM: ONTARIO, CANADA
I am an IT Consultant and father, with a passion for plastic models. I mostly prefer 1/35 Armor and 1/48 Aircraft. My main interests are anything Canadian, as well as WW2 German and British Armor and Aircraft. I have been building models since I was a young kid, got away from it for awhile, but r...
Comments

Kevin, thanks and well done for sharing your first attempt at the hair spray technique, especially as you say that you felt some trepidation about attempting it at all! Having spent the time building the kit and then applying the base colour, it is always tempting just to play safe for fear of ending up with something that you don't like.
I must say I think you have been somewhat daring as well to use dark grey as the base colour, although I am not necessarily saying that it is wrong... You have included some nice touches and details however.
This would be very nicely complemented by some figures, maybe some ground work?
NOV 19, 2011 - 12:46 AM

Kevin:
Excellent and a beautiful job done, particularly for your first time of doing a snow scheme!
One thing I might suggest is muddying up the treads and wheels more than they are. Perhaps some careful brushing on the wheels, treads and inside the outer frame walls of some very thinned out Quikrete solution would give the entire area a well traveled and weathered look once the Quikrete solution dries.
Cheers!
RoyaleTiger
APR 11, 2012 - 12:07 PM
Copyright ©2021 by Kevin Brant. Images and/or videos also by copyright holder unless otherwise noted. The views and opinions expressed herein are solely the views and opinions of the authors and/or contributors to this Web site and do not necessarily represent the views and/or opinions of Armorama, KitMaker Network, or Silver Star Enterrpises. All rights reserved. Originally published on: 2011-10-30 00:00:00. Unique Reads: 20680

WEB HOSTING BY


Copyright ©2021 Armorama and Kitmaker Network, a subsidiary of Silver Star Enterprises
All Rights Reserved. Please read our Conditions of Use and Privacy Policy.
All Rights Reserved. Please read our Conditions of Use and Privacy Policy.