

1⁄35M16 Multiple Gun Motor Carriage Part One
9
Comments
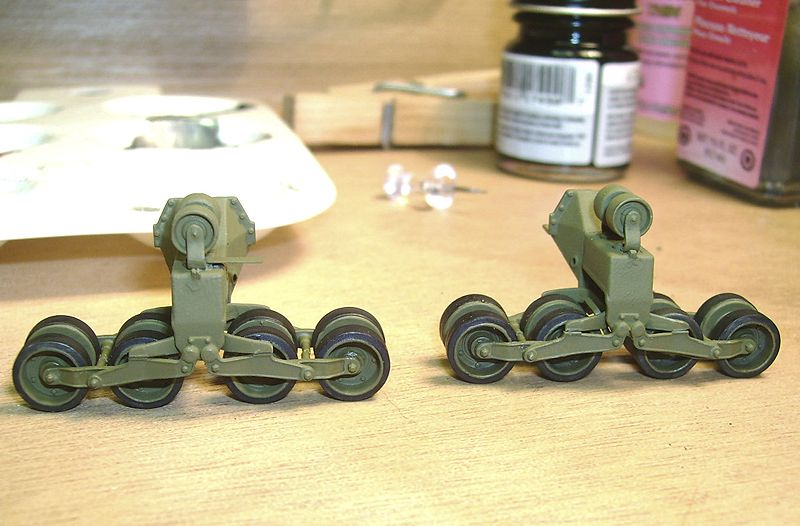
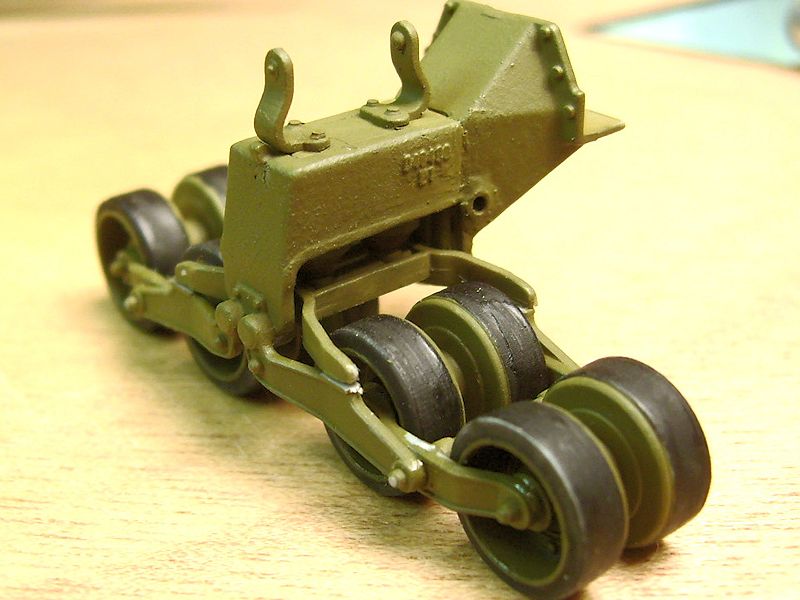
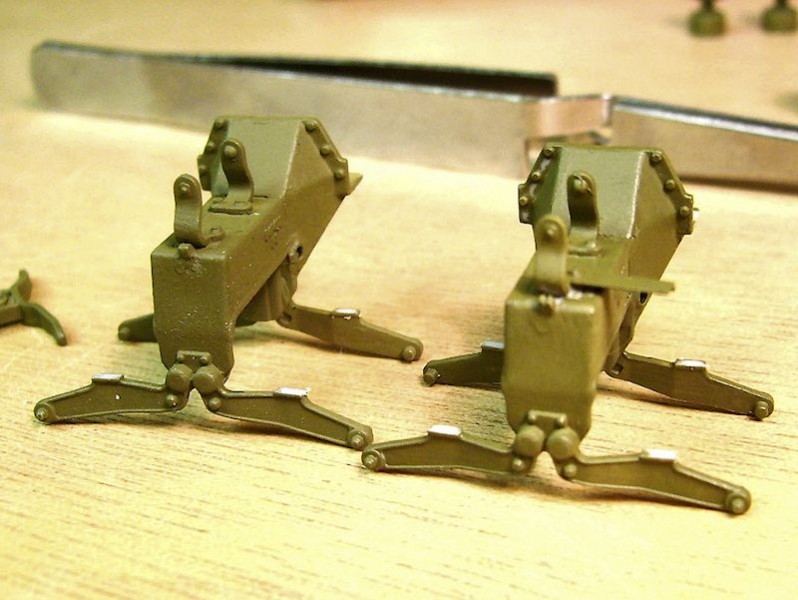
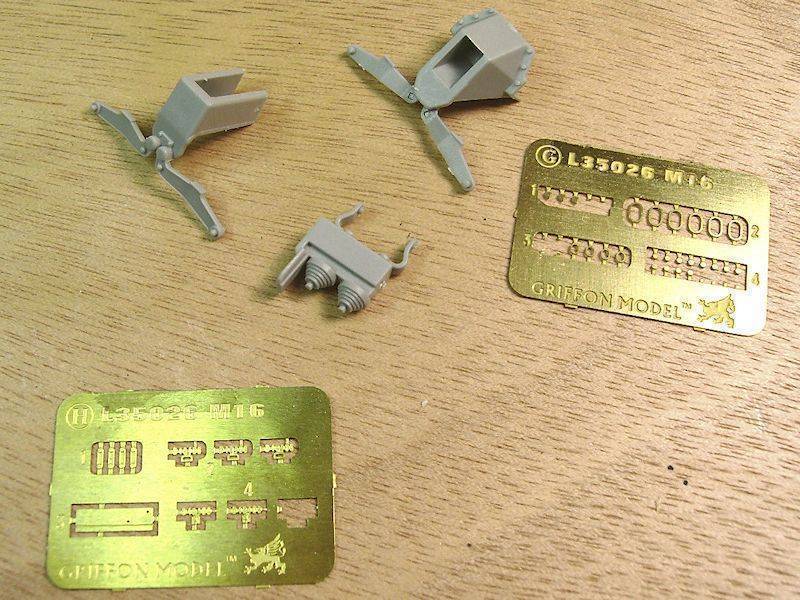
The first time we will dig into the excellent Griffon Models photo etch detail set (L35026) is to add details missing from the main wheel carriages for the rear tracks. These details include the drainage holes for the cast housings, the foundry casting numbers, some bolt heads and the correct exhaust pipe hanger and U-bolt. Assembly of these went rather smoothly, and the Griffon Models metal is very well engineered to fit the Dragon parts almost perfectly. If you end up with a rather rough look to these carriages, thats good. They are huge rough sand cast parts with a texture, they should NOT be smooth or refined. Once these are assembled again, overall Olive Drab is airbrushed to blend it all together.
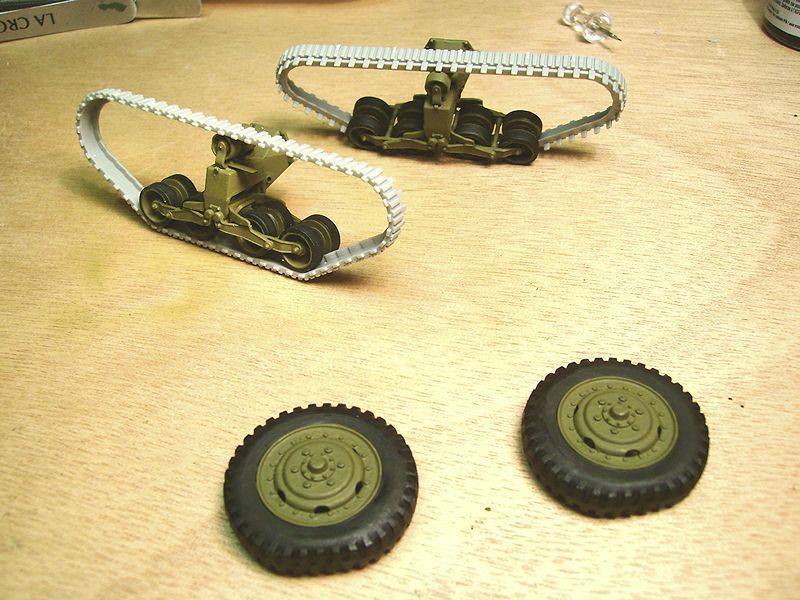
The small road wheels I mounted on pins to paint, painting the OD color of the metal wheel first. I make my own wheel masks out of sheet clear plastic, and made a set for this model. Flat Black looks best on tires when sprayed, and its the best way to get a nice sharp border between the tire and the metal wheel.
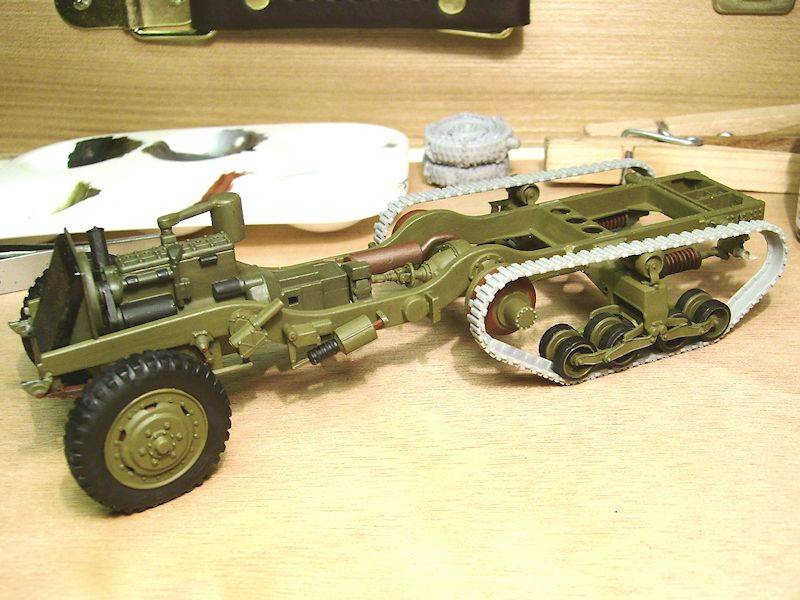
Once these are dry, all are assembled into the complete rear carriages, and assembled onto the chassis at the same time as the front tires. To get the alignments correct and the vehicle level, I use the rear track halves under the road wheels to put everything in the correct orientation while the glue dries. This will ensure that your flat spots on the front tires end up in the correct place.
When I was constructing the front axle unit, I chose to break the alignment pins where the hubs and backing plates install. I want the vehicle to be in action in my diorama and as such, I dont want my wheels locked straight ahead. Once you are rid of the alignment pins, now your eye is your only guide, so I advise patience and a lot of checking and visual inspection to ensure you get the desired results. Fortunately, my eye alignment worked out great, and my front tires are exactly where I wanted them. All of this is left to sit and dry awhile, being highly critical stuff.
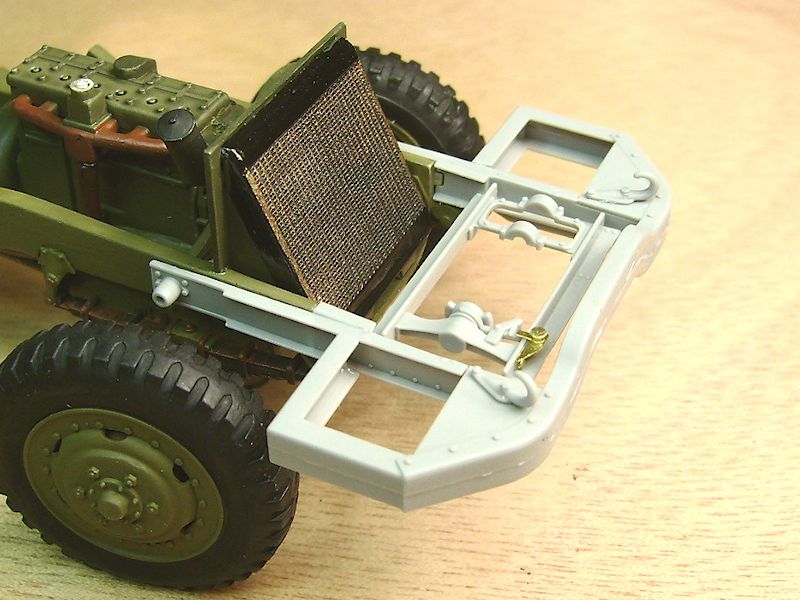
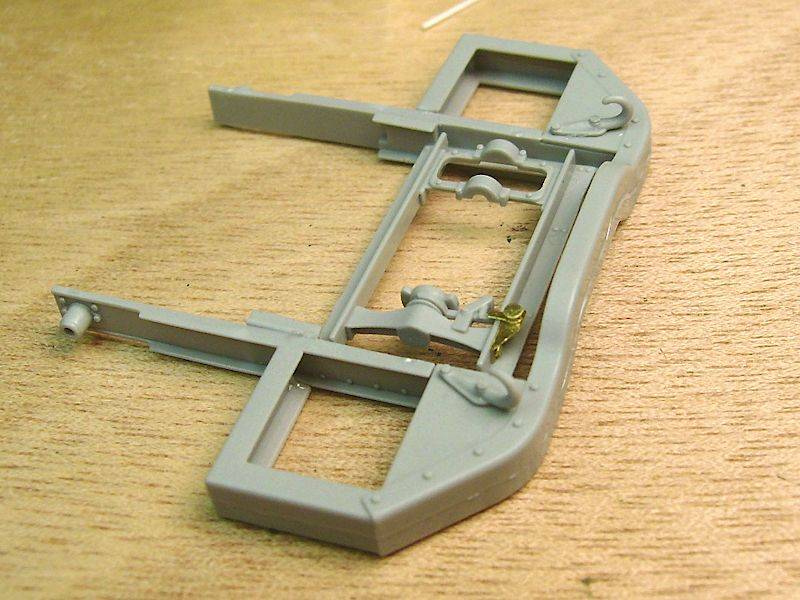
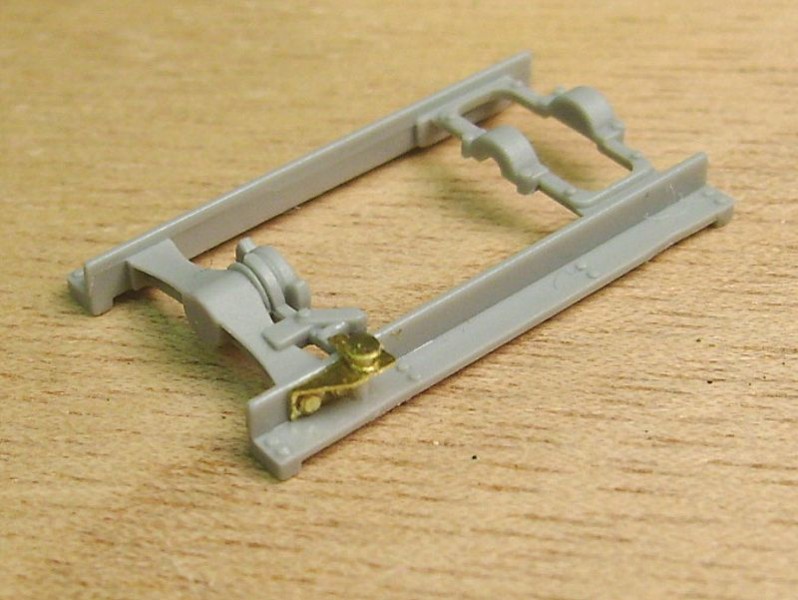
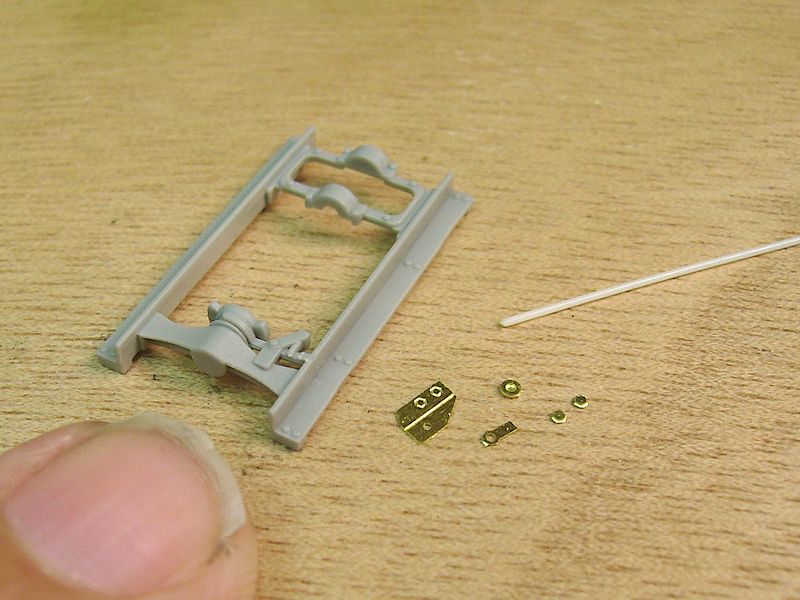
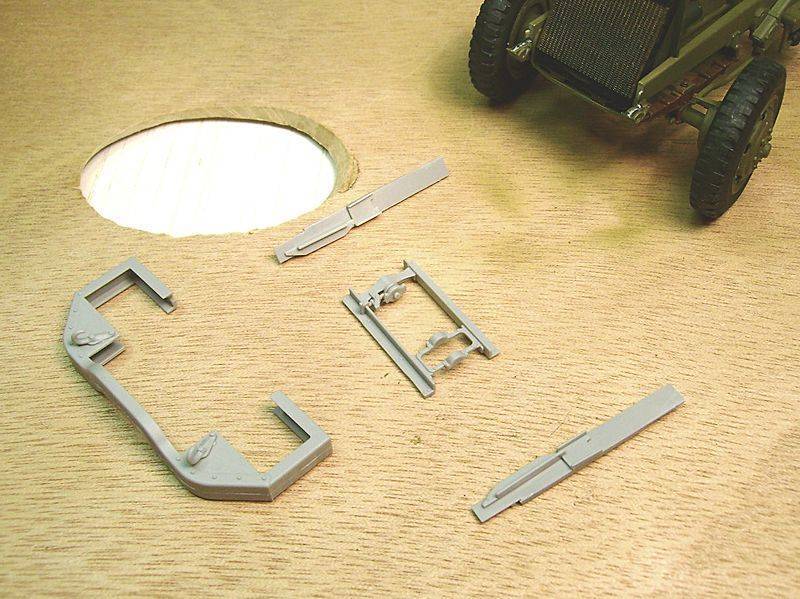
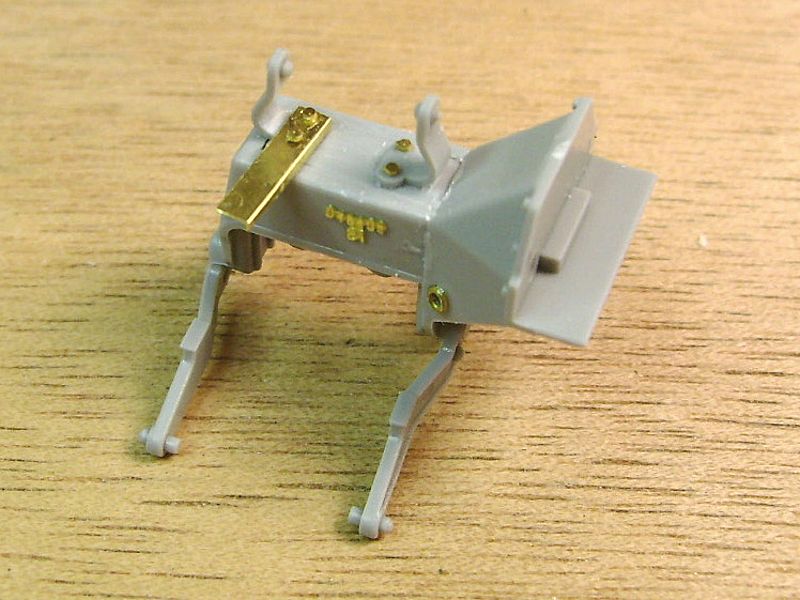
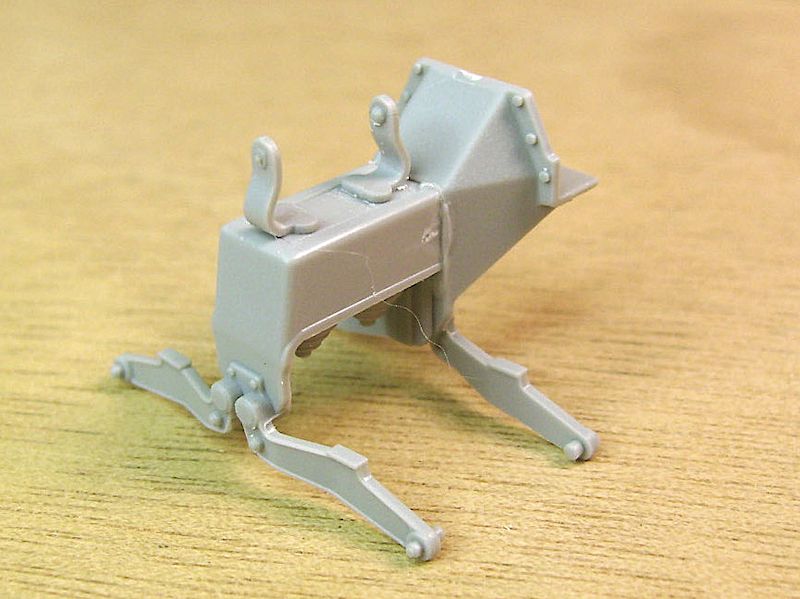
A build such as this has many, many sub-assemblies involved, and this works for me because I get to go assemble and detail some other parts while things dry. In this case, Im going to build and detail the front bumper winch chassis. Once again, the Griffon Models PE kit offers an upgrade to a compromise made by Dragon in their plastic. The winch has a distinct actuator mechanism, which Dragon chose to not represent very well, so it gets replaced with Griffon PE brass parts which do accurately represent the actual unit. After carefully cutting away the inaccurate plastic and smoothing, the PE parts are assembled and do look really good, and Im impressed with the Griffon details so far.
After the entire winch and bumper are assembled and allowed to dry a bit, its time to install it on the chassis, and it slips right together without much effort. After this has dried, then of course it is cleaned up and also painted into the chassis basic OD color. Do not install the actual winch gearbox at this stage. The short section of its driveshaft needs to go through a hole in the front armor of the body, and you wont be able to get the body on if you put the winch together now.
About the Author

FROM: JIHOCESKY KRAJ, CZECH REPUBLIC
I am one of the fortunate ones who has been gifted all my life with the Charm of Making..I am professionally an Artist / Illustrator at this stage of my life, and am or have been a Musician, Commercial Artist, Movie Effects Tech, Set builder, Mechanic, Machinist, Motorcycle Racer and Builder, and ev...
Comments

Very nicely done! I like it!
I do think it's a bit comical for there to be a controversy on the bulge issue for the front tires. Ask anyone who has been in the tire or automotive industry and they will agree that there will be a sidewall budge present ... especially if those pressures have been dropped. The vehicle weight alone will cause this too.
So, the call shouldn't be made by a group of modelers, just ask your local repair shop for the answer. I have spent over 20 years in that field and know the answer as well.
~ Jeff
APR 14, 2012 - 12:44 AM

I thoroughly enjoyed reading through this one Gary, can't wait to see what's in store next
APR 14, 2012 - 01:39 PM
Hi Gary, really interesting subject, and very detailed infos, I will wait for the next parts.
Rgeading your issue with the "overweathered" vehicles, I think it is just the question of approach. From the 100% replication of a vehicle, where every bolt is in position, to the artistic fantasies of Jean Bernard Andre, I think everything is acceptable, as far it is tell something about you and not just a repeat of a lesson. Those "madmaxed" Stug III-s and Tigers imho tell about the hopeless and sadness of war (yes you are right, in a bit surreal way), while the accurate reproduction tells about the desire of perfection, which is also an appreciated feature of a man.
Cheers,
Istvan
APR 17, 2012 - 08:46 PM

Thanks to everyone on your positive feedback on this project. Thanks to James Bella for giving me the opportunity to display my madness in public among my fellow madmen..as for "overweathering"..the idea of scale modelling as Artistic Expressionism...this is a concept indeed. I had not remotely considered this. I have seen some models which are so overdone, so chipped, so rusted, so worn, that they really do fit my description of 100 years sitting in acid rain. But do you think this was done in some sense of artistic expression of the bleak nature of war? Hmm...I have a philosophical concept to ponder now. I just assumed these guys were simply incurable show-offs with their advanced finishing techniques. It's way hard to do that realistic chipped paint rust and extreme wear and filth on the level these guys achieve, it's a high art. Expressionistic? I'll think on this. Thank you for that new perspective.
APR 20, 2012 - 05:01 AM

Thanks for sharing the build. I'll be following it thru. I'm going to be building this Dragon kit very soon myself to provide air cover for my Bailey Bridge
MAY 06, 2012 - 10:06 PM
HEY!! I didn't die!
My move to Europe got WAY more intense than I ever expected..the same old story..material, logistics, weather!
No, I haven't abandoned this feature, I just got taken away by the huge operation Called Move To Czech Republic!
Now that I'm HERE, and we have bought our cottage and have it set up to live in, I am hoping to unpack all of the modelling materials and kits (yes...I brought it ALL) and continue! Stay Tuned!!
JAN 14, 2013 - 09:38 PM
I'll be following this one with great interest! As for front tire sag on the M16, you bet they do. I've got four AA halftracks (real ones, an M15A1, two M16s and an M16A2) in the museum collection, one of which we operate on a regular basis. The front wheels always bulge.
Warcloud, let me know if you need detail shots of anything in particular.
Jon
JAN 24, 2013 - 01:25 AM
Sorry I didn't find this post sooner..there's no notification feature here I can find..
M16 halftrack issues right now on the scale model...
The "tombstone" drum mags do not fit in the rear compartment corners. The 1/35 model magazines do seem to scale up correct size for the real 21" high mags, which means the rear armor body itself is likely...WRONG. What I need are the exact measurements in the 'track itself..floor to top edge of armor wall, with flap up and flap down..and an exact H-W-D on the tombstone mags. This is a huge issue, so data on this is GREATLY appreciated!
APR 30, 2013 - 10:24 PM
Yes, as I said, I am also a WW2 weapon collector and am among several vehicle collectors as friends..15,000lb. + vehicles will put a bulge in their tires, especially if one follows the TM on off road/mud-rain-snow operation.
APR 30, 2013 - 10:26 PM
Copyright ©2021 by Gary Roberts. Images and/or videos also by copyright holder unless otherwise noted. The views and opinions expressed herein are solely the views and opinions of the authors and/or contributors to this Web site and do not necessarily represent the views and/or opinions of Armorama, KitMaker Network, or Silver Star Enterrpises. All rights reserved. Originally published on: 2012-04-10 00:00:00. Unique Reads: 15245

WEB HOSTING BY


Copyright ©2021 Armorama and Kitmaker Network, a subsidiary of Silver Star Enterprises
All Rights Reserved. Please read our Conditions of Use and Privacy Policy.
All Rights Reserved. Please read our Conditions of Use and Privacy Policy.