

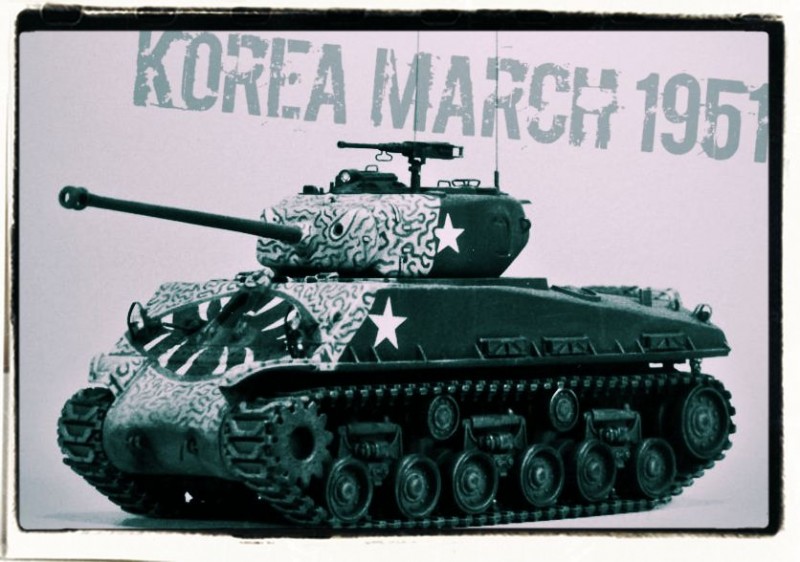
1⁄72Hasegawa Sherman in Operation Ripper
11
Comments
CONSTRUCTION CONTINUED
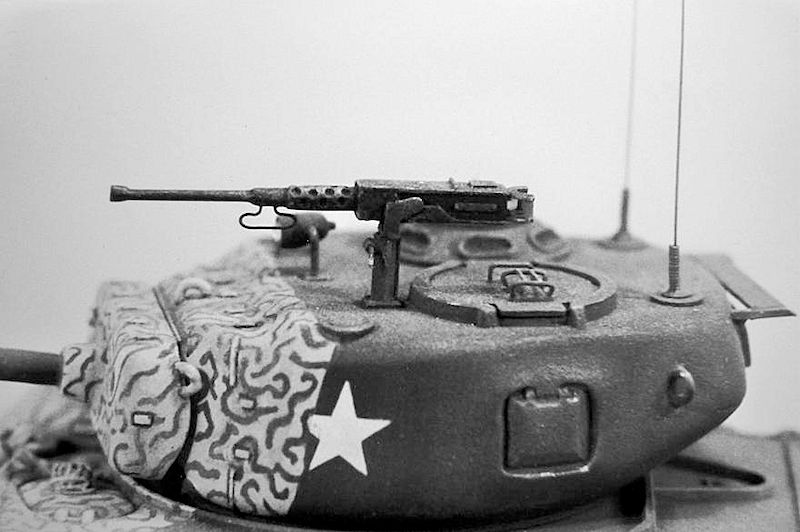
Replacements for these poorly done details were mostly scratchbuilt. Starting with the hull, I made new lifting points from bent wire and stuck them into small holes I had drilled into the deck to accept them. Tiny dabs of Squadron Green Putty applied to the joins represent attachment welds. Similarly, lift handles were added to the engine deck doors using smaller diameter wire. The shovel and axe on the right side of the rear hull came from an ESCI 1/72 scale M4A1 Sherman kit, as did the track tensioning wrench on the upper rear of the engine deck and the forward hull mounted tow points. That excellent kit also contributed the headlights, which were improved by boring out the plastic faces and inserting MV Products glass lenses. I discarded the kit tail lights in favor of new ones made from plastic rod. Guards for the hull lights and tool mounting clasps were fabricated from lead foil taken from an old wine bottle cut into thin strips and bent to shape. This real metal material is a great way to simulate scale sheet metal components, but I had to make sure to paint them carefully so that none of the bare metal remained exposed to the air. This is important since the alloy used for wine lead can oxidize over time, making the parts look like some sort of weird metal cauliflower... not very realistic! The small stowage rack on the rear of the model mounts to the deck with thick tabs which are supposed to fill the large unrealistic notches cut into in the armored hull to accommodate them. It doesnt look quite right, but I left them alone and mounted the kit rack as designed. The rack itself is a little chunky, so I thinned it and replaced the solid sides with open supports made from strip plastic. As for stowage, the kit provided none except a completely unconvincing rolled tarp intended to be mounted on the engine deck, so I had to look elsewhere. I tossed the tarp and added four jerry cans from Hasegawas 1/72 Field Camp Equipment Set. These U.S. style cans are well executed, but I improved them by replacing the solid plastic handles with wire. The K-ration box was made from a 1/35 scale Verlinden paper part reduced in a photocopier to 1/72 and wrapped with lead foil straps. The stowage was completed with an old Fujimi 1/76 ammo box, a length of model railroad chain and some beige sewing thread rope to secure the items in place. Moving on to the turret, I replaced the lifting rings on the turret sides and top with bent wire and added one on each side of the gun mantlet as well. As with the hull, they went into small holes drilled to accept them, the joins dressed up with green putty welds. I also added a pistol port to the left side of the turret. I dont know if some turrets were manufactured without them, but the Hasegawa turret didnt have a pistol port at all. I made the little door from a square of scrap plastic with the sides beveled. This was then framed with a fairing of Squadron putty. The kit spotlight was replaced with one from the ESCI Sherman, with an MV Products glass lens, and mounted with a bent wire. The .50 cal machine gun and its pedestal mount were improved with plastic rod, sheet, and wire detailsalthough I later removed the gun when I added the crew figures, leaving only the pedestal. The storage rack for the machine gun on the turret bustle was scratchbuilt from plastic sheet. The turret hatches were enhanced with small diameter wire handles, and the same material was used to fabricate the periscope guards. Wire was also employed for the antennas, with the aerial spring bases simulated with wire shaped around a pin. Other turret details included plastic mounting strips for the gun mantlet canvas cover and a tiny emergency gunsight made from wine-lead sheet.TRACKS
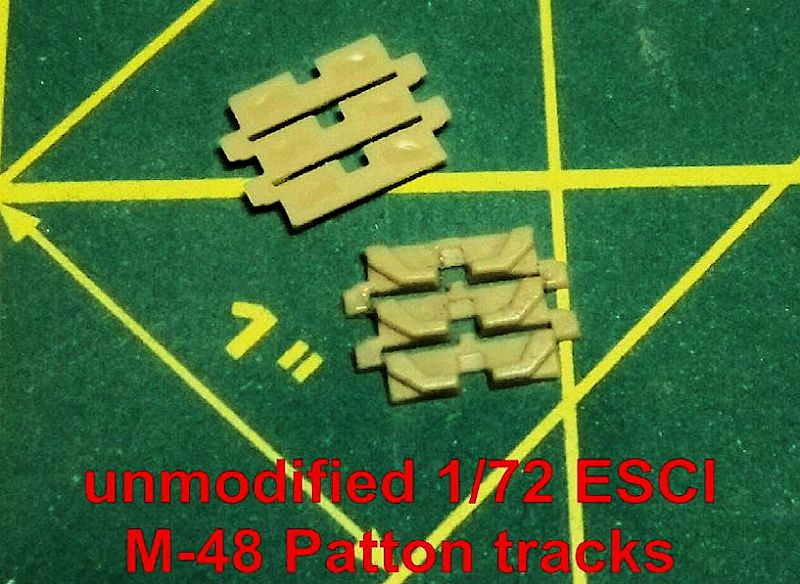
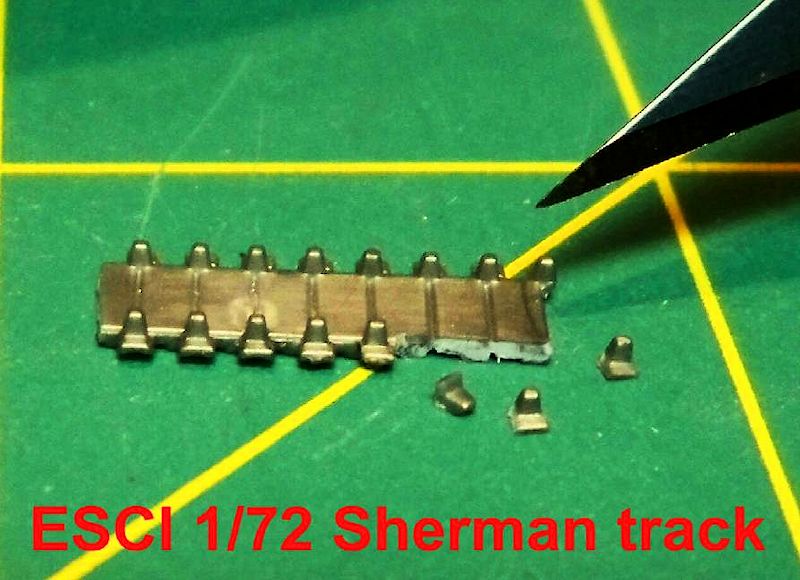
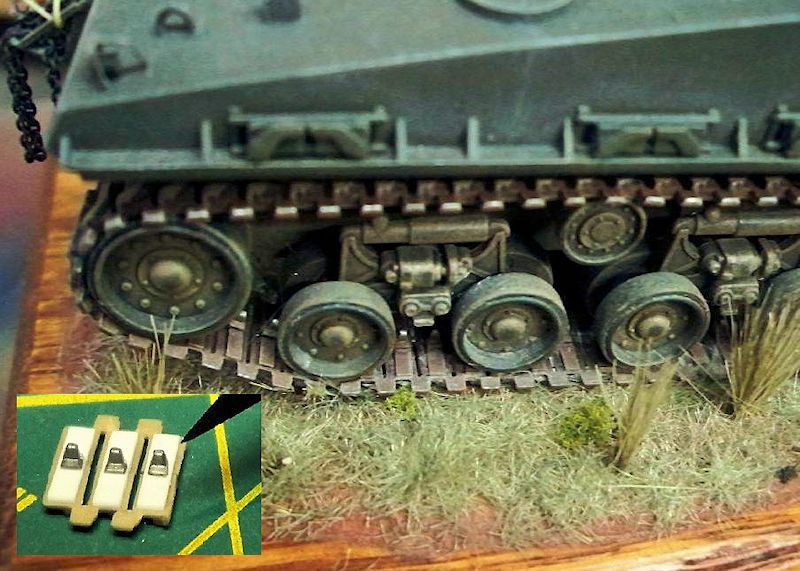
The most significant change I made to the model was to improve the tracks. The parts provided by Hasegawa are those one piece soft plastic lengths typical of 1970s-era tank kits. Impervious to polystyrene plastic cement, these things have to be assembled by fitting tabs on one end through holes on the other, then melting the protruding tips to secure them. Then they must be stretched over the completed sprockets and road wheels like rubber bands. I dont know why this approach was so popular with manufacturers; I remember the frustration as a kid of ruining tracks when I couldnt properly control the melting, or breaking them under the tension of fitting them around the wheelsand then not being able to repair them because the tabs had snapped off! Even if they survive the assembly process, the soft material used is not very convincing; these elastic tracks don't bend realistically at the hinges between links, and they tend to bow in the center where they wrap around the sprockets. Flexible rubber just doesnt look like steel link! The soft kit track parts are apparently intended to represent the Horizontal Volute Spring Suspension (HVSS) T-80 all steel, double-pin type tracks, but they bear only a passing resemblance to the real things. While detail on the outside of the kit parts is reasonable, the inner surfaces are completely smooth except for the guide teeth. They are also a bit too thin for this larger than 1/72 model. Since I couldnt figure out a way to make these look right, I hoped to replace them with the excellent hard plastic tracks from the ESCI M4A1 kit I had been raiding for parts. Unfortunately, this was not possible as the ESCI Sherman tracks were the wrong type. The T48 rubber chevron tracks for the Vertical Volute Spring Suspension (VVSS) in the ESCI kit had double sets of guide teeth framing a central wheel, but I needed tracks for the HVSS type, which had a single row of guide teeth sandwiched between paired bogey wheels. Searching through my stash, I found an ESCI M-48 Patton kit with T97E2 tracks that I thought could be adapted to resemble Sherman T-84 rubber chevron units. These were of course a bit too wide for the smaller Sherman and they had no detail on the insides, but the link and length tracks were nicely detailed on the outer surfaces - and they were made of hard plastic! To make the Patton tracks resemble the Sherman T-84s, I cut them lengthwise down the middle and removed the center section to narrow them. Cementing the halves back together, I added small .010 x .060 inch plastic strips across the inside surface to simulate individual links. Finally, individual guide teeth cut from the ESCI Sherman tracks were added to the centers of the strips. The resulting tracks are a little overscale for 1/72, but since the tank itself is also oversized, they look about right. I used the Patton tracks to improve the spare track links mounted on the hull sides too. The spares are nicely done, but for some reason Hasegawa chose to depict the rubber chevrons on them as depressions in the links. This is completely wrong, so I added rubber chevrons shaved from Patton parts to correct them. It also makes them match up better with the new tracks.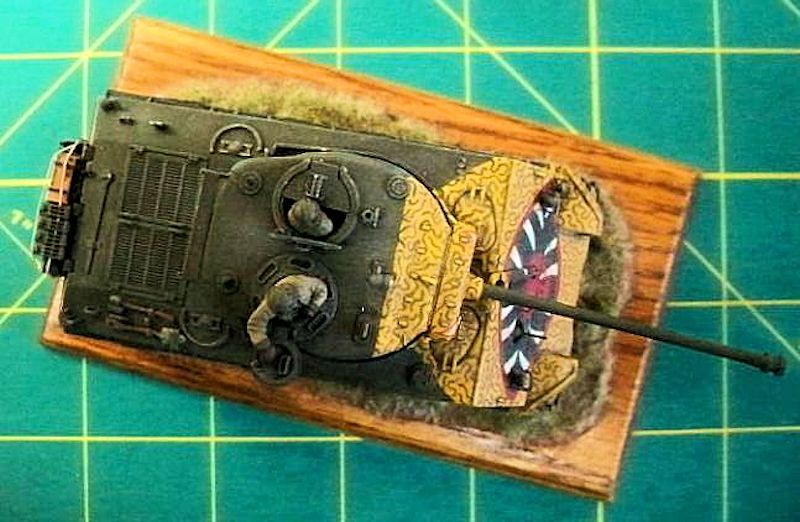


About the Author


FROM: CALIFORNIA, UNITED STATES
I am married with three daughters and a son, and I oversee the team of regional workforce policy advisors for the State of California. My wife is an elementary school teacher. Ive been building models since I was five years old (my first model was a NASA lunar module bought for a dime from a mag...
Comments


Very nice, Tim!
Why did you remove the .50 cal M2 MG? It looked pretty good in the b&w images.
SEP 22, 2012 - 04:46 PM

Amazing detail and such clean lines for something so small! Plus your backgrounds on the first page are just awesome.
SEP 22, 2012 - 09:27 PM

Very nice work Tim. I'm impressed with all the detailed work and corrections performed on this smaller scale which brings it up to par with most larger kits.
Thanks SO MUCH for showing us how it's done!
~ Jeff
SEP 23, 2012 - 12:58 AM

Thanks, guys, I appreciate all your kind comments. In answer to your question, Jeff, I originally built the tank with the .50 cal MG on the turret, but when I went back to open up the hatches and add the crew I found that the big MG interfered with the gunner figure. Couldn't figure out a way to position it or him so it didn't block his face, so I took it off.
It was a bit vexing to remove it since I had put a good deal of work into the thing (drilling vent holes in the sleeve, hollowing out the muzzle, wire and plastic details, etc.), but it won't go to waste; I'll reuse it on a Vietnam-era M48A3 Patton build I plan to do eventually.
SEP 23, 2012 - 01:56 AM
0
Doh!
Hi Roy,
Thanks for the heads-up. It is annoying that I got those details wrong, but I do appreciate your advice. (I had wondered why there were TWO headlights on the left side...!) Guess next time I'll do my research a little more carefully.
By the way, it was kind of you to point these oversights out to me in a personal message, but I wouldn't mind at all if you reposted this on the forum. No sense anyone else repeating my dumb mistakes!
regards,
Tim
--------------------------------------------------------------------------------
JAN 09, 2013 - 03:44 AM
(forgot to post ericadeane message to which I responded)!:
Great paint job there Tim. Fun to look over pics of your completed model. May I make two suggestions?
1) the spotlight atop the turret has its lens too far forward. The cylinder to which you attached the (MV?) lens is actually a shroud. The glass, on the real thing, would have been about 4 inches inset from the end of the shroud. The cylinder was to focus the spotlight beam.
2) the item on the glacis below and to the left of the left headlight was a siren and not something that would require another MV lens.
Hope these help.
JAN 09, 2013 - 03:46 AM


Just found this over your profile....absolutely stunning Sir!!!! Congrats on a tiny beauty!! Cheers Romain
JUN 18, 2014 - 07:49 PM
oh wow, very nice! That paint job is really cool, especially in this scale
JUN 18, 2014 - 08:19 PM
Copyright ©2021 by Tim Reynaga. Images and/or videos also by copyright holder unless otherwise noted. The views and opinions expressed herein are solely the views and opinions of the authors and/or contributors to this Web site and do not necessarily represent the views and/or opinions of Armorama, KitMaker Network, or Silver Star Enterrpises. All rights reserved. Originally published on: 2012-09-23 00:00:00. Unique Reads: 17011

WEB HOSTING BY


Copyright ©2021 Armorama and Kitmaker Network, a subsidiary of Silver Star Enterprises
All Rights Reserved. Please read our Conditions of Use and Privacy Policy.
All Rights Reserved. Please read our Conditions of Use and Privacy Policy.