

1⁄35A39 Tortoise
9
Comments
I will not describe the entire kits contents as I believe the in box reviews by Jim Starkweather more than covered this; links to these will be found at the end of this article.
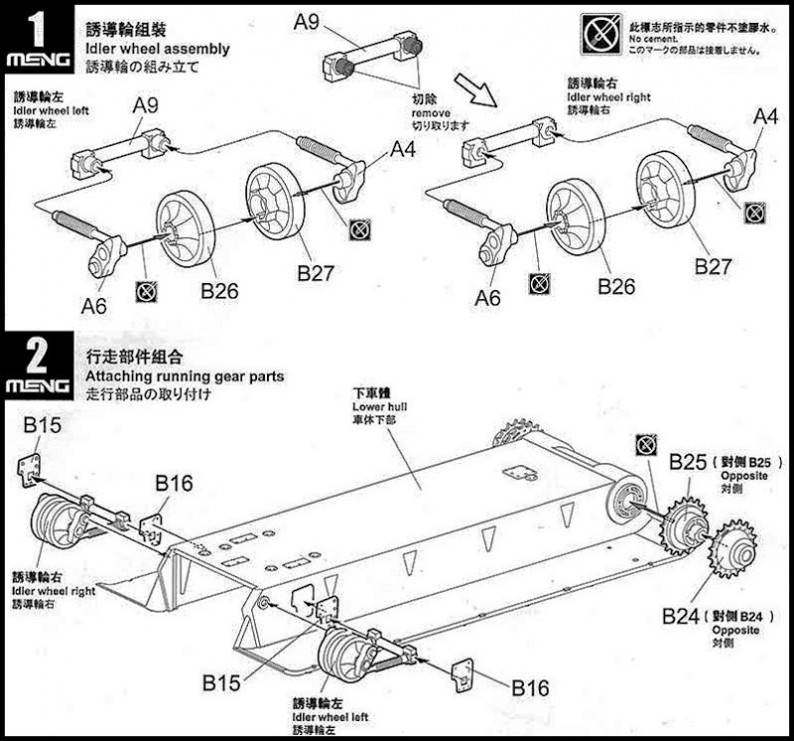
Stage one
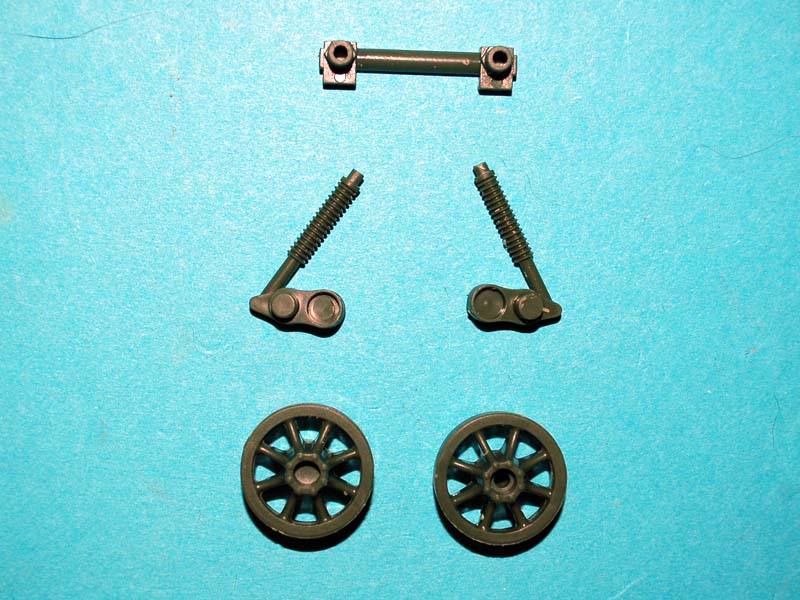
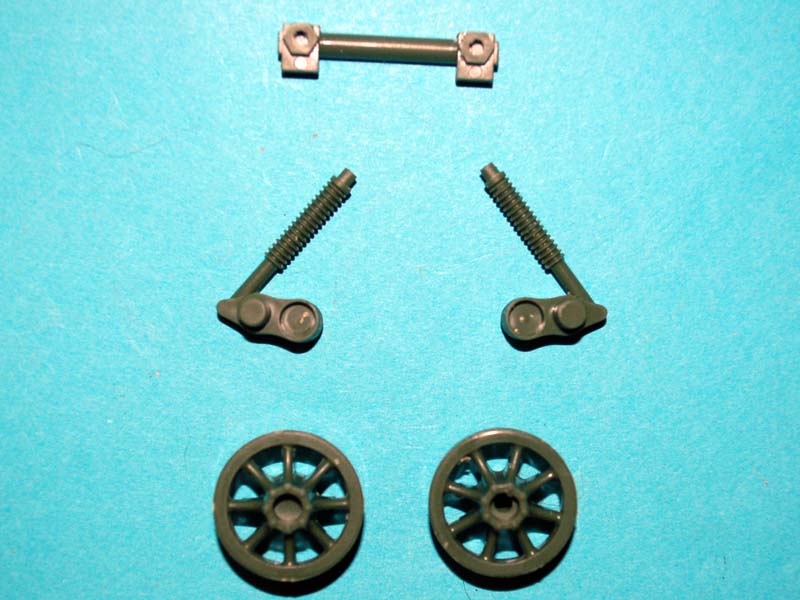
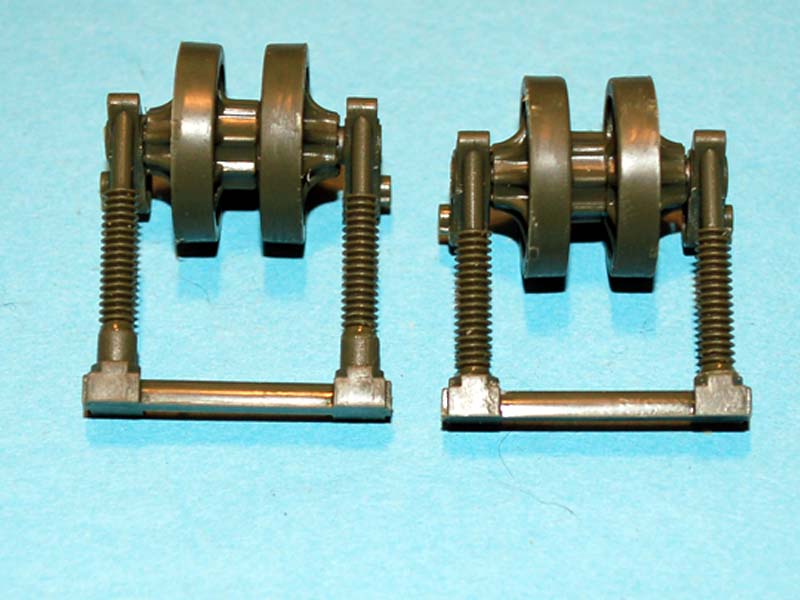
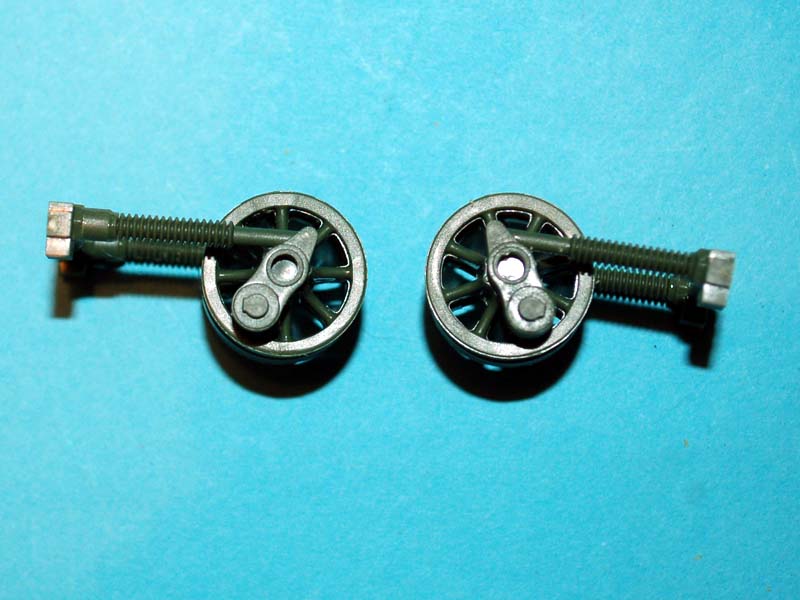
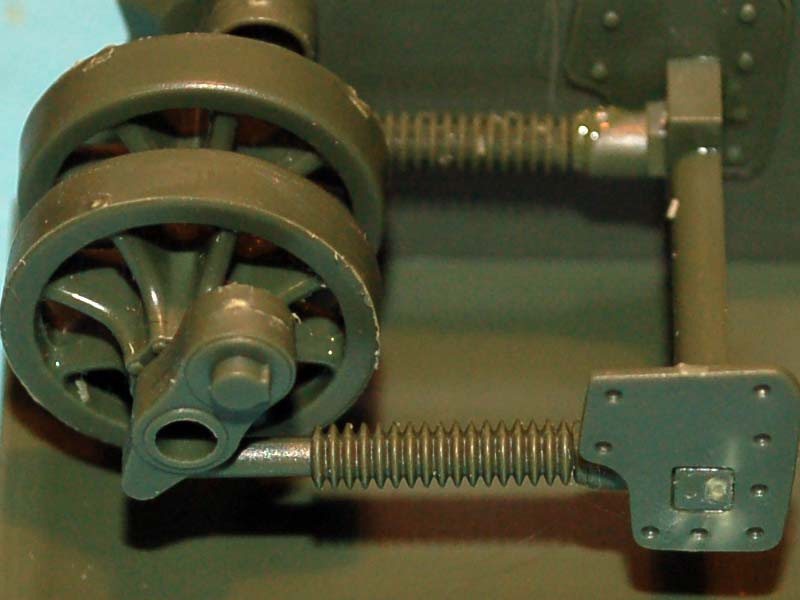
This stage covers assembly of the rear idler wheels which are left and right sided, with minor surgery being required to the right hand side. The right hand connection point to the track tension adjuster needs to be cut back, as indicated by the instructions. I cut away these two segments with a razor saw. There are some minor mould seams, both on the wheels and the tensioners, which are easily removed with a No 11 scalpel blade. One word of warning during this stage is to make sure you get the tensioners orientated correctly, or you will struggle when it comes to attaching the assembly to the tank hull.Stage two
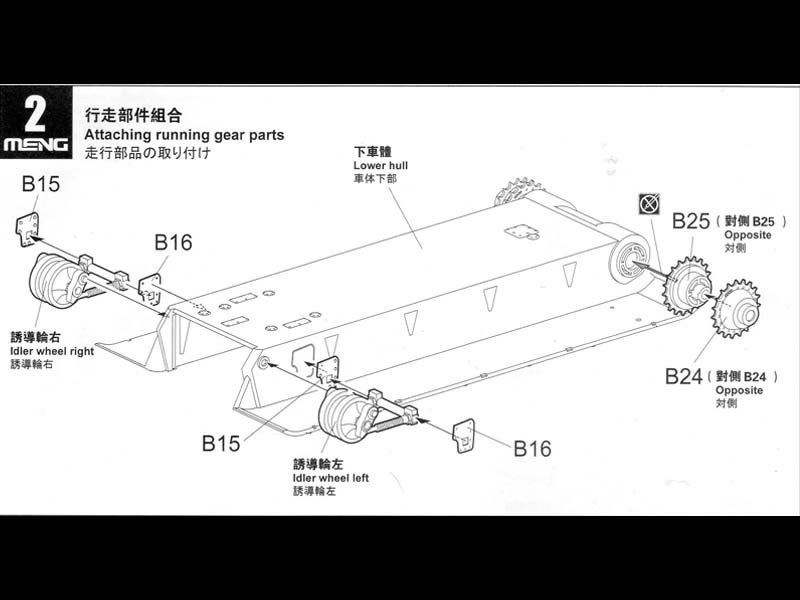
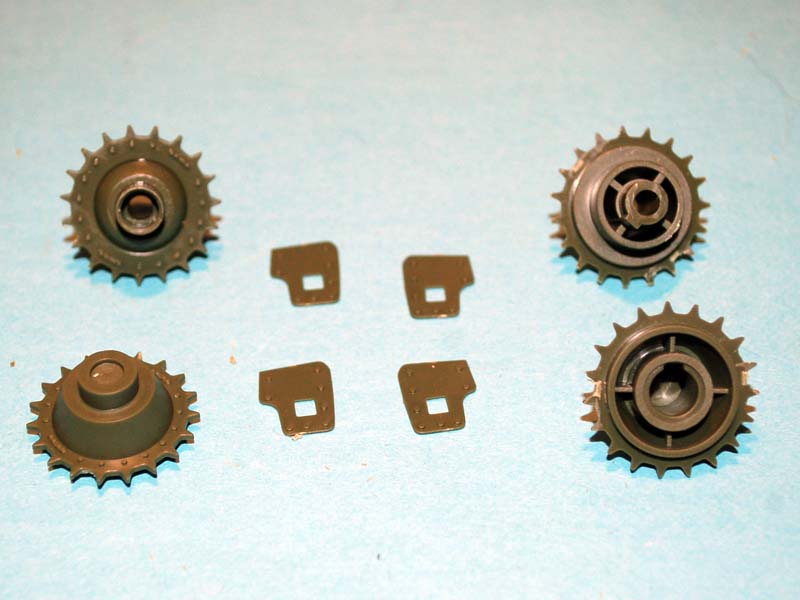
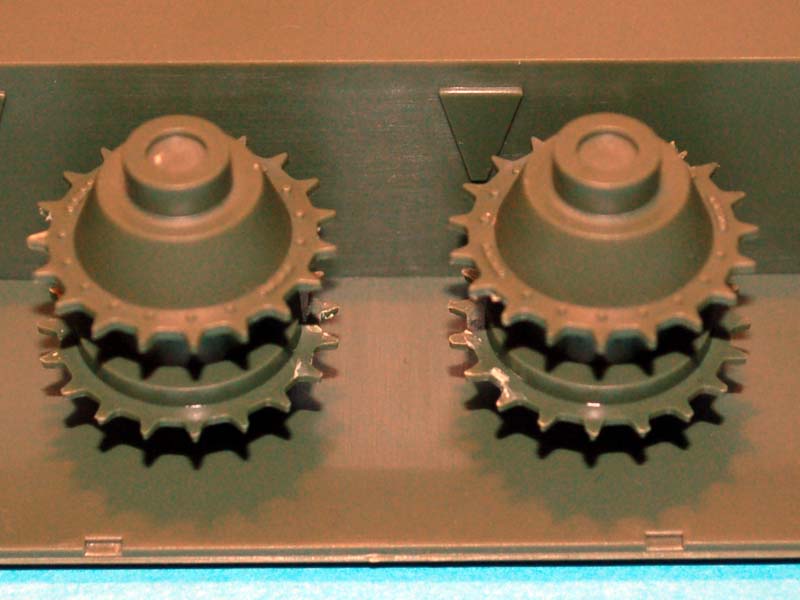
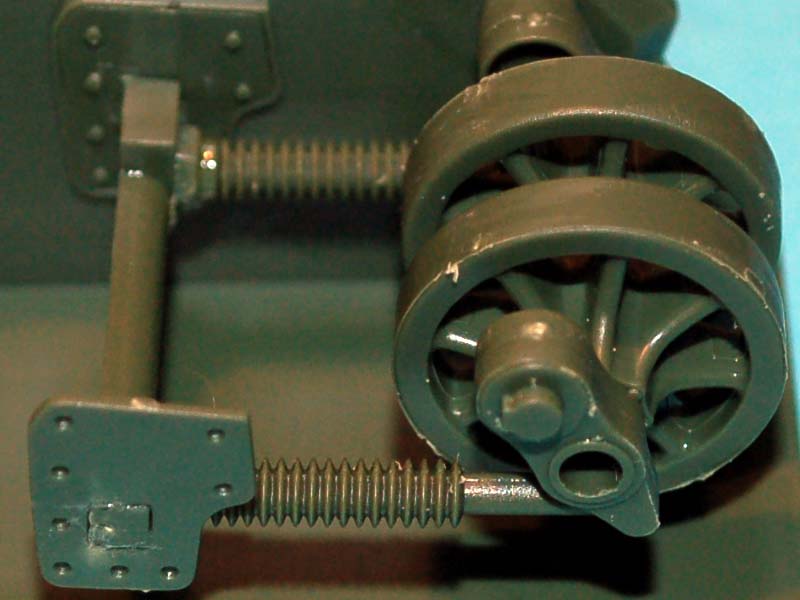
This stage covers assembly of the front drive sprockets and the attachment of the rear idler wheels. The rear idler wheels are easy enough to fit via the mounting brackets as long as you put them on the correct side, and get the orientation right during the previous stage. I found it easier to attach the four mounting brackets to the tensioner assembly first and then to the hull. The front drive sprockets are easily put together, the only area where care is needed being the removal of the sprue tabs from between the teeth, although the majority of the attachment lug is behind the sprockets, which does make the removal and clean up somewhat easier.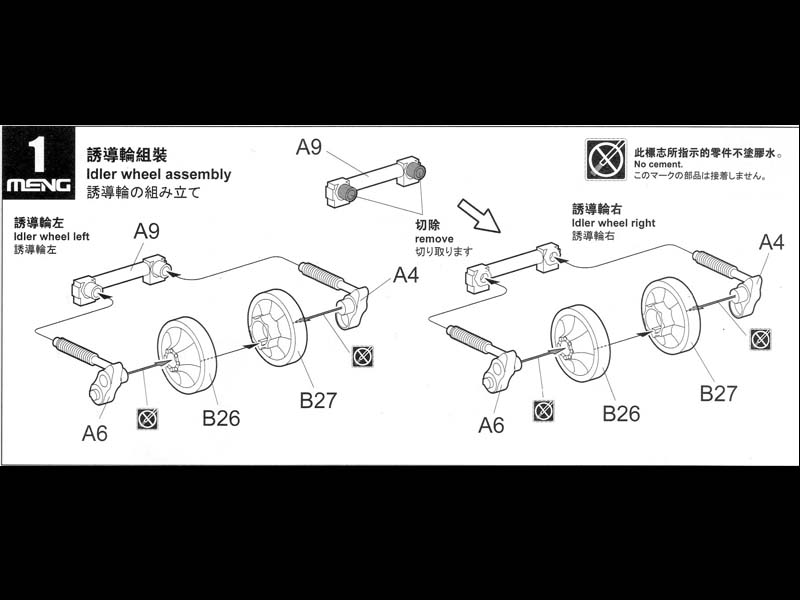

About the Author


FROM: ENGLAND - SOUTH WEST, UNITED KINGDOM
I have been building model kits since the early 70s starting with Airfix kits of mostly aircraft, then progressing to the point I am at now building predominantly armour kits from all countries and time periods. Living in the middle of Salisbury plain since the 70s, I have had lots of opportunitie...
Comments

Darren: Nice review. Any overall shots of your build? Or is it too big to fit in the camera frame?
NOV 08, 2012 - 09:11 AM

Thank you for your comment Zon and I wish I could provide pictures of the finished vehicle, It was when I was bringing the finished painted model down stairs that a combination of stairs, cat, and gravity came together with a less than pretty result.
NOV 08, 2012 - 09:52 AM
Ouch!!! Sorry to hear that. Perhaps a "What-if?" with battle damage is in order then? Bummer.
Happy Modeling, -zon
NOV 08, 2012 - 10:20 AM


I will simply say that you are not the only one who has had this problem during this time of year.
Thanks for what the great notes that you have been able to put together for the build, it would be nice to be able to download them in a compressed file or pdf. Perhaps your experience would provide adequate justification for obtaining a new Tortoise? Perhaps wishful thinking, but it's worth a shot
NOV 10, 2012 - 02:31 PM
I am afraid it was well beyond economical repair and so I saved some parts the rest was binned.
NOV 10, 2012 - 07:42 PM

Darren, on behalf of AFV club ( a Taiwanese model kit vendor) . We would like to know if you are willing to help us to provide the photos per our request. thanks
DEC 20, 2012 - 04:30 AM
Copyright ©2021 by Darren Baker. Images and/or videos also by copyright holder unless otherwise noted. The views and opinions expressed herein are solely the views and opinions of the authors and/or contributors to this Web site and do not necessarily represent the views and/or opinions of Armorama, KitMaker Network, or Silver Star Enterrpises. All rights reserved. Originally published on: 2012-11-07 23:37:07. Unique Reads: 21003

WEB HOSTING BY


Copyright ©2021 Armorama and Kitmaker Network, a subsidiary of Silver Star Enterprises
All Rights Reserved. Please read our Conditions of Use and Privacy Policy.
All Rights Reserved. Please read our Conditions of Use and Privacy Policy.