1⁄35Creating Digital Printables
2
Comments
My background
Those of us who endeavor to create the "perfect" diorama are continually searching for new ideas and unique ways to enhance our work. I was approached by my friends here at Armorama to share my creativity and knowledge. I am an artist by trade. I was educated in the visual arts, in the fine arts, as an illustrator, and a graphic designer. I have worked in the graphics and printing industry for over 20 years. I enjoy the love and frustration of modeling. My passion for details prompted this article.What you need before you start
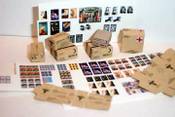
In writing this article, I assume that readers have basic computer skills, practical application of software and a good printer. It is not necessary to have top of the line equipment and software to produce good quality "printables" for your dioramas. Armed with a better understanding of printing and image handling will allow you to produce some great details.A few examples of after market "printables" are the propaganda posters, ration boxes, maps, playing cards, and paper money. The details we add to our dioramas help us to tell our story and make the diorama believable for the viewer by creating a natural setting. Visual stimulation in a diorama is a basic design element that we use to invite the viewer into a storyline.
Reference Images
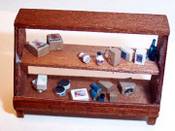
The research begins as soon as the idea for the diorama is born. A diorama encompasses a storyline, geographical location, general environment and surrounding. I list things that may be found in similar locations. Start an image reference file where you can draw inspiration for ideas. Study the reference material and observe the natural surroundings. See what is in the background and don't focus only on the subject. Note things that might become the details to create that natural setting. See the example on the sidebar of the shelf. The shelf is the subject and the 'printables' make it 'come to life'. With the reference material gathered, it is time to move on to the basic guidelines for working on images.Collecting Useful Images: What to look for and where
Assuming you possess software that will allow you to resize, crop and manipulate images, own a scanner, or a digital camera we can begin to collect our images.The established time period of your diorama is important. With that in mind, it is time to go web surfing. The Internet is a powerful tool and source of information. All it takes is time and patience. Some of the most beneficial sites are antique, "collectable", or military sites. Other good sites for reference are re-enactor sites. Most have details related to a soldier's everyday life. Often the sites will provide good information as to what was used or what a soldier may carry in the way of personal effects. Dollhouse, or action figure sites, are another good source as many of them have free downloads already available. These images are typically a larger scale than needed, which is actually a benefit. The quality at the intended scale is marginal. The quality is improved when reduced to 1/35th scale. If web surfing is not your thing or you don't find what you are looking for, there is always the library, museums, antique stores/malls, and art stores (clip art, art history, good for advertising reference, and period styles).
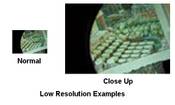
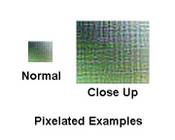
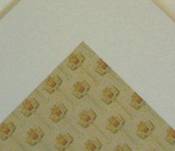
Internet images are typically produced at a lower resolution/quality to save memory. Most are created at 72 dpi (dots per square inch). On screen the images appear normal but if printed out at 100% they look pixilated (see the image on the sidebar - it's grainy and unclear). These images can still be of use. The rule of thumb for using web graphics is this: the bigger, the better. Keep in mind the scale of your diorama. Most images you collect will be reduced dramatically, so the bigger the original, the higher the quality of the final reduced product. The better the detail, the better depth of the "printable" we produce. The larger the scale reduction from the original to the finished size, the more detail can be maintained.
Example: if you have an original graphic/photo that is 64K, at 100% it prints to a 4" x 3", scaled down we want to produce at 25% of the original. The graphic will maintain an excellent quality. The same principal is applied when scanning or manipulating digital photography.
Things to avoid when choosing images: poor quality images, out of focus images, skewed images (angled), and the most important - do not use images that are under copyright. All of these will be reflected in the quality of the final product.
Scanning an image
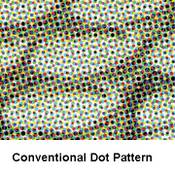
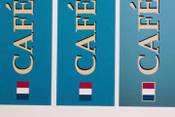
Always scan your images larger than needed for the final product. This will help keep the smaller details in tact when printing. Scanning an original photo is straightforward, however, scanning a printed image does present a problem. All printed photos and halftones are screened. A "halftone" is a black and white photo. Solids are referred to as line art, which does not present problems when scanning. If you look at a halftone or an offset printed photo with a magnifying glass, you will see a dot pattern or a screen to it (see the image on the sidebar). It is like looking through a screened window. This pattern has to be removed before reproducing the image. The vast majority of these screens are at 150 or 175 linescreens. This is important to know when you descreen an image. Linescreen is a conventional printing term, but can be related to digital printing terms as dpi which I defined earlier. Fine art books or some other materials may use a 200 line screen, but this is much more uncommon. The printing industry is quickly moving into the digital arena. Most print houses no longer support conventional printing that used film and screens. The scanning software that comes with your scanner should have a descreening function; refer to your manuals to resolve this issue. Your software manual should be explain the process.The printing industry standard is production at 150 or 175 dpi to produce good quality reproduction of photos and halftones. This is the quality of most printed materials you come in contact with on a daily basis. The exception is newspapers, which are printed at or around 90 dpi. When you scan something at home it is not necessary to go beyond 150 dpi, especially if you intend to reduce it.
Photography and Digital Photography
This is an excellent way to capture images for labels, boxes, posters, signs, etc. Below are a few basic tips to good photography for these types of projects. Take photos "head on" or "flat" so not to skew it at an angle. For small items, if possible, use a contrasting backdrop to make the object stand out. A towel or sheet makes a great backdrop. A backdrop creates hard defined edges making it easier to cut out the final product digitally or with an x-acto knife. Use a tripod or a table edge, the back of a chair, stabilize your body against the wall to avoid shaking the camera. A stable camera is essential when taking close-ups. If nothing else is available, tuck and lock your elbows into the side of your body take a few deep breathes to oxygenate your blood, exhale snapping the photo half way through your breathe. Lighting is always important. It can accentuate or obscure details. Avoid fluorescent lights, as they do not reflect color properly. Mother nature provides the best lighting available to most of us.Printing and Paper Stock
Ink jet printers do an excellent job for home production. I would recommend an Epson, as they have some of the best printers on the market. A good quality printer will run $150, not a bad price for those who demand good printing.I would advise you to stick with the paper products and manufacturers inks specifically created for your printer. The papers are electrostatically charged and are designed to work best with the printer. Speaking from experience, using other materials could ruin a printer. I prefer to use a heavy weight matte photo paper. The print quality is extremely high. The other benefits working with the heavier weight is the abilities to withstand gluing and weathering with a number of different mediums. If the thickness for scale is of concern, gently sand it with fine sand paper.
All printers and associated software seem to be unique in their menu functions and options. I recommend that the slowest setting be used. Many also have the options built in to the print menu for paper quality, and dpi settings, your setting should be no less than 1440 dpi.
The Easy Way Out
For those of you that don't have the time or the equipment to do this, don't despair. There are After Market companies who produce these items. You may have seen a review of the supply, ration, and medical boxes by St. George Design; see it here. These designs and many more items will soon be available under the banner of St. George Design. Another method of obtaining "printables" is to use a freelance service. Feel free to private message me with questions or inquiries about freelance options.Comments
Paul thanks for sharing ure precious knowledge on the field.
Scott thanks for doing the rest!!!!
DEC 21, 2004 - 08:26 PM
Copyright ©2021 by Paul Rains. Images and/or videos also by copyright holder unless otherwise noted. The views and opinions expressed herein are solely the views and opinions of the authors and/or contributors to this Web site and do not necessarily represent the views and/or opinions of Armorama, KitMaker Network, or Silver Star Enterrpises. All rights reserved. Originally published on: 2004-12-21 00:00:00. Unique Reads: 14396


