

1⁄35Tamiya's new M151 kits
20
Comments
The builds
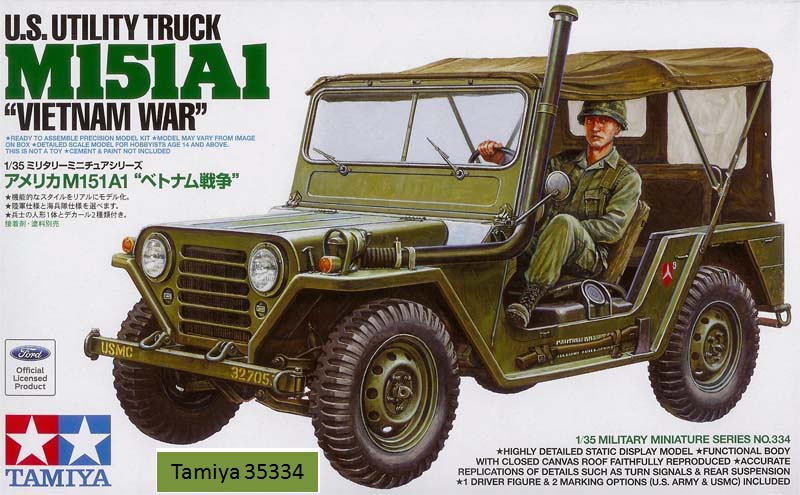
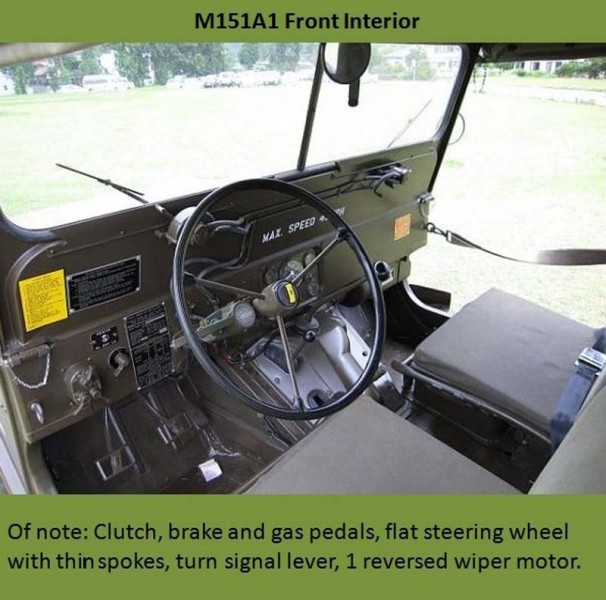
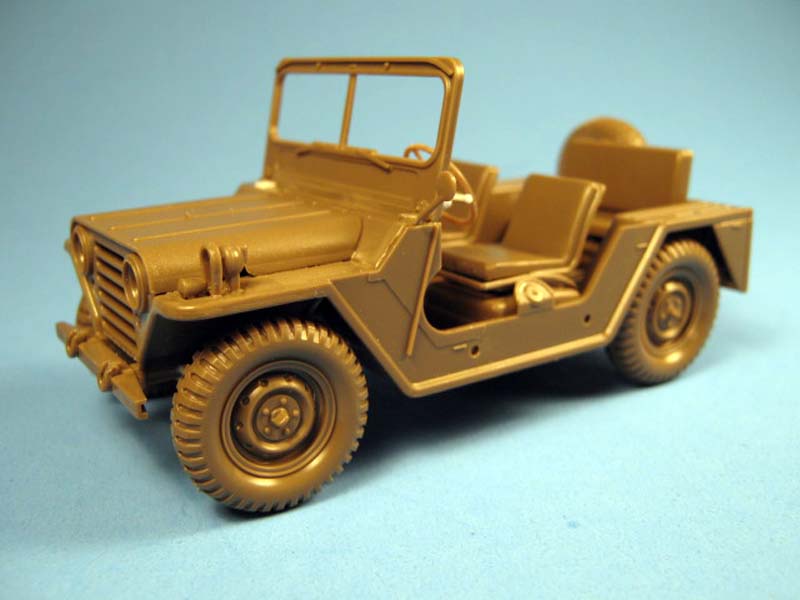
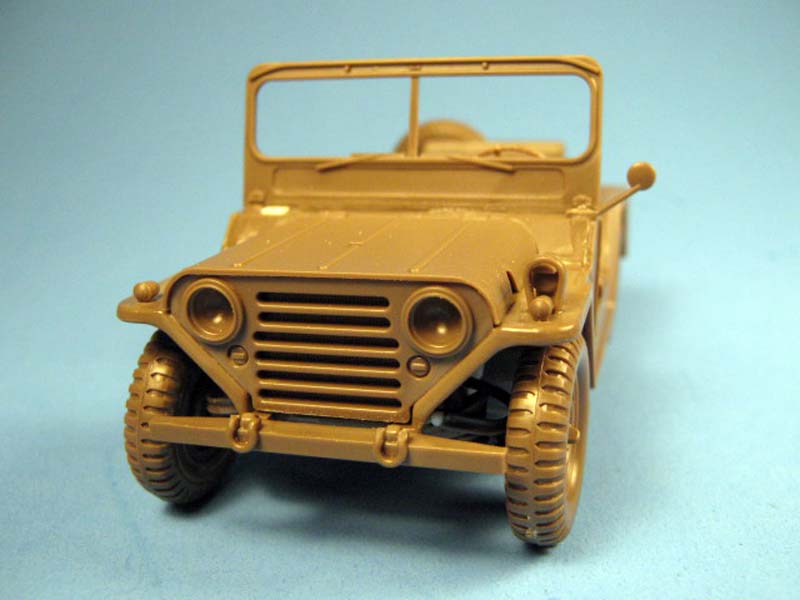
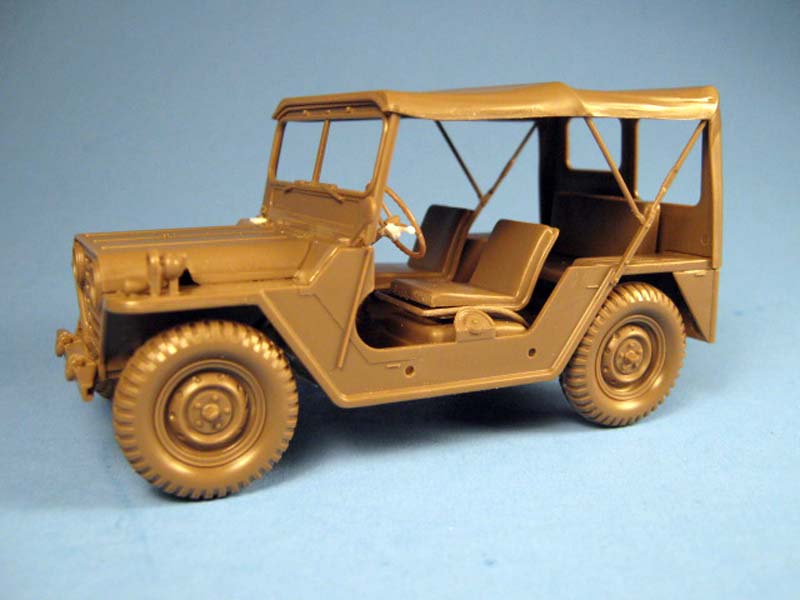
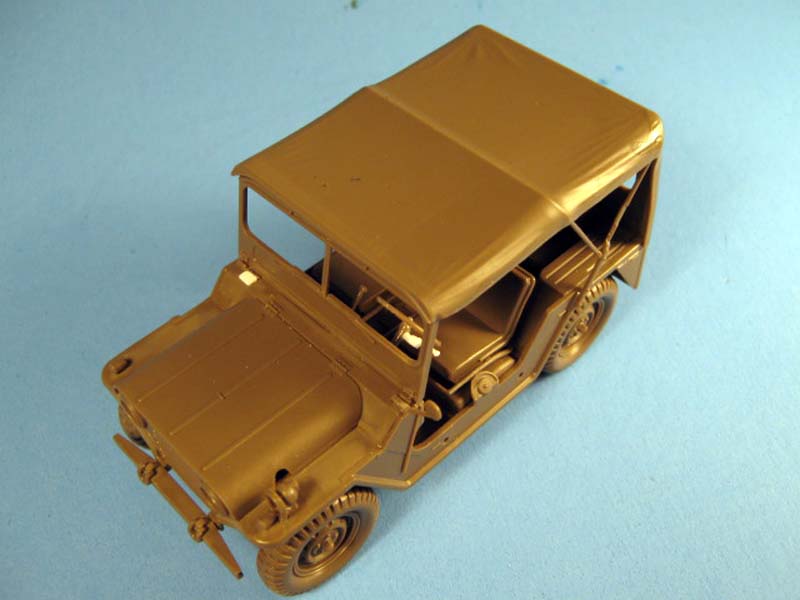
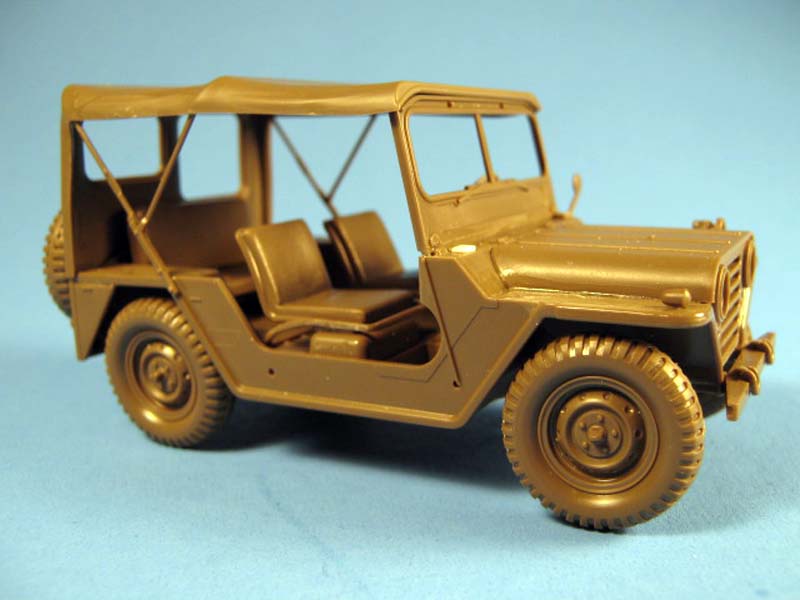
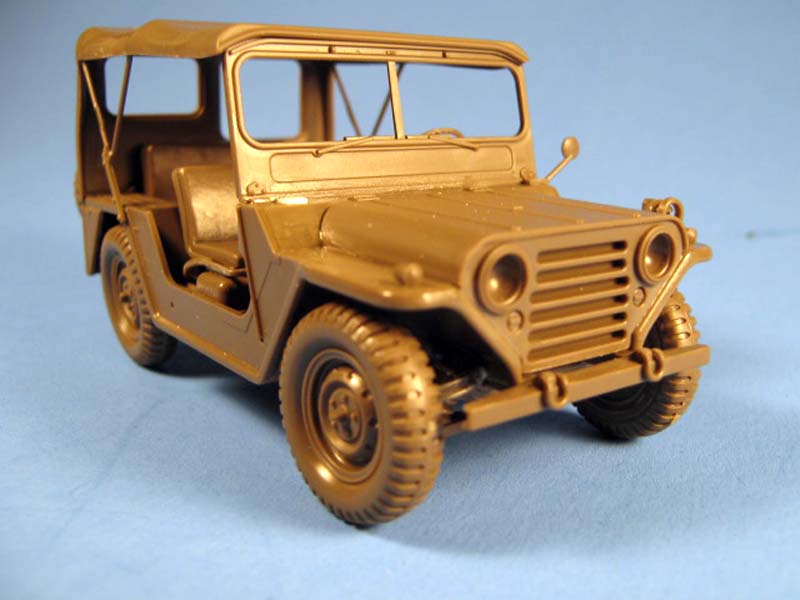
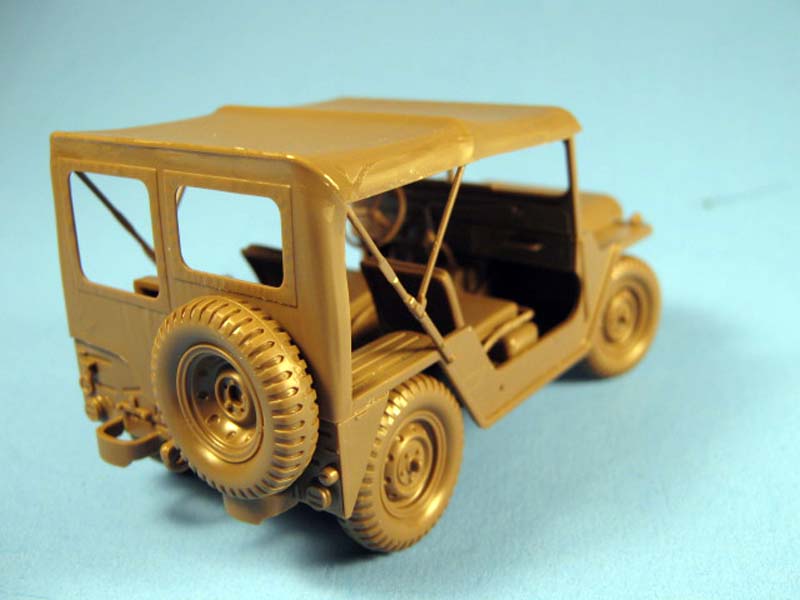
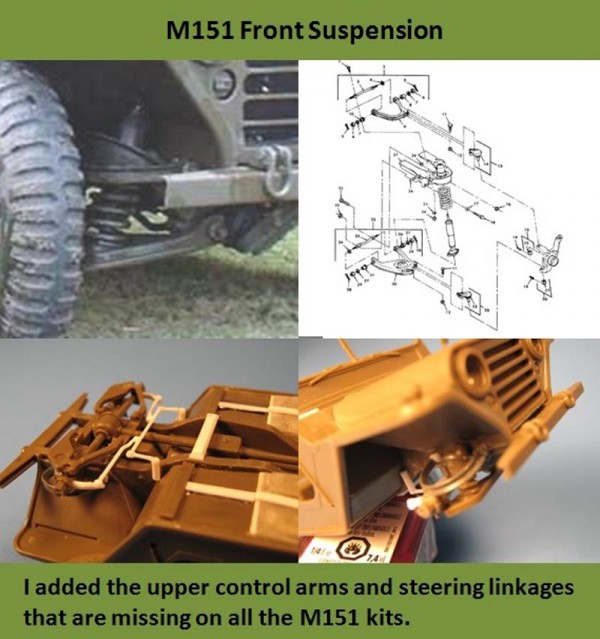
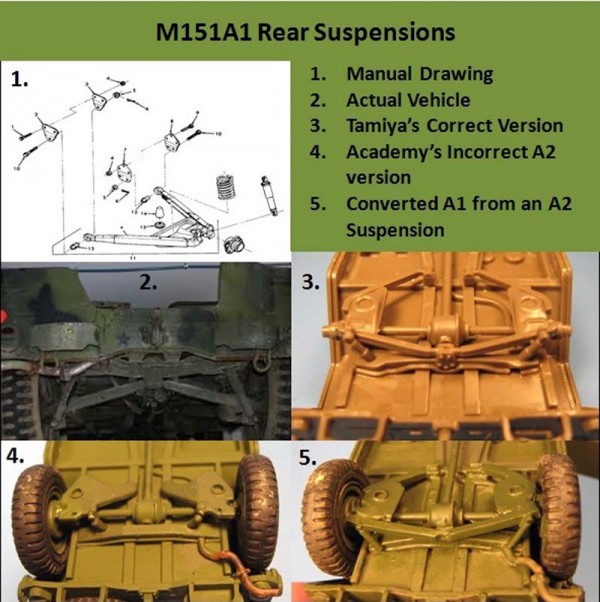
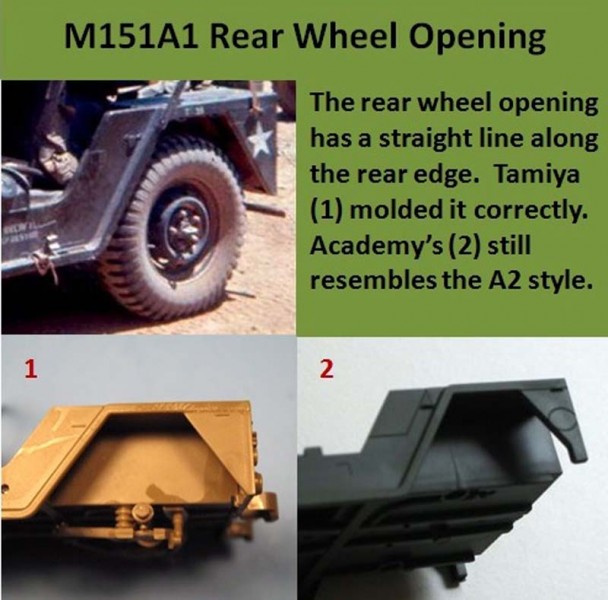
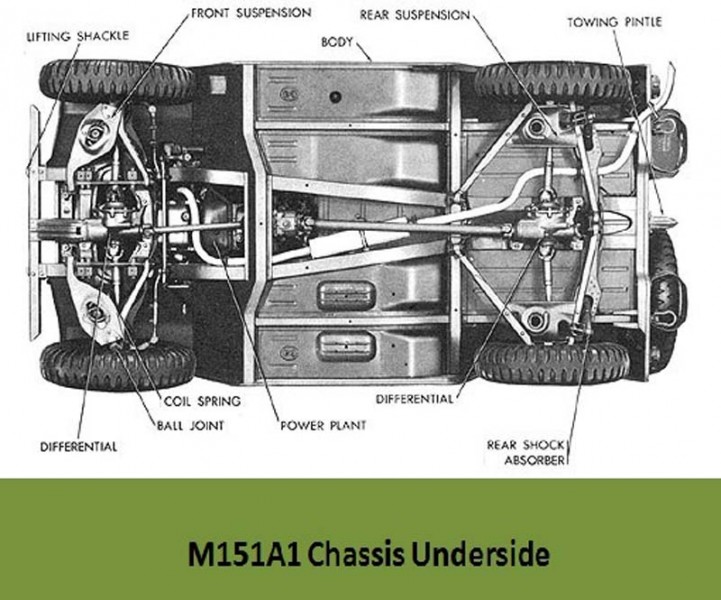
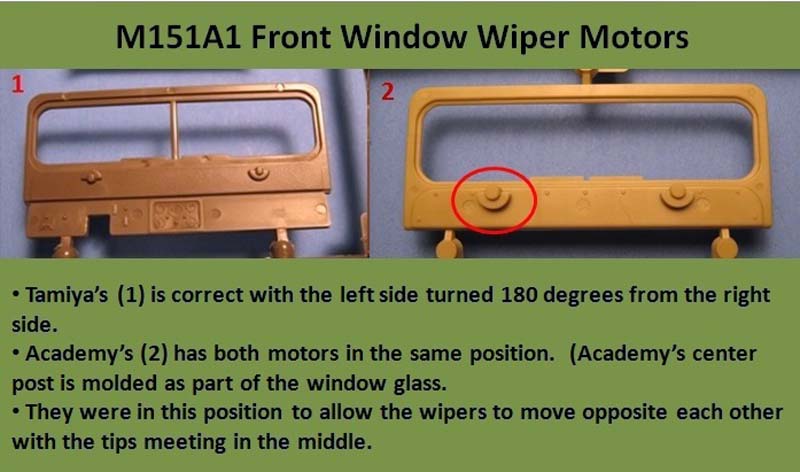
M151A1s (Tamiyaa 35334 and Academy 13003, I will not talk of the M106 RR parts for the Academy kit) Steps 1 and 2 The Tamiya kit has you start with the building of the multi-piece body. You have to add the side pieces and a choice of separate rear fenders to build either a USMC vehicle with rear lifting ring/tie down points or an Army vehicle with a smooth rear fender. You also build the rear plate by adding the bumpers and tow pintle, then mate all these pieces to make the body tub. Academy starts by building the very detailed engine and adding it to the one-piece body tub. The Academy body has a flaw in the rear wheel opening by having a squared off area behind the wheel. This area should be shaved and sanded to be a straight line from the top to the bottom of the wheel opening. Both body tubs are about the same level of detail with the Academy one having more details in the engine compartment. Both have the incorrect NATO slave cable adapter on the right engine cowl in the form of a raised square. These should be sanded flat for an early, Vietnam-era M151A1. Step 3 is identical in both kits by adding the rear axle, differential, and drive shaft assembly, front springs and cross member, and muffler parts. Step 4 is close in both kits as well. Tamiya has you add the correct trailing swing-arm suspension in the rear and an incomplete front suspension. Academy has you adding the identical, incomplete front suspension and incorrect A2 style rear cross member. Step 5 Tamiya builds and adds the tires and wheels. In the Academy kit, you continue adding the incorrect A2 style A-arm rear suspension parts, the rear bumpers, and tow pintle. Note 1 Rear Suspension. If you want to correct the rear suspension on the Academy kit, you can order another B sprue from Tamiya for the trailing swing-arm suspension part (B36) and rear cross member (B37). Another option is to modify the Academy kit parts to replicate the correct rear suspension. You can do this by cutting the A-arm suspension pieces (B1 and B2) into a triangle shape following the Tamiya parts and adding the square stock arms for the trailing swing-arm from sheet styrene. Attach these new parts in the same location as they go on the Tamiya kit and add bracket and bolt details and you will have a pretty good representation on the trailing swing-arm rear suspension of the M151A1. Also, on all the M151 kits, the rear suspension seems to sag and ride too low. This can be easily corrected by adding a 0.020 styrene disk under each rear spring along the underside of the body. This will give it enough lift to have the proper sit. Note 2 Front Suspension. All the M151 kits share identical front suspensions that are simplified and missing the upper A-arms, steering linkages, and tie rods. These can be easily added from sheet and rod stock styrene. For the upper A-arms, you can bend and fashion them from angle-iron styrene stock. Bend this into a semi-circle and add a piece of rod to close the open end. They should resemble a D shape. Glue these to the top of the front cross member and spring towers directly above the lower control arms. You can also add the steering linkage from the steering wheel to a steering gear box on the frame on the drivers side. Next, add the steering linkages from the steering gear box to the left wheel and the pitman arm from the right wheel to the frame. Lastly, add the tie rod to connect the two wheels so they turn together. Note 3 Underside of body. All M151 kits are incomplete on the undersides. The areas under the seats should have more details and a floor under each side. The floor should follow the curve of the frame and allows room for the fuel tank on the drivers side and the battery box on the passenger side. The floors can be added from sheet styrene with a couple strips of styrene for the frame rails and the swells on the bottom of the battery compartment. See the M151A1 and M151A2 Chassis Underside pictures for details. Step 6 differs again. In the Tamiya kit you build the front bumper. Tamiya gives you the option of either a straight, square-stock USMC bumper, or the C channel shaped US Army bumper. On the Academy kit, you add more details to the engine compartment including the air cleaner, which is missing the hose from it to the engine. It can be added with a small piece of solder. You also start adding the 106mm RR parts. Step 7 is close on both as well. Tamiya has you flesh out the drivers area with seats and control leavers and adds the front grill. The grill is peculiar though, it has nicely hollowed out headlights, but solid green lenses for them. I replaced them with left over clear lenses from another kit. Academy has you add the seats, radiator, and blackout light as well as the fuel filler as a separate piece, while it is molded as part of the body side panel in the Tamiya kit. Step 8 deviates between the two. On the Tamiya kit, you build the front windshield with the correctly oriented pneumatic wiper motors, one being rotated 180 degrees from the other so they work opposite each other. You also add the steering column and steering wheel. Here it shows you adding the decals to the instrument panel gauges and placards. They should be left until after painting though. Academy has you add the shift lever and transfer case control levers and more RR parts in the rear. Note 4 Interior details. Tamiya has most of the interior details correct. They are still missing the clutch, brake, and gas pedals though. These can be made out of thin wire fashioned into squares for the clutch and brake and the gas pedals. Academys wiper motors are incorrect as both are in the same position. The steering columns on both are missing the turn signal arm on the left side. It can be made from a square block of styrene on the column, and a thin piece of styrene rod coming off of it to make the arm. The steering wheel in both A1 kits is also incorrect. It is an A2 wheel. The A1 steering wheel was more flat and had 3 small, wire spokes, more like an older Willys MB wheel. I replaced the kit wheel with one from the Bronco GPW kit, which has two wheels in it in two different styles. Both Academy and Tamiya provide decals for the gauges on the instrument panel. Academy also represents the gauges with individual tick marks and indicator pointers nicely molded into the panel. See the M151A1 and M151A2 Front Interior pictures for details. Step 9 is again different. On Tamiyas you add the incorrect, dished steering wheel. Attach the front hood/cowl/windshield assembly, and add the shovel to the right side. The shovel could do with a mount on the front and a strap to hold the rear on. As is, it just hangs there magically. On Academys kit, you add the front bumper, 5-piece rubber wheels/tires, instrument panel, cowl and a couple handles as part of the RR set-up. Note 5 Tires. Academys rubber tires, to me look too narrow, flat across the top, and small. They dont represent the uni-directional mud tires that were used on M151s well. In my opinion, the Tamiya plastic tires look much better. Step 10 Again differing greatly between the two kits. Tamiya has you add just the two-piece rear seat. This part is another weakness of the kit. The large drums that are the base should be removed. The actual seat was attached to the insides of the wheel wells with small brackets that can be replicated with a couple rectangles of 0.020 styrene placed on the inner wheel wells for the bottom of the seat to rest on. Academy has you add the spare tire, side mirror, radio parts, reflector, and axe, again needing a strap as it simply floats as in the Tamiya kit. Step 11 Tamiya has you build the very nice looking top and its supports, adding the small turn signals, mirror, black-out drive light, and building the gas can. Academy has you add the front windshield, incorrect steering wheel, steering column without turn signal lever, a couple pieces in the engine compartment (fuel filter and horn), and incorrect NATO slave cable adapter which should be sanded smooth for an M151A1. Step 12 For Tamiya, you add the gas can and spare tire to the rear to finish off an Army vehicle. You can also add the optional extended exhaust for a vehicle outfitted with a deep water fording kit, common on USMC vehicles. Academy has you add the separate hood (with a decal on the underside) and the T-bar hood hold downs (which are absent from the Tamiya kit). At this point, the basic Academy M151A1 is complete. Academys basic M151A1 kit also shows the folded bows for the top and has an M60 MG on a pintle mount to add. No rear seat is included. The remaining steps are use to build the Recoilless Rifle tray insert and its specific parts. Step 13 is only in the Tamiya instructions and is for a USMC M151A1. Here you add the front tie-down rings on the front bumper and a deep water fording snorkel for the air intake. This completes the build of Tamiyas M151A1 kit.M151A1 Conclusion
Overall, the Tamiya kit builds into a very nice representation of an M151A1 as seen in the Vietnam War. It has the correct trailing arm suspension for an A1, unlike Academys M151A1 kit which retained the A2 suspension parts. However, Academys is better detailed and has many small details that Tamiya is lacking. Most can be easily fixed or added. Also, both kits include parts for pintle-mounted M60 machine guns and ammo boxes for them. Academys is slightly better and more in scale. Tamiyas is left over from the original A2 kit and is too big and not well detailed. Both kits are generally free of flash and go together well with no real fit issues or problems. Your best bet is to combine both kits and use the best features of each to build a very detailed, accurate M151A1.


About the Author


FROM: FLORIDA, UNITED STATES
Retired US Army Artillery Officer, currently a contractor at MacDill AFB in the Tampa, FL area. I have been modelling for the past 40+ years, really seriously on armor and large scale helos (1/32, 1/35) for the last 35 or so.
Comments
I hope that Tamiya provides you with the front upper suspension arm; they haven't done so in the past.
NOV 05, 2013 - 09:42 AM

Hi Chris - No the upper control arms on the front suspension are not included (they are not hard to scratch though). Only the rear suspension for the A1 has been corrected. The rest of the suspension on both the A1 and A2 kits are the same as in their earlier releases.
NOV 12, 2013 - 06:11 PM

I found the new Tamiya M151A1 kit on a recent trip to the hobby store. Having a price of $34.99 I will pass.
NOV 27, 2013 - 08:38 AM
That is nuts. Online supplier and eBay have it going for about $20, including shipping.
NOV 30, 2013 - 01:13 AM


I think that Tamiya is basing the Grenada version on a Ron Volstad painting in the Osprey Ranger book.
The painting is bad-ass. I did a version of it years ago when I was stationed in Germany.
The Tamiya kit is pretty lame compared to the painting. A couple extra dudes in Kevlar helmets and a couple M60s just ain't cutting it.
It is good to see these re-released, tho.
DEC 11, 2013 - 01:59 PM
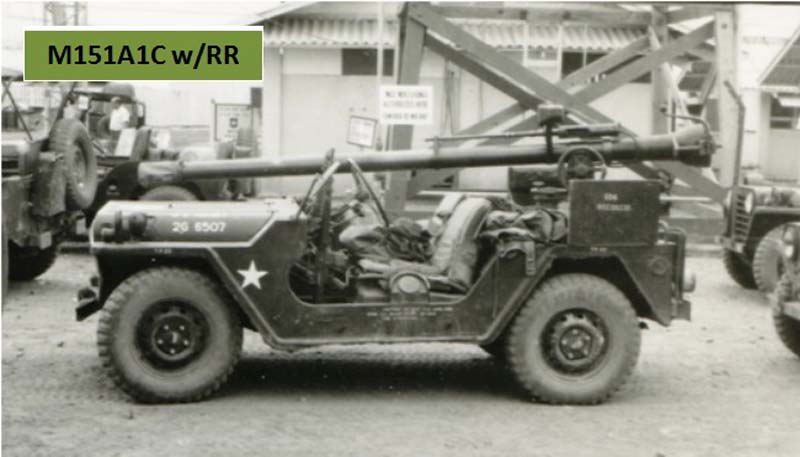
I haven't seen the Volstad painting, but the exact vehicle they based it on, down to the bumper numbers, is in this picture.

DEC 11, 2013 - 02:52 PM
I can't post a link to it, but if you google "ron volstad ranger jeep" in google images, it's the first one.
Four rucks on the hood, dudes in soft covers and old school NVGs. 60 on the pindel mount and one on a tripod on the front passengers lap.
Looks like the Tamiya has some cots lashed to the hood....
DEC 11, 2013 - 03:18 PM
 Similar, I still think it is based on the pic I posted. It has the same bumper numbers, same sand color, similar gear set-up, crew with Kevlar helmets, etc.
DEC 12, 2013 - 07:45 AM
Copyright ©2021 by Gino P. Quintiliani. Images and/or videos also by copyright holder unless otherwise noted. The views and opinions expressed herein are solely the views and opinions of the authors and/or contributors to this Web site and do not necessarily represent the views and/or opinions of Armorama, KitMaker Network, or Silver Star Enterrpises. All rights reserved. Originally published on: 2013-10-31 23:28:17. Unique Reads: 23407

WEB HOSTING BY


Copyright ©2021 Armorama and Kitmaker Network, a subsidiary of Silver Star Enterprises
All Rights Reserved. Please read our Conditions of Use and Privacy Policy.
All Rights Reserved. Please read our Conditions of Use and Privacy Policy.