

1⁄35Tamiya's new M151 kits
20
Comments
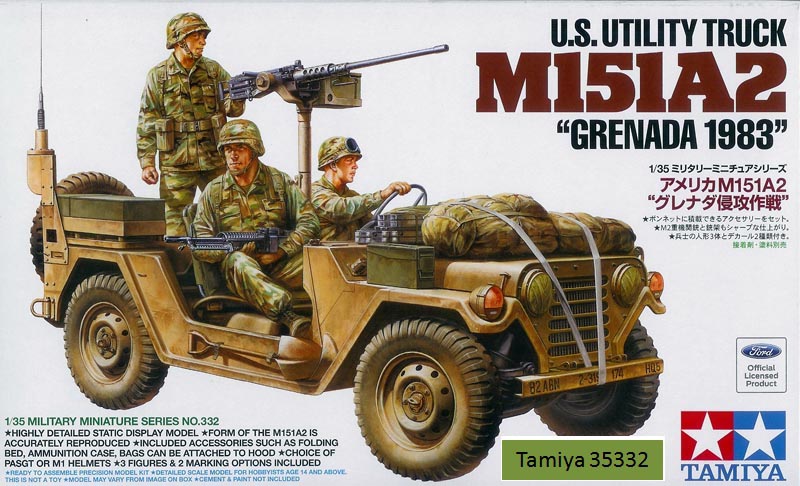
M151A2s (Tamiya 35332 and Academy 13012)
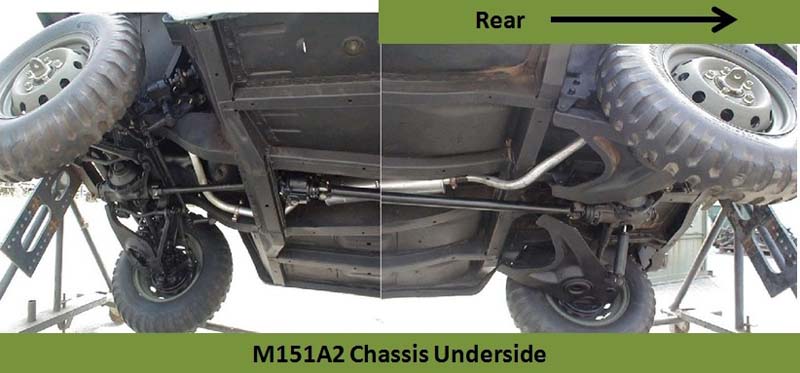
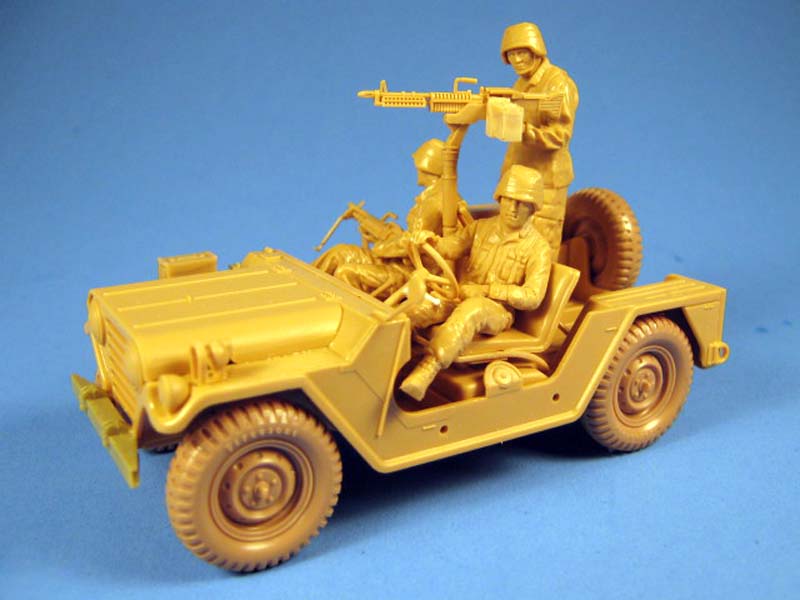
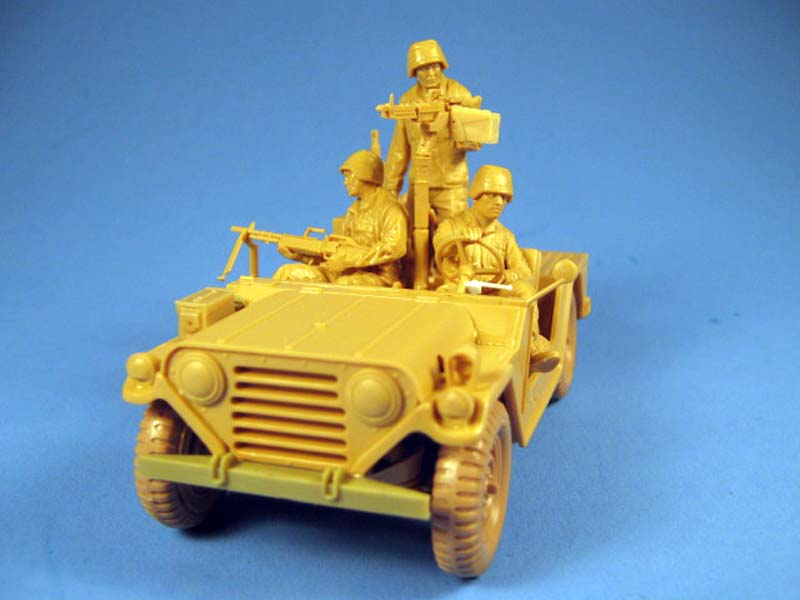
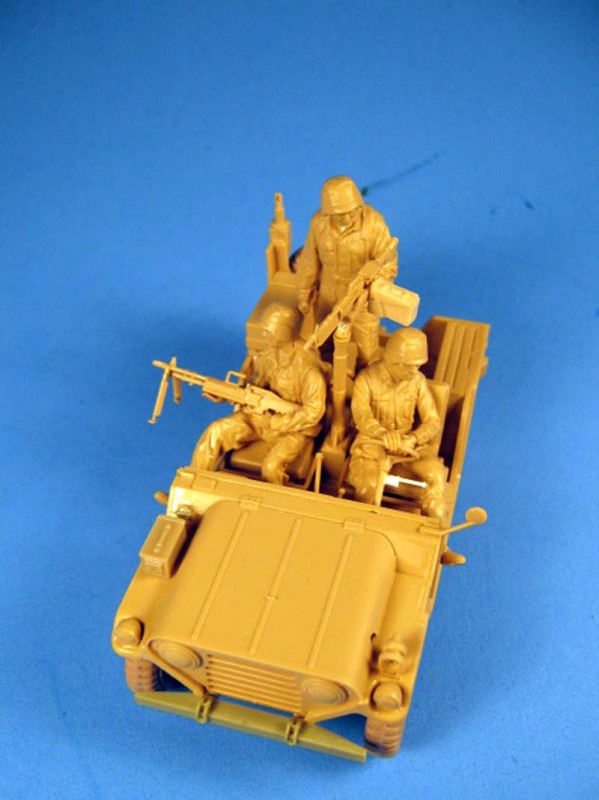
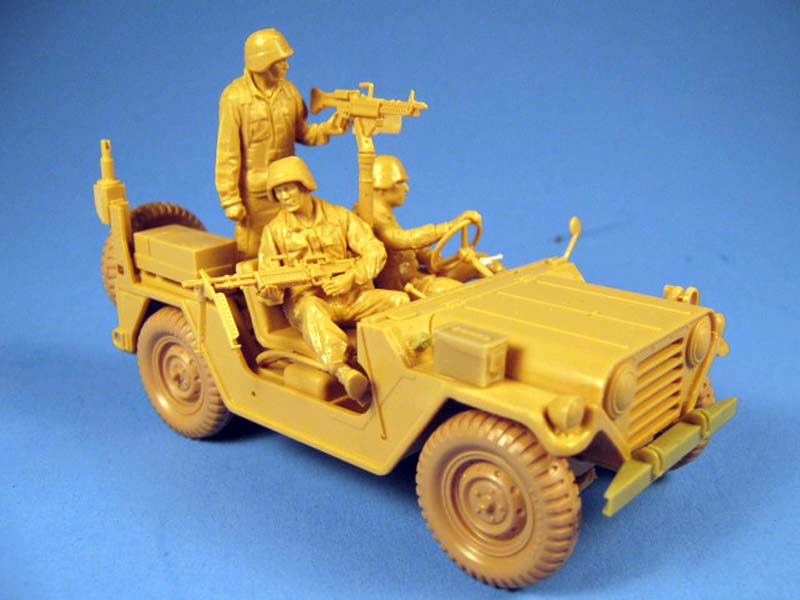
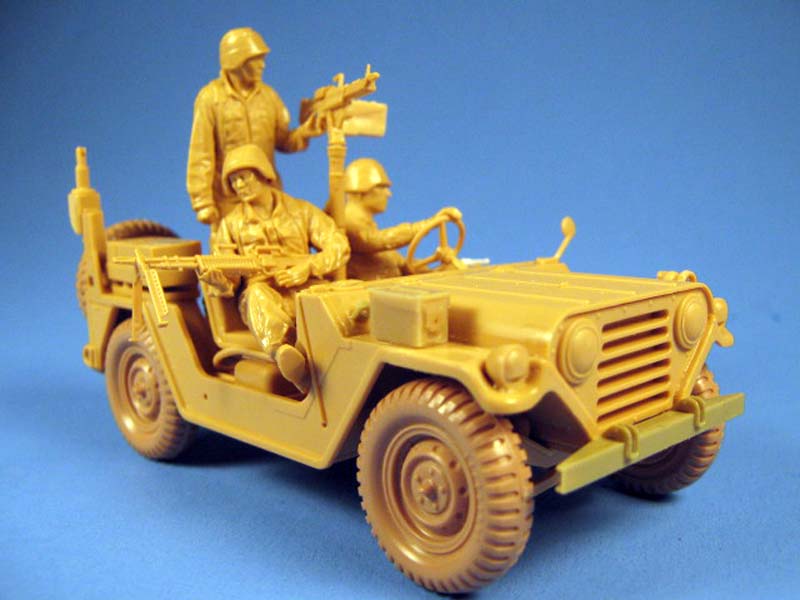
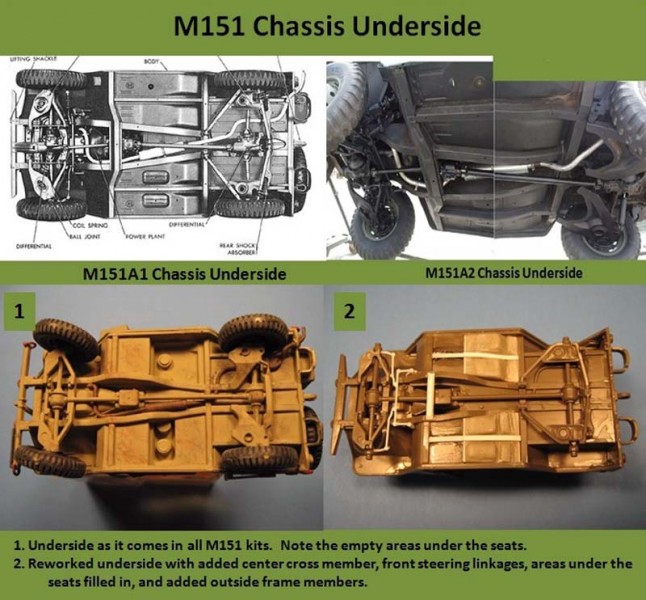
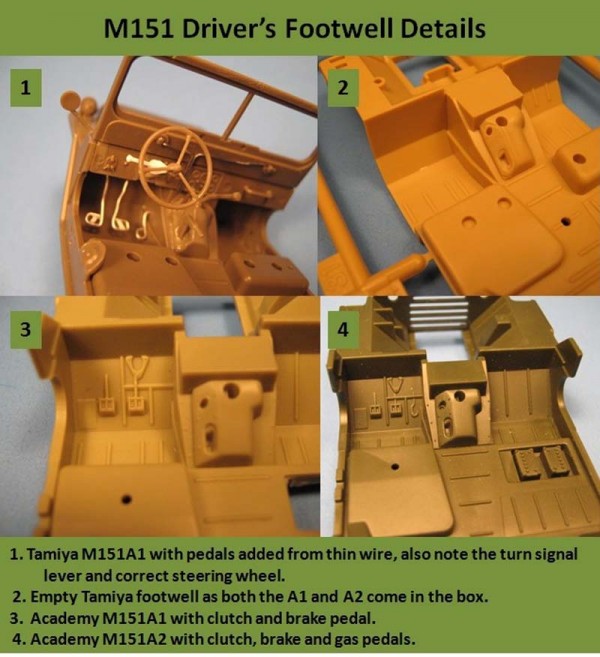
Step 1 On the Tamiya M151A2 kit, you start by building the body by attaching the side panels to the lower floor and front fender piece. You also add the rear plate with rear bumpers and tow pintle, and start on the suspension with the rear springs, front cross member, and lower engine piece. Academy has you build a very complete and well detailed engine here. Step 2 Tamiya continues with the suspension by adding the front and rear differential/axle combos, and the muffler. Also, you are instructed to cut the front bumper ends off at an angle to poorly represent the Army-style bumper. Their new M151A1 kit includes a very nice, separate bumper with the proper C profile. I dont understand why it wasnt included in this kit. I replaced the bumper with one from Academys M151A1. I replaced the bumper with one from Academys M151A1C kit, which I intend to build as a USMC vehicle. Academy installs the engine into the body/chassis in this step. Step 3 Tamiya finishes the suspension in this step with the addition of the incomplete front suspension and the rear A-arms. Academy begins their identical suspension build here by adding the front cross member, rear drive shaft/axle combo, and muffler. Step 4 Tamiya completes the suspension by building the wheels. Academy continues by adding the rear cross member, rear springs, front drive shaft/axle combo, and the rear plate with separate rear lights with clear lenses. Also added are separate rear tie-down rings. This is where the added details on the Academy kit start to show. Step 5 Tamiya adds the wheels here. Academy completes the suspension and rear plate by adding the front and rear A-arms and adding the rear bumpers. Also, you add the tow pintle and a separate piece for the safety chain connections around the tow pintle. Once again, more details than the Tamiya kit. See above notes 2 and 3 for corrections that can be made to the undersides on both kits at this stage. The A2 suspension is moderately well represented by both kits, but can be improved upon. Step 6 Tamiya starts on the interior with the addition of the shift lever, hand brake, and transfer case lever. I also added the gas, brake, and clutch pedals from thin wire. You also add the seats, front grill, and axe onto the side. Again, Tamiya could have updated the front grill in the same way they did on the M151A1 kit with hollowed out headlights. Lastly, the axe could use a couple retaining straps to hold it on. Academy has you build basically the same parts with a couple more parts in the engine compartment (air cleaner and headlight backs) and the seats, also with added seatbacks for more details. Of note, the air cleaner is missing the hose from it to the engine, easily rectified with a bit of solder. Step 7 On Tamiyas kit, you only add the dash board to the engine cowl here. The steering column, again without turn lever, is added and a hand-hold on the dash. I made the turn lever out of sheet and rod styrene. Academy adds the shift lever, hand brake, and transfer case lever, along with the separate fuel filler cap, and blackout light. Also added are the separate C profile bumper, the radiator, front tie-downs, and the tires. Step 8 Tamiya mounts the front hood/cowl assembly and the steering wheel, along with adding the shovel, which again needs a strap and holder at the front so it doesnt magically hang on the side. Of note, there is no NATO slave cable receptacle even though there is a plate and indent for it on the cowl and all M151A2s had them installed and the earlier Tamiya M151A2 w/trailer and M151A2 TOW kits had the adapter part. I replaced it with the left over one from Academys M151A1 kit. Academy continues with smaller details by adding the dash board (with the nice addition of a map light added to it on the passenger side), cowl, rear antenna and mounting bracket, front turn signals with separate clear lenses, and the shovel and axe (both needing straps and brackets as Tamiyas do). Step 9 Tamiya adds the wire cutter to the front bumper for the Ranger version, front turn signals, and blackout drive light on the left fender. Academy adds a few more detail pieces to the engine compartment, the spare tire on the rear plate, the NATO slave cable adapter (missing in Tamiyas kit,) to the cowl, correct dished steering wheel, and a storage box behind the drivers seat. Step 10 On Tamiyas kit, you build the antenna and bracket, radio, and gas can. Academy has you add the front hood with T hold downs (missing from Tamiya), front window with wiper motor, storage bags, and mirror. You also add the lenses for the headlights here. Step 11 In the Tamiya kit, you now attach the spare tire, gas can, radio, antenna mount, and the base for the MG pintle. Academy gives you the option in this step to complete the model as an open top version by adding folded bows for the canvas top and a wire cutter for the front bumper. Step 12 Tamiya continues with building the ammo can and .50 cal MG for the pintle mount. A note here, this is not very accurate as the standard gun for the M151 was an M60 MG. The .50 cal was not used due to the heavy recoil tended to crack the frame. The original M60 pintle and mount are still in the kit. I recommend cutting off the old pintle and using the new version pole with one of the new M60 MGs off of the Y sprue. Academy has you build the radio for this step. Academys radio is quite nice, much better than the Tamiya offering of the same. Step 13 Tamiya mounts the .50 cal MG here. I skipped this step. Academy has you mount the radio and a gas can, and also build and mount a nice M60 MG. This completes the standard, open-topped M151A2 for the Academy build. The remaining steps cover the hard top version and the M416 trailer. The parts and version are nice and unique. The hard top is well build and looks good. Likewise, the trailer is as detailed as the jeep and compliments it well. Step 14 Tamiya concludes its build here with the construction of the figures and the addition of accessories like the ammo cans, bags and cots on the hood, and shows where to add a strap to hold the gear on.M151A2 Conclusion
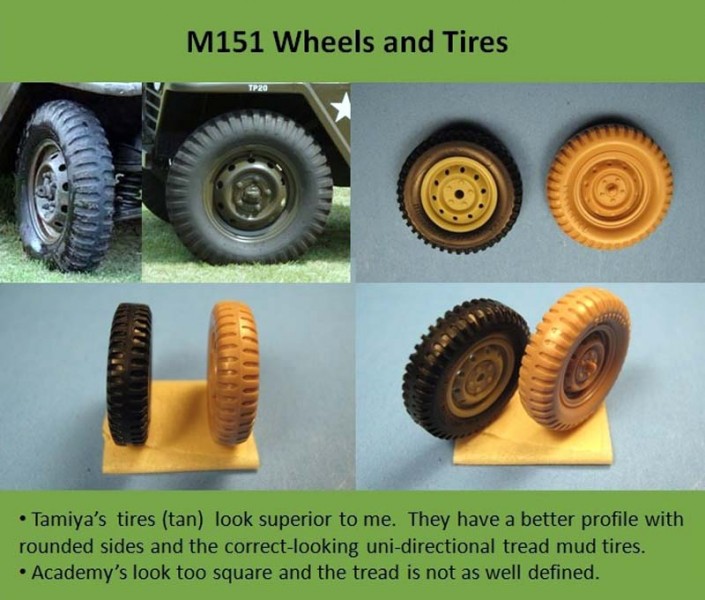
Overall, both M151A2s are pretty accurate representations of the vehicle. The Tamiya one is nice due to the new sprues that give it the crew and gear for a vehicle that took part in the Grenada invasion of 1983. However, with the exception of the wheels, the Academy one is better detailed and has more features.Overall Impression
The new Tamiya M151s are a nice addition to the jeep timeline. The M151A1 is really nice with the correct rear suspension and a nice canvas top. The M151A2 kit builds up into a nice representation of an early 1980s version that took part in the invasion of Grenada in 1983. The new figures in the kit are really nice as well. You can easily see the similarities between the Tamiya and Academy kits. It is easy to tell that the Academy M151s came from the original Tamiya M151A2 kit. They share many parts, and inaccuracies, in common. I recommend using the updated parts from the Tamiya kits with the Academy kit, along with Tamiyas wheels to make a hybrid vehicle that is better than either of the kits is on its own. Both can use upgrading and added details to make a really good M151. M151A1 Vietnam War Live links M151A2 Grenada 1983 Live links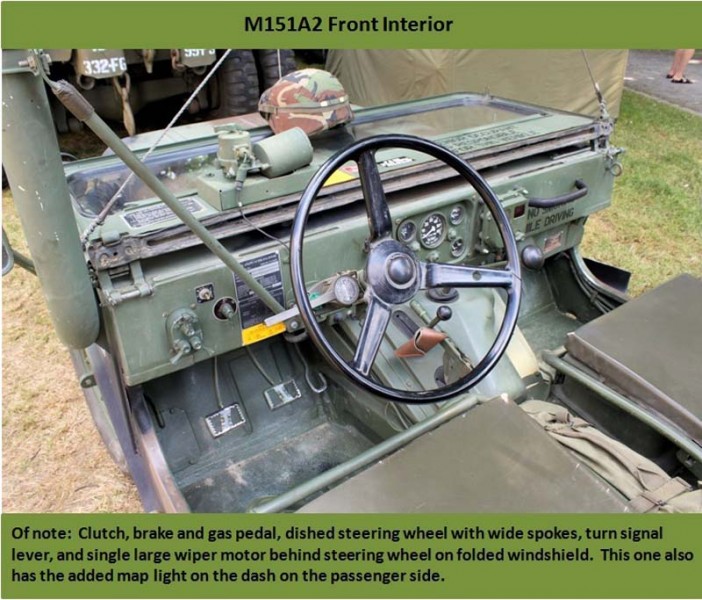


About the Author


FROM: FLORIDA, UNITED STATES
Retired US Army Artillery Officer, currently a contractor at MacDill AFB in the Tampa, FL area. I have been modelling for the past 40+ years, really seriously on armor and large scale helos (1/32, 1/35) for the last 35 or so.
Comments
I hope that Tamiya provides you with the front upper suspension arm; they haven't done so in the past.
NOV 05, 2013 - 09:42 AM

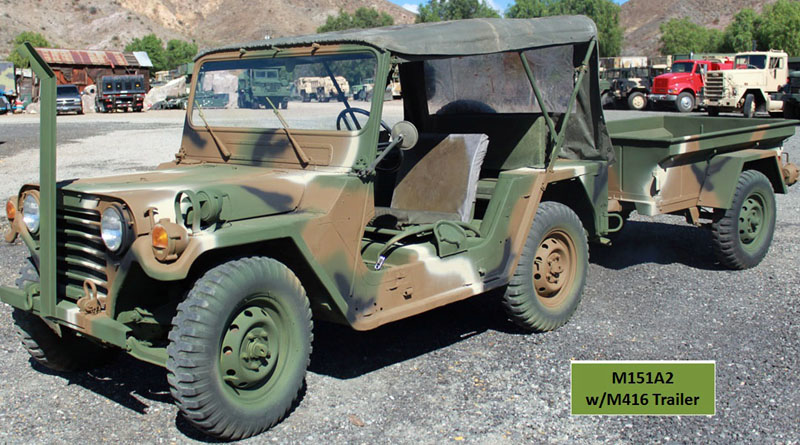
Hi Chris - No the upper control arms on the front suspension are not included (they are not hard to scratch though). Only the rear suspension for the A1 has been corrected. The rest of the suspension on both the A1 and A2 kits are the same as in their earlier releases.
NOV 12, 2013 - 06:11 PM

I found the new Tamiya M151A1 kit on a recent trip to the hobby store. Having a price of $34.99 I will pass.
NOV 27, 2013 - 08:38 AM
That is nuts. Online supplier and eBay have it going for about $20, including shipping.
NOV 30, 2013 - 01:13 AM


I think that Tamiya is basing the Grenada version on a Ron Volstad painting in the Osprey Ranger book.
The painting is bad-ass. I did a version of it years ago when I was stationed in Germany.
The Tamiya kit is pretty lame compared to the painting. A couple extra dudes in Kevlar helmets and a couple M60s just ain't cutting it.
It is good to see these re-released, tho.
DEC 11, 2013 - 01:59 PM
I haven't seen the Volstad painting, but the exact vehicle they based it on, down to the bumper numbers, is in this picture.

DEC 11, 2013 - 02:52 PM
I can't post a link to it, but if you google "ron volstad ranger jeep" in google images, it's the first one.
Four rucks on the hood, dudes in soft covers and old school NVGs. 60 on the pindel mount and one on a tripod on the front passengers lap.
Looks like the Tamiya has some cots lashed to the hood....
DEC 11, 2013 - 03:18 PM
 Similar, I still think it is based on the pic I posted. It has the same bumper numbers, same sand color, similar gear set-up, crew with Kevlar helmets, etc.
DEC 12, 2013 - 07:45 AM
Copyright ©2021 by Gino P. Quintiliani. Images and/or videos also by copyright holder unless otherwise noted. The views and opinions expressed herein are solely the views and opinions of the authors and/or contributors to this Web site and do not necessarily represent the views and/or opinions of Armorama, KitMaker Network, or Silver Star Enterrpises. All rights reserved. Originally published on: 2013-10-31 23:28:17. Unique Reads: 23407

WEB HOSTING BY


Copyright ©2021 Armorama and Kitmaker Network, a subsidiary of Silver Star Enterprises
All Rights Reserved. Please read our Conditions of Use and Privacy Policy.
All Rights Reserved. Please read our Conditions of Use and Privacy Policy.