

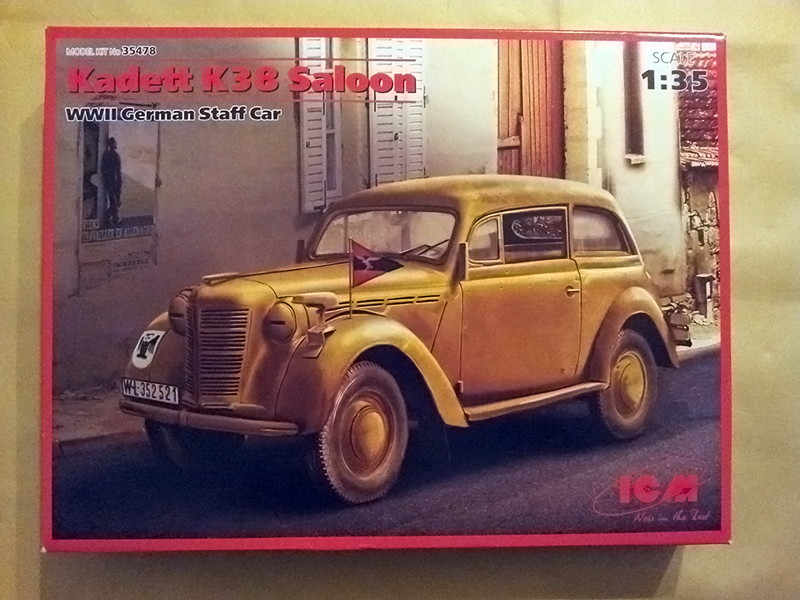
1⁄35Opel Kadett K38 Build
6
Comments
Introduction
The following is a build log of ICMs Opel Kadett K38 that was written by Robert Blokker and which was reviewed by Robert at the beginning of january. There is a link to that review at the end of this build feature. Aside from a normal build I thought it would be good to show everything from start to finish with painting and weathering covered. I will not go into the historic background of the vehicle; or what you get on the sprues. All of that information can be found in the review; but I made some comments that there were certain things I had no answer to at the time of writing. This had mostly to do with the way ICM made the sprue-layout. It was not easy to determine how accurate it was dimension wise. Nor could I comment on areas in which I expected problems during the build. But since I have now built the kit I can go deeper into those issues. And my findings are below.The build
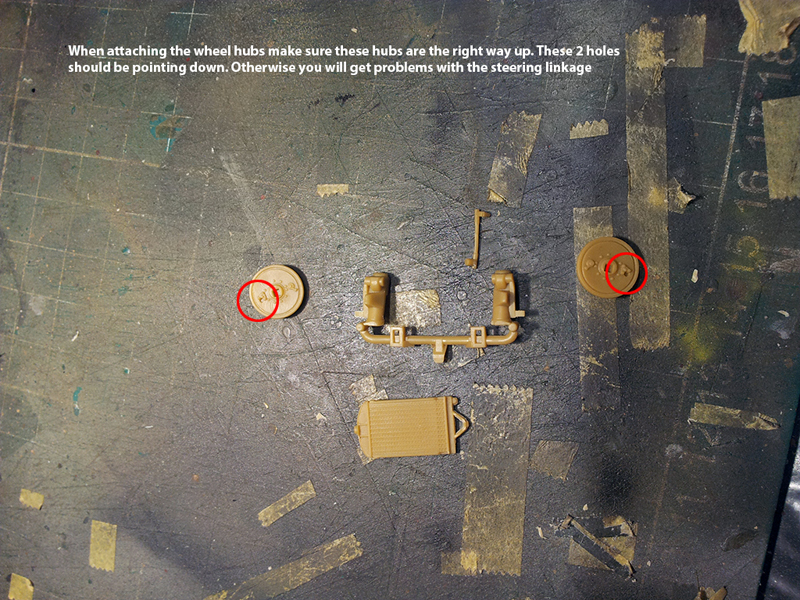
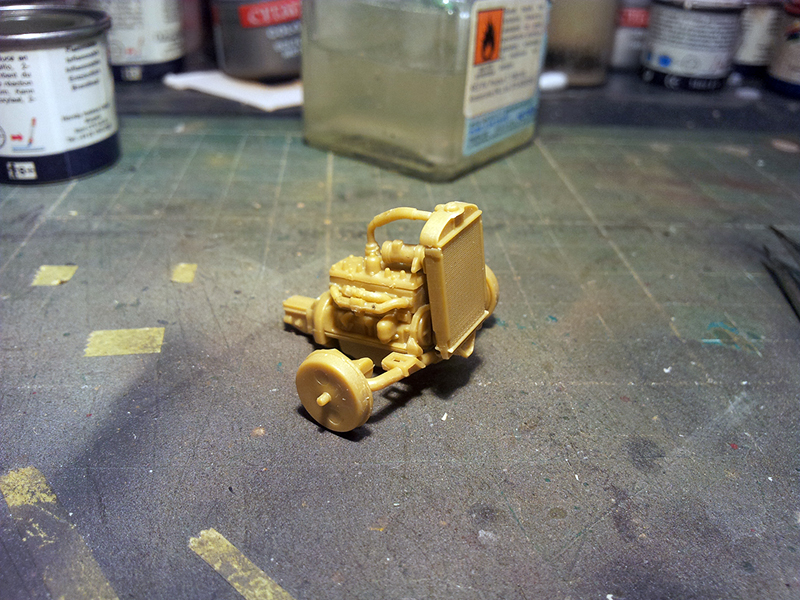
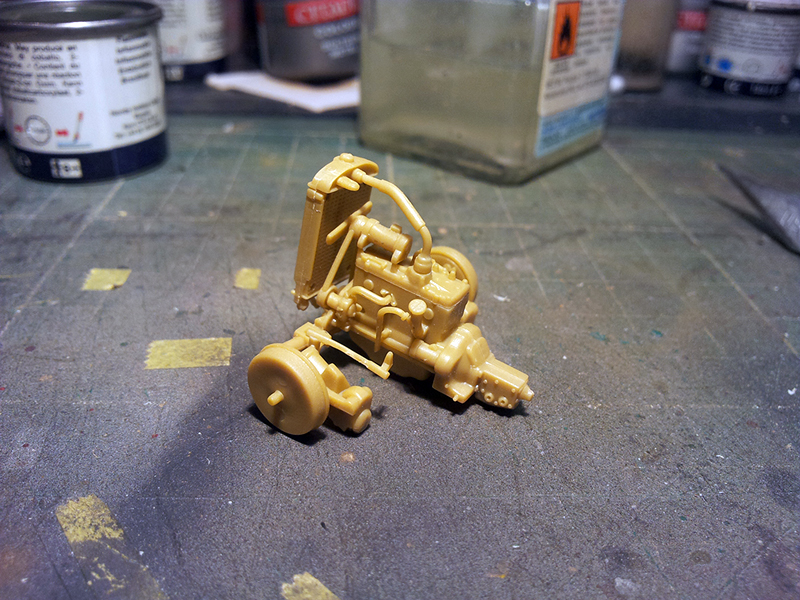
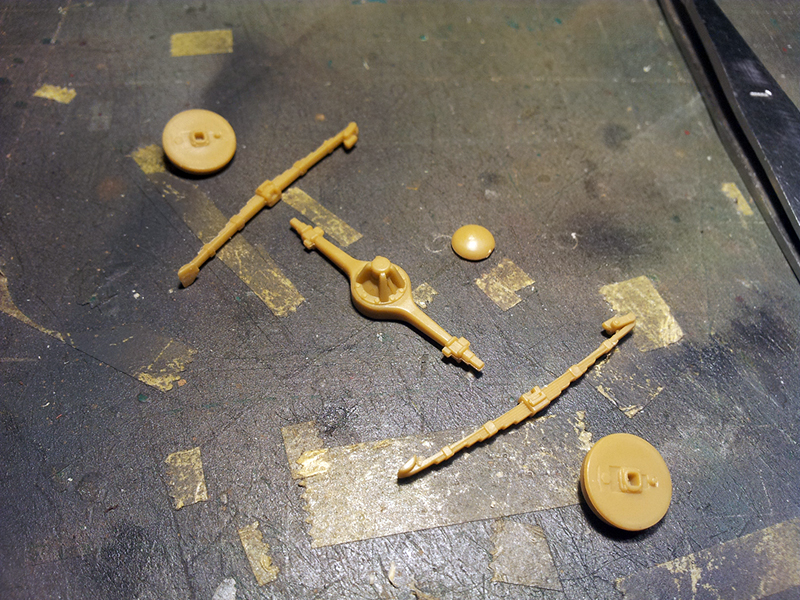
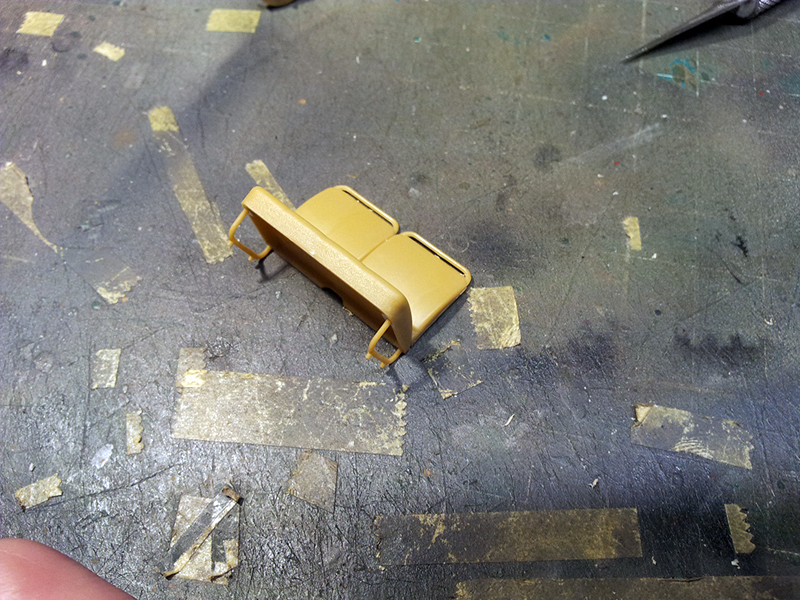
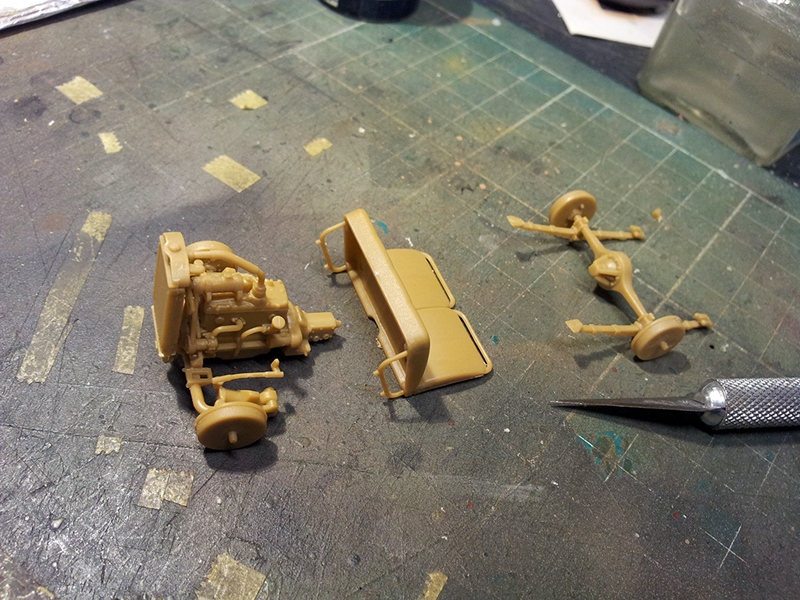
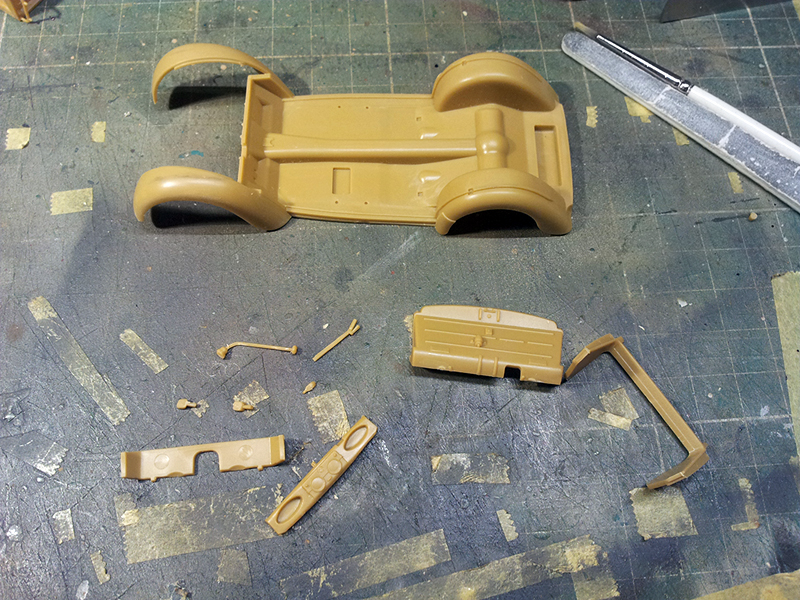
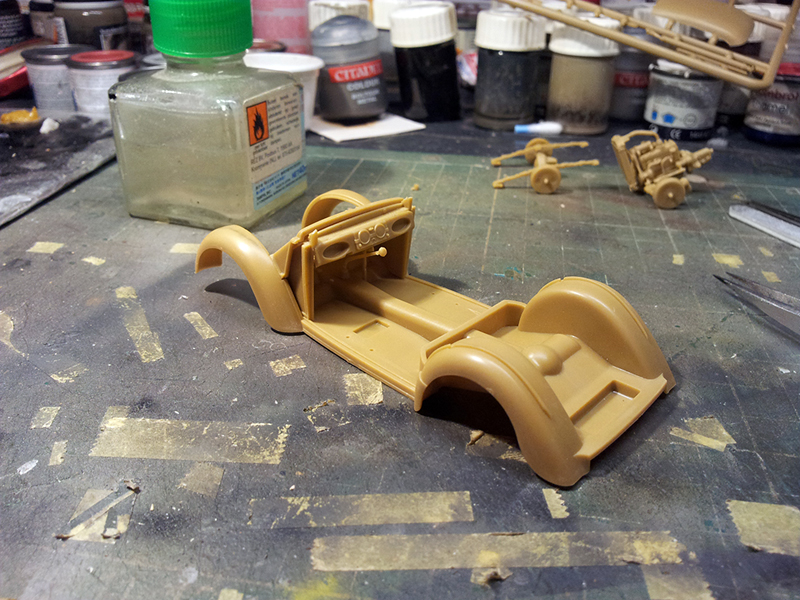
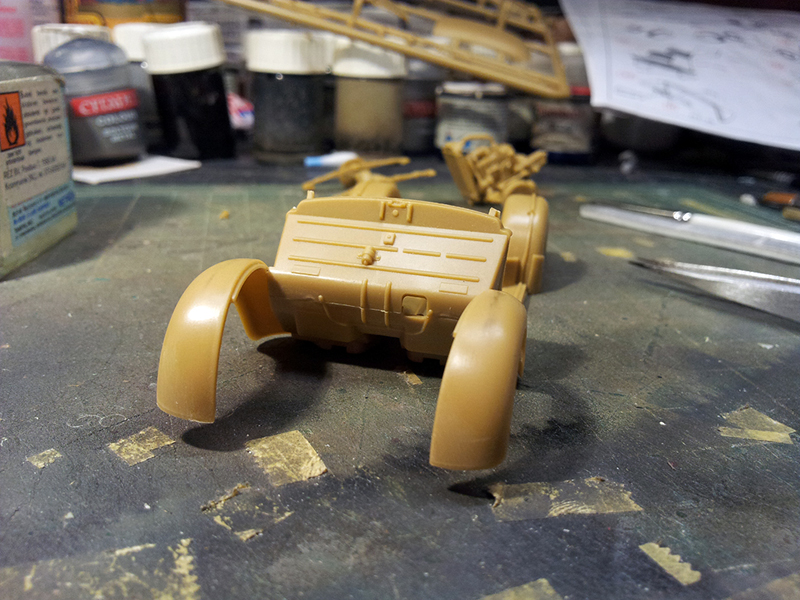
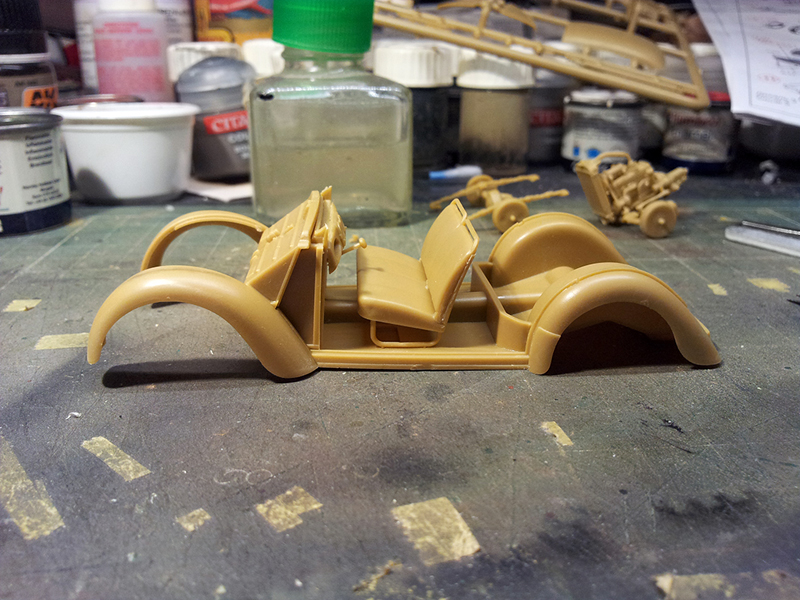
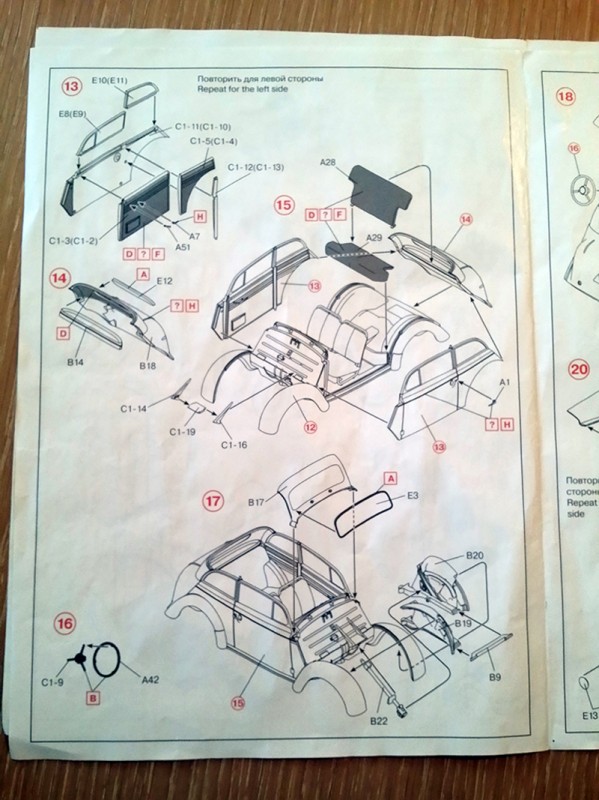
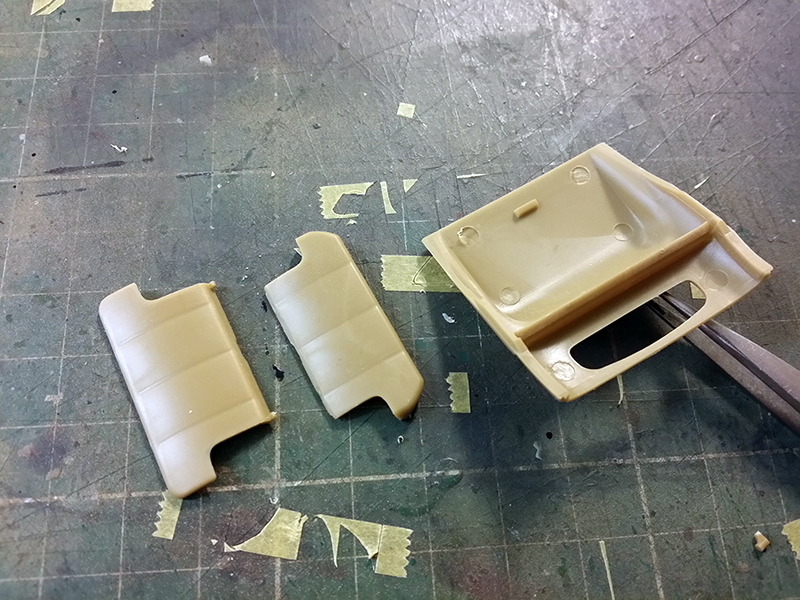
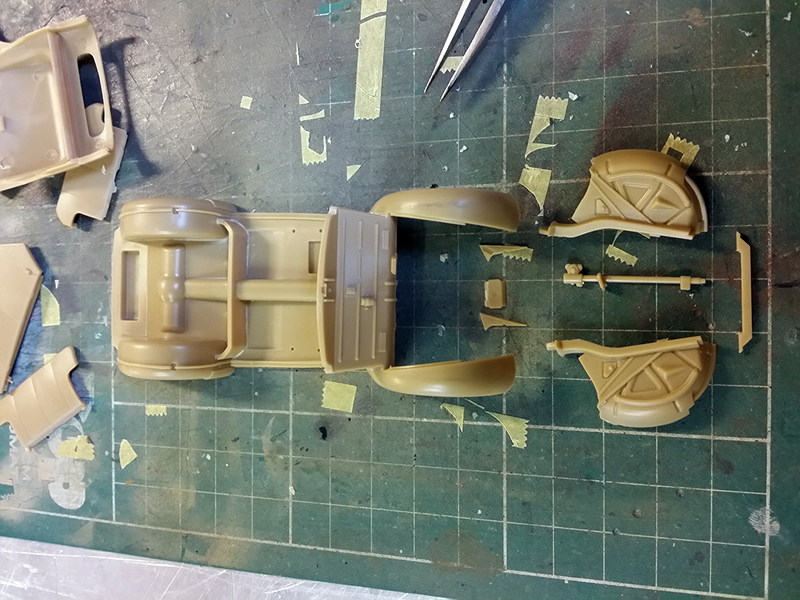
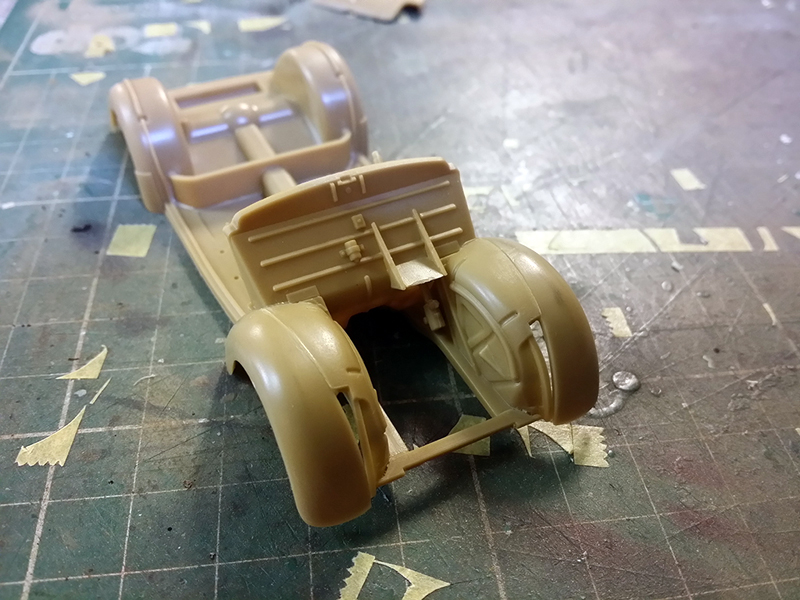
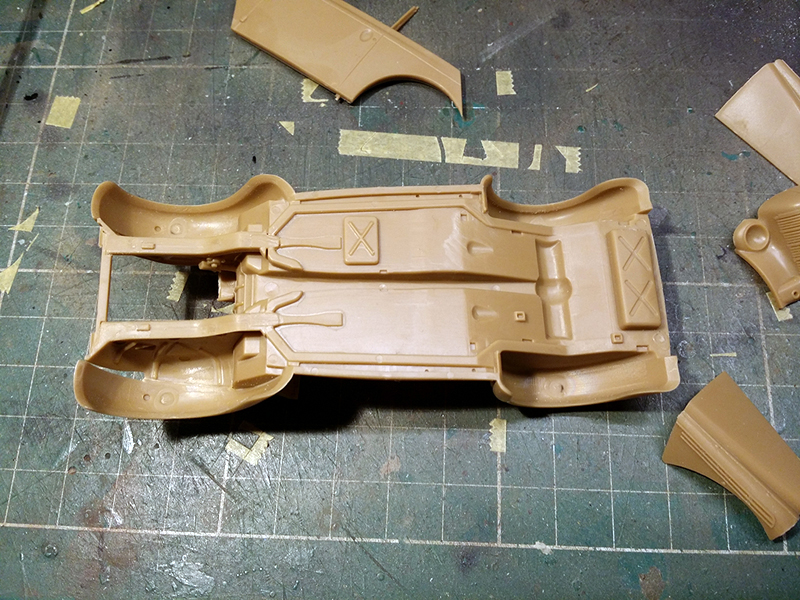
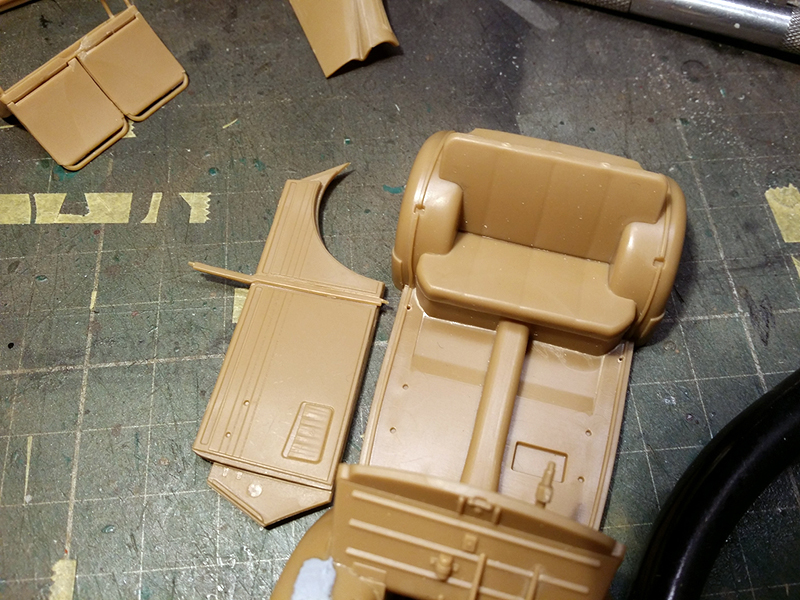
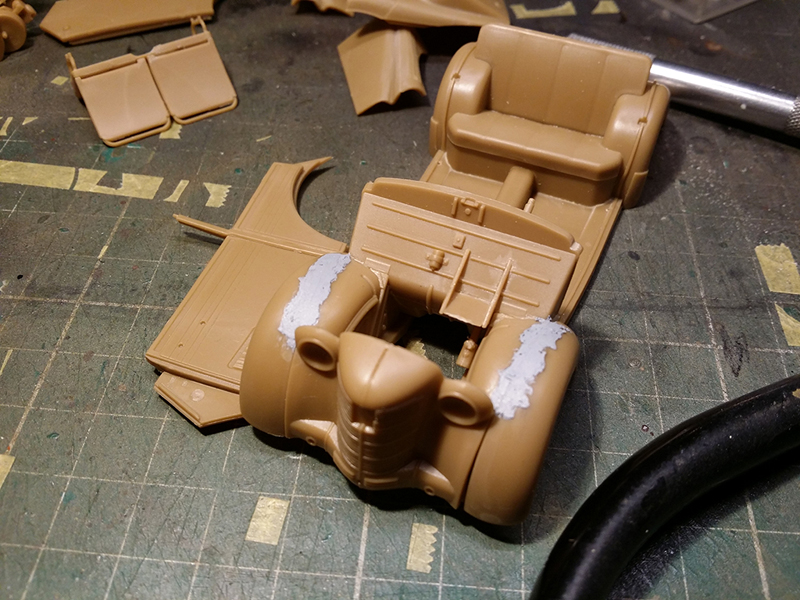
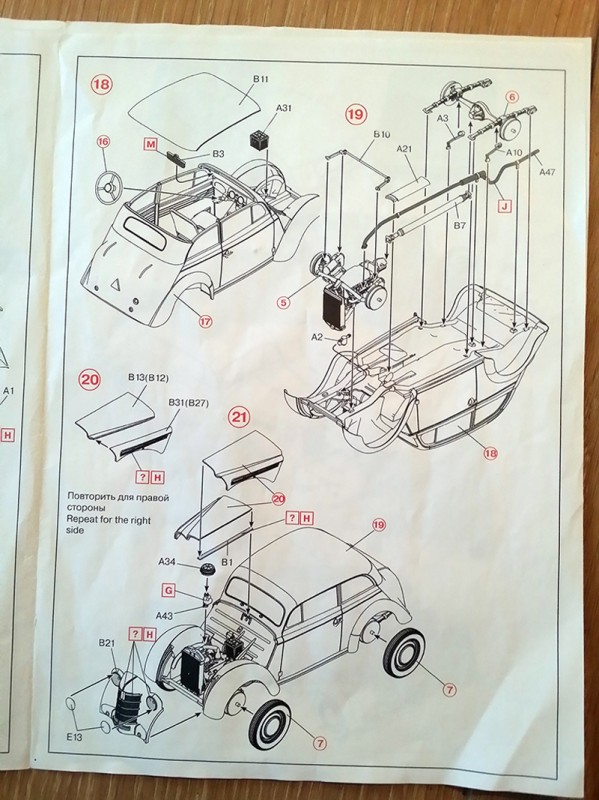
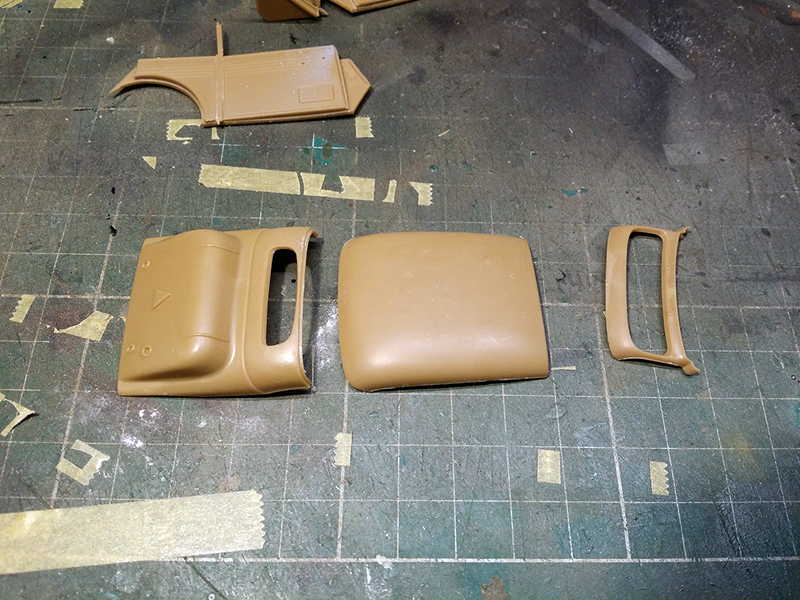
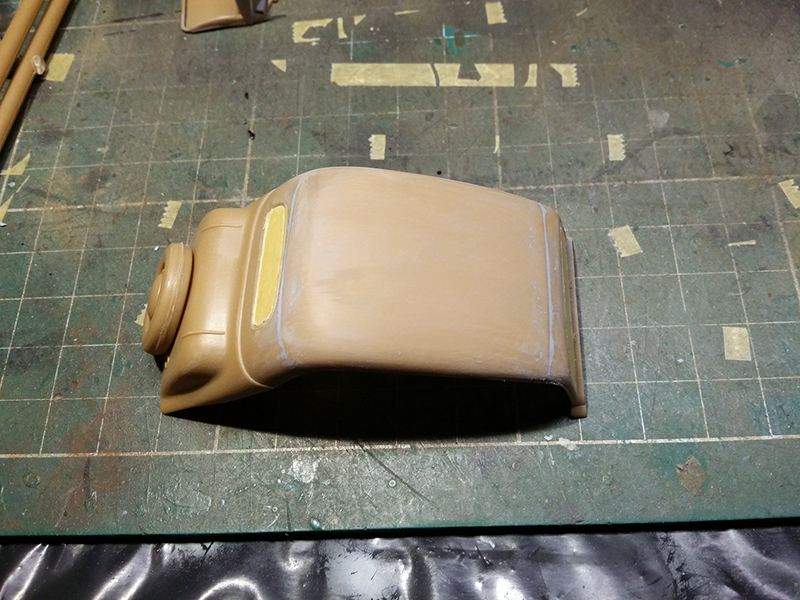
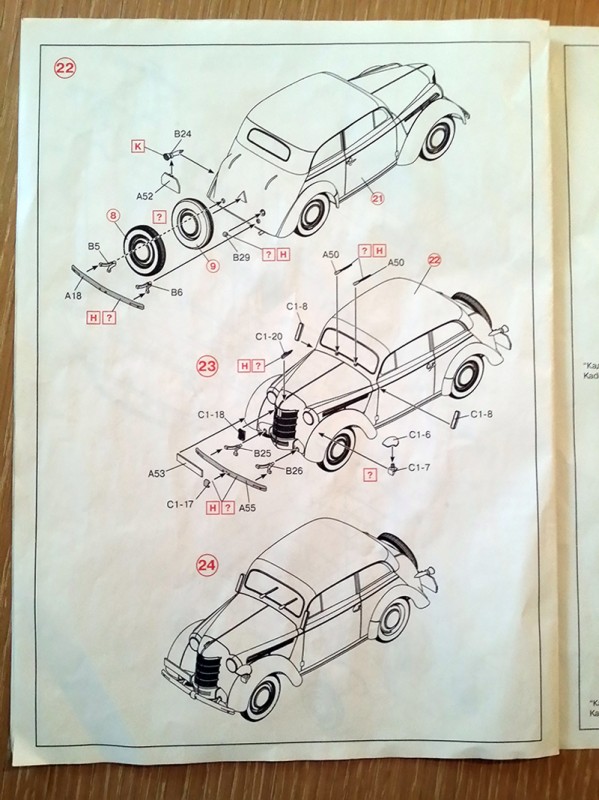
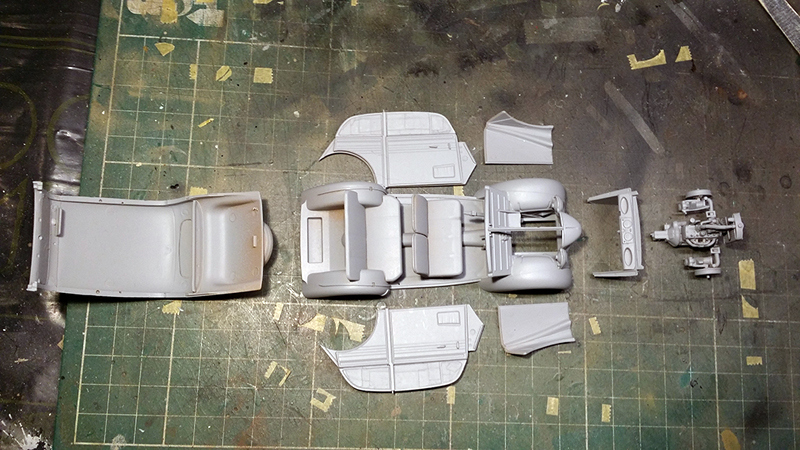
Starting off by saying I was really looking forward to building this kit. I love early automotive design and Im delighted with the amount of cars we modelers can choose from these days. My experiences with the newer range of ICM are very good so far. And I can say that this kit was no different in that respect. It was a joy to build. So lets Skidaddle directly to the build. I made plenty photographs and some show all the parts of a subassembly and the next shows the parts together as said subassembly. Starting with page 1. Which has 12 steps of the build process. The first 3 deal with the construction of the cars engine. 16 parts some of them very small make up the Kadetts Powerhouse. Pay attention to the instruction sheet especially in step 3 because the instructions show some 2 parts that actually consists of 2 parts each. Aside from that no real problems here and you should end up with a good representation of the engine. The only thing you could add is some wires. For the sake of this review I decided not to add the wire and stick with the OOTB theme so you can see exactly what you get from ICM. Step 4 to 6 has you construct the front suspension, the back suspension and mating the front suspension to the engine and radiator. The front suspension is made up of 4 parts. Fit between the parts is good. Make sure you have the wheel hubs attached correct otherwise you will find some troubles with adding the steering linkage later on. In step 5 you mate the front suspension to the engine and the radiator which gets attached here too. It is not very clear how exactly the engine mounts onto the front axle but you need to glue it pretty much in between the 2 rectangles that eventually mount to the underside of the chassis. Another point worth mentioning is the radiator which in the instructions show clearly that it has a little nub on the left bottom side that gets glued to the fanbelt drive. Sadly this nub was not there on my radiator which means it only attaches to the water hose and the front suspension and this is quite a fragile connection. In my case I found myself breaking it off a couple of times. The rear suspension has 6 parts and no problems were encountered. Steps 7 to 9 Deals with the wheels and the sparewheel. ICM gives you 2 options for the sparewheel. Either as simply the wheel or a closed casette for the wheel. I decided to go with the latter. Very straightforward assembly no problems. In steps 10, 11 and 12 we move towards the interior of the vehicle. The drivers seat which consists of 7 parts that fit together perfectly. And the dashboard and several interior panels such as the firewall as well as the gas, clutch and brake pedals and levers. Everything here fits good, and aside from launching the tiny pedals I think nobody should encounter serious problems here. One thing worth mentioning is that you have to paint all of these things before closing it up, because it will be impossible to reach afterwards. The decal sheet comes with some very nice decals for the dials. Turning the page and on to steps 13 to 15 which deals mostly with the body of the car. The side panels consist of 6 parts each. One outer panel with the door, 2 inside panels, one doorframe pillar and 2 transparent windows which get sandwiched between those panels. The fit is perfect with the only thing you need to do being to mask the windows off before glueing them into the door for the simple reason that this is way easier this way. It is possible to model the car with the doors open but it requires quite some surgery to the kit. I decided not to go this route and simply built it as it comes. Meaning that I had to prime and paint the whole interior first. Also in these steps you add the backseat and the back of the body. Further small details are added like the doorhandles and the handles to turn the windows up and down; these parts break very easily so take care here. Step 16 is the 2 part steering wheel which is a bit of an oddity. And still I cannot think of a benefit to this method opposed to the one part steeringwheel that never really posed any problems to me. Step 17 Inside the engine bay. This is also the first area where filler is needed. Further you have to add the steering mechanism and the front window section. Fit again isvery good. On the insides of the fender wells there are pushout marks which you can fill but since most of it is obscured by the wheels it is not really neccesary, and you can hide them with mud. The next page has you adding the battery, the roof with sunblind and the steering wheel. The way ICM has engineered this kit means you have two seams to fill over the width of the roof. One at the front and one at the back just above the back window, also on the inside of the roof, the back of the body and on the front window frame you have some pushout marks to fill. I did it but eventually found out I may just as well not bothered as they can not really be seen through the windows. Step 19 has you adding the engine to the chassis beams and the back suspension to the underside of the body and the other bits and bobs like the driveshaft, steering linkage and exhaust. Step 20 to 21 has you adding the two bonnet halfs with the hingepart, the airfilter which can not be added earlier because you cant get the engine between the chassisbeams with it added. And the vehicles nose with its really neatly designed grill. With me nearing the end of the build I turned to the last page of the instructions which deals mostly with the small details like: Fuelfiller cap, the bumpers, the sparewheel, rear lights, licenseplates, windscreenwipers, indicators, the hood ornament, Notek light for the military versions of the K38 and the really well made Opel badge on the nose. So far I can only be enthousiastic about the build. Fit is good and the areas that I expected to be problematic turned out to be not so bad and very easy to solve. There were some parts that were extremely small and fragile. But nothing that could not be fixed really. On to more serious matters.Accuracy
A 1:1 Opel Kadett K38 measures 3810 centimeters which in scale translates to 10,88 cm and fron sparewheel to the tip of the nose it is exactly that. 1:1 width is 1375 cm which in 1:35 is 3,9 cm and again ICM has it spot on. Height of the car is 1535 cm scale height is 4,3 cm. And I cant fault ICMs work on this point either. All the other details match pictures I have seen. The dash is correct, Interior details spot on, all-in all this kit does extremely well when it comes to accuracy. One thing that puzzled me is the following. The paint instructions show the military versions with headlight covers. The type with a slit in it. But none are in the kit. You only get clear lenses.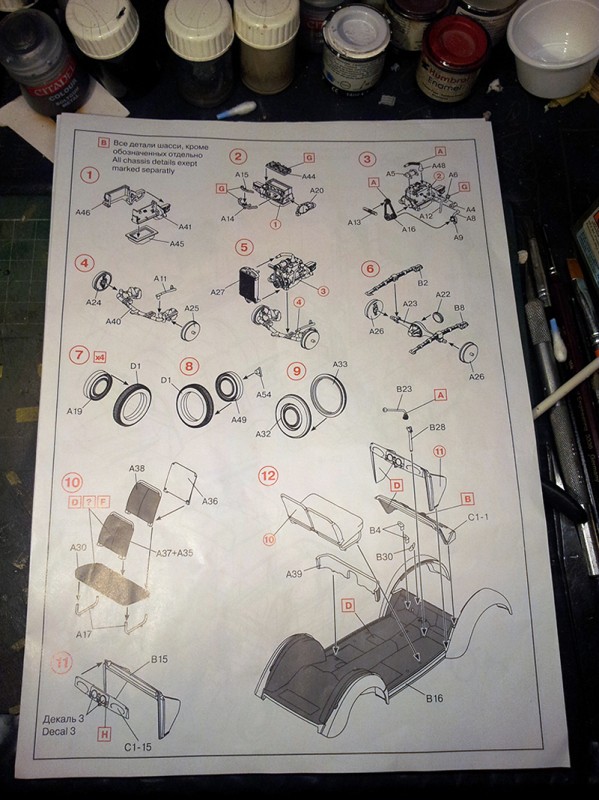


About the Author


FROM: NOORD-HOLLAND, NETHERLANDS
Started modelling when I was about 7 or 8 years old had a little break in between (school, girls partying) and eventually returned when finding this site in 2002. Main interest WW2 German army, wheeled vehicles and radio and communication troops or every other thing that manages to catch my interest...
Comments


Ola guys
@ Daren
Thanks for the lightning fast publication. Sterling work as usual.
@ Christopher
Thanks for the compliments. Yeah I'm kinda on a roll lately. And the build for feature 4 is already halfway. Allthough I don't think I will get the feature finished this month. But it will be a nice start for march.
FEB 25, 2014 - 02:58 AM

Hi Robert,
Another cracking build article and a great finish to the kit. Lovely work and I like the cross over of use.
Cheers
Al
FEB 25, 2014 - 07:14 AM
Cheers mister McNeilly for the compliments.
Was a really enjoyable built.
FEB 26, 2014 - 01:11 AM

Copyright ©2021 by Robert Blokker. Images and/or videos also by copyright holder unless otherwise noted. The views and opinions expressed herein are solely the views and opinions of the authors and/or contributors to this Web site and do not necessarily represent the views and/or opinions of Armorama, KitMaker Network, or Silver Star Enterrpises. All rights reserved. Originally published on: 2014-02-25 07:36:02. Unique Reads: 13946

WEB HOSTING BY


Copyright ©2021 Armorama and Kitmaker Network, a subsidiary of Silver Star Enterprises
All Rights Reserved. Please read our Conditions of Use and Privacy Policy.
All Rights Reserved. Please read our Conditions of Use and Privacy Policy.