

1⁄35Pz.Kpfw.III (5cm) Tauchpanzer Ausf.G
9
Comments
Step 7
The pin wash is the next step in the finishing process. For the pin wash I used MIG Productions Dark Wash and applied it with a small brush to areas such as panel lines, around small details, hatch openings and any other areas I wanted shadowed. I let the wash dry for a few minutes and then clean / blend any excess away with a clean brush dampened with AK Interactive white spirit.
The pin wash, in my opinion, is one of the most important steps in weathering. It can be a very time consuming job, and I rarely (basically never, unless it is a very small object) finish a pin wash job in one sitting. It is also important to remember that all of the weathering techniques, including pin washes, can be revisited later in the weathering process, and are not limited to a one time application.
Once the pin wash was completely dry I dry brushed the original base colour over the model. I am not a fan of dry brushing lighter base colours, I think it looks kind of fake, but, I find dry brushing the base colour after applying a pin wash really helps clean things up. To dry brush I use a large brush, dip it in my colour and dry it off on a paper towel until there is almost no paint left on the brush. I think it is better to have too little paint on the brush as opposed to too much (Pic. 10).
Step 8
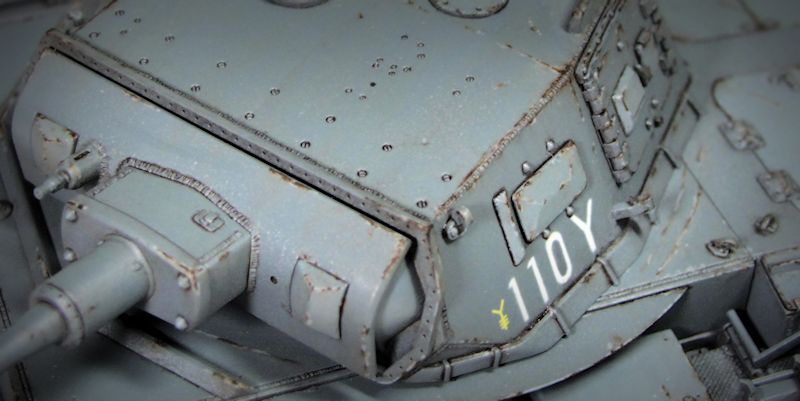
Next is the chipping / wear spots. I started by adding lighter grey chips to replicate paint damage that has not made it down to the bare metal, using XF-53 and XF-2 thinned with water. Using a small brush I painted the chips in logical locations for paint wear and damage (Pic. 11). Next I added the darker chips to replicate damage or wear that has made it to bare metal but is not fresh. To do the dark chips I used Vandyke Brown Winsor & Newton oil paint mixed with a little AK Interactive white spirit. I paint the chips with a small brush in logical areas and inside some of the lighter coloured chips, then leave it for a few minutes to dry a little. After a few minutes I apply white spirit directly onto the oil paint which causes it to dissolve into smaller more realistic looking chips.
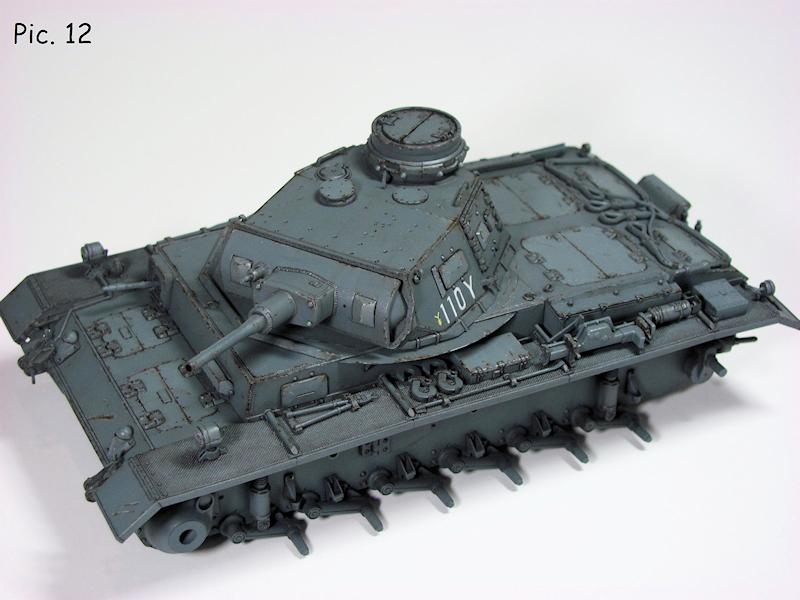
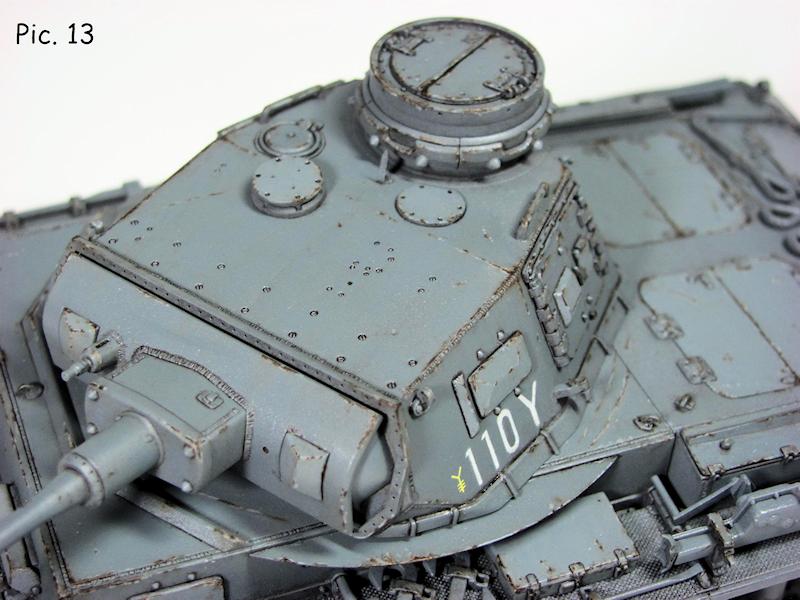
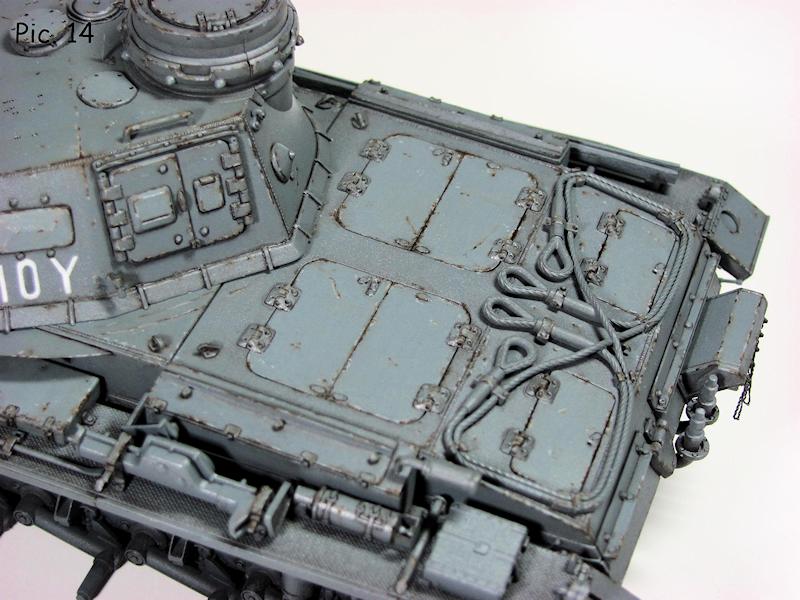
I like the look and colour of this method. I find the oil paints dissolve nicely and create a very realistic looking chip / wear spot. Not all of the darker chips are painted inside the lighter chips, and not all of the lighter chips have a dark chip in them; its good to keep it random (Pics. 12 16). The road wheels, drive sprockets, idler wheels and return rollers were all treated with the same chipping method.
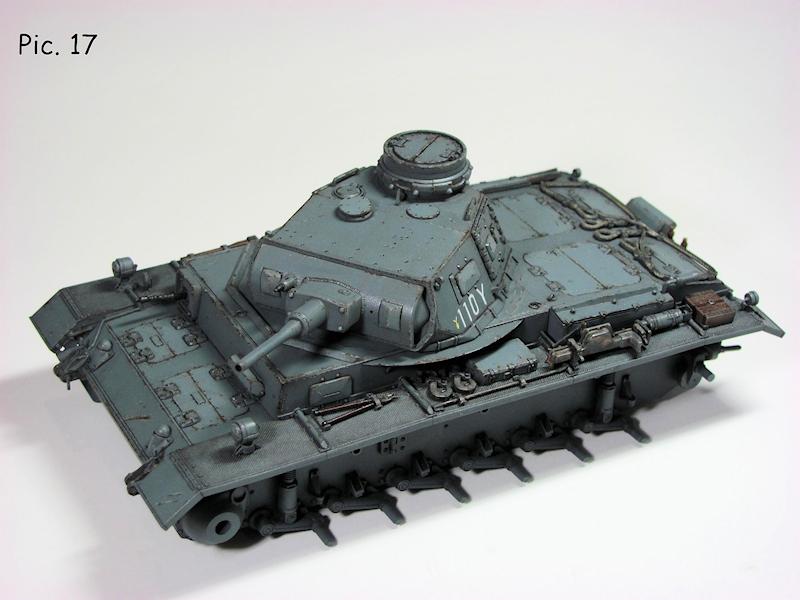
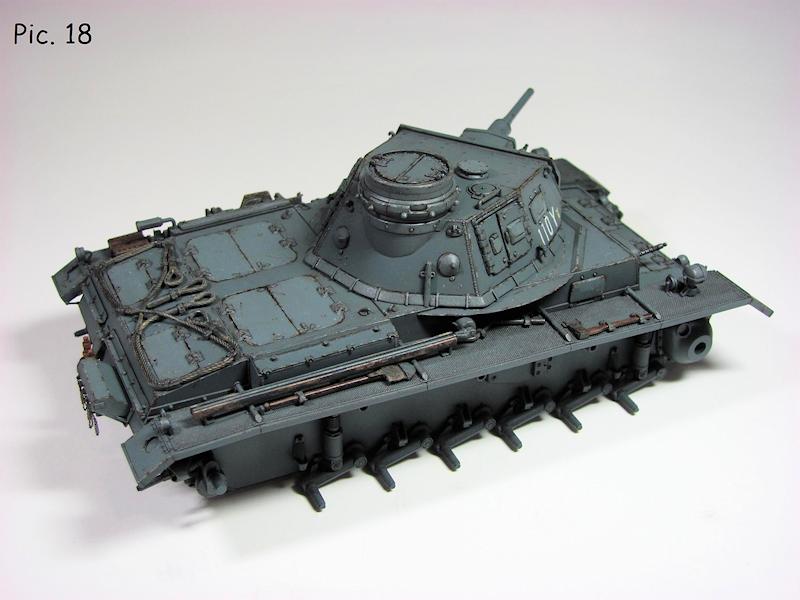
Step 9
I then moved onto painting the details and tools. All of the metal tools were first painted a flat black. I then applied several different heavily diluted coats of Life Color rust and dust paints. I used several different shades of rust and dust mixed together and continued to apply thin diluted coats of different colours until the desired look was achieved. Once this was dry I applied graphite shaved from a HB2 pencil with an old small brush. The wooden parts of the tools were painted with XF-52 and then given a wash using MIG Dark Wash and Winsor & Newton Raw Umber. The exhaust was given several coats of diluted Life Color rust paints. I again mixed the colours with each other and applied diluted layers on top of one another until the desired look was achieved (Pics. 17 and 18).
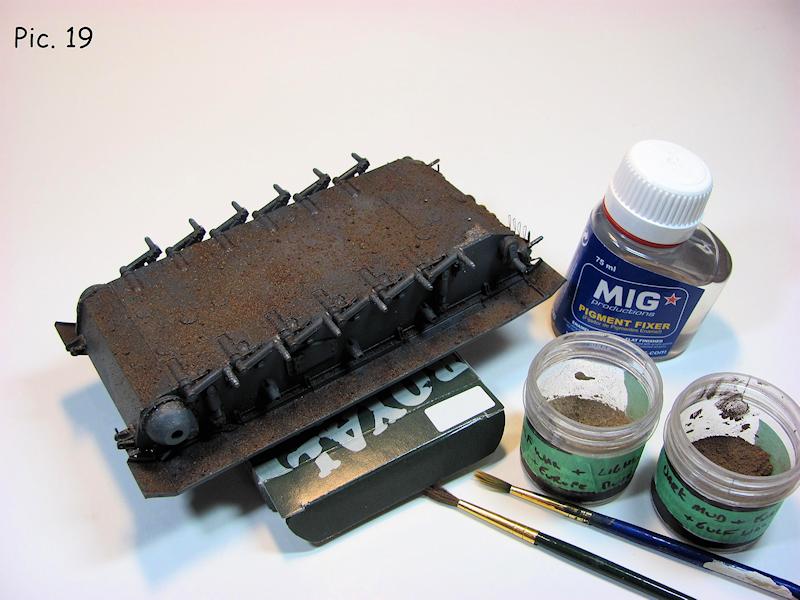
Step 10
Now I applied pigments to the lower hull area. I mixed up two different batches of MIG pigments, one light and one darker brown. I applied the dry pigments to the lower hull areas using an old brush. I then applied MIG pigment fixer to the dry pigments and allowed it to flow over the lower hull making all of the pigments previously applied wet. More pigments were applied while the fixer was still wet (Pic. 19). The pigments look a little darker when wet but will return to the normal colour once the fixer has dried; however, I was not too worried about that, because the pigments I have applied are going to be receiving a good amount of oil and enamel paints in the next step (Pic. 20). I feel that pigments are great for creating texture; however, I think they are sometimes over used. Im not a big fan of using pigments all over a model to make it look dusty. I prefer to use oil and enamel paints to create that type of dust effect and will demonstrate that in the next step.
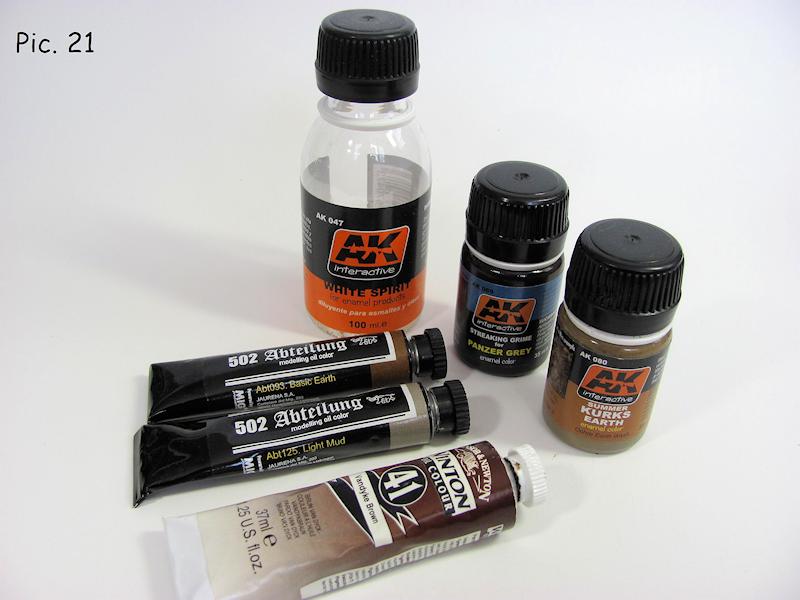
Step 11
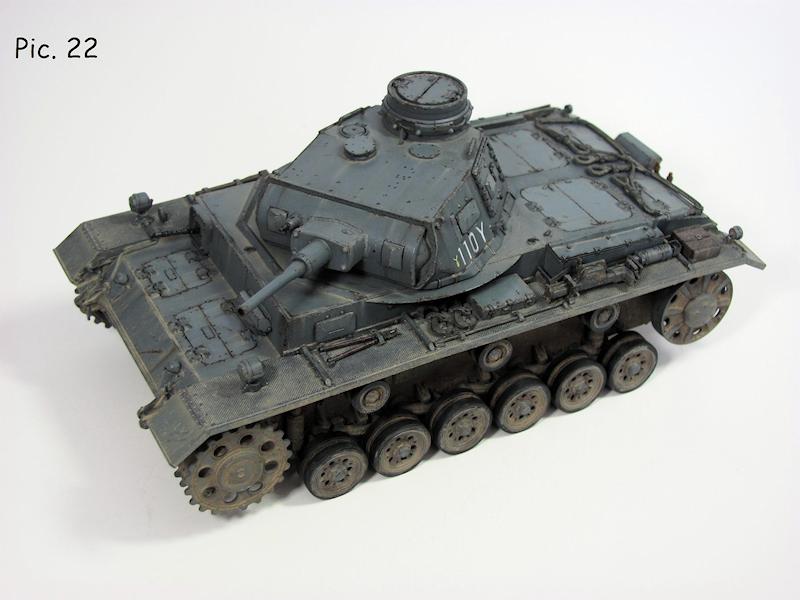
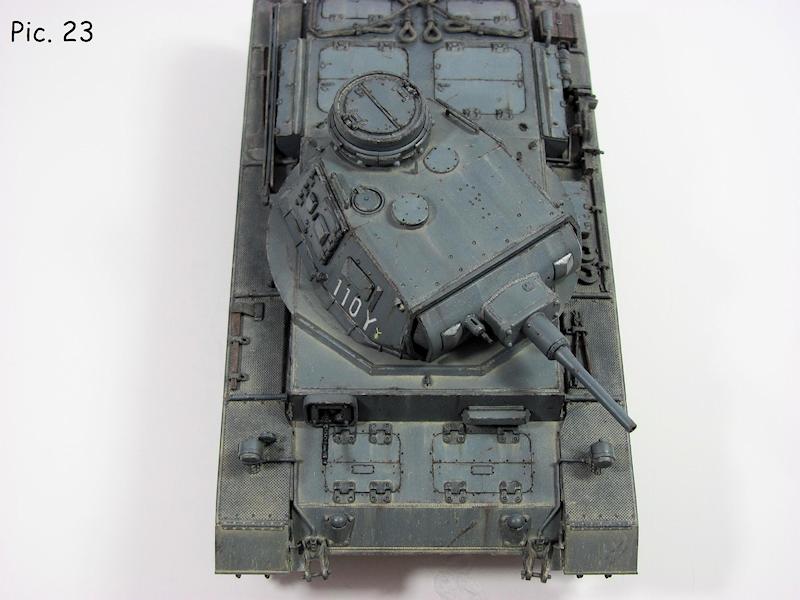
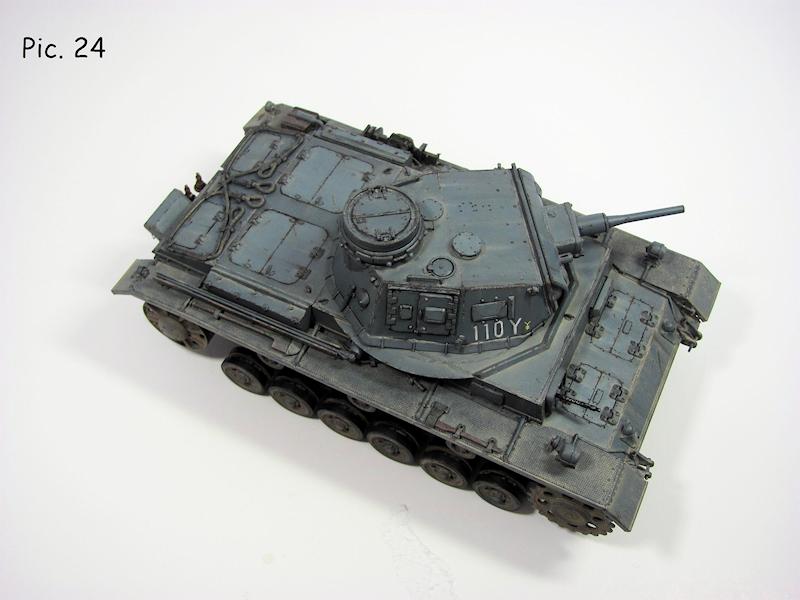
The next step is the create dust, dry dirt, and some streaking effects. I use oil paints and enamel paints to create these effects. The colours I use depend on the type of dirt Im making. In this case I wanted to create a dry dusty effect, so I used 502 Abteilung Basic Earth oil paint, 502 Abteilung Light Mud oil paint and AK Interactive Summer Kursk Earth enamel paint. For the darker streaks I used Winsor & Newton Vandyke Brown oil paint and AK Interactive Streaking Grime for Panzer Grey. The thinner used for all of these colours was AK Interactive white spirit (Pic. 21).
To create the dry dirt and dust I mixed the three different dust paints together to create a nice light dust colour. I painted this colour in logical areas where dust and dirt would accumulate. The paint was allowed to dry for a few minutes. I then blended the paint and faded it using several different brushes dampened with white spirit (almost completely dry). The nice part about oil and enamel paints is that they take a long time to dry, so you can move them around and play with them until you get the look you are going for. On vertical surfaces I pulled the paint downward to create streaks. On the horizontal surfaces I blended the paint with more of a stabbing motion and made sure to blend it so there was no defined border or edge to where it started or stopped.
After applying the lighter dust effects I mixed up another batch of paint, this time I created a little darker of a colour and applied it in the same manner, but only in select areas where I wanted a darker dirt. The same dust / dirt mixtures were also flicked / splattered onto the lower hull areas using an old brush which I had cut short. I simply loaded the brush with the paint and ran my finger along the bristles causing the paint to flick / splatter onto the model. Some of these splatters were blended into the surface and some were pulled in a downward motion to create more streaks and dust runs. Another nice aspect of oils and enamels is if you dont like the look, or if a splatter ends up in the wrong spot, you can easily correct it with some thinner and a clean brush. The same process was done to all of the lower hull, road wheels, drive sprockets, idler wheels, and return rollers. The dark runs and streaks were simply painted on and blended with a brush nearly dry of thinner (Pics. 22 24).


About the Author


Comments


Excellent job. Very good job in explaining things & paints used , technique etc..that's how you teach!
APR 16, 2014 - 01:57 AM

Thanks for sharing Bart, I like the modulation a lot, the final result is outstanding.
JUN 02, 2014 - 11:29 PM


Very nice, thanks for sharing Bart. Never thought the acrilyc+lacquer thinner combo would work well -- will have a try on that mix. Cheers, Tat
JUN 04, 2014 - 09:51 AM
Copyright ©2021 by Bart Campbell. Images and/or videos also by copyright holder unless otherwise noted. The views and opinions expressed herein are solely the views and opinions of the authors and/or contributors to this Web site and do not necessarily represent the views and/or opinions of Armorama, KitMaker Network, or Silver Star Enterrpises. All rights reserved. Originally published on: 2014-04-10 22:12:26. Unique Reads: 14716

WEB HOSTING BY


Copyright ©2021 Armorama and Kitmaker Network, a subsidiary of Silver Star Enterprises
All Rights Reserved. Please read our Conditions of Use and Privacy Policy.
All Rights Reserved. Please read our Conditions of Use and Privacy Policy.