

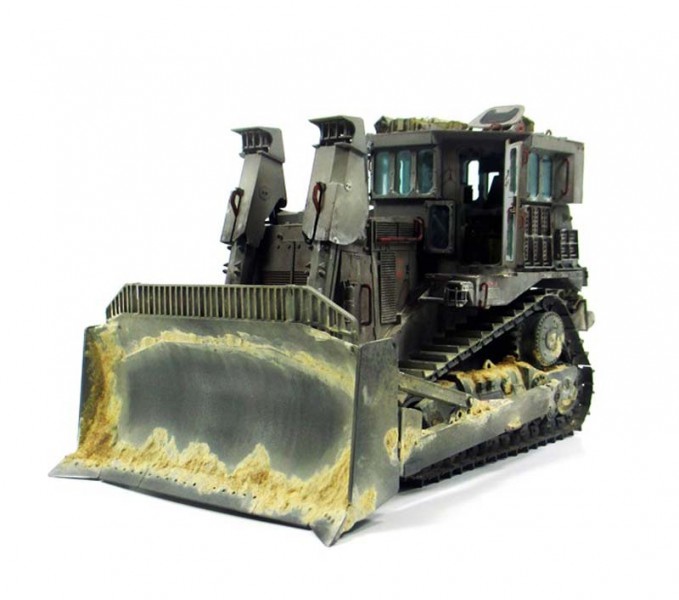
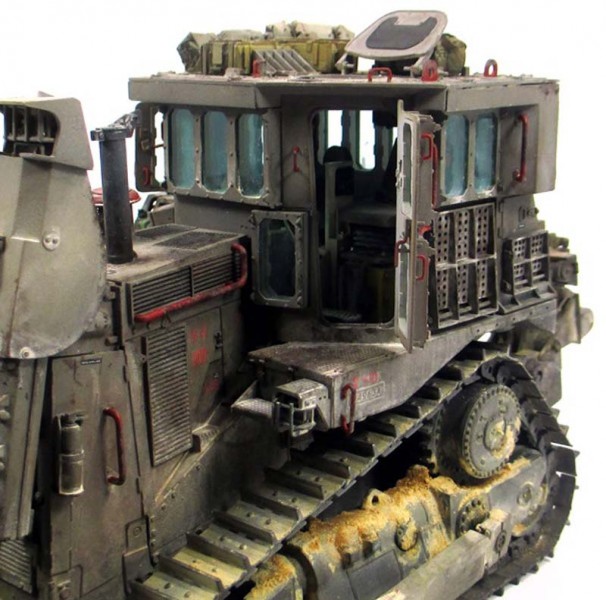
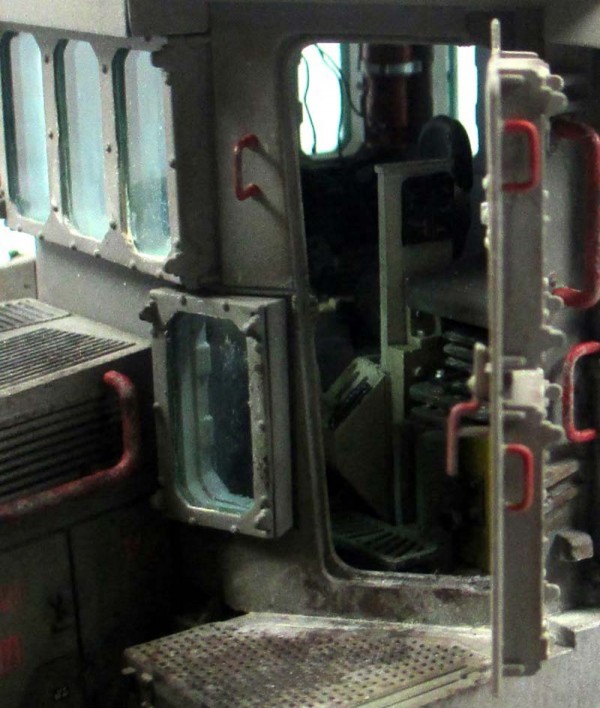
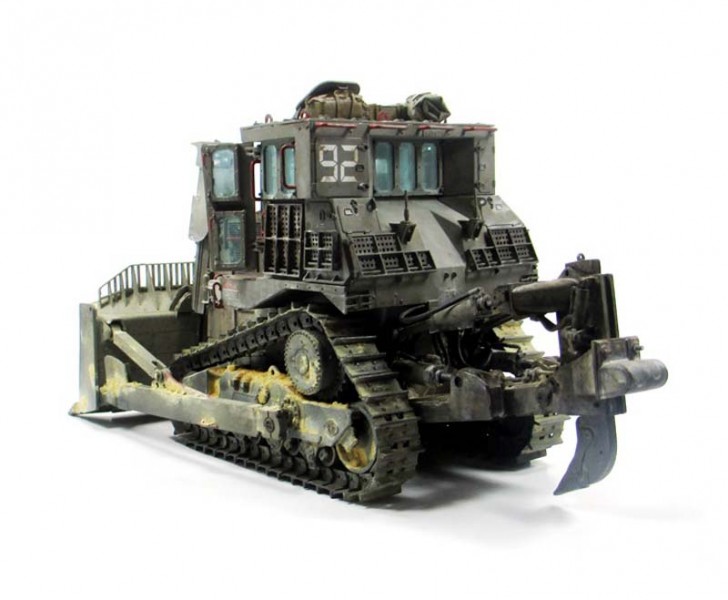
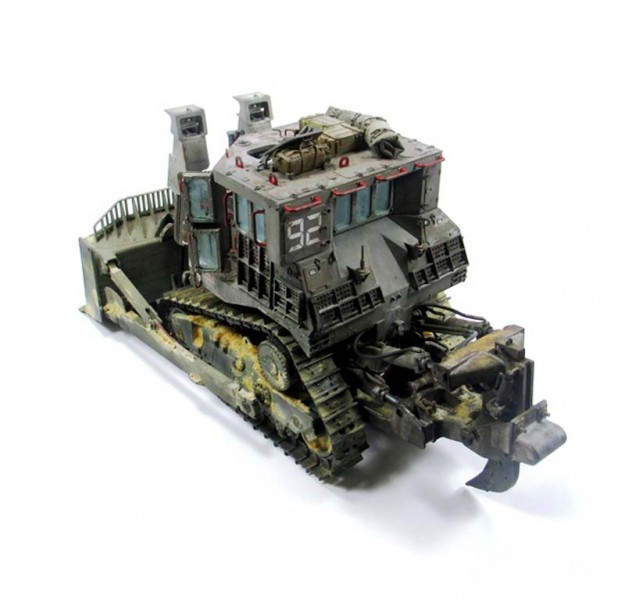
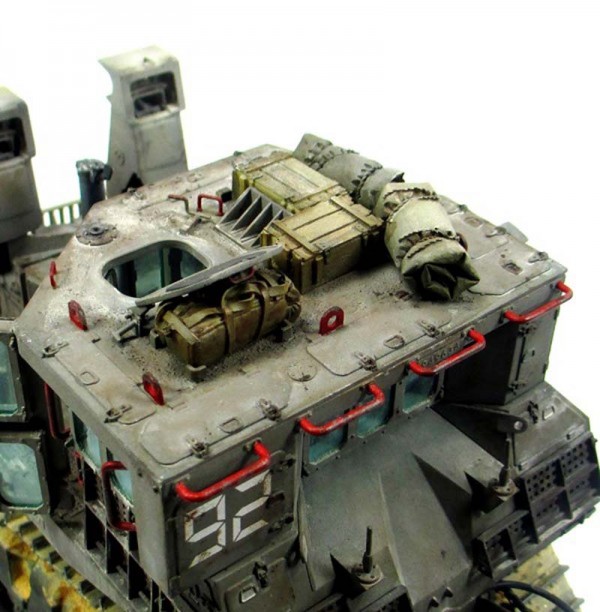
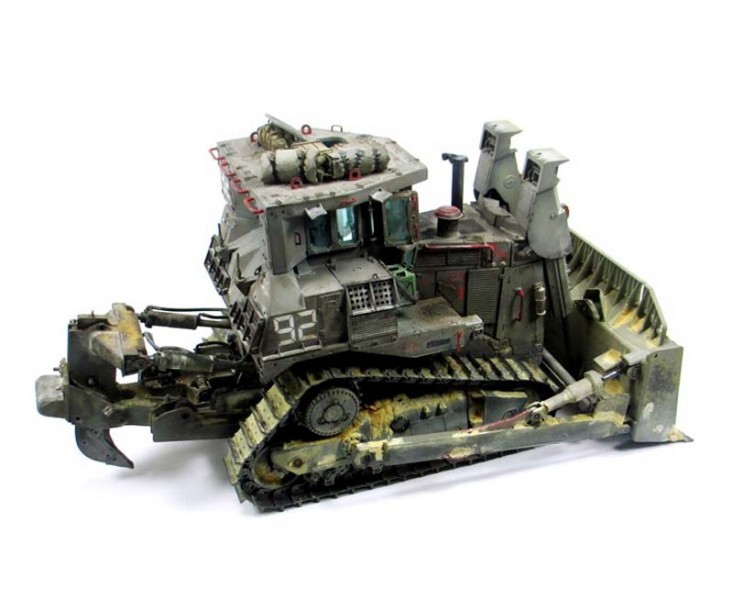
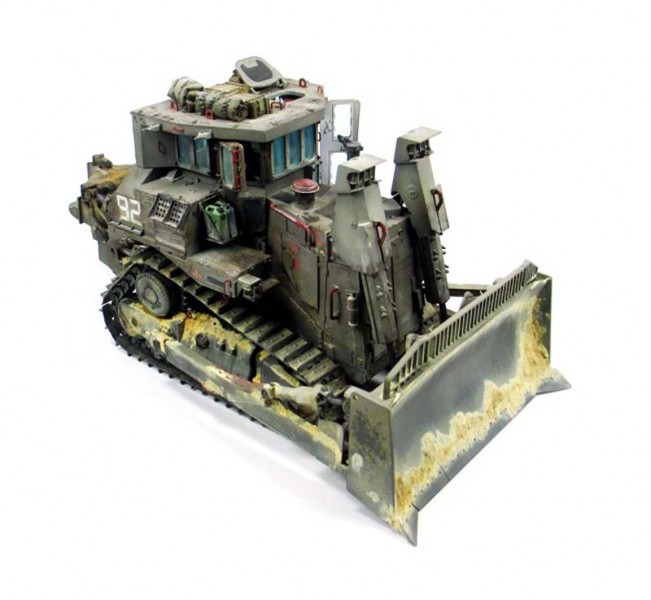
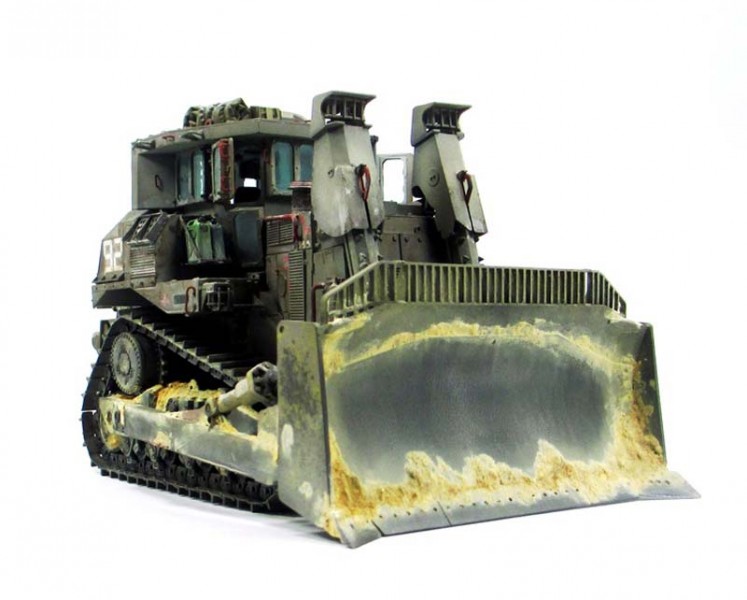
1⁄35D9R Armored Bulldozer
17
Comments


About the Author


FROM: MASSACHUSETTS, UNITED STATES
I am building what I like, when I like and how I like it; having fun doing it. I have been building and finishing models on and off my whole life but the past ten years things really exploded. Just about anything goes when it comes to hitting the bench, but wrecked armor, rusted hulks, ships or ...
Comments

Of course, your WIP photos completely disprove my theory, but it's a phenomenal piece of work
MAY 01, 2014 - 08:10 PM

Thanks again Mark!! Sorry to disband any "theories" there were!!
Thanks Bill! Aside form the numerous pictures of these things completely covered in dust there are plenty of interesting shots where the sandy mess seems to collect in a few spots leaving the rest, well...not. I was looking at some pics of these in the Golan Heights and the dark brown mud was very enticing... Maybe next time!!
MAY 02, 2014 - 02:50 AM

Sorry about that. I have a question. In step 5 there is a some small/big screws in spruce A that needs to cut in a different way, but where those screws goes to? The instructions doesn't specified where. I think there is another step that mention the same thing. Any help? Thanks!
JUL 20, 2015 - 07:46 PM
Hello Jose,
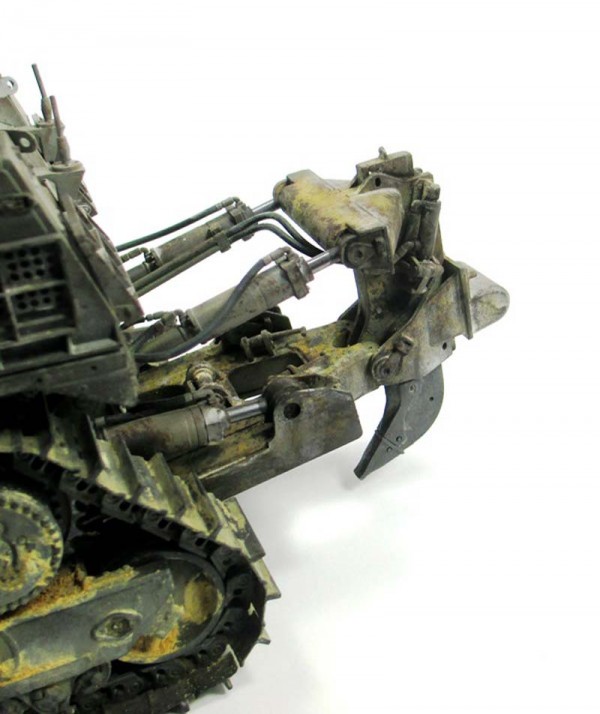
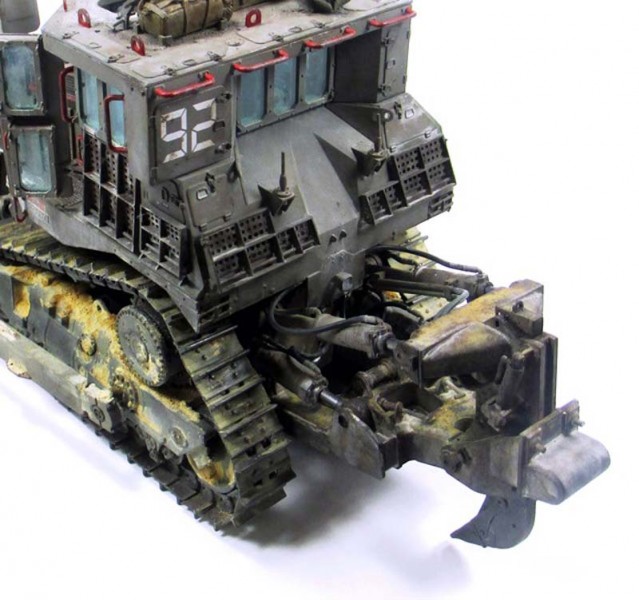
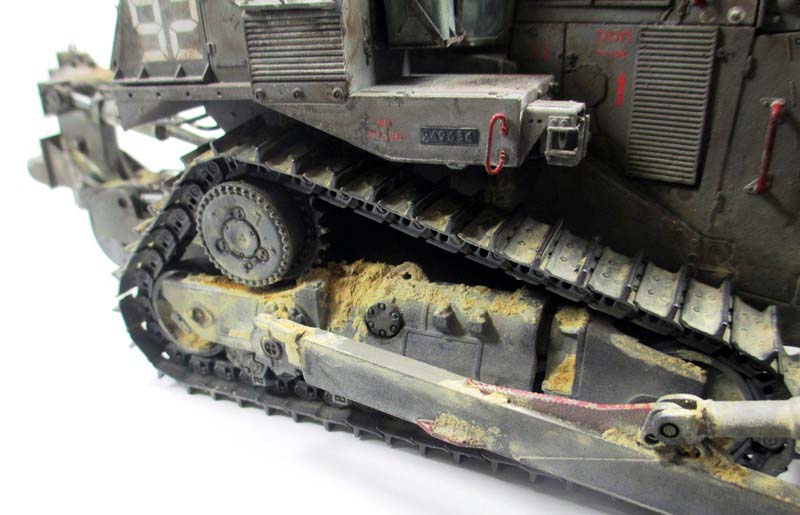
Yeah, the instructions are a bit shady in that section. In step 5 there is to small graphics at the top...one square and one round....the square one is correct, the round is not. The bolt heads are to be installed on the backside of the cylinders...facing the ripper. there are two different sizes.
In this picture you can see where they go. I found it easier to make my own bolt heads, this is why they are white in the picture.
 Also, I added some bolt heads to the large piston for the dozer blade! Hope this helps....have fun!!
Also, I added some bolt heads to the large piston for the dozer blade! Hope this helps....have fun!! JUL 20, 2015 - 08:30 PM
Thanks for the tip! I assumed that is the same procedure for step 37 also. Can't wait till painting, but I'm little concern about the tracks when I get to that step.
JUL 21, 2015 - 07:48 PM
How did you make the bolts? You right! Was hard for me to cut a nice one.
JUL 22, 2015 - 02:54 AM
In step 26 Tracks assembly, parts A5 and A6 is state use to finish the whole track. What they mean about that? I didn't see those parts in your pics unless you painted them black after finished the track. Also, do I supposed to punch a hole in part C2 to connect the link with C1?
JUL 23, 2015 - 02:32 AM
Hello Jose,
Sorry for the delay. I am away at the IPMS Nationals in Ohio.
The bolt heads were made using the RP TOOLZ Hexagonal punch and die set.
As for the tracks, the written English in the instructions is a bit off. I have to assume they were meaning you need to finish the construction of the tracks. They are not too bad once you get going. No, you do not need to punch anything out. If you take the side with the post on it and lay it down so the post is sticking up, slide the next link over the post and attach the non-posted link to the top of the post via thin cement or CA. I put a tiny drop with a small paint brush on top of the post carefully and then place the small flat link on...the open end will slide down over the next post.....and so forth. I would go out about 10 links and then set that aside to dry and start another run.
When I finished the 10, then I would put the track pads on after letting them sit for maybe 10 or 15 minutes.
If don correctly...and the glue is on top of the post the links will be working. Like I said...it get easier once you start.
Best of luck!
JUL 25, 2015 - 03:10 AM
Copyright ©2021 by Todd Michalak. Images and/or videos also by copyright holder unless otherwise noted. The views and opinions expressed herein are solely the views and opinions of the authors and/or contributors to this Web site and do not necessarily represent the views and/or opinions of Armorama, KitMaker Network, or Silver Star Enterrpises. All rights reserved. Originally published on: 2014-05-01 12:47:58. Unique Reads: 20254

WEB HOSTING BY


Copyright ©2021 Armorama and Kitmaker Network, a subsidiary of Silver Star Enterprises
All Rights Reserved. Please read our Conditions of Use and Privacy Policy.
All Rights Reserved. Please read our Conditions of Use and Privacy Policy.