1⁄35Leopard 1 AEV
17
Comments
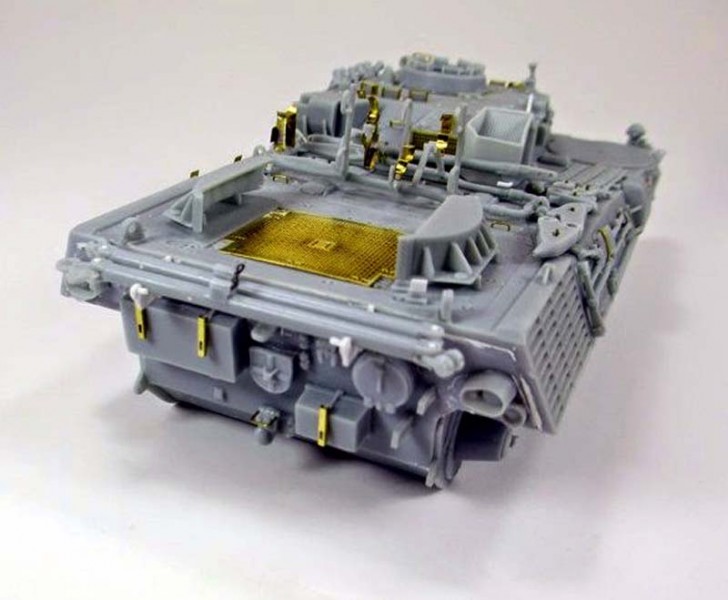
As I stated, this kit I built came with an interior. There are decent reliefs of the wiring on the inside of the hull and all of the parts do dress up the interior nicely. This is an area, even with all the hatches open, it still cannot be seen too clearly but for some folks, filling in the dead space inside is a must! I for one really didn’t want to have the side doors open when complete, but this is an option for both the side door to the inside of the AEV as well as a side storage compartment. After the installation of the interior parts things do look pretty good. There are only two decals included with this set for the inside.
The main construction was not too bad and the provided photo etch parts are a real nice accessory for this kit. The finer details just seem to pop once the PE is installed. I did find there were some areas that were in need of possible improvement. I say possible as I do believe that this kit can be built Out of the Box and still turn out great, but I noticed a few minor things. First being some brackets located on the front of the model that are used as stand-offs for various items the crew carried. These were easy to replicate. I took some of the photo etch sheet that was left over after part installation and bend some flat brackets and installed them in the various locations.
One of the larger items that I addressed was the tail light placement. The rear plate to the AEV is cast in one piece with the tail lights cast directly to it. On this particular variant, the tail lights were up and out a bit more than they were on this kit part. I used a flat razor blade to carefully remove each of the tail lights. I first placed the whole part into some hot water as this softens the resin and allowed me to remove the parts and salvaged them to reinstall after some clean up. Again, this is not something that is “needed” but I thought the correct placement was warranted.
With all but the ground auger and tracks left to construct out of the way, I felt that things went rather well. Despite the less than helpful instructions, the AEV went together quickly. The auger is an area that will need some time and patience. I was not thrilled at the way this part was cast. Slit down the middle it was basically impossible to remove from its casting without knocking off a couple blades to start. This prompted me to remove all the blades and replace the auger’s shaft with a piece of styrene rod then try and decipher how the blade went back on. I am still not completely happy with this part, but some days you have to choose your battles and move on.
The final hurdle was the tracks. The kit supplied tracks were beautifully cast and looked as if they would work out nicely…but I was wrong. Again, it was pretty much impossible to remove the tracks from their respective cats without snapping off the end links for the track pins. Frustrated and feeling lucky, I found Meng’s new D 640 A Workable Tracks for Leopard 1 Family. These tracks were a salvation. Easy to construct, movable and the cost was extremely low. Well worth the expenditure.
Comments
Hello Pedro!! Hope all is well my friend!! Seems like yesterday I seen you in Virginia!!
Thank you very much for the kind words!!
SEP 09, 2014 - 08:12 AM
Copyright ©2021 by Todd Michalak. Images and/or videos also by copyright holder unless otherwise noted. The views and opinions expressed herein are solely the views and opinions of the authors and/or contributors to this Web site and do not necessarily represent the views and/or opinions of Armorama, KitMaker Network, or Silver Star Enterrpises. All rights reserved. Originally published on: 2014-08-24 18:12:11. Unique Reads: 17732


