

1⁄35Panzerhaubitze 2000 build
10
Comments
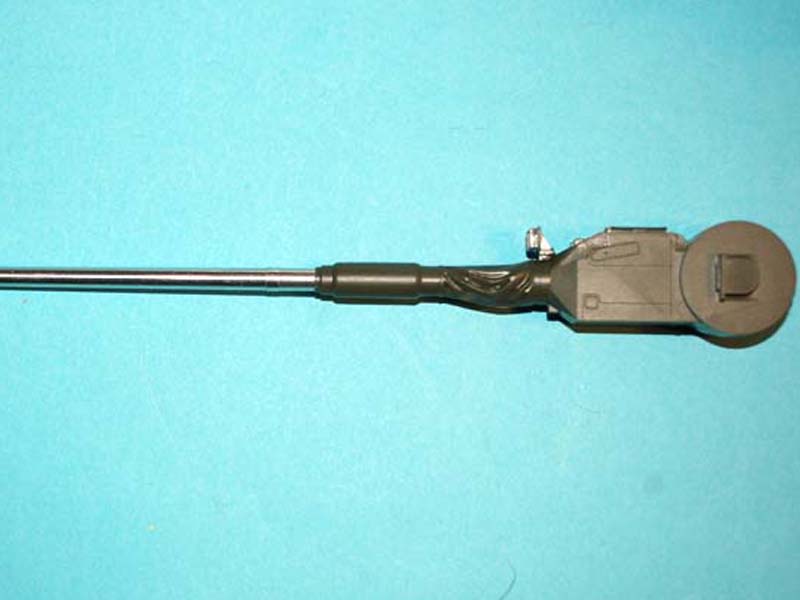
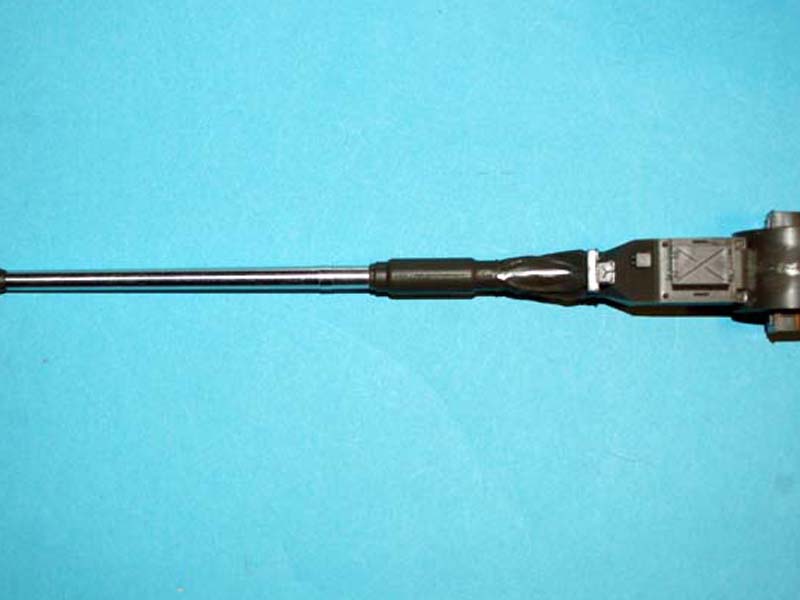
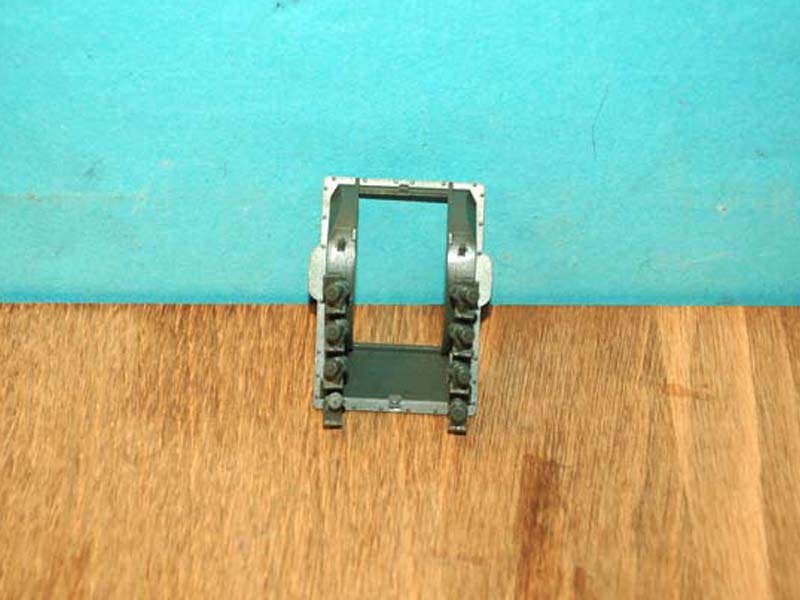
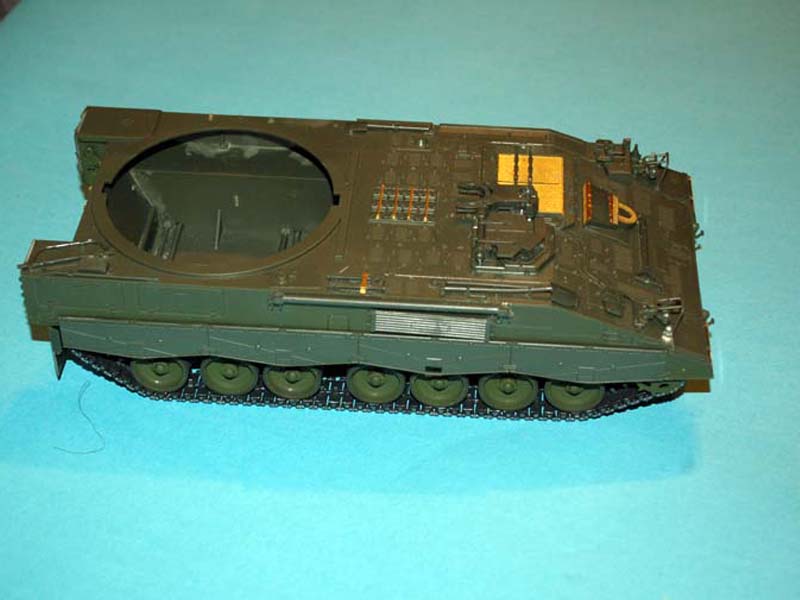
Step 11 covers assembly of the drivers hatch and the gun barrel travel lock. The drivers hatch is nicely detailed and can be shown open or closed; the only complaint about this area is the difficulty in removing the parts from the sprue without causing damage to them, due to the plastic being on the soft side and the edges being very thin. The barrel travel lock is a game of two halves, the actual locking arm is very nicely done, and I like the simple but positive look of the assembled part, but the components that make up the area that attaches to the hull are weak in my opinion, due to what I feel is poor design. The two pieces making up the bracket that the travel lock swivels on have a very poor fit and tend to fold in the centre, so I ended up placing a wedge between the lock and the bracket to hold them correctly while the cement cured. The light assemblies go together very easily and the clear lenses fit very well.
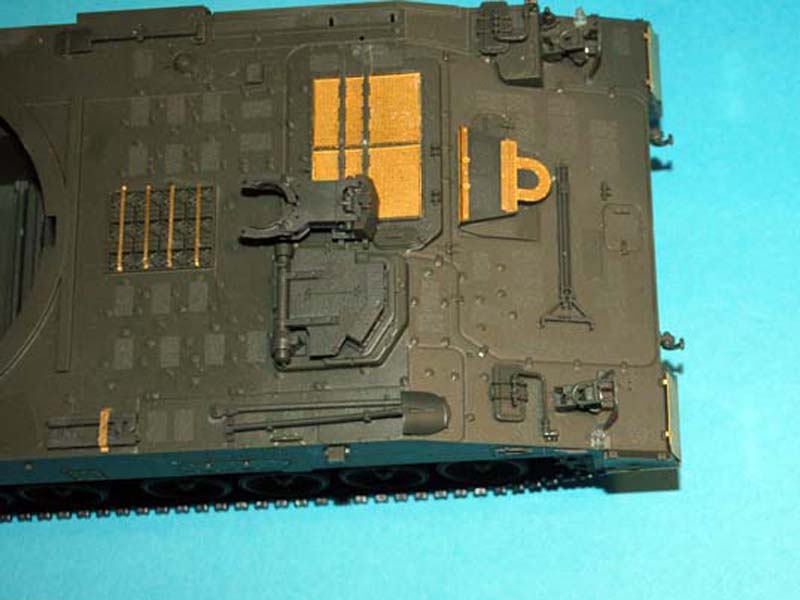
Step 12 covers applying the sub-assemblies from step 11 to the main hull. All of these parts again fit very well and I am impressed with the effort that has been put in by Meng in terms of the fit of parts. The only parts that require caution on the part of the modeller are the brush guards for the light fittings, but this is more to do with clean-up rather than fitting the pieces. D28 which is missed in the instructions can also be added at this point, and I have added a picture to show location and orientation.
Note
For those modellers who like to make their own additions to the model, at this stage you can to add the wiring for the travel lock.
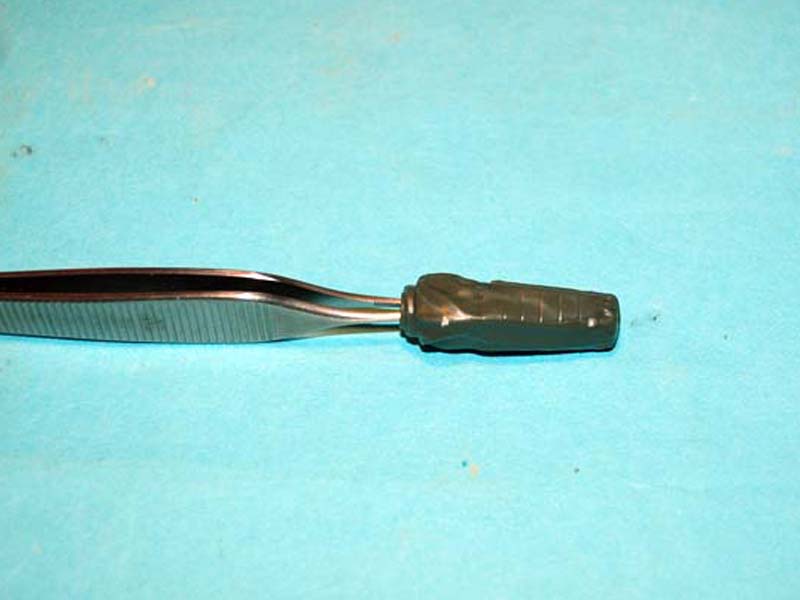
Step 13 covers the addition of the gun cleaning rods and details on the front right and rear left sides of the hull. These areas need to be looked at carefully as some minor surgery is required depending on the version you have opted to build; because of these options, please make a point of studying the instructions carefully, as I did not find them immediately clear. One aspect I like and that will very much appeal to the scratch builders out there, is that the gun cleaning rods have been supplied as a moulding, or there are photo etched parts included to make up the storage clamps. This allows the modeller to fabricate their own individual rods if wished, which will be an improvement. I have seen complaints elsewhere about the fit of the cleaning rods, so I did test this aspect, and am pleased to report that I found no issues, the fit being pleasing overall.
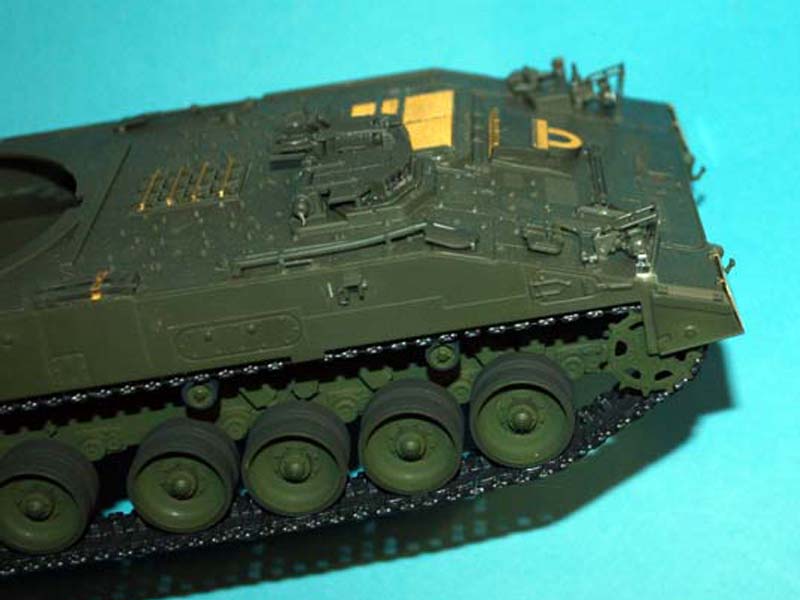
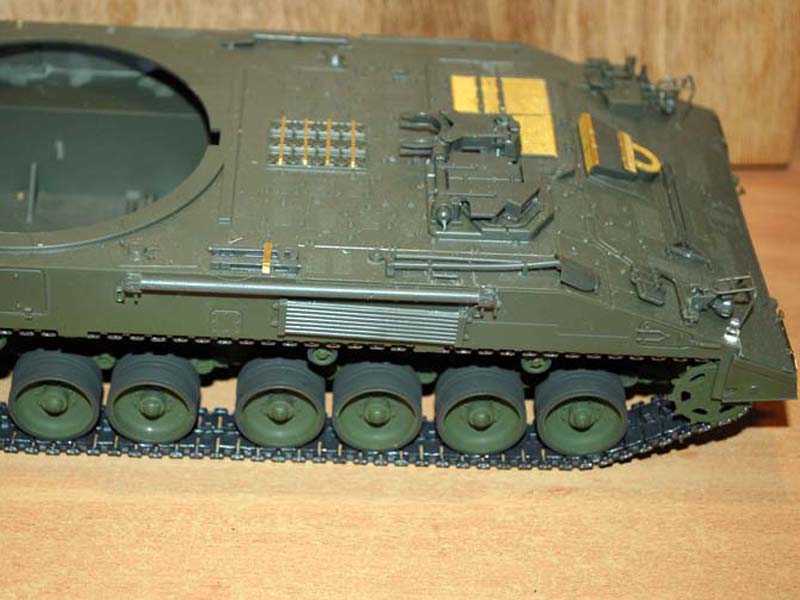
Step 14 covers assembly of the tracks, which are workable and require no glue during assembly. The only part that will likely get to you is the removal of the parts from the sprue and the subsequent clean up, however if you use a good pair of snips there will be little if any clean up necessary. Meng have supplied a guide tool for assembling the tracks and it does its task very well. There are two pins on the track links which fit tightly in holes on the other half; you will need a set of smooth flat pliers to squeeze the halves firmly together, but there is still some risk of the tracks coming apart.
Step 15 is where you are instructed to attach the lower hull to the upper hull. I do suggest that you attach the upper and lower hull at an earlier stage, but if you do, you will need to assemble and paint the tracks along with the wheels and suspension. If you decide to wait until this point be very careful as there are now a lot of details that could easily be damaged and/or broken off.
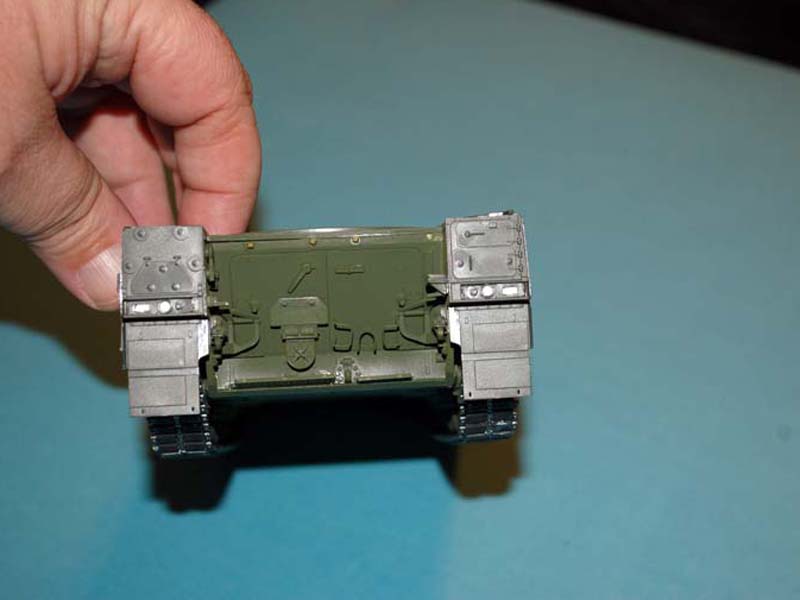
Step 16 and the hull build comes to an end with the addition of the side skirts, rear boxes and mud guards. The fit of these parts is very good and it is that good fit that causes the only slight issue, and that is getting the adhesive where it is needed is tricky.
Step 17 covers the assembly and addition of the tow line. Meng have supplied string to replicate the cable, but this is one aspect I really do not like using in a model and so I have replaced the string with a metal coiled cable, which I feel provides a much more realistic look. Attachment of the cable to the model is very simple as Meng have supplied very positive locators.


About the Author


FROM: ENGLAND - SOUTH WEST, UNITED KINGDOM
I have been building model kits since the early 70s starting with Airfix kits of mostly aircraft, then progressing to the point I am at now building predominantly armour kits from all countries and time periods. Living in the middle of Salisbury plain since the 70s, I have had lots of opportunitie...
Comments

Hi Darren,
thanks for sharing this extensive build. Very helpfull.
Good to see one of the, if not the, best guns in the world at this moment as a decent model. You did a lot of detailed work!
The only remark, please, if allowed, is the camo pattern. Pls., do have a look at Google and see that the overal impression of these howitsers is far less red, but more dark. Less than 20% of the surface should be painted brown. Furthermore, the edges of the camo should be rather sharp.
But.....
All together, i like the build and your comment.
P.
NOV 21, 2014 - 07:43 PM

Regarding the end comments, yeah the Greek version is tempting, LM Decals recently released decals for it.
LINK
Cheers,
Christophe
NOV 21, 2014 - 08:08 PM
Impressive build Darren, Congratulations !
This could be something for me, i will return to do 1/35 scale AfVs in the future, as well the 1/72 scale kits.
Got a Meng Leopard, may i can did out a build here.
Cheers
Bernd
NOV 21, 2014 - 08:51 PM

Paul if you take a look at the darker pictures it shows the colour as it appears to the naked eye, the red colour occured after I balanced the pictyre in Photo Shop. I am surprised on your comments about camouflage layout as I used ref pics online and checked them against what Meng offered, I accept it is not 100% but it is close.
Thank you for your comments guys.
NOV 22, 2014 - 12:45 AM
Hi Darren, i took the liberty to comment since I have worked with these guns as an art Lcol! Actually, now I am rather confused since neither the Germans nor the Dutch have this camo pattern, so is it your intention to go further into the 4 color Greek scheme?
NOV 22, 2014 - 10:34 PM
Paul; No that is the finished main painting and I was sure I was close, I am a little rattled now as I believed I had got it right, but thank you for pointing out I have got it wrong. As you have worked on these can you show me some pics of the tools on the vehicle please, I assume they are overall green with some wear and tear present.
NOV 23, 2014 - 12:29 AM

If you compare this German scheme (photo from Prime Portal) you can see that the brown pattern in the middle is different from your portrayal. There are lots of photos on the Internet to verify - I don't know if your pattern is based on the instructions but it never hurts to double check!
 Jim
Jim
JimNOV 23, 2014 - 01:47 AM
Hi Daren,
first of all, I believe that the most important of modeling is the fact that one enjoys building and painting.
So, I am not supposed to ordeal on that.
But the camouflage pattern on the PzH2000, if used by the German or Dutch army, show differrent patterns. Spots, no bands! Only in Afghanistan, mud was used to camouflage them, though one can discuss the (non)sence of that, based on the huge defence around these important vehicles, static and while travelling (Their value was so high that they were flown back to Europe in stead of using road and sea transport from Afghanistan)
About the tools: they were supplied together with the vehicles, thus having a NATO olive color, with, in rare cases, clear wooden parts. However, most of it was just green, close to the base vehicle colour. The wear and tear is rather rare since these vehicles do "suffer" from budget reductions, thus being used rather seldomly. Money makes the world go around, even in the army!
NOV 23, 2014 - 01:53 AM
Thank you for your review and reports of the build. Since the finished model was photographed under poor lighting, I suggest that the reddish colour i the result of the camera trying to make a picture, and not be too accurate about it. I am a modeler, and have considerable photographic experience, having worked in labs and studios during the Kodak years, in both black and white and colour, in mixing and monitoring, quality control, etc. The model looks great Darren!
MAY 17, 2016 - 04:35 AM
Copyright ©2021 by Darren Baker. Images and/or videos also by copyright holder unless otherwise noted. The views and opinions expressed herein are solely the views and opinions of the authors and/or contributors to this Web site and do not necessarily represent the views and/or opinions of Armorama, KitMaker Network, or Silver Star Enterrpises. All rights reserved. Originally published on: 2014-11-22 06:01:46. Unique Reads: 22763

WEB HOSTING BY


Copyright ©2021 Armorama and Kitmaker Network, a subsidiary of Silver Star Enterprises
All Rights Reserved. Please read our Conditions of Use and Privacy Policy.
All Rights Reserved. Please read our Conditions of Use and Privacy Policy.