

1⁄35Find Him; Dead or Alive
The groundwork
I always use plaster of paris for groundwork. If I intend to do elevated terrain such as here, I use styrofoam at first to give the desired levels. I cut, sand and brake several pieces of styrofoam and give a primary shape of the terrain. Styrofoam can be glued to the base with white glue easily.After the positioning of the bridge and placing the styrofoam pieces into desired positions, I waited for the glue to dry. Then I began to pour plaster in small amounts over the base. Using an old knife I give the shape of the terrain, paying attention to the fit of the terrain at the bridge. The unexpected gaps and holes, especially at the bridge-terrain junction have been fixed with acrylic wall repairing putty. I applied this putty after a couple hours after pouring the plaster. I let the plaster and putty dry over night.
Before starting for the groundwork detailing, I examined the plaster and putty work for possible defects and sanded down some excesses. The detailing stuff comes from nature: sand, different sizes of small stones, sawdust, moss and some florist's turf. I brushed some diluted white glue where I want to add the detail stuff. This ended up being almost everywhere but I worked in small areas consecutively. I sprinkled the sand first and a little bit turf, which gives an irregular look to the surface. Then I put the sawdust where I wanted to have vegetation, like a forest or grassy ground lets say. I repeated the processes, spreading the diluted glue between every kind of groundwork sprinklings. I've added some stones here and there, especially to the streambed, by gluing them down. I let them to dry fully over night.
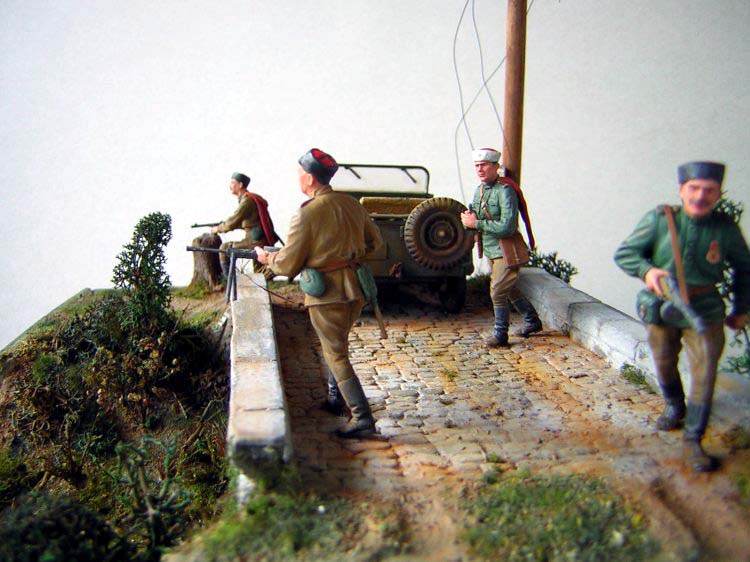
The next day, I studied the diorama for placement of the models. How would it look? I drilled many holes for the pins from the heels of the figures to test fit them on different positions on the diorama for different possibilities of presentations. These holes are very easy to drill because the plaster layer is thin, having styrofoam underneath. It is easy to fill them with acrylic putty and then weather them in the desired colour.
While drilling the holes and positioning the models and kept thinking of ways to enrich the scene, I had a brilliant idea of adding a telegraph post, with broken cables and with some road signs on it. I decided where to put it....and I drilled its hole on the base.
Then I applied a dark grey prime coat using acrylic based wall painting material. This paint is cheap and easy to find everywhere and the plaster sucks it. The plaster saturated with this kind of cheap paint won't be able to suck your precious hobby paints, saving your money and time. While waiting for the primer coat to dry, the vehicle and the figures had been washed and then left to dry before applying their undercoat paint.
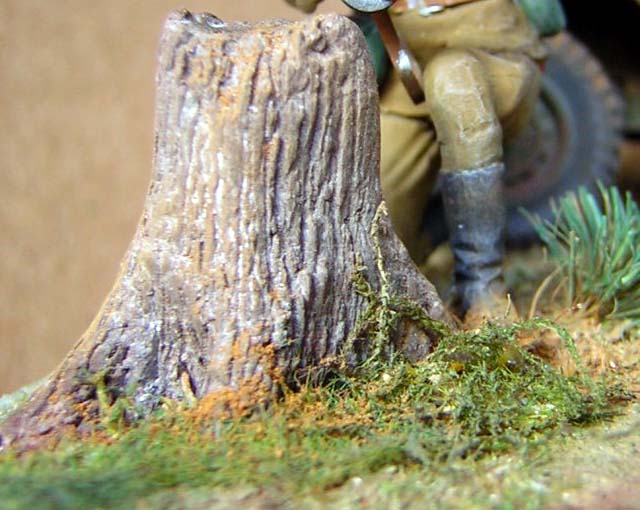
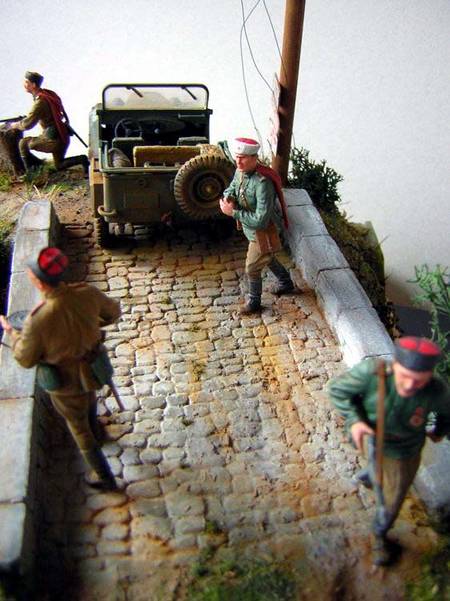
Next, I applied a coat of different earth colours in enamels to the base using my airbrush. I repeated this till it covers the dark grey coat. I've dry brushed the bridge with lighter grey tones. The ground was also dry brushed with earth colour oils. Then I added some static grass. Using the same "brushing diluted glue, sprinkling the stuff, spraying glue and gently blowing away the excess" method. I've added varieties of bush like plants and roots collected from the backyard. I also used some foliage stuff produced by Noch for Railroad Modelling. A piece of hemp rope works fantastic for imitating long grass. I used one of my scratch built tree trunk on a corner. I added some sponge pieces between the stones of the bridge, they looked like grooving grass there.
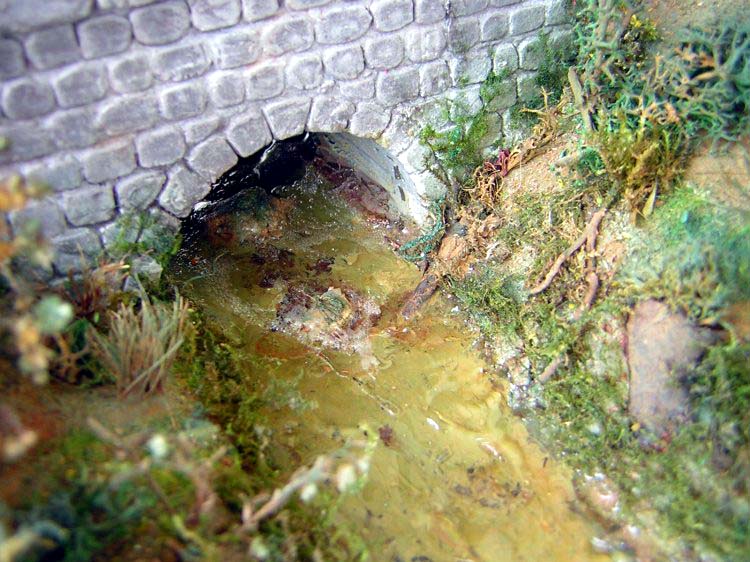
The most challenging part of this diorama was the stream. I had Woodland Scenics EZ water because there is nothing else to buy where I live (Romania). I only had a little experience using this material. The first attempt I didn't like and covered it with a coat of enamel paint. The second attempt worked but I lost all the streambed detail with created with stones and sand. That wasn't very important, the result was satisfactory. I added some moss nearby the stream bed, close to the water.
After all was done, I washed every part of diorama with darker shades of the original colours and then I painted the foliage in different shades of green. First using an airbrush and then just by dry brushing I tried to give the colour details.
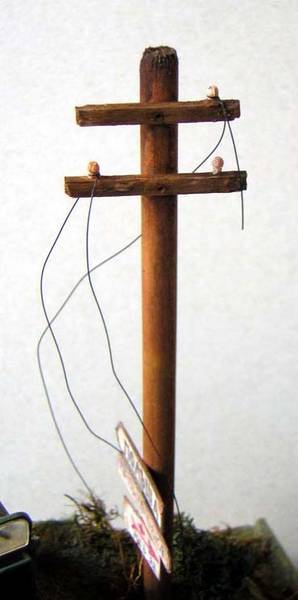
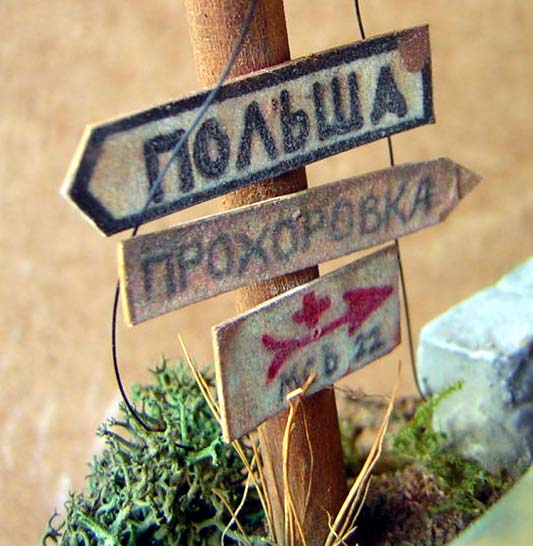
The telegraph post
This was a good idea but how to do it? I thought a lot about it and decide to use a pencil. I've mounted the pencil on a rotatory tool and lightly sanded it with a sandpaper to take off the paint on it. When all the paint has been removed the pencil looked like a real post. I've cut it in a desired length. Then I've glued two pieces of balsa wood on it. For the cable holding pieces (I have no idea what are they called) I used a piece, which I've cut from a insulin syringe. The cables have been imitated using a polystyrene medical suture thread.Road signs came from Plusmodel.
Final weathering
For me. the most enjoyable part of a diorama work is this final weathering. I use several colours of pastel chalks and oils. First of all with some oil paint I gave some dry brushing touches where I like. Then little touches of pastel chalk dust all over, concentrating on dusty areas. This step is hard to explain, it is just spontaneous.. It took several hours of just playing on the diorama.Conclusion and thanks
I had great fun and did not spend much money building this diorama and that is why I wanted to share it with you all. Almost at every step of this diorama I've discussed the details with my modeller friends in Armorama forums. They had excellent ideas, comments and constructive critics. I thank them all.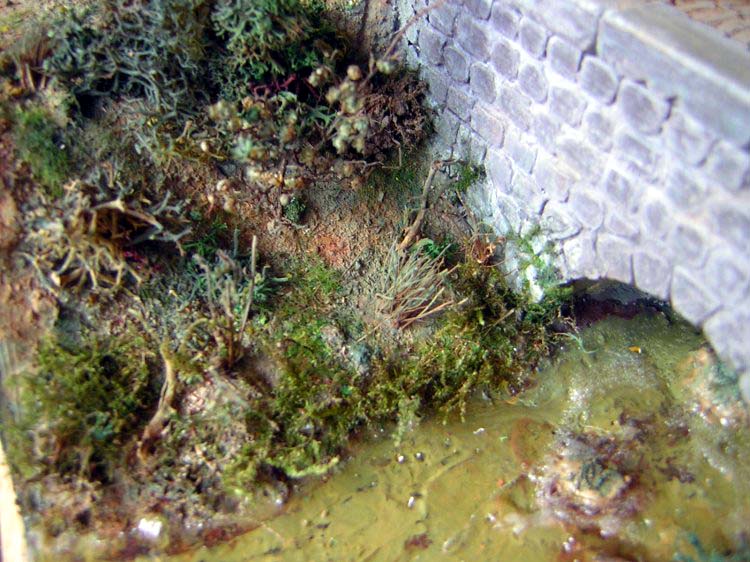

About the Author


FROM: TEKIRDAG, TURKEY / TüRKçE
Born in 1973, Istanbul.I'm married and I have two lovely sons. As a son of a modeller I've built many aircraft models when I was just a little kid. Then by my father's suggestions I've built some sailing ships in large scales. Later my favorites were 1/35 dioramas, mostly WW2 German till I met the ...
Copyright ©2021 by Alguhan Akşar. Images and/or videos also by copyright holder unless otherwise noted. The views and opinions expressed herein are solely the views and opinions of the authors and/or contributors to this Web site and do not necessarily represent the views and/or opinions of Armorama, KitMaker Network, or Silver Star Enterrpises. All rights reserved. Originally published on: 2005-05-19 00:00:00. Unique Reads: 21306

WEB HOSTING BY


Copyright ©2021 Armorama and Kitmaker Network, a subsidiary of Silver Star Enterprises
All Rights Reserved. Please read our Conditions of Use and Privacy Policy.
All Rights Reserved. Please read our Conditions of Use and Privacy Policy.