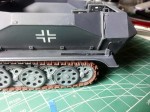
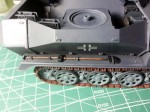
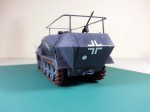
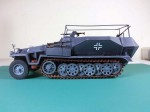
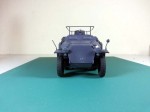
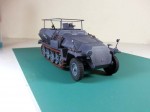
1⁄35Sd.Kfz. 251/17 Ausf.C
...
Post a Comment
Body
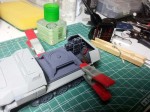
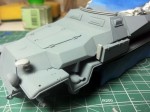
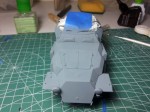
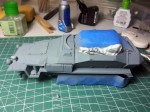
The body construction it is quite complex, and there I encountered the first problems. The chassis and the sides do not sit at a right angle at front and back. Perhaps the issue was created when I attached the front of the lower chassis, or perhaps the base is just warped from the box, I’m not sure. To address the problem, I glued the front first (about one third of the entire length of the vehicle). When the glue was thoroughly dry and the bond firm, I forced the back of the lateral sides against the end of the chassis with tape, then I applied glue liberally, making sure I’m not spoiling the surface of the model. The result was a good bond all along the chassis and the vertical warp was eliminated. I couldn’t avoid the lateral gap and the back end needed some filler. Once I sanded the join, I attached the track guards on both sides. The angle is excellent and joined with no gap along the length of the body. In the front section the story was a little different: four (small) gaps had to be dispensed with. The folding sides – the most prominent feature of Sd.Kfz. 251/17, also fitted well, but not airtight. Viewed from inside, the light passed through the lateral edge of the folding sides and the edge of the body. I decided to fill the edges too. After all main parts were in place, I primed the model, and only after that applied the small and delicate details, such as the minuscule canvas latches.Painting
First I covered the interior with paper towel and masking tape. For primer I used Testors flat medium gray which provides excellent opacity and offers excellent grip to both plastic and to the subsequent coat. As mentioned above, the construction wasn’t entirely finished by the time I applied the first primer coat. I left for later the very small details in case I needed some heavy sanding. When I was happy with the way the model looks, I added extra details, like the MG protective rail, side turn signals and canvas latches. All surfaces were primed one more time, then I sprayed pre-shadows with flat black acrylic. Honestly, I wasn’t sure they will have any effect, knowing the base coat will be quite dark. I was pleasantly surprised to discover the shadows under the first coat of Panzergrau… the next step was to dry-brush the raised surfaces, with a lighter tone of the base coat. At this stage the contrast looks quite sharp but I knew from experience that the protective coat will dim the appearance. With this step, the painting was virtually finished, with the exception of small chips, scratches or imperfections which I corrected later.Decals and exterior details
After painting the exterior of the body with the first coat of base color, I airbrushed diluted acrylic floor polish (Klear / Future) to achieve a semi-gloss appearance and to preserve the work; also I needed a glossy surface for decals. I have to confess I am not a big fan of decaling and I always prefer masks when possible. After I studied the exact placement of the decals, I applied a light coat of floor polish over the selected surface areas. To my relief, the decals performed impeccably. Very light residue remained on the model’s surface, easy to remove with a damp cloth. Further on, I added up pre-painted stowage (carbines, carbine supports, inertia starter handle and various tools). Another semi-gloss coat was applied to unify the shades and to protect the work.Weathering
Based on photographic evidence, the depicted SPW was in rather very good condition. In consequence, I kept the weathering to minimum: just a few oily patches at the front of the engine bay and around the back doors. The front armored plate received the “harshest” treatment, along with the fenders. All work was then further protected with a final coat (very lightly applied) of semi-gloss. The weathering is not finished, I still have to add the dust effects, but I’m going to do that at a later stage: I use homemade pigments, and I want to be sure all the vehicles (six of them are planned) and figures will receive the same pigment treatment with the diorama base. No mud will be needed as the action is placed in the summer of 1942 in the south of the Soviet Union.Copyright ©2021 by Gabriel Szeitz. Images and/or videos also by copyright holder unless otherwise noted. The views and opinions expressed herein are solely the views and opinions of the authors and/or contributors to this Web site and do not necessarily represent the views and/or opinions of Armorama, KitMaker Network, or Silver Star Enterrpises. All rights reserved. Originally published on: 2015-09-22 13:16:30. Unique Reads: 16774


