

1⁄35Sd.Kfz. 251/17 Ausf.C
...
Post a Comment
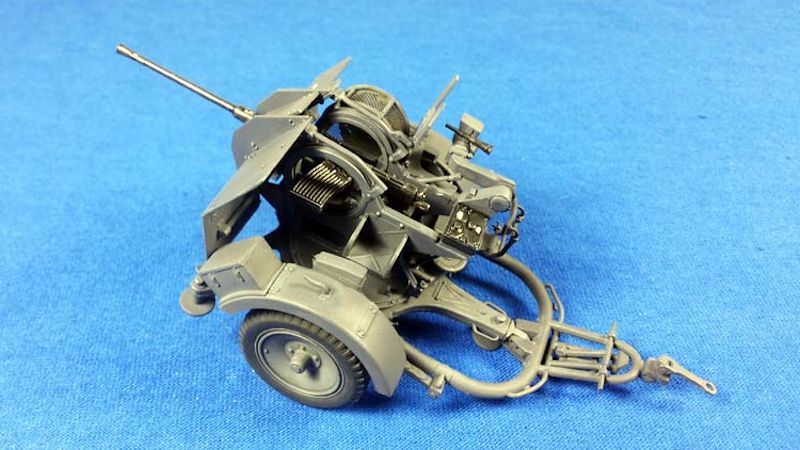
Flak 38
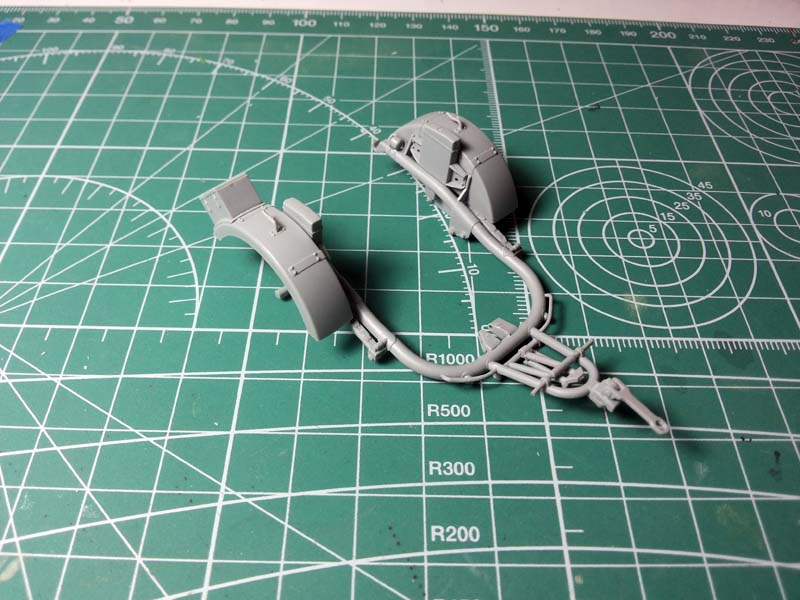
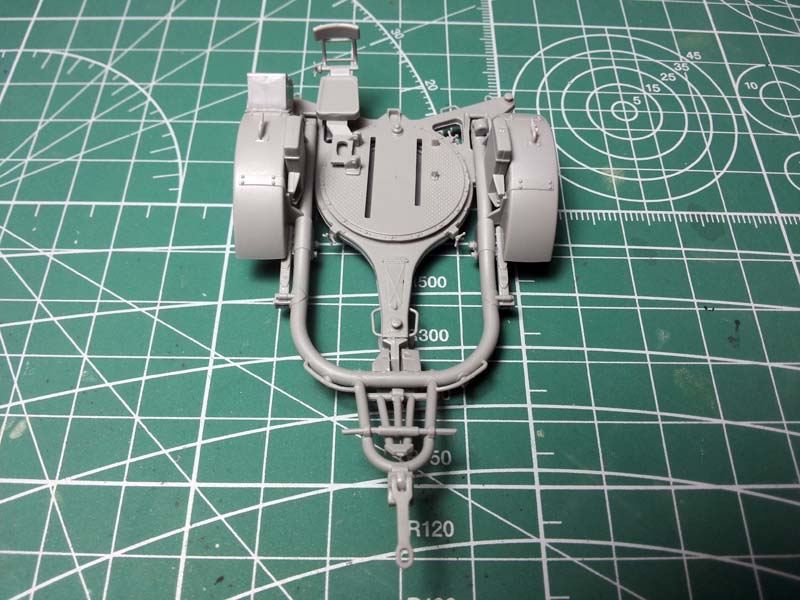
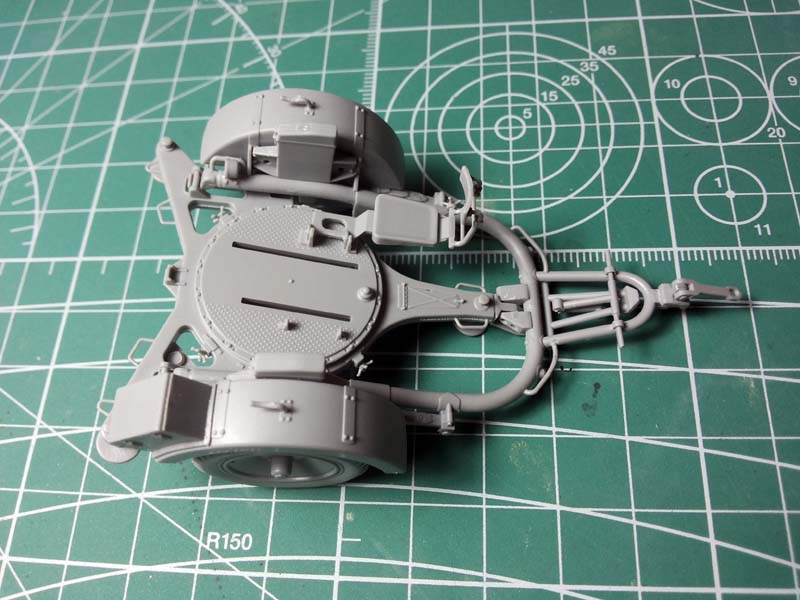
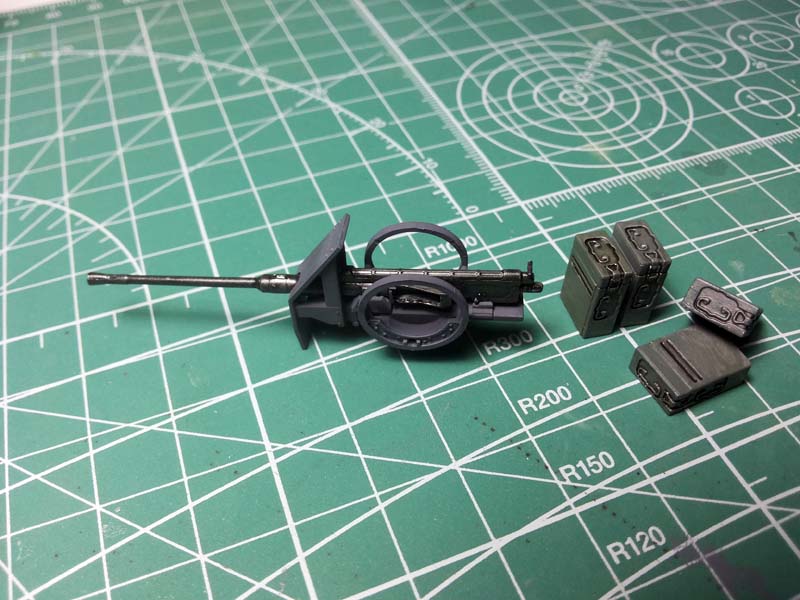
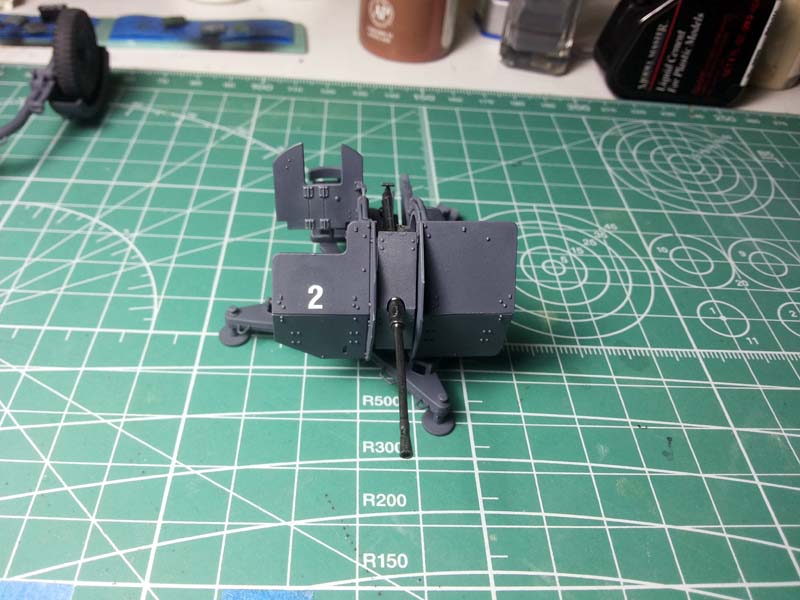
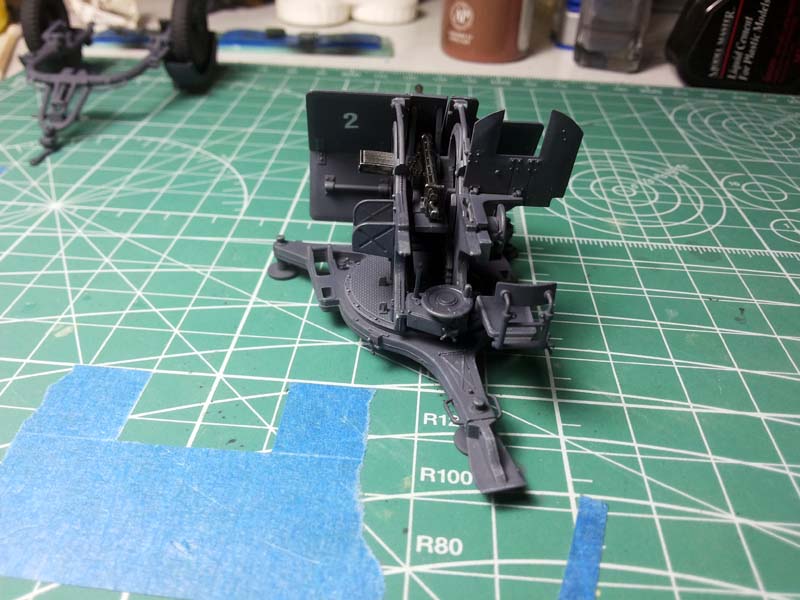
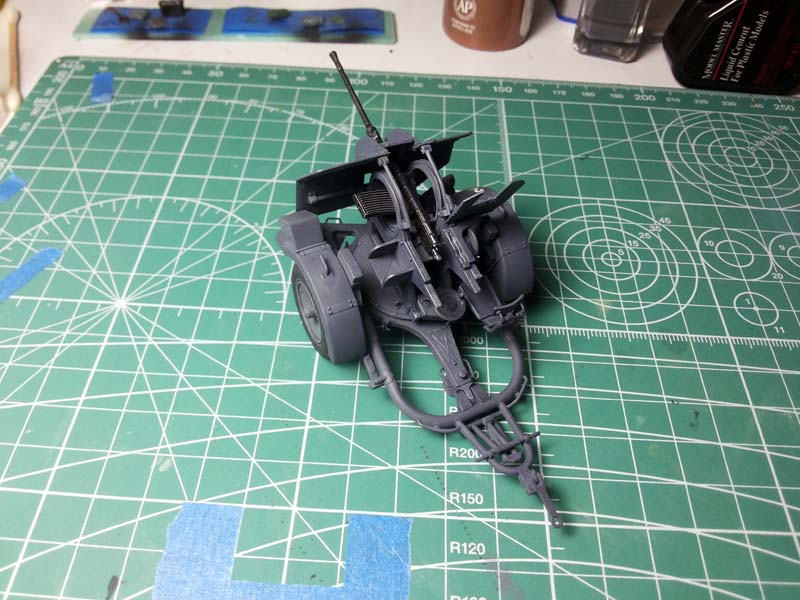
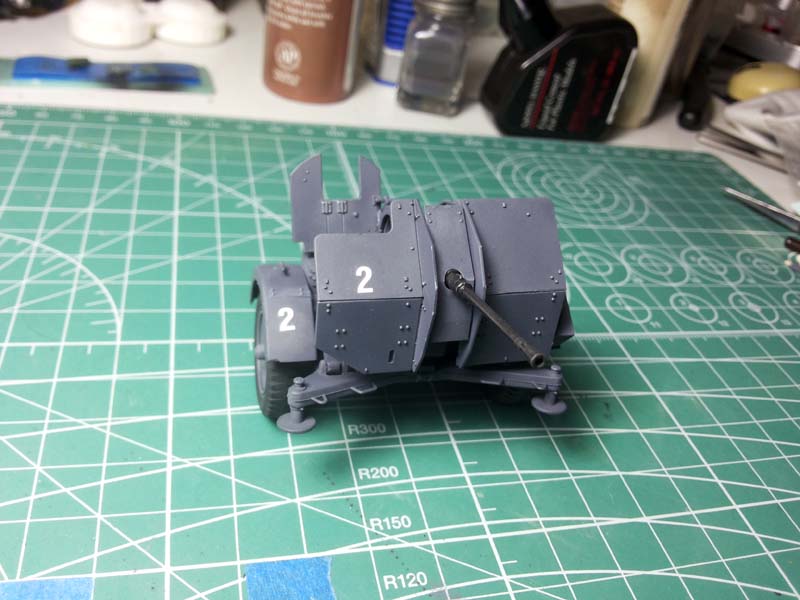
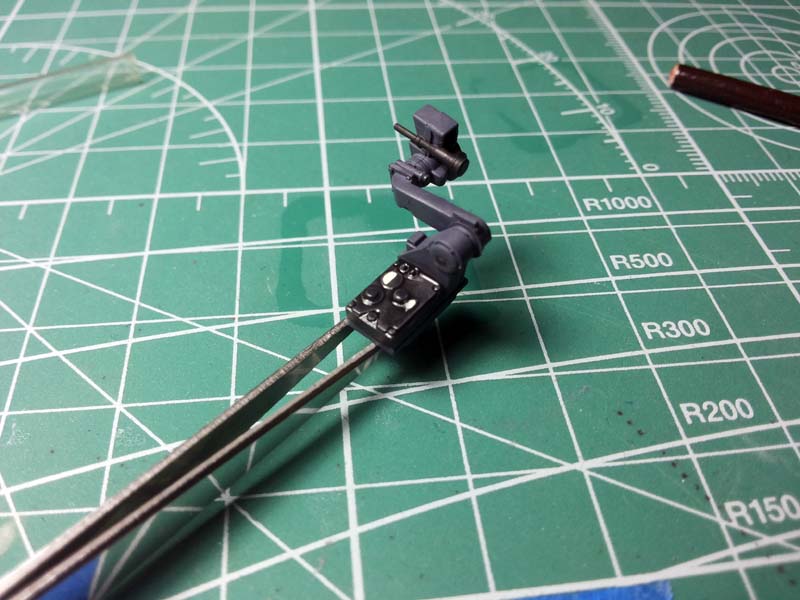
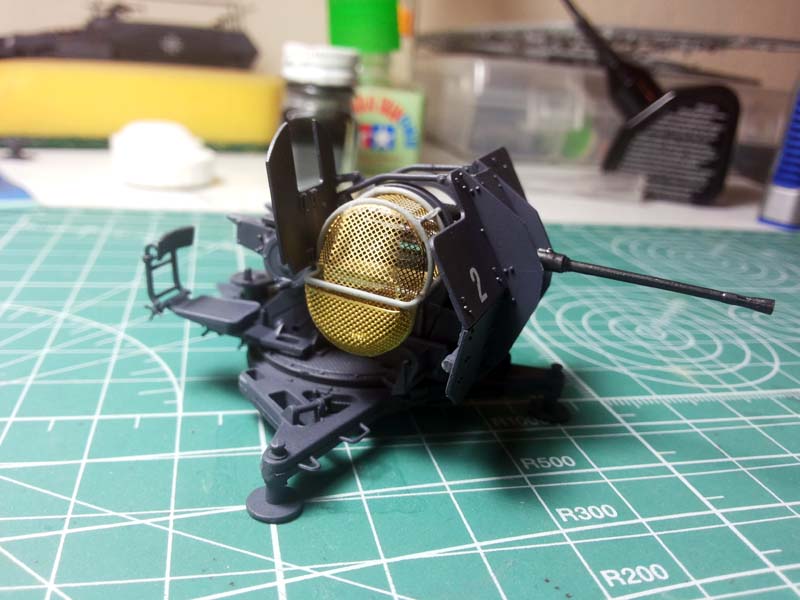
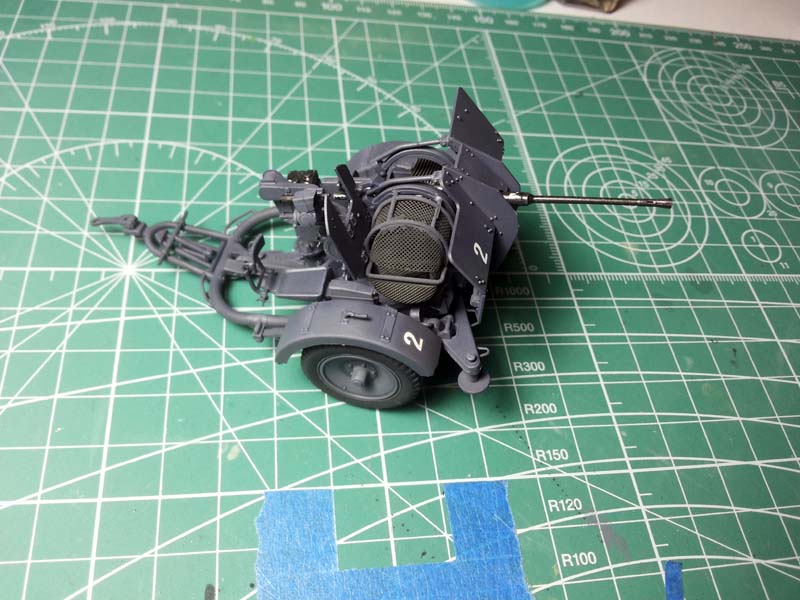
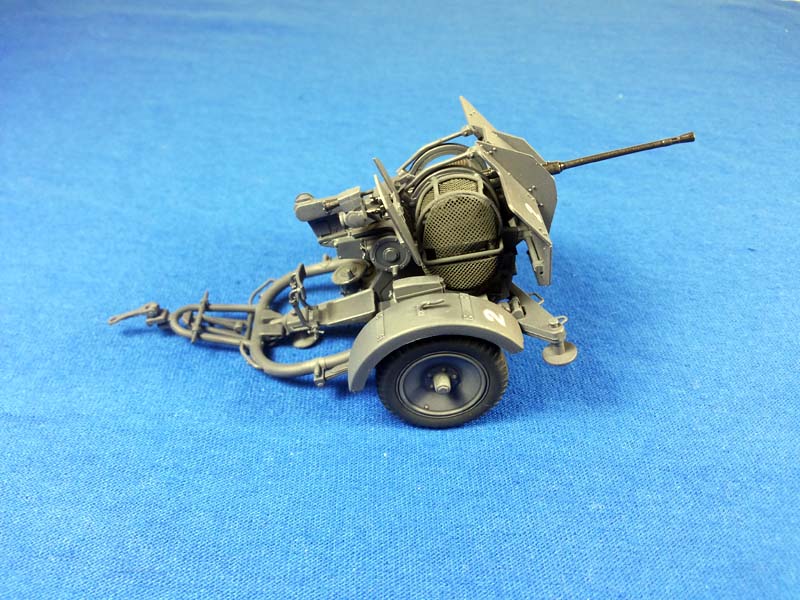
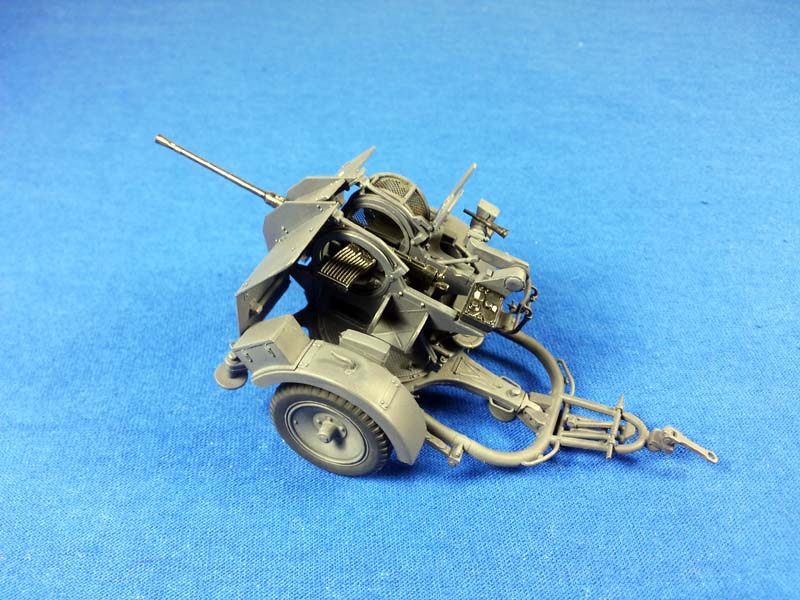
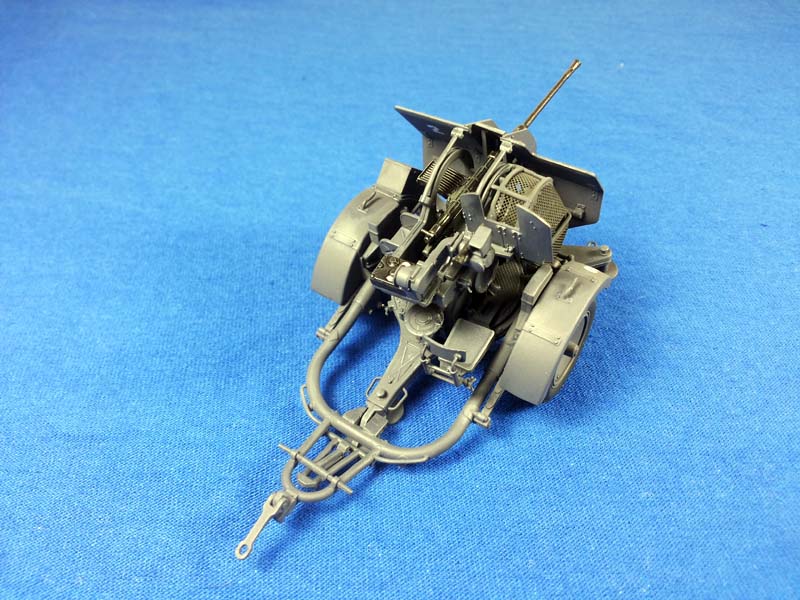
As soon I finished the SPW, I knew I faced a dilemma: to do or not to do the gun? Truly, I had chosen the command vehicle, but without the crew (not provided by Dragon, despite the fact that they make one) and without the ammunition cases, the interior looked desolately empty. On the other hand, the whole kit of the AA gun was in the box, still in its plastic bag I chose to make the best with what was in the box. We knew that the SPW were employed as towing vehicles whenever they were available. It suited my diorama plan, as the main idea was to depict a column on the move, at a bridge crossing: mixed elements from Herman Goering flak regiment and Wehrmacht pushing forward in their last offensive on the Eastern front. A side issue was the lack of assembly instructions, but it was easy to find and download from Dragons web site, as it is sold as a separate kit in its own right. I have to confess that I couldnt resist the level of detail, and I knew that if I left the little kit in the box for later, well, ahem my schedule is just too unforgiving at the moment (two more SPWs, a truck, and a car to be delivered by the end of the year ) Without further ado, I start building the gun carriage and I was completely absorbed another delicious delay (sorry for being selfish). The assembly is quite fiddly, although the engineering is excellent. The abundance of detail makes the build a rather slow process. To my surprise, I went through without breaking any parts, and without sacrifices to the mighty Carpet Monster! Many dry fits ensured the process went in the right way I built the Flak in easy to paint and easy to handle sub-assemblies, painting as I go. Simultaneously, I built and painted the guns ordnance, which I used mainly as interior stowage for the SPW. The painting went quite easily, excepting a couple of details trailing behind. The kit provides no decals for the Flak, and I would very much love some kill marks. I decided to simplify the matter by adding numbers from the Dragon decal sheet. I know, usually the batteries were marked with letters but I felt like breaking the rule, attaching numerals (Regimental specific markings? Odd markings? Temporary markings? I dont know!) The same decal, white 2 was applied to the trailers mud guard and inside and outside the gun shield. Then I moved to PE parts. At the beginning, I had a headache just looking at the instructions to make the matters worse, a small detail from the spent ammunition nets frame was broken on the sprue (the only incident of this kind). I scratch built a replacement from stretched sprue. To my surprise and relief, I managed to bend and assemble the PE parts in just one evening! Once completed, Dragons Flak38 is a very nice little kit.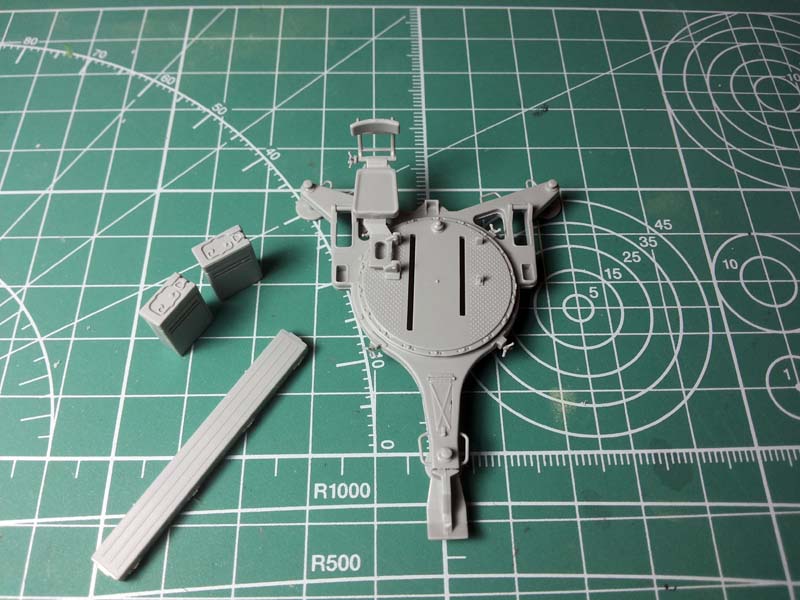

About the Author


FROM: NETHERLANDS ANTILLES
Born in Romania, from a German father. Classical studies, Latin teacher. Currently holding French residency, business owner in a Dutch island where currently spoken language is English. At home I speak Spanish, though. Interest in history and modelling: since babyhood, I grown with my father's stor...
Comments
Copyright ©2021 by Gabriel Szeitz. Images and/or videos also by copyright holder unless otherwise noted. The views and opinions expressed herein are solely the views and opinions of the authors and/or contributors to this Web site and do not necessarily represent the views and/or opinions of Armorama, KitMaker Network, or Silver Star Enterrpises. All rights reserved. Originally published on: 2015-09-22 13:16:30. Unique Reads: 16774

WEB HOSTING BY


Copyright ©2021 Armorama and Kitmaker Network, a subsidiary of Silver Star Enterprises
All Rights Reserved. Please read our Conditions of Use and Privacy Policy.
All Rights Reserved. Please read our Conditions of Use and Privacy Policy.