

1⁄35Harley-Davidson WLA
5
Comments
History
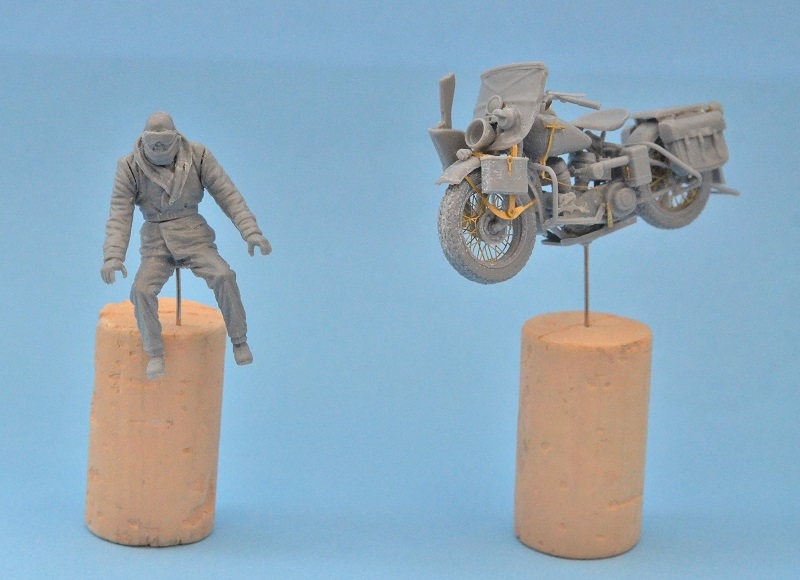
The Harley-Davidson WLA is a Harley-Davidson motorcycle that was produced to US Army specifications in the years during and around World War II. It was based on an existing civilian model, the WL. The WLA name comes from: W: the W family of motorcycles. Harley-Davidson (except in very early models) gives a letter designation for each model family. The W series at the time was the newest incarnation of the 45-cubic-inch (740 cm3) flathead motor, and was developed from the earlier R family 19321936. L: "high compression", in the usual HD scheme. The "low compression" W model was only briefly available. A: army. The company would also produce a model to the slightly different specifications of the Canadian Army, which would be named the WLC. Harley-Davidson began producing the WLA in small numbers in 1940. The later entry of the United States into World War II saw significantly increased production, with over 90,000 being produced during the war.The Kit
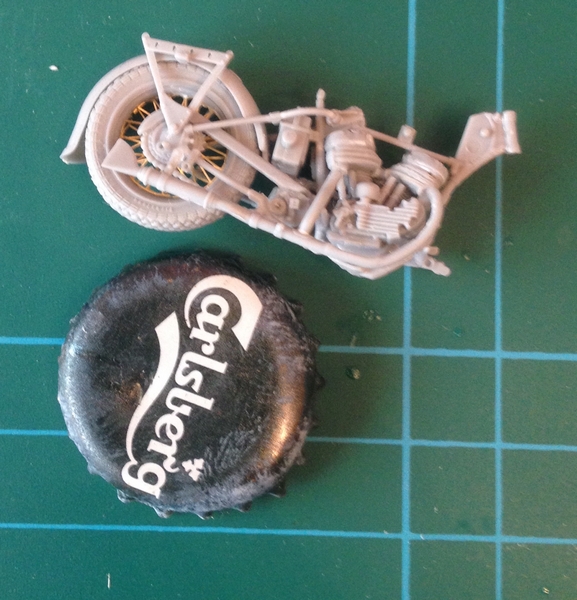
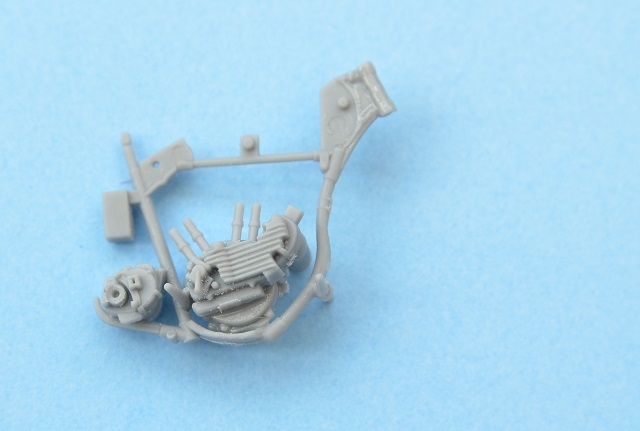
The kit arrives in a stout top opening cardboard box with an excellent painted rendition of the real thing on the lid. On opening the box you are confronted with;- 112 parts broken down over three sprues (A) for the bike consisting of 74 plastic grey pieces
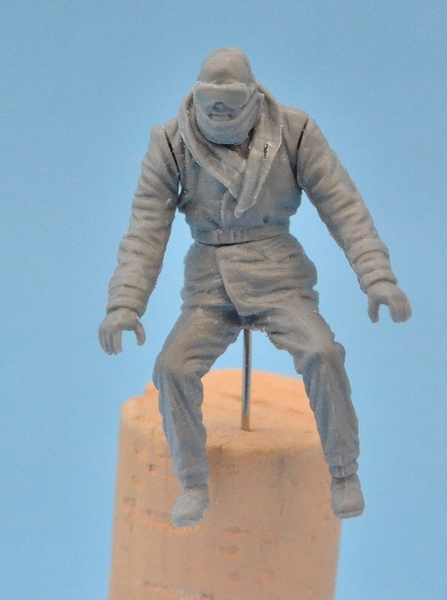
- 11 parts for the rider figure, sprue (B)
- 3 clear parts windshield and lights, sprue (C)
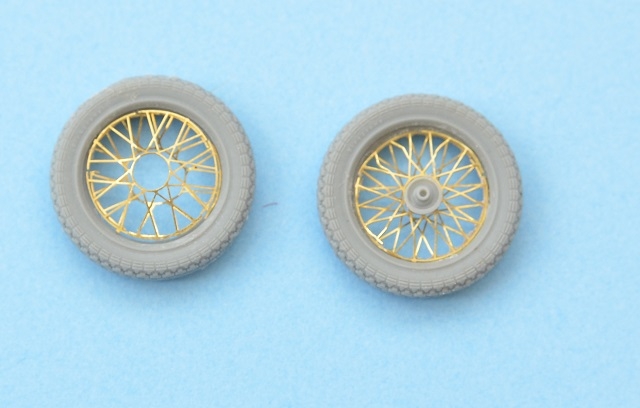
- 24 etched metal parts for the various brackets and supports
- 9 decals
- and one very nicely printed instruction booklet with full colour profiles.
Building
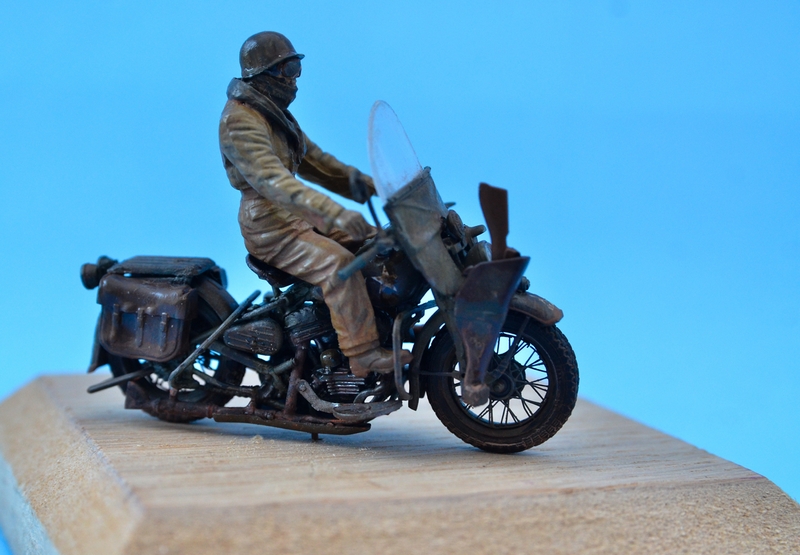
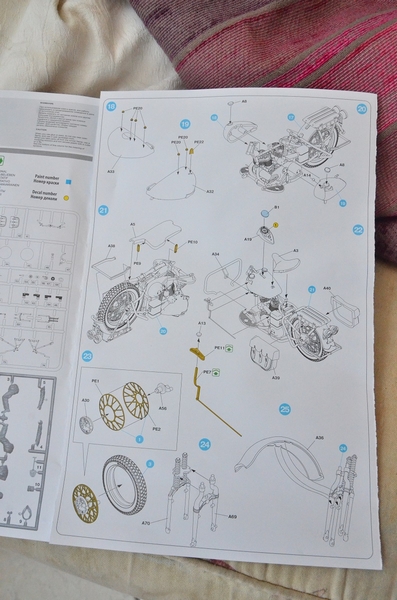
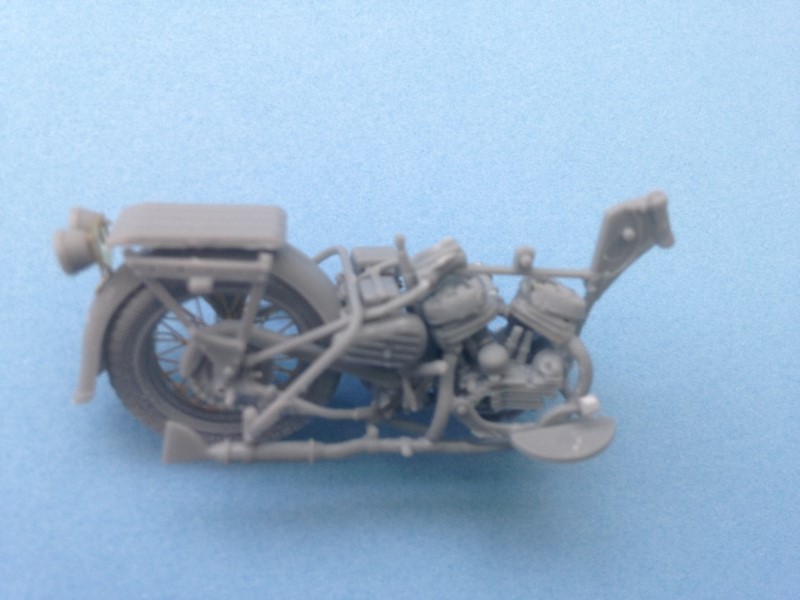
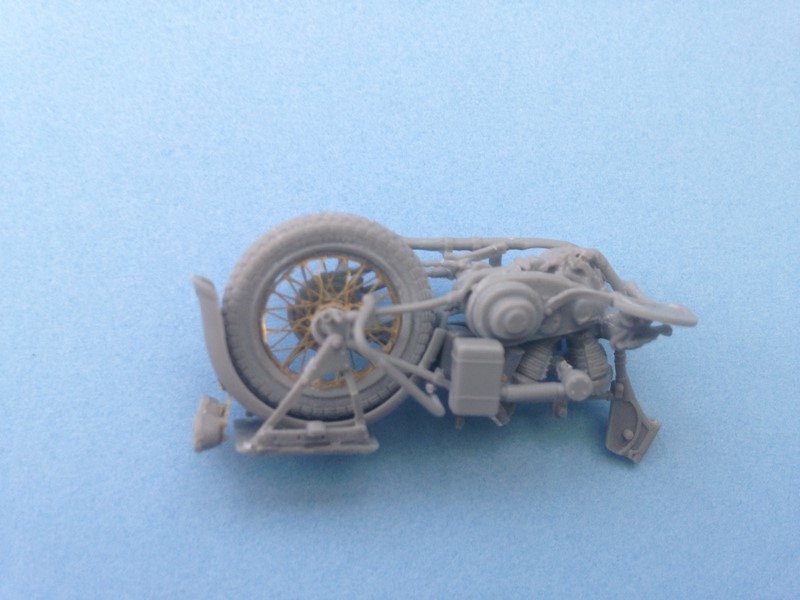
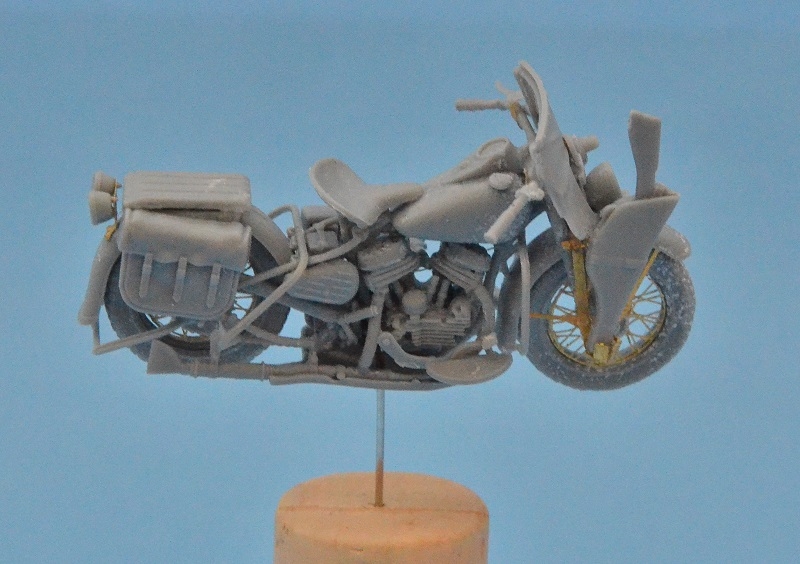
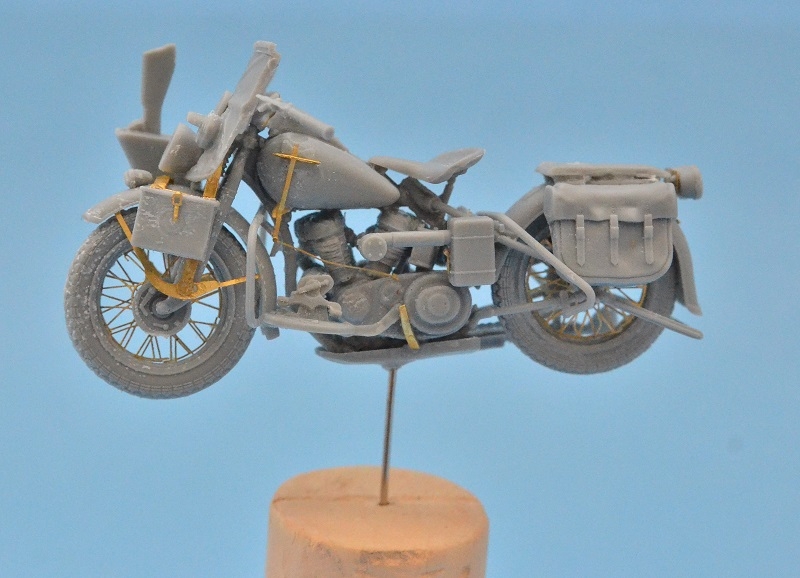
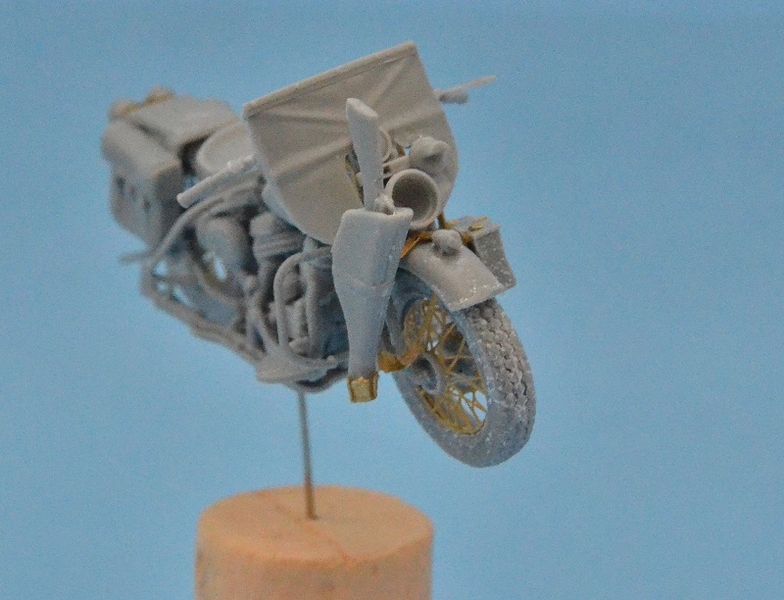
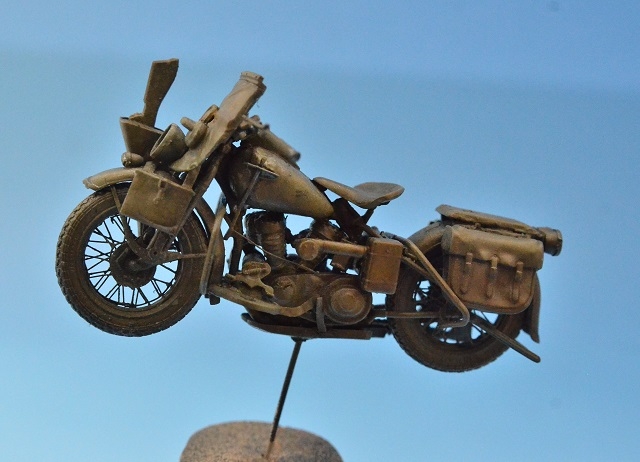
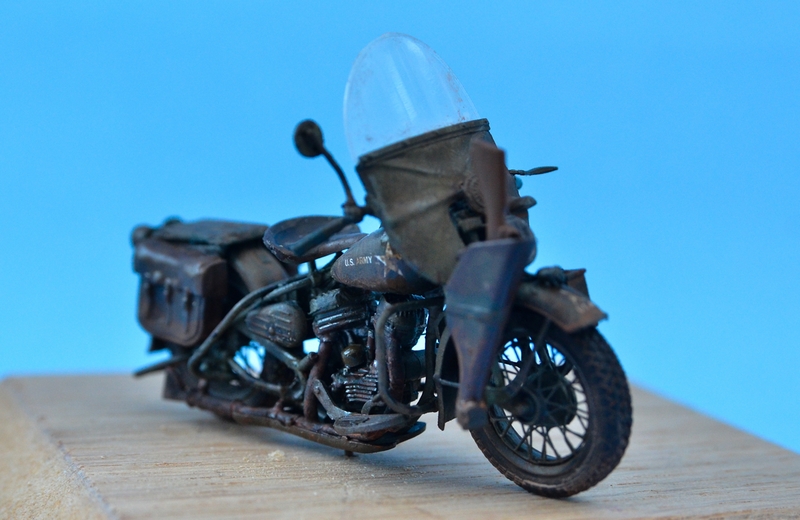
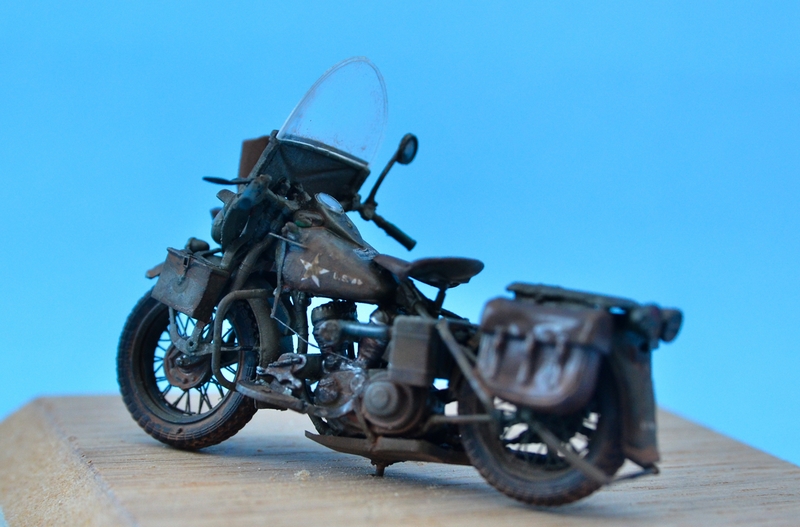
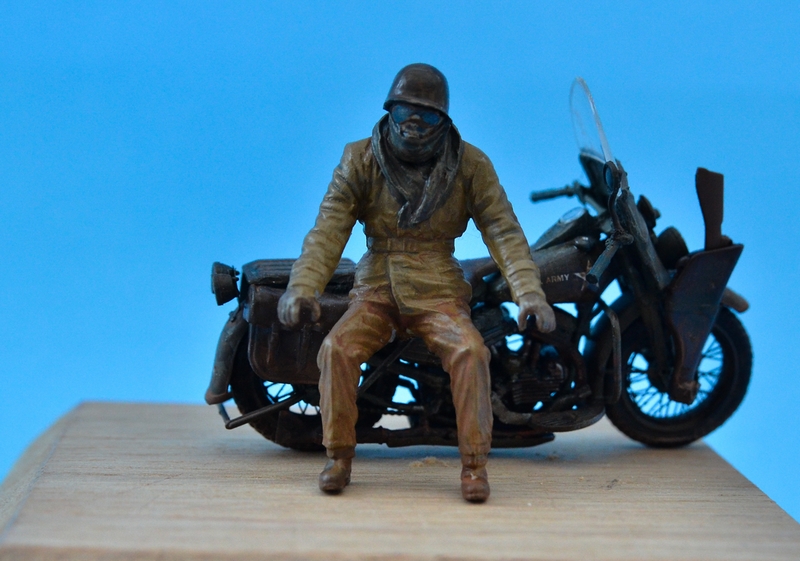
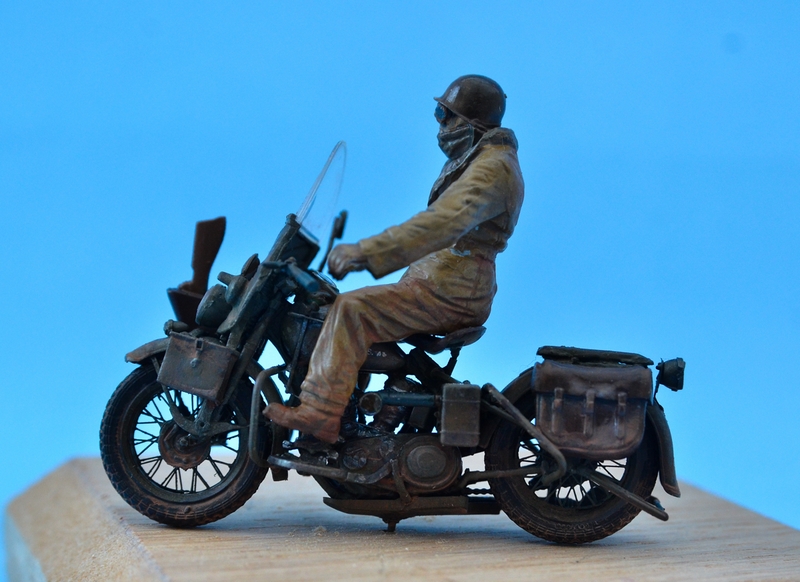
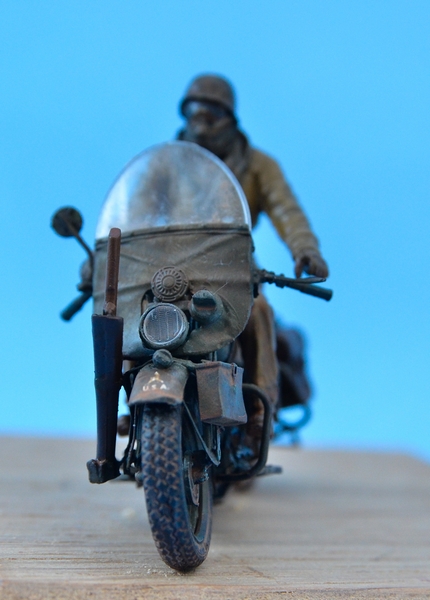
As stated previously the instructions come printed on a A4 fold out glossy booklet which is nicely produced, there are a couple of errors, missing parts, but will explain as we build the bike. A lot of the parts have little moulding pips on them and found it best to remove these from the very delicate parts, before removing the actual part from the sprues. Another thing to watch for is that some of these little pips are in fact supposed to be attached and are actually part of the main part, so double check before removing them. Its hard to try and attach something smaller than 1 mm to a 3mm piece of plastic, I know !! Steps 1 5 relate to the construction of the wheels and bending the etch into shape. One confusing issue on step 1 is when the instructions ask you to build two sets of the wheel spokes using parts PE1 and PE2, but there is only one PE1 and three PE2s. The PE1 and PE2 are constructed for the front Fork and the two PE2s for the rear assembly of the bike. The wheel struts are formed using a pair of moulds to get them into the correct shape. What I found by using these moulds is once the etch is bent its a bit of an issue getting them back out without causing any deformities with the freshly bent spokes. Step 2 MiniArt have, vey kindly, included a small jig to bend the four pieces of etch into the correct shapes. In hindsight I would advise you to mark the bent pieces of etch to make their use a lot easier latter on in the build process. What I discovered, unfortunately not until halfway, was to look at the current step and then flick forward a few steps to see where the current part should actually mate to. It was too late for the rear light cluster, just an arrow pointing to somewhere on the rear mudguard (step 14), but getting further in the build you could see exactly where it should have been glued (step 16), the mudguard on my model is sitting slightly to high due to it shown as fitting onto part A73/A74, it should actually go past this point and rest on part A26. Meaning I had my mudguard at the wrong height, even though it was correctly glued to the rear stowage support A25. Steps 7 10 These detail the building of the engine and care needs to be taken when adding the cylinder heads to ensure they are aligned correctly as in step 15 the exhaust system mates to two output holes and also fixes onto the motorbike frame, so these need to be exact. Steps 11 13 Carry on the process of putting this kit together with the addition of the left and right rear frames, which might need a little persuasion with some superglue to fix them to the rear vertical stem, and then onto the chain assembly, which has very fine link details. Steps 14- 15 Add on the rear mudguard, already discussed, the rear parcel/stowage shelf, the exhaust system and the oil tank. Steps 16-17 We now have something looking like a motorbike, gone from its embryonic state in steps 5-11, to a more developed and recognisable item. Step 16 adds in the foot rest, clutch foot pedal. Step 17 shows the right hand foot rest part A59 attached to the bike, but this part isnt shown anywhere else in the instructions, so I also added this part at this time. Steps 18-20 Here we start the construction of the fuel tank, with the smallest bits of photo etch I have ever seen, no bigger than a pin head and 6 of them to fix to the fuel tank halves, unfortunately they go on the underside of the tank so you never get to see them but at least you know they are there. In Step 20 the two halves of the fuel tank are added to the model and they fit very well once lined up, with no gaps to fill or clean up. Steps 21-22 With step 21 you add the underside tray and two more small pieces of brass, as joiners and also the bike stand, in Step 22 the side panniers are added along with the seat and instrument cowling. I wouldnt be using the kit decals instead choosing the excellent set from Archer transfers, whatever you decide, best left off until the model is painted. Step 23 Another point of ambiguity, parts A30 and A56 pass through the centres of the etched spokes, but they are not keyed, so another point where you need to ensure they line up with each other whilst looking through the brass spokes, else you will be in trouble later on at step 26. I think MiniArt missed a trick here, would it have been so difficult to add a notch to ensure that both parts sat in the correct orientation. Steps 24-25 Deal with the construction of the front forks, with 3 parts been used to construct this item including the front mudguard, which sits into notches on the underside of the forks. Step 26 Here you attach the front wheel to the front forks, and its a bit fiddly to get all four points attached at the same time, I found it best to bend the forks so the wheel sat inside them and then glue one side top fixing and then repeat on the other side and then glue the two remaining attachment points, all with the aid of some thin superglue. Steps 27-29 Front mudguard supports; there are 4 pieces of brass to construct the front guard supports and the machine gun holder (l) and the ammunition box (r), meaning there are 4 touch points for the brass onto the plastic wheel assembly. I found it easier, due to no actual markings for joining all the etch together, to glue PE3 and PE4 to the hubs and the mudguard A36, followed by the uprights PE3/PE4 to parts A69/A70, then working from their add parts PE5 and PE6 finally followed by the cross braces of PE17 and PE21. It is a lot easier than it sounds I promise. Step 30 Here you add 3 parts of brass to the ammo box to give it a bit of finesse. Step 31 Two more pieces of brass (clamps) are attached to the handlebars along with the mirror assembly. Step 32 The gun and its case are added to the right side of the bike. Step 33 Sees the attachment of the forks and handle bars to the main bike module, the instructions suggest no glue, but as the wheel and handlebars have nothing joining them together (handlebars could point left and the wheel point right!), I decided to glue them in place. Step 34 35 Front shield is added and in step 35 the various lights and horn are added, I left the glass of the light and the windshield whilst the model was painted. And thats it all built up into a stunning little replica of this magnificent bike. Unfortunately the figure does not quite sit correctly on the seat, once built up from 8 pieces, so does not line up with the handle bars and the foot pedals, interestingly on MiniArts build up photos he doesnt manage to reach the grips. I have purchased the Mantis Miniatures WLA figure and he sits a lot better on the bike and it proved my suspicions correctly that MiniArts figures thighs need trimming down a lot to sit on the seat.Painting
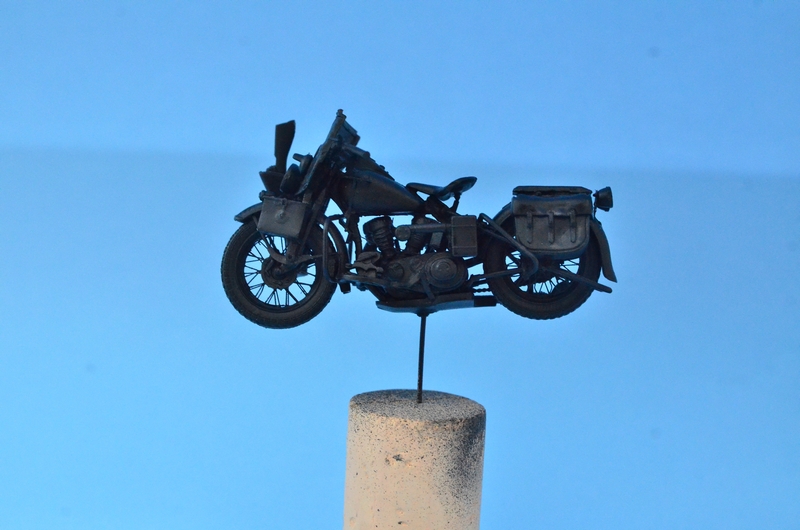
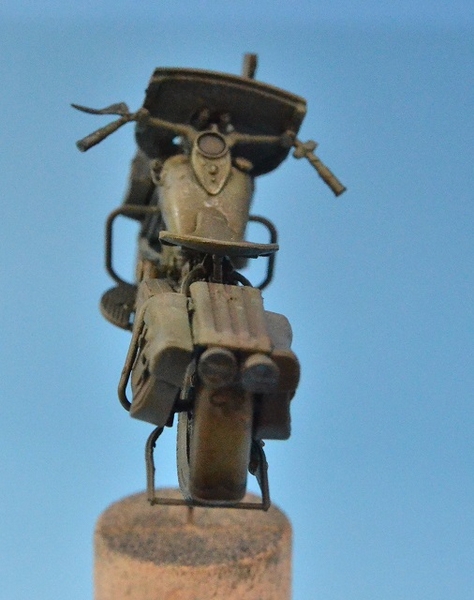
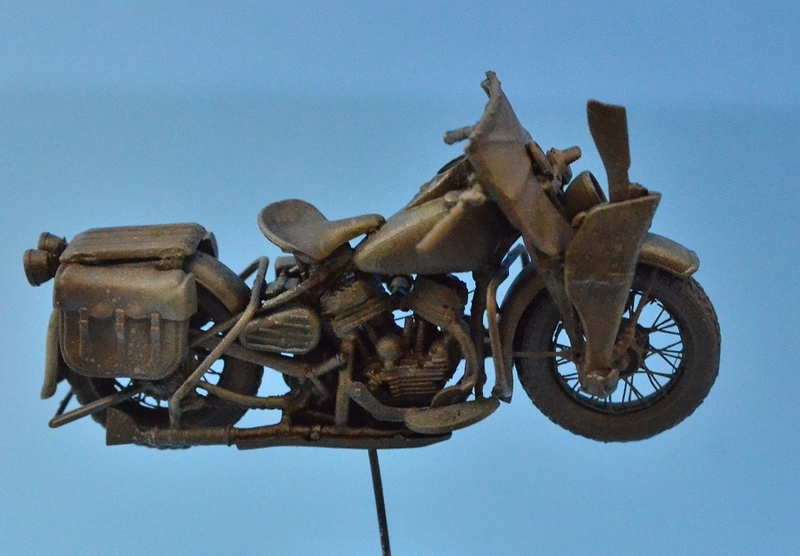
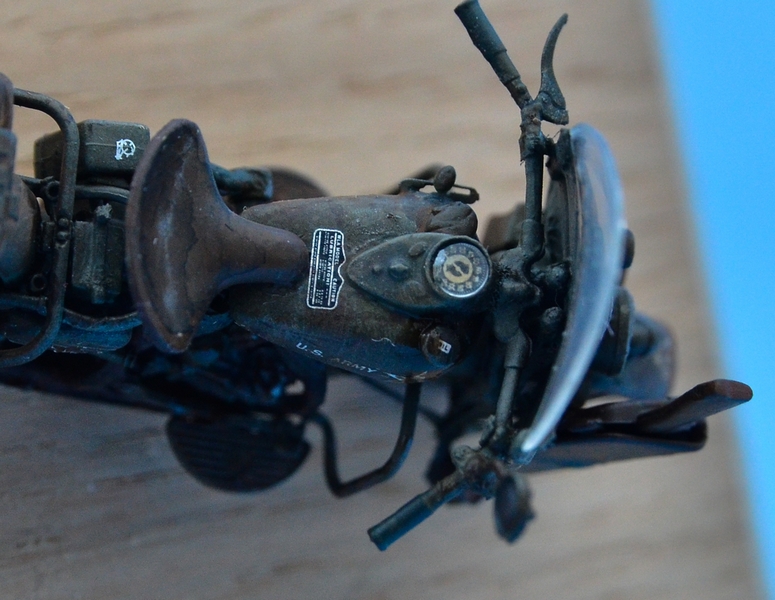
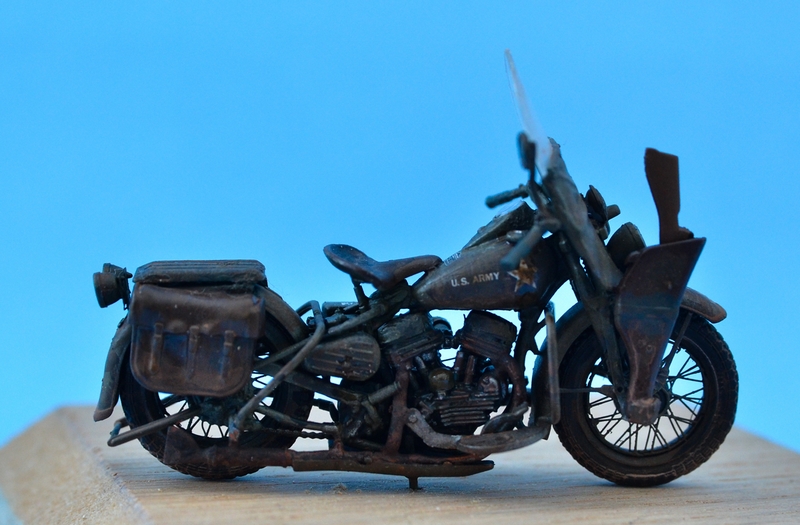
The bike was primed using Vallejo Black primer and left for a day to harden, the colours were applied from the Vallejo US olive modulation set, for such a small object I had to overspray a few of the last highlights as they just didnt look right. Leather seat and bags were painted with Revell leather and then mixtures of orange and tan, sealed with gloss varnish then washed with a black wash, this black wash was also used on the seat and the engine areas to bring out the detail. The rider was first base coated via my airbrush (Vallejo Grey Primer) and then set aside to dry. Once dry the figure received a full coat of Vallejo Khaki and left for a day, a darker wash was mixed using the base coat and panzer grey and painted into the crevices on the figure, this was built up wash on wash with a final darker wash for the deepest creases. A highlight colour was made using the base coat plus Vallejo basic skin tone and dry brushed to accentuate the folds in the uniform. If you dont like painting faces then this figure is ideal, as once the goggles, helmet and scarf are added a quick lick of a flesh colour will suffice for all the flesh that requires painting, it is a shame though that the goggles were not supplied as clear items. To break up the monotony of the Khaki scheme I decided to paint his scarf olive drab again this was weathered as per the uniform. The uniform received a coat of Vallejo Matt and the helmet semi-gloss. I used a mix of the kit decals (front, rear and stars), and the excellent Archer set and used the instrument panel, oil label, and filter labels. The instrument panel is still clearly visible when you look through the glass. Just need to build the Mantis figure and attach them to a suitable base in the near future.Conclusion
So the big question, would I build another one of these bikes, well taking all the fiddly construction, every other step presenting some challenge, trying to get bits to line up on other parts which in turn need to line up somewhere else, the frustration at bits not staying where I wanted them to stay, the answer is simple YES, I would defiantly build one of these or in fact any other 1/35 scale motorbike in the future, I learned so much from this build that it would be amiss not use this experience to build more. For this bike I intend to combine it with Mantis Miniatures excellent resin WLA rider and a suitable piece of groundwork in the near future. Lows Instructions not very clear on the placement of certain parts; parts missing on instructions; mounting points; very ambiguous, lot of play on parts; etch is very soft, easily gets bent out of shape; very fragile till step 14 when model becomes a lot more stable (not a fault of MiniArt); no leg guards or extra stowage as per the box art; decals. Highs Fantastic detail on parts; etched wheel spokes, catches and braces; etch additions for scale thickness; superb subject; looks fantastic once completed. My thanks to Armorama for the review item.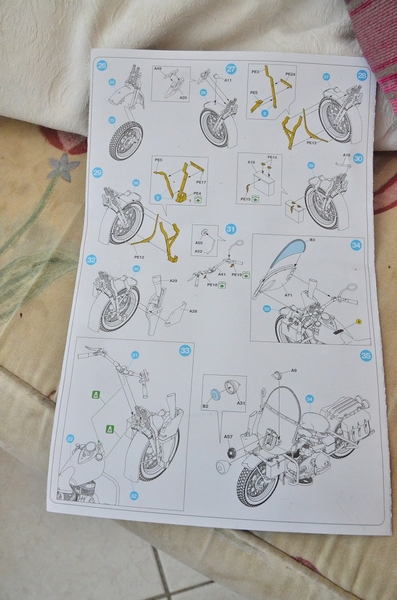


About the Author


FROM: ENGLAND - EAST ANGLIA, UNITED KINGDOM
Born in '66 Married to my understanding wife for 20+ years. i have two teenagers a Cocker spaniel and a tank full of fish, so guess where i am on the 'home scale'. I work in a fairly pressurised job, so building replicas of tanks and things is my way to chill - most of the time. 'Re-born modeller...
Comments

Thanks Stevebodie, nice review. Thinking what these couriers had to put up with during the winter of 44/45...brrrrr.
DEC 13, 2015 - 03:13 AM

I'm in the midst of building the MP version of this Miniart kit, and have discovered too late that in Step 2, the four pieces of etched brass are being formed to shape on a single plastic molding part. Since there is no text for the instructions, I took it to mean that the four pieces should be superglued to the forming part, although it didn't make sense to me at the time.
JAN 01, 2016 - 09:35 PM
So, now I am without the four brass pieces that I suspect are all for constructing the front fender supports and equipment boxes on the front end. And I certainly don't want to lay out another 30-some odd dollars for another Miniart kit just for a single small sheet of brass. Grrrrr
JAN 01, 2016 - 09:37 PM
Ouch! You could try to free the PE from the plastic by chucking it in the freezer in the hope that the glue will break free through differential contraction of the brass & plastic. (Same goes with using heat, but the plastic form would not survive if you applied the soldering iron to the brass...)
Having just built these same parts I would cut some new ones from plastic strip - it's a LOT easier than trying to assemble the PE with superglue! There wasn't any real positive alignment between parts, so it was a case of trial and error. They could have provided these brackets as a single PE part instead...
JAN 01, 2016 - 10:14 PM

Have to agree, the brass parts for the fender are a nightmare to align up, all very hit and miss, so much easier if they supplied as a single part each side with grooves for bend locations. Ended up glueing the pieces to the wheel arch and then holding all tight with tape till they had set.
FEB 02, 2016 - 09:35 PM
Copyright ©2021 by Steve Brodie. Images and/or videos also by copyright holder unless otherwise noted. The views and opinions expressed herein are solely the views and opinions of the authors and/or contributors to this Web site and do not necessarily represent the views and/or opinions of Armorama, KitMaker Network, or Silver Star Enterrpises. All rights reserved. Originally published on: 2015-11-23 00:00:00. Unique Reads: 12776

WEB HOSTING BY


Copyright ©2021 Armorama and Kitmaker Network, a subsidiary of Silver Star Enterprises
All Rights Reserved. Please read our Conditions of Use and Privacy Policy.
All Rights Reserved. Please read our Conditions of Use and Privacy Policy.