1⁄35
Ardennes Advance - Parts 3 & 4
Editors Note: This story is a
continuation of the project coverage started in
Ardennes Advance - A lesson in detail. Please read that article first if
you would like the whole story. Thanks.
 |
Part 3: The Stowage Bin |
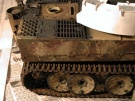
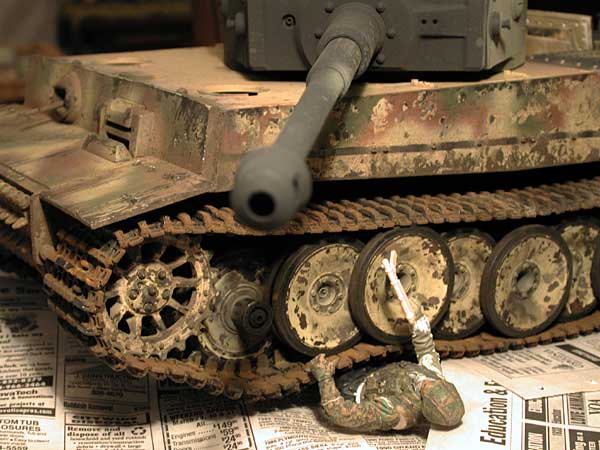
Battle damage or when referring to the
Tiger's battle scars, are another
learning curve that can be difficult to model at times. I've seen many
fantastic models treated in this manner and congratulate those who practice
this art. (which I am still struggling with). I study other accomplished
modelers (they know who they are) and I'm fortunate to have been able to
study their work. Thanks to Web sites such as these.
When I say battle scars I'm referring to damage while the subject is still
a threat or operational. I would define "battle damage" as the result of a
kill or heavy plate steel that pertains to the hull integrity or chassis.
Battle scars can be used to emphasize the units history and point out it's
weakness. In this case the rear of the
Tiger.
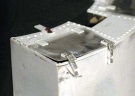
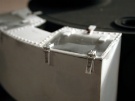
The plastic in the model is thick enough for glancing blows and gouges but
the stowage bin needs to be thinned out for this type of application.
I chose to scratch the stowage bin from O.15 though, in order to correct and
revise the bin as it is on this particular unit. After looking at photos I
must redo the rivets (to big). Field revisions and add-ons were more
prevalent than we sometimes realize. I just don't normally look for this in
historic photos. Since the whole bins thickness is closer to scale I can now
sit back and imagine: what direction did the projectile come from? Was it
(e.g.: HE, AP, small arms, etc.) If so, what was in the bin and how was it's
contents affected from the penetration and exit.
In one of the photos you can actually see darker spots which are the extra
thin styrene so I can model the penetration and exit hole. I also added a
first aid box on the one side. (field mod). The hatches can be slightly
deformed due to the impact.
|
| QuickTip: Model railroad
accessories are a gold mine for armour detail. |
|
©2002 - Text by Warren Jones. Photos by Jeremy Wedel. All Rights Reserved.

Copyright ©2021 by Warren Jones. Images and/or videos also by copyright holder unless otherwise noted. The views and opinions expressed herein are solely the views and opinions of the authors and/or contributors to this Web site and do not necessarily represent the views and/or opinions of Armorama, KitMaker Network, or Silver Star Enterrpises. All rights reserved.