1⁄35Diorama or Bust
14
Comments
Introduction
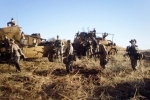
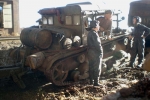
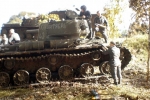
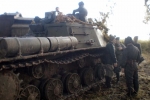
My purpose is to explore how much closer to Realism itís possible to get. Everyoneís entitled to their own opinion and there is no right or wrong because a hobby is personal. For me, if the whole aim of model-making & dioramas is to ďmake it look like the real thingĒ, the final step of that process ought to be photography that doesnít detract from that aim.Just so that Iím not misunderstood, there is definitely a place for dioramas which are true vignettes i.e. you can see the edges of the base. There are countless superb examples on this site and elsewhere. What Iím suggesting is that there should also be a place for a kind of war-photography diorama, but I donít know what to call it Ė any ideas?
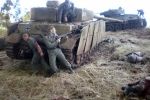
I started on this project nearly 20 years ago, depicting episodes in the northern salient battles of Kursk in July 1943 - donít ask me why as Iím still not sure. To date there are around 60 vehicles and 190 photos & counting. The overall shape of my portfolio is going to be around 20 albums, each containing around 10 images depicting a particular place on a certain day during the main 10 days of hostilities in and around Ponyri near Orel on the northern edge of the Kursk battles.
So hereís a selection of images to date from various albums, and some notes follow below on how it all came together.
Diorama bases
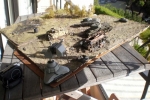
They needed to be light for frequent portability outdoors (because natural light is essential) so I made buckets full of papier-mache (shredded newspaper + some gloops of wallpaper paste + water + sweat) and landscaped it (no more than 2 inches thick) on sections of melamine/formica slabs. Drying time varied so I sprayed a solution of household disinfectant to prevent mould. When dry Ė warped and shrunken a bit Ė I peeled them off and glued them onto sections of plywood/mdf braced for rigidity. Using a much thinner and runnier top layer of papier-mache I could then imprint tank tracks which barely shrank at all.Last step was a sprayed thickish solution of PVA glue (save the air-brush, use any domestic cleaning bottle with a spray action) and sprinkled sieved soil onto it, with a more dilute final spray to fix it.
Foliage
The eternal problem is grass Ėsmoking it doesnít relieve the frustration for long. After many failures the only thing that worked for me was a 2nd-hand Gras-Master I found in on EBay in Austria about eight years ago. Itís an electrical device that looks like a small hair-dryer, you fill the hopper with (say) half-inch cut lengths/sheafs of filaments of the packets of grass found in railway sections of model shops or on the net, attach a trailing wire to the diorama, spray PVA glue over a patch of ground and drop/shake the filaments onto it. They magically land on their ends and stay stood up in an electrostatic field long enough for the glue to dry enough. Itís tricky and takes practice but the result can be outstanding. Over time the grass tends to droop, revivable with a few zaps from the device. Most of my crops have been trampled beyond redemption but that wasnít such a bad thing.Trees and leaves are dried samples from local botanical expeditions; I canít tell you what anything was called except some kinds of miniature Rockery shrubbery can be a good source of in-scale ďleavesĒ. Repeated sprays of PVA glue and sprinklings of leaves on twiglets build up to a reasonable tree, finished off with air-brush sprays of (acrylic) shades of green and/or brown.
Buildings
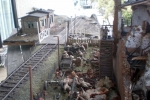
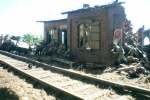
MiniArt, extemporised with walls made of thin (quarter-inch ideal) polystyrene packing (stiffened with thin balsa sheet for the interior walls) covered with a layer of plaster or gap-filler into which (while wet) I pressed a home-made ďgridĒ make a brick pattern. To do that I made a bunch of to-scale bricks, glued them onto a backing-plate with slightly projecting sheet-styrene where the mortar would be. I tended to do sections as long as the wall but only about 5-bricks wide at a time. More home-made bricks can be used for the rubble and broken edges. Iím a big balsa fan, sheets and strips for everything else: window frames, doors, floorboards, rafters, itís easy to use, paint, smash up, strong when it needs to be yet light as a feather.Vehicles and figures
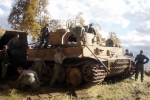
Theyíre mostly identifiable by manufacturer in the photos, but I can identify on request. Only two of the 60-odd kits have full interiors - the old Academy Tiger, and the T34 wreck (AFV Club version with the transparent armour) which took intermittently over 18 months of sanity-testing to finish. I only do after-market if itís going to make a difference in the photos i.e. not that much, and I loathe figure-painting so letís move right along.Research
Somewhat important if reality is the goal, probably two-thirds of my kits are based on specific documented originals, the rest are approximated to the extent that itís unlikely anyone can prove me wrong, and where differences of opinion rage because thereís no defining proof then I have to weigh the arguments. For example, were sPzAbt 505ís Tigers at Kursk camouflaged with just green, or just brown, or both? I made my choice on the evidence available Ė which meant a complete re-paint because Iím not afraid to change my mind or be corrected.Photography
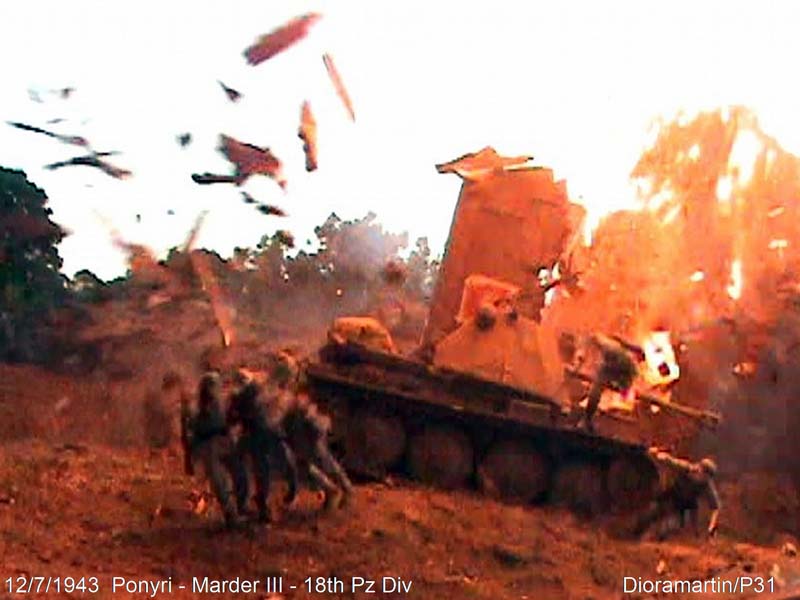
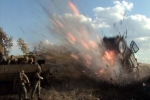
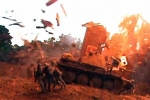
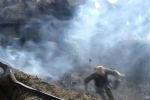
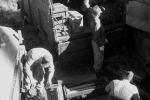
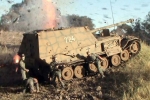
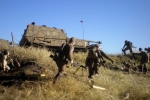
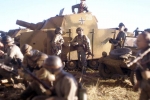
A fancy camera isnít necessary Ė I just pointíníshoot my baby Olympus ($205 in 2008) on full automatic, no flash. Because Iím trying to replicate variable and often poor quality WW2 photography anything more would be pointless, as is Photoshop et al. Either the image stays ďcleanĒ or it gets deleted and re-shot, the only modifications I make are to tweak tone/contrast or try some out in glorious black & white.The pyrotechnical images are well below optimum definition because thereís no way I can be that quick on the draw (or blast-proof) with a stills camera, so the old Sony Handycam braves the shrapnel. Once clips are uploaded I turn single frames into jpegs. The quality is screwed in the transfer process but I havenít seen much actual combat photography where there was time to set up a tripod and get the right lens/exposure settings ready for the moments of random detonation.
Meteorology is key, it can be on your side when a nice convergence of conditions occurs. And then it can be the bane of the project, even in Sydney where itís beautiful every day, right? Apart from rain, even a light breeze can scuttle a session because I donít secure the figures, they have to stand on their own two feet or they donít get the gig. I shoot on an upstairs balcony partly overlooking the city with a big sky, but it took an embarrassingly long time to work out that by tipping up the diorama platform (a picnic table) by around 10 degrees at the leading edge, the modern skyline neatly disappeared from view and gave me a much wider background field. The downside (literally!) is that the grunts fall over all the time, usually 0.25 seconds before the camera shutter opens and this is one of several reasons why I donít have any hair left on the top of my head.
Last but the opposite of least, framing is where I try to make it count Ė itís has to be 1/35th-Manís viewpoint every time, because they werenít flying many hot-air balloons over the Kursk salient in July 1943.
General
The cost of kits has always been a concern so I made it a policy to use minimal-cost dioramic materials. Apart from whatís already mentioned, another example is kidsí powder paint - ideal for painting balsa, turning tissue paper into tarps and camouflage covers (dab on gently with a soft brush), mud washes on vehicles, and used dry it makes great dust Ė keep the pastels for artwork. Apart from getting good photography results, I get a kick out of adapting often unlikely household materials; if a hobby isnít fun itís not worth it.Comments
Works for me. Some of the scenes are almost indistinguishable from the real thing.
MAY 11, 2016 - 09:50 AM
Amazing shots - I esp like the ones set in the railway station itself. Did you look into whether any companies manufacture Soviet WW II railway cars?
MAY 11, 2016 - 05:22 PM
Great stuff Tim - Thanks for posting! I really like the 'natural' settings and the action shots. Are you telling us those explosions are for 'real'?! I don't think many would put their fine models up for that treatment! I think
you have that market cornered! :-)
(Oh rats! Now hitting 'enter' does not sumbit my reply!!!!)
MAY 12, 2016 - 07:04 AM
Great stuff Tim!!! Message to Jerry Rutman: stop throwing the old models away!! Send them to Tim for "recycling"
MAY 12, 2016 - 02:41 PM
Thanks guys for your kind comments, much appreciated. In reply;
I guess it was always going to come up, what makes it go bang. Iím reluctant to elaborate for reasons I covered in a reply (May 10) within my original Diorama forum post last week (ďAlternative realityĒ). All Iíll add is that the combustion agents are freely available in any supermarket or convenience store, and the shells are made of different materials depending on their placement. It took a while to perfect a fuse that gave me enough time to duck but not long enough to melt the model. One problem I havenít resolved is thick black smoke, Iíve tried most materials with significant carbon content but miniaturisation adds a degree of difficulty. If/when I nail it youíll be the first to know.
Leading on from that, yes I half thought submitting the Feature article was futile because the sponsors of this site wouldnít be impressed I appeared to be destroying their products. However apart from the odd pioneer tool or aerial, all targets surprisingly came through unscathed (even the Marder III)Ö.well, except a Dragon early Hummel - I replaced its barrel with what was effectively a brass pipe bomb in an attempt to capture a shell being fired. Got it right eventually, but two successive ignition malfunctions resulted in total rebuilds of the entire fighting compartment. I never found the first barrel, itís possibly still in orbit.
So to counter any suspicion itís fakery Iím posting a full sequence of single-frames of the clip of the Tamiya SdKfz 222 back-flipping - you can find them under todayís date in my original post to the Diorama forum ďAlternative realityĒ (And Kevin, thereís a few train shots there too plus a reply to your query).
Tim
MAY 12, 2016 - 04:34 PM
Tim, absolutely impressive and motivational! have you thought about trying a green or blue screen then adding in blast effects later? I have got to give this a try now....shrapnel be damned!
MAY 13, 2016 - 09:13 PM
A very interesting thread, some very good pictures I struggle to take a simple picture
MAY 14, 2016 - 12:53 AM
Thanks guys, to answer both comments above at once; as I said in the article I use what most self-respecting photographers would class as a crappy little camera - although I would disagree, I've been an Olympus fan all my life and they've served me well, even the 2008 bottom-of-the range model I use now. And I'm nowhere near a good photographer, I have next-to-zero technical knowledge.
MAY 19, 2016 - 05:10 PM
Very incredible shots of scenery... I put my interest on how you present your work with railway tracks there and I learn a lot from your work, many thanks for your sharing, mate!
Warm regards,
Garry
OCT 08, 2016 - 11:53 AM
Thanks Ricky,
I assume you found the other train photos in the "Alternative Reality" post too? (last activity 14th May 2016). A mate has ever since been trying to provoke me into an explosive derailment dio (Russian partisans, dynamited track, loco & trucks crashing down an embankment etc. Maybe next year.
Cheers, Tim
OCT 09, 2016 - 07:08 AM
Copyright ©2021 by Tim Martin. Images and/or videos also by copyright holder unless otherwise noted. The views and opinions expressed herein are solely the views and opinions of the authors and/or contributors to this Web site and do not necessarily represent the views and/or opinions of Armorama, KitMaker Network, or Silver Star Enterrpises. All rights reserved. Originally published on: 2016-05-11 10:21:09. Unique Reads: 18678


