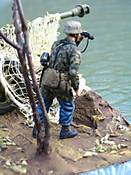
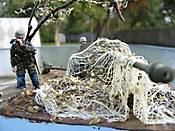
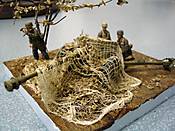
1⁄35Diorama 7.5cm PaK 40
13
Comments

THE BASE
Since I have a small allowance (and I’m cheap) I always make my bases out of blue wall insulation. I bought a sheet of it at my local hardware store that was about 8 feet by 6 feet. It has lasted me forever, and I have only used about a 1/6th of the entire sheet. It is lightweight and strong. There is only one drawback. If I used any sealer that is non-water based, that stuff will eat into the insulation.The groundwork is simply plaster or wall-patch or anything that is chalky and dries to a hard finish. I have tons of that stuff around to patch holes in the walls.
I use a simple step-by-step process. First, I cut a square of the insulation that I know will be larger than I need. Then using the toothpick mounted figures and the gun, I position them on the base until I get them just the way I want them. I then trim the base down to size for the project. I used the remaining pieces to make a small wall before the main gun, just to give the base some character.
I then take the base and scratch the surface that will receive the groundwork. This enables the plaster to grip the surface and roughens it up enough to make it more realistic. Once I have it on in the right thickness (about a 1/8th of an inch generally) I let it set for about 10 minutes, or until it is just starting to harden on the surface. I then take a generously moistened paper towel, and shape the ground by roughing it up a little more. This will be allowed to dry over about 48 hours.
I used regular brown tempura paint for the base. This ensures that I don’t use a brown that I used on the uniforms or gun. Plus, Tempura paint is cheap. I brush this color on and use a lot of it in covering the ground. I would rather pay a little for a lot vice using an expensive bottle of Vallejo or Model Master. I then use the brown, mixed with different colors of tan, light brown, etc to break up the color of the ground. Finally, I highlight the ground with a lightened shade of the final color I mixed.
THE TREE
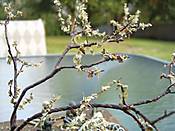
I have recently read all kinds of wonderful articles on making trees, but since I am so darn cheap, I wanted to use things that I already possessed. So, out to the yard I went. Thanks to an abundance of hurricanes, I have twigs scattered everywhere in my backyard. I picked out about twenty candidates for use with the diorama and narrowed them down to two twigs that fit within the parameters of what I was looking for. A quick “nuke” in the microwave killed any unwanted natural things that might have been present.I went out on a limb (pardon the pun) with the next step of the tree. The twig was a great representative of a twig, but needed more branches. I solved the lack of smaller limbs, by wrapping wire around individual limbs and gluing the wire into place. I didn’t want to cover the dio with a canopy, so I was sparing in adding the wire. I then painted the limbs the same color brown I used on the base color.
The last step was the leaves. Well, I had gone shopping with my wife and daughters at an international food market, and found a bag of dry Greek seasonings that, to me, looked just like the right scaled leaves. Of course, the bag was only 99 cents. I took regular white glue, diluted with water, and with an old (cheap, of course) brush, I dabbed the glue on random sections of the “limbs” and then sprinkled the “leaves” over the areas of glue. I liked the results and then sealed the entire tree with sealer.
THE CAMO NETTING
Okay, okay, cheap is the way I go. I went into the bathroom and found some old gauze that we have had for probably 15 years. It was perfect, and perfectly white. White wouldn’t do, so I first measured how much of the gauze I would need for the dio. Once I had cut it, I soaked it in a mixed solution of white glue, water and dark yellow paint. A couple of minutes of soaking and the net was ready to go. I used two pair of tweezers to lift it up and place it on a piece of paper towel to soak up the majority of the paint (If it dripped on the gun, I was afraid that it would ruin the finish of the gun.) Once it was just damp, I placed it on the gun and positioned it with the tweezers. I wanted it to have the right droop in the right places. The paint made it the right color and the glue stiffened it up quite nicely.BRINGING IT ALL TOGETHER
I knew the general location of everything, so I glued the tree on the base first. I poked a hole into the base with a chopstick that was roughly the same size as the tree and white-glued the tree into the base. Once it was dry (overnight) I then white-glued the figures and gun into place. The final step was randomly gluing leaves to the groundwork and to the netting. I took my old trusty “yuck” brush and dapped straight white glue in different places on the ground, then sprinkled leaves onto the daps of glue. I used the same technique for the netting, but the glue was watered down a little. I then glued the two shell cartons behind the gun and kneeling crewmembers. The final step was spraying a dull coat on the entire dio.FINAL THOUGHT
It was a lot of fun doing this project. I hope that you like the outcome. I realize that I sound cheap (and that’s okay), but I’m always trying to find a cheaper way to make any effect I can. Hopefully, you picked up a couple of good ideas for your next project. Thanks for taking the time to read my article.Comments
Ciao everyone,
First, thank you Danny for making an okay article into a really good one. Thanks for all the time and effort.
Vinnie - yes, you are absolutely right on that one. Unfortunately, I did this one a while ago and it was a done deal by the time I learned of my mistake. One day I will be able to afford more references or, at least, look at the ones that I have. Thanks for the nod!
Dave - Hey, who you calling cheap? :-) :-) :-) Yes, thrifty is me. Thanks so much for the compliments. You are absolutely right about the blue outline. I usually finish it in paint of some type, but I dropped the ball on this one. I love contributing to the site, though. Heck, this is the only site that I go to recreationally, anymore.
Scott - thanks for the compliment. I truly believe that the big "A", and it's many talented modelers, has (or have) really elevated my skill.
Again, thank you everyone. I'm off to watch (American) football. Have a great weekend.
OCT 30, 2005 - 02:34 AM
nice feature Rob, the figures, pak and ground work are as usualy splendind
congradulations!
Frank
OCT 30, 2005 - 02:53 AM
Ciao Frank,
How are you, my good friend? Thanks so much for the nod on the model! I am just trying to keep up with the talent around here. Speaking of talent, what is your next model? Keep me posted.
OCT 30, 2005 - 02:58 AM
Or at least do the edges in black!!! That's how I've done a few of mine where I'm too lazy to miter trim for a small base
OCT 30, 2005 - 03:03 AM
Ciao Alan,
Black? Are you sure? I was actually torn between Teel or Lavender..... :-) :-) :-) Yes, I goofed up!!
OCT 30, 2005 - 04:23 AM
A very nice dio with an impressive OOTB build, or should I say perfect build! In my opinion, everything in this dio is perfect and shows a well balanced dio! Congratulations!
Cheers and happy modelling!
Prato
MAR 10, 2006 - 12:03 AM
Ciao Tigerbait and Prato,
Thanks so much for your kind words. That was truly a labor of love, that one. Fun to build and fun to paint. Again, thanks for your generous words!!
Ciao for now
Rob
MAR 10, 2006 - 09:35 AM
hy husky ill agry with my brother 3442 its an awesome dio extreamly well made i like the netting affect u have their. hes presntly working on n elefant by dragon the prem kit
simon
APR 26, 2006 - 01:32 AM
Hey Rob. I know you wrote this article a while ago. You probably won’t even read this. But I hope you do in the future and this might help you out just a little. I'm new to the site and modelling, and I'm just discovering everything here for the first time. Great article. I even printed it out to help me out with my own Pak 40 model.
However, and just after praise there’s always a however, have you noticed that.? The cam net on the pak 40 would have been removed before firing. The two gunners are about to load the weapon and the commander has already spotted a target or is fishing about for one. So I'm assuming they about to fire or in the process. I've had personal experience with leaving a cam net on over a gun while it’s firing. The barrel tends to heat up after every shot. So hot in fact that it ignites anything flammable touching it. I have photos but unfortunately not scanned on to the computer. Cam nets go up in quite a nice burst of flames. Therefore destroying the whole effect of the cam net. Hope this helps you or other modellers in the future.
JAN 10, 2007 - 11:07 AM
Copyright ©2021 by Rob Lively. Images and/or videos also by copyright holder unless otherwise noted. The views and opinions expressed herein are solely the views and opinions of the authors and/or contributors to this Web site and do not necessarily represent the views and/or opinions of Armorama, KitMaker Network, or Silver Star Enterrpises. All rights reserved. Originally published on: 2005-10-15 00:00:00. Unique Reads: 20358


