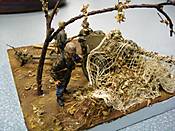
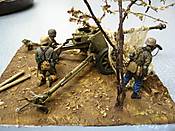
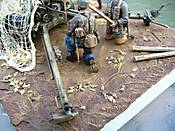
1⁄35Diorama 7.5cm PaK 40
13
Comments

WHY I DID THIS
I have always liked the PaK Anti-tank weapons, and I have built a couple of them at least, including one from Tamiya and one from Italeri. Both of those guns have their good points and bad points, but when DML released the most recent one with Fallschirmjager at Anzio, I had to give it a try.THE KIT OVERALL
I really liked the kit. The inclusion of a turned aluminum barrel, some photoetched parts and even turned brass ammunition is really neat!! The only real problem that I saw was the lack of bolts running through the frontal plates and there were two parts that had the numbers reversed on the instructions that caused me to trim to fit. The final oops was that I had two sprues of the same crewmembers. Apparently, there was supposed to be three men on one sprue and two other crewmembers on another sprue. I got the sprue of three crewmembers. Undaunted, I pressed on.THE FIGURES
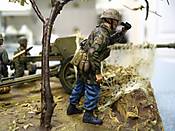
I built the three crewmembers first. I realized rather quickly that these were the same guys that manned my leichtgeschutz. I did want to give them a different appearance, so I gave two of them the blue Luftwaffe pants.Some issues on equipment – all men have the standard issue kit of bread bags, canteens, eating tins and folding shovels. The two enlisted men have bandoliers for their rifles and the Lieutenant has mag pouches for his machine pistol. I have conspicuously left the weapons off the troopers. I would have left most of the kit off of them also, but I believe it would have taken away from their overall appearance. Their personal weapons rest in prepared positions short distances away from the gun. That would facilitate them scattering in three directions to defend, and also would keep them from bunching up in case of counter-battery fire.
I generally clean and assemble the figures as everything put together, with the head and equipment separate. I drill a small hole in the foot or knee (for kneeling figures) and superglue a toothpick into the hole. That will allow me to hold the figures for painting without actually touching the figure. The toothpick doesn’t get in the way when I trying to reach those hard-to-reach areas. I can stick the toothpick into a block of insulation to leave them for drying. I can allow use the toothpick to pose the figures on the dio base, which allows me to position and re-position the figures until I get them just right. When they are finished and ready to be mounted to the base, I will trim the toothpick with a sprue cutter and knife.
I used the following paints for uniforms (all acrylics) – Model Master Dark Tan, Special Tan, Wood, Olive Drab, Black, Israeli Armor Tan and Leather; Vallejo Black (which gives a different shade of black than the Model Master Black), German Camo Pale Brown, Basic Skintone, White, Green-Grey, Flat Green, Cork Brown, Flat Green, Desert Yellow, Buff, Green-Brown and USA Tan-Earth. Finally, I used PollyS Prussian Blue. I realize this seems like an inordinate amount of colors, but I like the different tones and shades they give, keeping the different paratroopers from looking too much like the same color.
Note: I am not a stickler for exacting colors. Colors are going to be different, based on manufacturer, material, age and amount of exposure to the elements. Besides, I think it’s a great way to use up the paint that I have paid so much for. Indeed, that PollyS bottle has served me since around 1996.
THE GUN
I built the gun straight out of the box, and that is more than sufficient. It really builds into a beautiful gun, and it really is realistic looking with many delicate parts. The delicate parts can also be a real pain to deal with. The gun features a couple of sub-assemblies that made me feel a lot like a surgeon. More than once, I was sent scrambling on the floor looking for a handbrake or small latch that I failed to secure while trying to clean off the mold seams. The breech block is separate (which is nice for painting). The return system in the gun skid is a bear to work with.The really nice thing about this kit is all the options. There are three options for a muzzle brake. There are three options for wheels. There is a turned-aluminum barrel or the classic two piece plastic barrel. The tires are really nice because they are separate rubber pieces, with an option of using perfectly shaped ones or used ones with ruts and damage. There is turned-brass ammo and the regular plastic bullets. There are shipping boxes for ammo that can be modeled open or closed, and shipping tubes for single rounds that can also be posed open or closed.
I finished the gun in one color of Tamiya Dark Yellow (again, this gives a color tone different than the Vallejo paint), with a wash of diluted black tempura paint. It makes it a lot darker, but it makes the gun look really used, which I like. I then re-painted the larger exposed areas with the Dark Yellow and highlighted with Vallejo Buff. I also used a regular lead (or graphite) pencil and a silver Sharpie to give exposed metal finish to rubbed areas of the gun and the crew helmets and gear. I like the Sharpie pens because they are permanent, dry fast, and leave a realistic metal finish. I have found that Sharpies are much cheaper and more realistic than any metal-finish acrylic that I have ever used.
Comments
Ciao everyone,
First, thank you Danny for making an okay article into a really good one. Thanks for all the time and effort.
Vinnie - yes, you are absolutely right on that one. Unfortunately, I did this one a while ago and it was a done deal by the time I learned of my mistake. One day I will be able to afford more references or, at least, look at the ones that I have. Thanks for the nod!
Dave - Hey, who you calling cheap? :-) :-) :-) Yes, thrifty is me. Thanks so much for the compliments. You are absolutely right about the blue outline. I usually finish it in paint of some type, but I dropped the ball on this one. I love contributing to the site, though. Heck, this is the only site that I go to recreationally, anymore.
Scott - thanks for the compliment. I truly believe that the big "A", and it's many talented modelers, has (or have) really elevated my skill.
Again, thank you everyone. I'm off to watch (American) football. Have a great weekend.
OCT 30, 2005 - 02:34 AM
nice feature Rob, the figures, pak and ground work are as usualy splendind
congradulations!
Frank
OCT 30, 2005 - 02:53 AM
Ciao Frank,
How are you, my good friend? Thanks so much for the nod on the model! I am just trying to keep up with the talent around here. Speaking of talent, what is your next model? Keep me posted.
OCT 30, 2005 - 02:58 AM
Or at least do the edges in black!!! That's how I've done a few of mine where I'm too lazy to miter trim for a small base
OCT 30, 2005 - 03:03 AM
Ciao Alan,
Black? Are you sure? I was actually torn between Teel or Lavender..... :-) :-) :-) Yes, I goofed up!!
OCT 30, 2005 - 04:23 AM
A very nice dio with an impressive OOTB build, or should I say perfect build! In my opinion, everything in this dio is perfect and shows a well balanced dio! Congratulations!
Cheers and happy modelling!
Prato
MAR 10, 2006 - 12:03 AM
Ciao Tigerbait and Prato,
Thanks so much for your kind words. That was truly a labor of love, that one. Fun to build and fun to paint. Again, thanks for your generous words!!
Ciao for now
Rob
MAR 10, 2006 - 09:35 AM
hy husky ill agry with my brother 3442 its an awesome dio extreamly well made i like the netting affect u have their. hes presntly working on n elefant by dragon the prem kit
simon
APR 26, 2006 - 01:32 AM
Hey Rob. I know you wrote this article a while ago. You probably won’t even read this. But I hope you do in the future and this might help you out just a little. I'm new to the site and modelling, and I'm just discovering everything here for the first time. Great article. I even printed it out to help me out with my own Pak 40 model.
However, and just after praise there’s always a however, have you noticed that.? The cam net on the pak 40 would have been removed before firing. The two gunners are about to load the weapon and the commander has already spotted a target or is fishing about for one. So I'm assuming they about to fire or in the process. I've had personal experience with leaving a cam net on over a gun while it’s firing. The barrel tends to heat up after every shot. So hot in fact that it ignites anything flammable touching it. I have photos but unfortunately not scanned on to the computer. Cam nets go up in quite a nice burst of flames. Therefore destroying the whole effect of the cam net. Hope this helps you or other modellers in the future.
JAN 10, 2007 - 11:07 AM
Copyright ©2021 by Rob Lively. Images and/or videos also by copyright holder unless otherwise noted. The views and opinions expressed herein are solely the views and opinions of the authors and/or contributors to this Web site and do not necessarily represent the views and/or opinions of Armorama, KitMaker Network, or Silver Star Enterrpises. All rights reserved. Originally published on: 2005-10-15 00:00:00. Unique Reads: 20355


