

1⁄35Make your own realistic wood
15
Comments

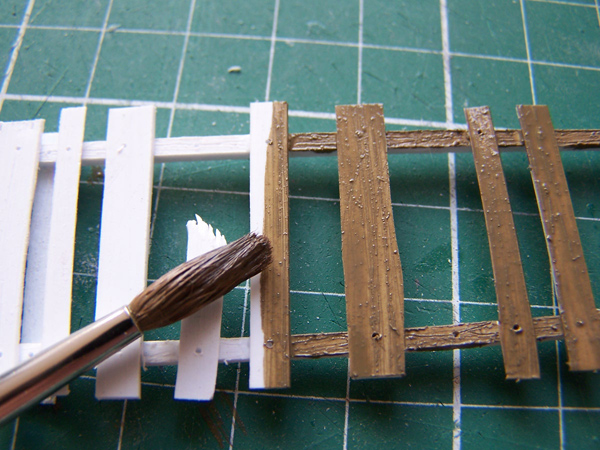
Step 4 Paint
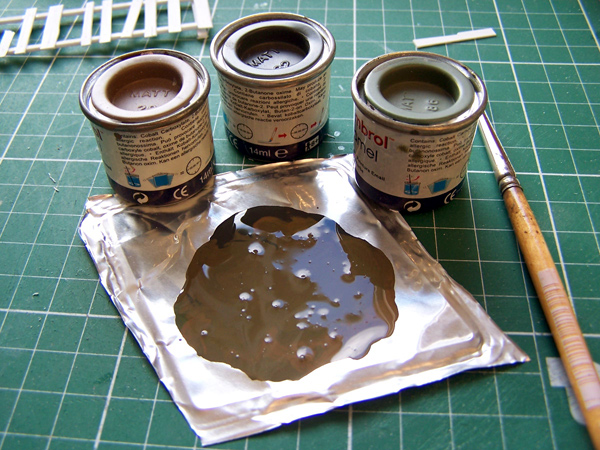
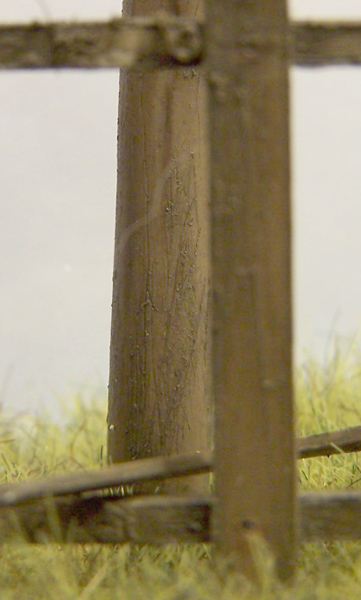
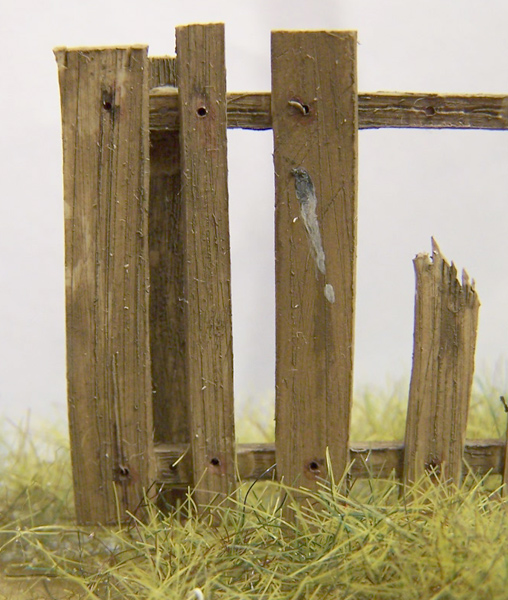
Plastic will stay plastic when you are not able to paint it in a convincing way. Without the next step the fence will remain a plastic fence. With this step it is extremely easy to make a realistic finish in only a minimum of steps. The secret lies in thinning the paint. I mixed 3 Humbrol colours to eventually get the unvarnished weathered wood Actually just a cheap fence.I used a light (wood) brown, Olive drab and panzergray. This are not colours I use every time I make wood. Mother nature offers you a gazillion colours to choose from. I mixed the three colours and thinned them with turpentine from the DIY store. Then with a big brush I painted the diluted paint onto the white plastic. Because it is thinned the paint will go into the deeper parts of the plastic and the higher parts will get a sort of instant highlight .. An effect that looks really nice. By the way make sure that the turpentine you use for thinning the paint is old, so used, preferably a couple of times because this is how you get the nice colour variations. Just let it cure a bit ( a process that goes faster due to the turpentine and then on to the next
Step 5 small details
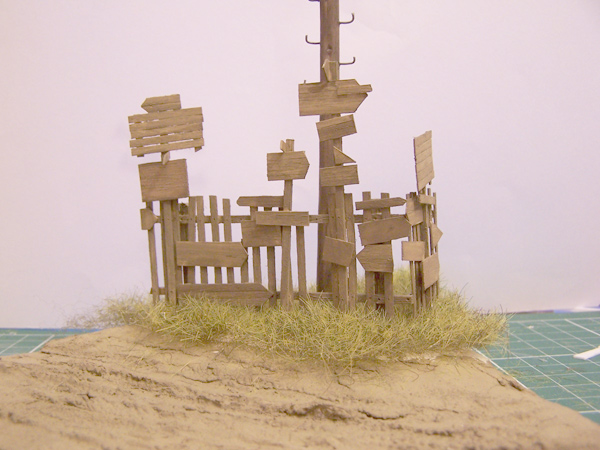
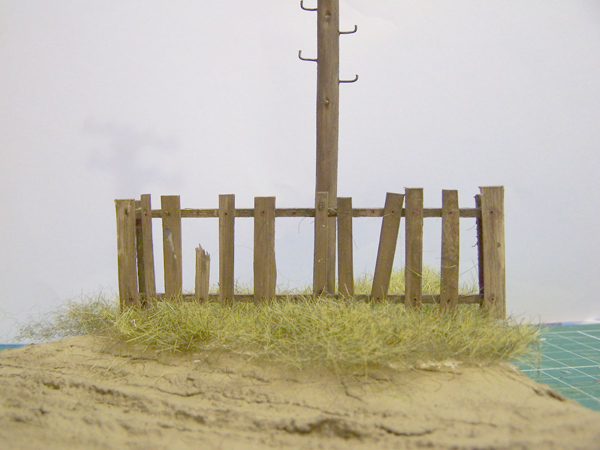
Take some black paint. Dilute it and do some pinwashes in the nailholes. Then dilute some rustcoloured paint and do the same in the nailholes, Here you can paint around the nailholes on the wood too to make the impression the rust soaked into the wood. I did some bird dropping on my fence too The fence stays outside and such things happen there. A little dot of panzergrey and a line of white painted in a little angle to show it is dropped in flightOk this are the 4 steps that you will need to take to go from styrene to realistic looking wood. Personally I think working with plastic gives you more control, in assembly and in painting. But above that it is a fast technique. The fence I made for this article was only an hour of work from start to the paintjob. So in a short time you have something really nice to put in the background of your dioramas. Bigger projects are no problem with this technique. Another thing I learned using this is working the toolhandles of the tools on your vehicle with finer grit sanding paper will add a great effect when you paint them
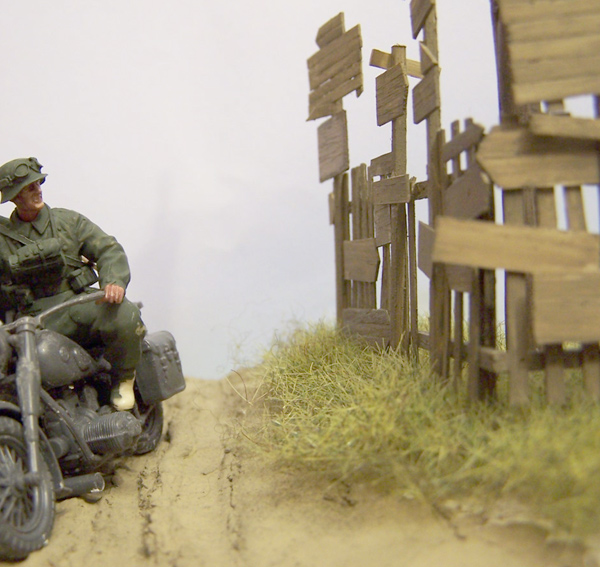
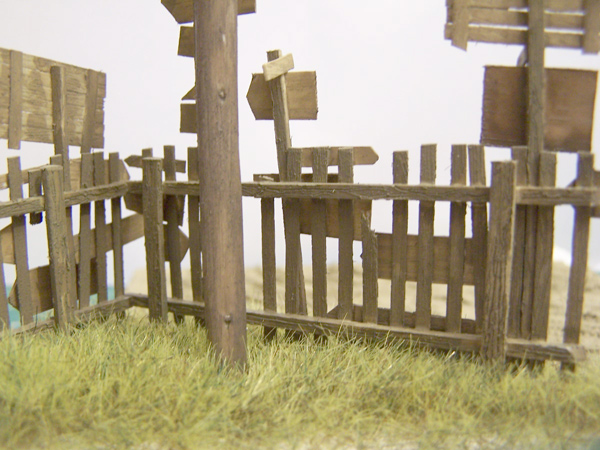
I made pictures of the fence on a little groundwork and some pictures of other finishes I had with this technique.

About the Author


FROM: NOORD-HOLLAND, NETHERLANDS
Started modelling when I was about 7 or 8 years old had a little break in between (school, girls partying) and eventually returned when finding this site in 2002. Main interest WW2 German army, wheeled vehicles and radio and communication troops or every other thing that manages to catch my interest...
Comments

Hey Robert:
Kool article, dude. Very helpful. I work w/ PlastStrucks
(sp) plastic pieces/rod all the time. But I never
thought of sanding the pieces with a really rough
sandpaper to get that woodgrain effect. Super idea,
I can't wait to try it. Thanks again, amigo
JAN 30, 2006 - 03:34 AM


Ola guys
Thanks for the comments on the article. You guys really should try the technique. It is terribly simple and fast, and next to that it is also very versatile. Imagine rebuilding the cargobed of a Blitz with this technique. No worries anymore with painting woodgrain on the tools of you vehicles... etc. etc. endless possibilities
Looking forward to other peoples results when they will give this a try
JAN 30, 2006 - 02:01 PM

Nice technique Robert. Makes me wonder what I'm going to do with all my wood?
JAN 30, 2006 - 04:03 PM
Excellent feature article Robert.
It looks so simple and the result so good. This I have to try.
Thanks Robert.
JAN 30, 2006 - 07:21 PM

Thanks for a great SBS.. I can't wait to give it a try. Good Job!!!
Mary (++)
JAN 30, 2006 - 07:35 PM
Ola Guys and gal
Thanks for the comments.
@Scott
Isn't it cold there? and don't you have a fire place :-) :-) :-) :-) :-) :-)
No I'm kidding mate. Sure you still can use wood if you like. But try to use the technique I describe I'm sure you will like it.
And I will say it again I look forward to other peoples results with this
JAN 31, 2006 - 12:56 AM
:-) :-) :-)
There you go -always a new technique for an old product - time to get warm and build a fire.
JAN 31, 2006 - 01:08 AM
Hehehehehe Scott
You can also save it for the fourth of july and built a bonfire out of it :-) :-) :-)
JAN 31, 2006 - 03:55 PM

Copyright ©2021 by Robert Blokker. Images and/or videos also by copyright holder unless otherwise noted. The views and opinions expressed herein are solely the views and opinions of the authors and/or contributors to this Web site and do not necessarily represent the views and/or opinions of Armorama, KitMaker Network, or Silver Star Enterrpises. All rights reserved. Originally published on: 2006-01-30 00:00:00. Unique Reads: 45109

WEB HOSTING BY


Copyright ©2021 Armorama and Kitmaker Network, a subsidiary of Silver Star Enterprises
All Rights Reserved. Please read our Conditions of Use and Privacy Policy.
All Rights Reserved. Please read our Conditions of Use and Privacy Policy.